前言: 自從.net core問世之後,就一直想瞭解。但是由於比較懶惰只是斷斷續續瞭解一點。近段時間工作不是太忙碌,所以偷閑寫下自己學習過程。慢慢瞭解.net core 等這些基礎方面學會之後再用.net core寫一個項目,前期文章都是為之後的項目做準備。同時也希望這些基礎文章能幫助更多的想入手 ...
前言:
自從.net core問世之後,就一直想瞭解。但是由於比較懶惰只是斷斷續續瞭解一點。近段時間工作不是太忙碌,所以偷閑寫下自己學習過程。慢慢瞭解.net core 等這些基礎方面學會之後再用.net core寫一個項目,前期文章都是為之後的項目做準備。同時也希望這些基礎文章能幫助更多的想入手 .net core的小白。(文中如有不正確地方歡迎各位指正)
開發工具vs2017
資料庫 mysql8.0
.net core環境 .net core2.1
1】model層建立
先新建一個項目:左側目錄選擇其他項目類型=》vs解決方案=》空白方案=》自己隨意去個名字
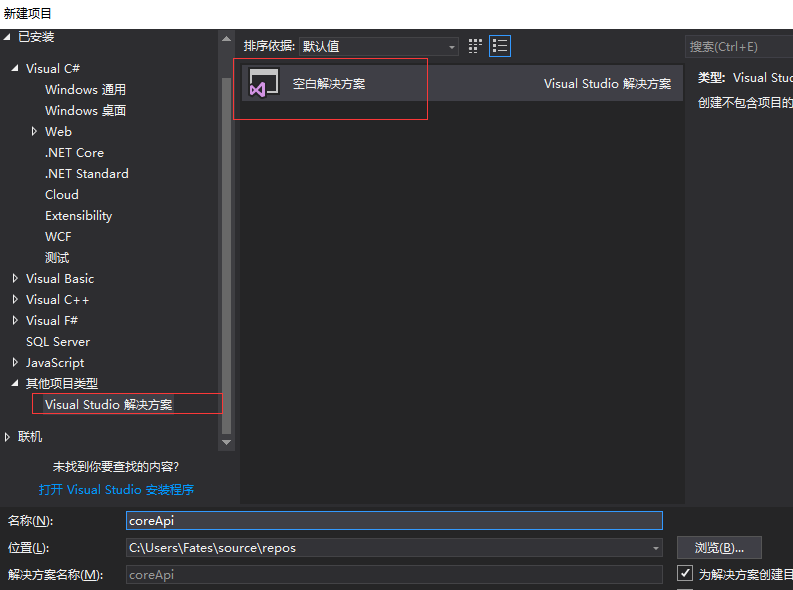
添加一個core 內庫作為model層,

由於本次資料庫使用的是mysql,所以在model層中通過nuget分別引用Microsoft.EntityFrameworkCore.Tools和Pomelo.EntityFrameworkCore.MySql(註意兩個版本必須一致 這裡選自2.1.4版本,之前博主引用版本不對,直接導致連接輸出出錯)

然後分別添加一個model類和資料庫上下文類,本demo創建一張user表

資料庫上下文類DataBase

using Microsoft.EntityFrameworkCore;

namespace Core.Model
{
    public class DataBase : DbContext
    {
        //構造方法
        public DataBase(DbContextOptions<DataBase> options)
            : base(options)
        { }

        #region 數據區域
        public DbSet<User> User { get; set; }
        #endregion

    }
}
View Code
至此,model創建完畢,後期各位可以根據自己的需要自己拓展
2】創建api層
首先在解決方案中創建api層,流程如下圖
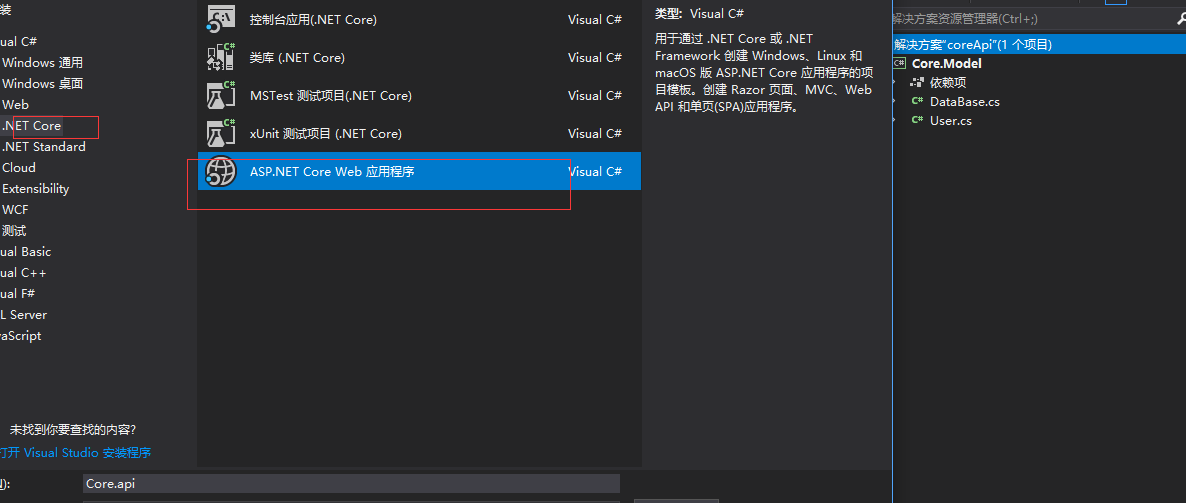
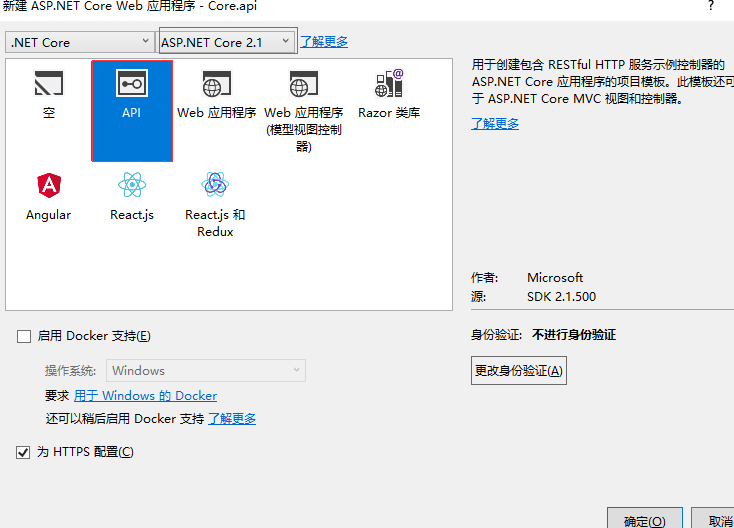
建議新手選擇api這一項,創建完畢之後,項目結構如右圖
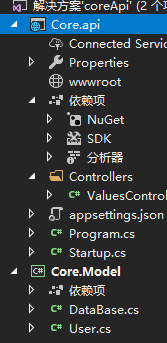
別忘記在api層添加對model層的引用

首先來appsettings.json配置資料庫,127.0.0.1代表本地電腦
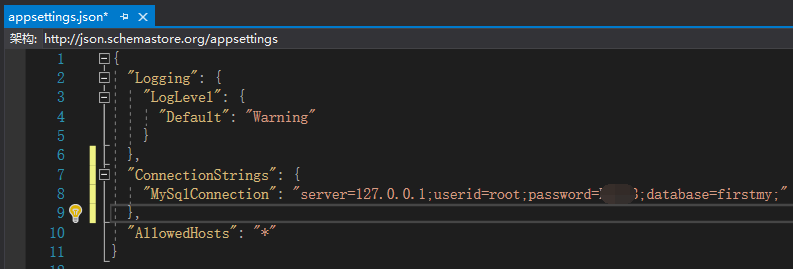
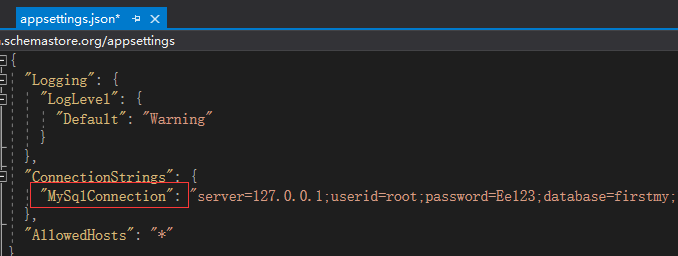
配置完畢之後來到 Startup.cs的ConfigureServices方法將資料庫連接配置好,如果此段代碼有飄紅部分,只需要將其缺失的地方引用(需要引用
using Microsoft.EntityFrameworkCore;和using Core.Model;)


   //mysql連接
            services.AddDbContextPool<DataBase>(options =>
options.UseMySql(Configuration.GetConnectionString("MySqlConnection")));
View Code
註意括弧中的MySqlConnection就是appsettings.json中寫連接資料庫字元串的首碼
接下來將原有的控制器刪除,自己添加一個UserController.cs
控制器中代碼(包含增刪查改CRUD)

using System;
using System.Collections.Generic;
using System.Linq;
using System.Threading.Tasks;
using Core.Model;
using Microsoft.AspNetCore.Http;
using Microsoft.AspNetCore.Mvc;

namespace Core.api.Controllers
{
    [Produces("application/json")]
    [Route("api/admin/[controller]")]
    [ApiController]
    public class UserController : Controller
    {

        private readonly DataBase _context;
        public UserController(DataBase context)
        {
            _context = context;
        }
        #region base

        /// <summary>
        /// 獲取單個
        /// </summary>
        /// <param name="id">Id</param>
        /// <returns></returns>
        [HttpGet("{id}")]
        public JsonResult GetById(string id)
        {
            var tt = _context.Set<User>().Where(c => c.id == id).ToList();
            //_context.Set<User>().Add(us);
            //_context.SaveChanges();
            return Json(tt);
        }
        /// <summary>
        /// 添加
        /// </summary>
        /// <param name="entity"></param>
        /// <returns></returns>
        [HttpPost]
        public JsonResult Add(User entity = null)
        {
            _context.Set<User>().Add(entity);
            int num = _context.SaveChanges();

            if (entity == null)
                return Json("參數為空");
            if (num > 0) { return Json("成功"); }
            else { return Json("失敗"); }
        }
        /// <summary>
        /// 編輯
        /// </summary>
        /// <param name="entity"></param>
        /// <returns></returns>
        [HttpPut]
        [Route("User")]
        public JsonResult Update(User entity = null)
        {

            _context.Set<User>().Update(entity);
            int num = _context.SaveChanges();
            if (entity == null)
                return Json("參數為空");
            if (num > 0) { return Json("成功"); }
            else { return Json("失敗"); }
        }

        /// <summary>
        /// 刪除
        /// </summary>
        /// <param name="ids"></param>
        /// <returns></returns>
        [HttpDelete]
        public JsonResult Dels(string ids = null)
        {
            if (ids.Length == 0)
                return Json("參數為空");
            var tt = _context.Set<User>().Where(c => c.id == ids).First();
            _context.Set<User>().Remove(tt);
            int num = _context.SaveChanges();
            if (num > 0) { return Json("成功"); }
            else { return Json("失敗"); }
        }
        #endregion
    }
}
View Code
自此一個簡單的api基本完成,需要運行檢驗還需要一個步驟。
3】swagger
為了檢測介面運行,這裡選擇swagger
首先在api層通過nuget引用Swashbuckle.AspNetCore

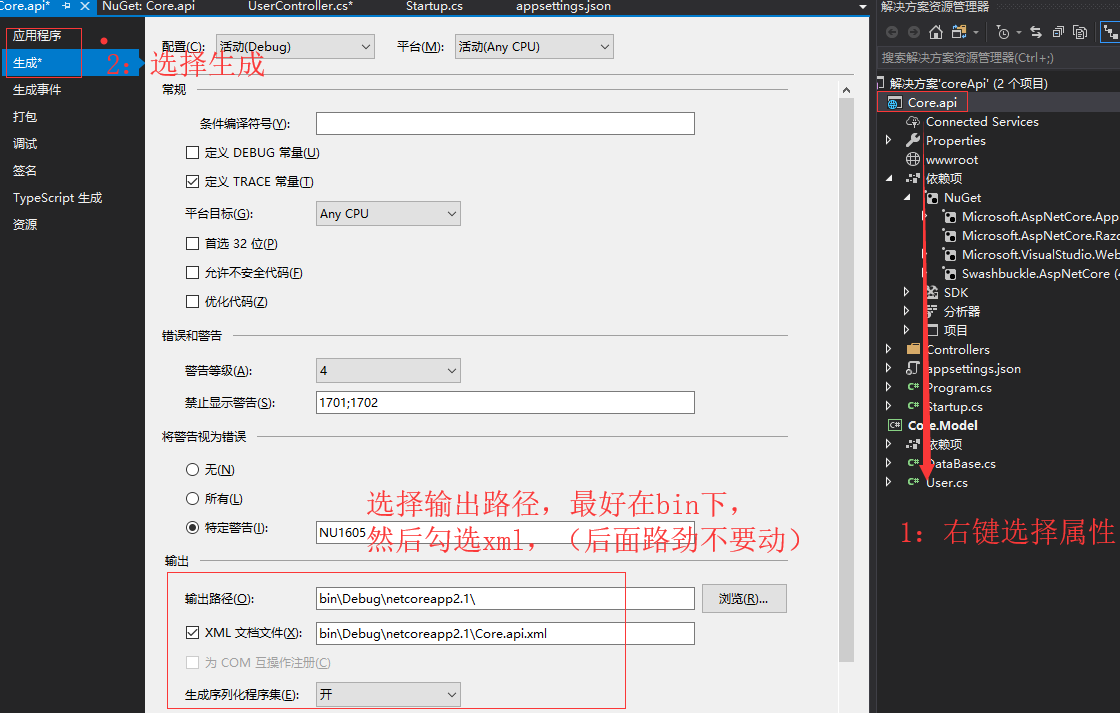
然後右鍵單擊core.api項目選擇屬性,打開一個新面板之後選擇左側的生成菜單=》扎到輸出提示。選擇輸出路徑bin\Debug\netcoreapp2.1\=》勾選xml文檔文件
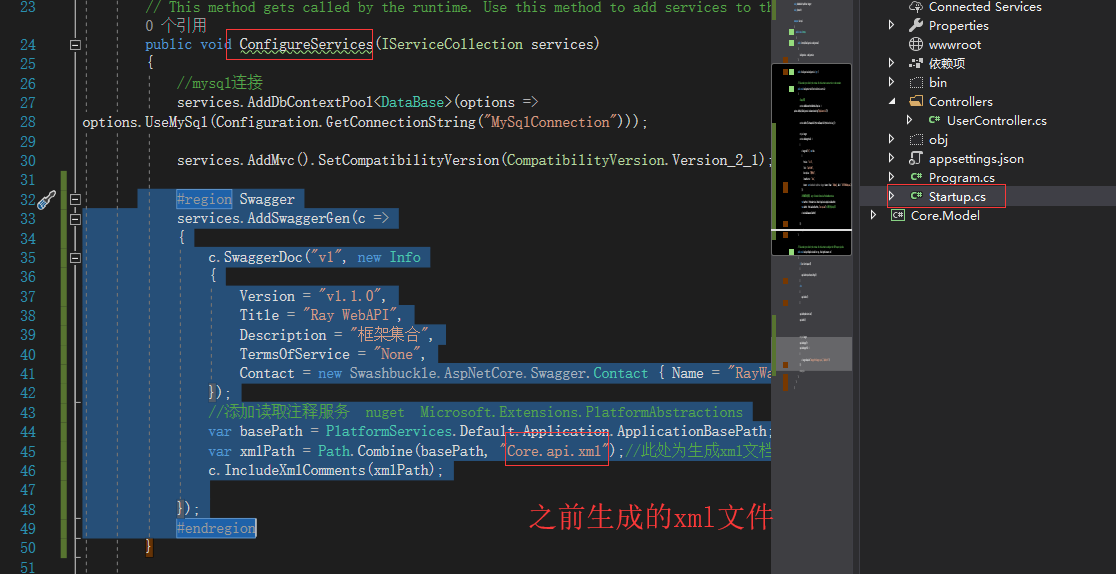
然後回到 Startup.cs ,分別加入以下代碼
此處需要先在nuget中引用 Microsoft.Extensions.PlatformAbstractions
註意 上文中生成的core.api.xml寫入到下列方法中 ,名字要保持一致,否者報錯

     #region Swagger
            services.AddSwaggerGen(c =>
            {
                c.SwaggerDoc("v1", new Info
                {
                    Version = "v1.1.0",
                    Title = "Ray WebAPI",
                    Description = "框架集合",
                    TermsOfService = "None",
                    Contact = new Swashbuckle.AspNetCore.Swagger.Contact { Name = "RayWang", Email = "[email protected]", Url = "http://www.cnblogs.com/RayWang" }
                });
                //添加讀取註釋服務  nuget  Microsoft.Extensions.PlatformAbstractions
                var basePath = PlatformServices.Default.Application.ApplicationBasePath;
                var xmlPath = Path.Combine(basePath, "Core.api.xml");//此處為生成xml文檔
                c.IncludeXmlComments(xmlPath);

            });
            #endregion
View Code

  #region Swagger
            app.UseSwagger();
            app.UseSwaggerUI(c =>
            {
                c.SwaggerEndpoint("/swagger/v1/swagger.json", "ApiHelp V1");
            });
            #endregion
View Code
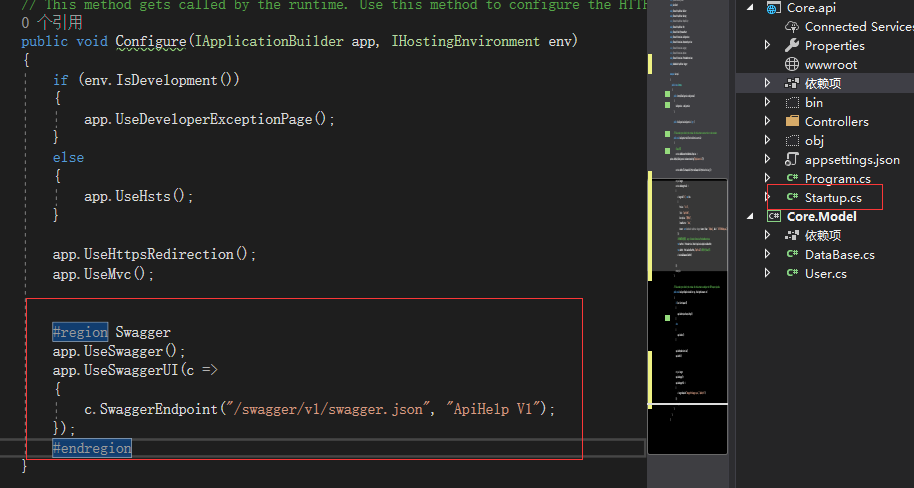
,最後來到launchSettings.json修改以下代碼,將api/value修改為swagger,表示項目已啟動就顯示Swagger的主頁面,而不用通過輸入路勁
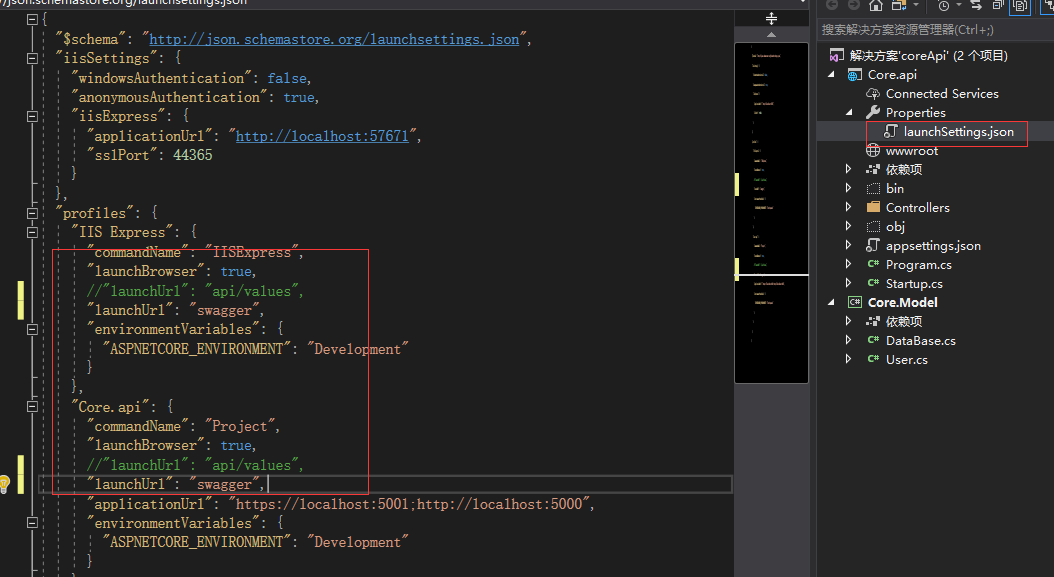
因為本項目是codefirst,所以最後在項目啟動之前別忘記在nuget控制台運行以下兩行代碼
先輸入:Add-Migration  MyFirstMigration(名字。這裡隨意取未MyFirstMigration)
 在輸入:Update-Database

補充一個小問題,博主首次在nuget控制台輸入
Add-Migration MyFirstMigration的時候不知道為什麼報錯,後來先輸入Add-Migration 然後隨意取一個名字才成功。之前未遇見過。如果遇到此類錯誤的讀者可以先試試我這個辦法。

最後】最後運行代碼,就會看到頁面如下
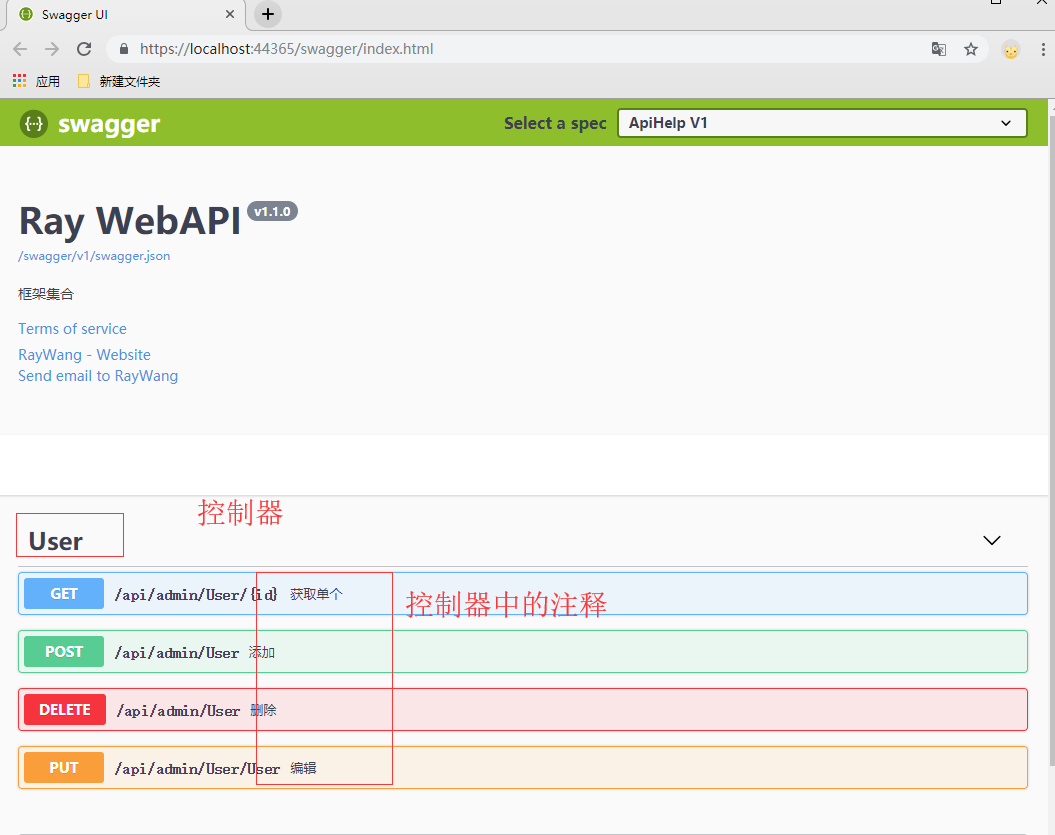
添加一條數據進行嘗試,單擊綠色post=》單擊try it out =》輸入數據(這裡我全部輸入“測試”)=》單擊execute
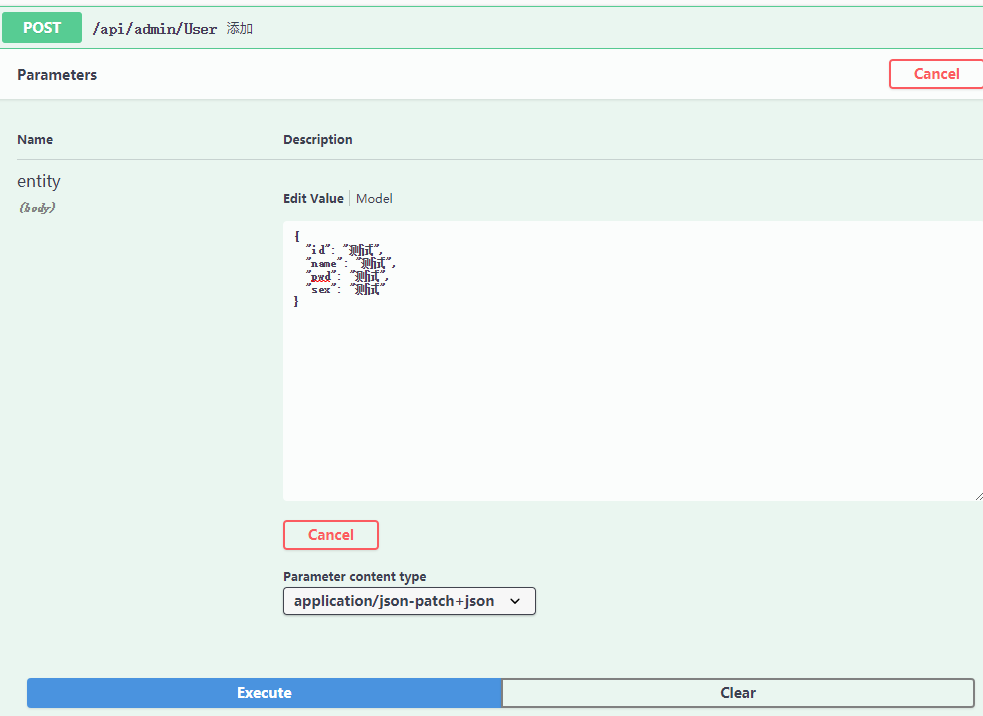
然後滑鼠下滑,就可以看到返回的結果
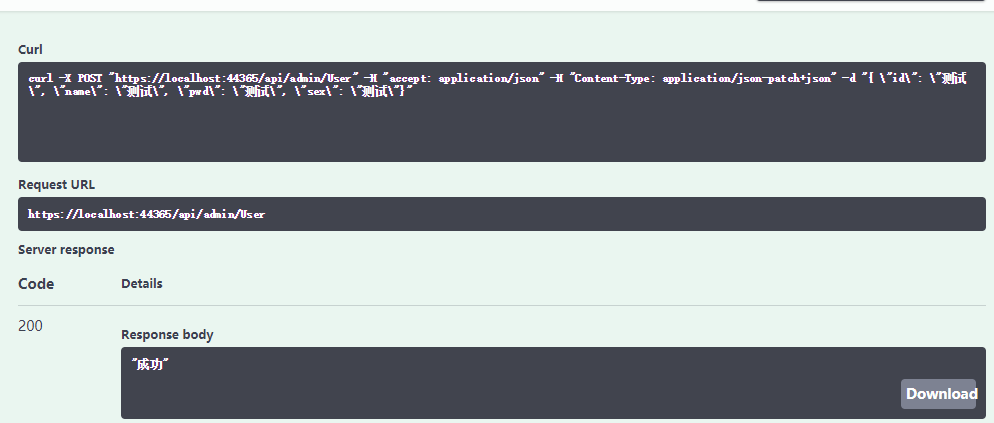
然後進入資料庫驗證,發現數據插入成功


