
一、準備工作 1安裝vue-cli npm install vue-cli -g 2檢查是否安裝成功 vue -V(大寫V) 3初始化一個新的項目 vue init webpack vue-demo 進入項目目錄 npm install npm run dev 二、配置路由 1我們可以看到生成的ro ...
一、準備工作
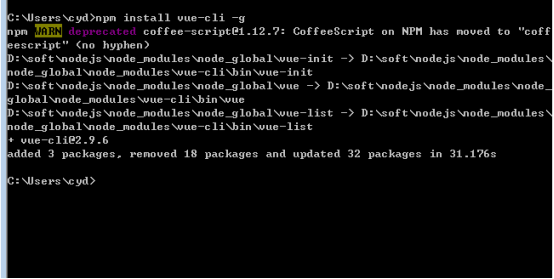
1安裝vue-cli npm install vue-cli -g
2檢查是否安裝成功 vue -V(大寫V)

3初始化一個新的項目 vue init webpack vue-demo
進入項目目錄 npm install npm run dev

二、配置路由
1我們可以看到生成的router文件夾下麵有個index.js
首先我們先在components下新建幾個組件,如HelloWorld.vue \ Home.vue 在index.js中引入 ,路由配置如下 index.js
import Home from '@/components/Home';
Vue.use(Router)
export default new Router({
mode:'history',
routes: [
//預設路徑下顯示該路由
{
path: '/',
name: 'HelloWorld',
component: HelloWorld
},{
path: '/home',
name: 'Home',
component: Home
}
]
})
註意:在創建的 router 對象中,如果不配置 mode,就會使用預設的 hash 模式,該模式下會將路徑格式化為 #! 開頭。
添加 mode: 'history' 之後將使用 HTML5 history 模式,該模式下沒有 # 首碼,而且可以使用 pushState 和 replaceState 來管理記錄。
2App.vue作為一個存放組件的入口容器,其中 <router-view> 是用來渲染通過路由映射過來的組件,當路徑更改時,<router-view> 中的內容也會發生更改
上面已經配置了兩個路由,當打開 http://localhost:8080 或者 http://localhost:8080/home 的時候,就會在 <router-view> 中渲染 home.vue 組件。Home相當於是這個頁面的主界面,其他的頁面都是嵌套在這個頁面裡面的,所以有動態變化的地方都要有<router-view>,如果被嵌入的頁面部分下還有下一級頁面,則需要在一級路由中嵌套二級路由,修改router/index.js
 1 routes: [
 2   //預設路徑下顯示該路由
 3   {
 4     path: '/',
 5     name: 'home',
 6     component: Home,
 7     children:[
 8       {path:'/',
 9        component:Login
10       }
11     ]
12   },{
13     path: '/hello',
14     name: 'helloWorld',
15     component: HelloWorld
16   }
17 ]
在配置的路由後面,添加 children,併在 children 中添加二級路由,就能實現路由嵌套
配置 path 的時候,以 " / " 開頭的嵌套路徑會被當作根路徑,所以子路由的 path 不需要添加 " / "
三、使用 <router-link> 映射路由
我們在index頁面裡面加上映射路由,使其進行調轉。
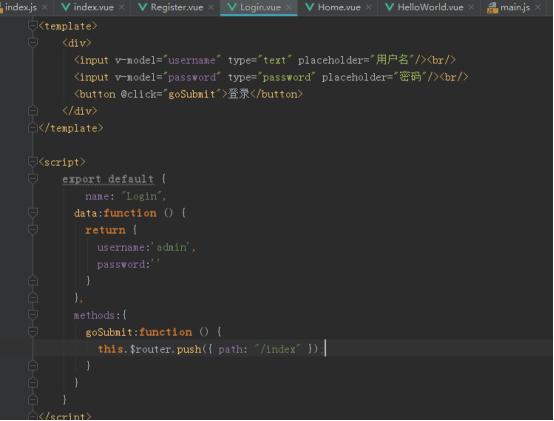
首先我們在login登錄加一個路由跳轉,也稱為編程式導航
this.$router.push(location) 來修改 url,完成跳轉
push 後面可以是對象,也可以是字元串:
// 字元串

this.$router.push('/home/first')


// 對象

this.$router.push({ path: '/home/first' })


// 命名的路由

this.$router.push({ name: 'home', params: { userId: wise }})//傳參的形式
然後,進入index頁面後,設置兩個router-link,在編譯之後,<router-link> 會被渲染為 <a> 標簽, to 會被渲染為 href,當 <router-link> 被點擊的時候,url 會發生相應的改變,如果對於所有 ID 各不相同的用戶,都要使用 home 組件來渲染,可以在 index.js 中添加動態參數:
這樣 "/home/user01"、"/home/user02"、"/home/user03" 等路由,都會映射到 Home 組件
然後還可以使用 $route.params.id 來獲取到對應的 id
跳轉時的傳參:
this.$router.push(`/index/${this.username}`);
路由的參數配置
{
  path:'/index/:id',
  component:index
},
跳轉後的參數接收:
created(){
  this.usname = this.$route.params.id;
 }
最後,在index.vue中寫好路由跳轉router-link
import Vue from 'vue'
import Router from 'vue-router'
import HelloWorld from '@/components/HelloWorld';
import Home from '@/components/Home';
import Login from '@/components/Login';
import index from '@/components/index';
import Register from '@/components/Register';
Vue.use(Router)

export default new Router({
  mode:'history',
  routes: [
    //預設路徑下顯示該路由
    {
      path: '/',
      name: 'home',
      component: Home,
      children:[
        {path:'/',
         component:Login
        },
        {
          path:'/index/:id',
          component:index
        },
        {
          path:'register',
          component:Register
        }
      ]
    },{
      path: '/hello',
      name: 'helloWorld',
      component: HelloWorld
    }
  ]
})
運行後界面如圖:


好了,今天的路由配置與跳轉就講到這裡,下次我們繼續動態路由的配置講解步驟。


