
驗證碼作用: 沒有驗證碼登陸,黑客會更加容易破解你的賬號,通過組合碼刷機等黑客技術來破取你的密碼,有了驗證碼相當於加了一層很厚的屏障,安全繫數很高。 驗證碼是一種區分用戶是電腦和人的公共全自動程式。 驗證碼作用:可以防止惡意破解密碼、刷票、論壇灌水,有效防止某個黑客對某一個特定註冊用戶用特定程式暴 ...
驗證碼作用:
沒有驗證碼登陸,黑客會更加容易破解你的賬號,通過組合碼刷機等黑客技術來破取你的密碼,有了驗證碼相當於加了一層很厚的屏障,安全繫數很高。
驗證碼是一種區分用戶是電腦和人的公共全自動程式。
驗證碼作用:可以防止惡意破解密碼、刷票、論壇灌水,有效防止某個黑客對某一個特定註冊用戶用特定程式暴力破解方式進行不斷的登陸嘗試,實際上是用驗證碼是現在很多網站通行的方式(比如招商銀行的網上個人銀行,百度社區),利用比較簡易的方式實現了這個功能。
(因為老師佈置的作業,做了兩種做法,一種自己先做的,借鑒過網路,還有一種是老師教的,第二種用到了工具類kaptcha)
第一種:
生成驗證碼的代碼:


/**
 * @author hh
 */
public class CodeUtil {
    private static int width = 90;// 定義圖片的width
    private static int height = 20;// 定義圖片的height
    private static int codeCount = 4;// 定義圖片上顯示驗證碼的個數
    private static int xx = 15;
    private static int fontHeight = 18;
    private static  int codeY = 16;
    private static char[] codeSequence = { 'A', 'B', 'C', 'D', 'E', 'F', 'G', 'H', 'I', 'J', 'K', 'L', 'M', 'N', 'O', 'P', 'Q', 'R',
            'S', 'T', 'U', 'V', 'W', 'X', 'Y', 'Z', '0', '1', '2', '3', '4', '5', '6', '7', '8', '9' };

    /**
     * 生成一個map集合
     * code為生成的驗證碼
     * codePic為生成的驗證碼BufferedImage對象
     * @return
     */
    public static Map<String,Object> generateCodeAndPic() {
        // 定義圖像buffer
        BufferedImage buffImg = new BufferedImage(width, height, BufferedImage.TYPE_INT_RGB);
        //Graphics2D gd = buffImg.createGraphics();
        //Graphics2D gd = (Graphics2D) buffImg.getGraphics();
        Graphics gd = buffImg.getGraphics();
        // 創建一個隨機數生成器類
        Random random = new Random();
        // 將圖像填充為白色
        gd.setColor(Color.WHITE);
        gd.fillRect(0, 0, width, height);

        // 創建字體,字體的大小應該根據圖片的高度來定。
        Font font = new Font("Fixedsys", Font.BOLD, fontHeight);
        // 設置字體。
        gd.setFont(font);

        // 畫邊框。
        gd.setColor(Color.BLACK);
        gd.drawRect(0, 0, width - 1, height - 1);

        // 隨機產生40條幹擾線,使圖象中的認證碼不易被其它程式探測到。
        gd.setColor(Color.BLACK);
        for (int i = 0; i < 30; i++) {
            int x = random.nextInt(width);
            int y = random.nextInt(height);
            int xl = random.nextInt(12);
            int yl = random.nextInt(12);
            gd.drawLine(x, y, x + xl, y + yl);
        }

        // randomCode用於保存隨機產生的驗證碼,以便用戶登錄後進行驗證。
        StringBuffer randomCode = new StringBuffer();
        int red = 0, green = 0, blue = 0;

        // 隨機產生codeCount數字的驗證碼。
        for (int i = 0; i < codeCount; i++) {
            // 得到隨機產生的驗證碼數字。
            String code = String.valueOf(codeSequence[random.nextInt(36)]);
            // 產生隨機的顏色分量來構造顏色值,這樣輸出的每位數字的顏色值都將不同。
            red = random.nextInt(255);
            green = random.nextInt(255);
            blue = random.nextInt(255);

            // 用隨機產生的顏色將驗證碼繪製到圖像中。
            gd.setColor(new Color(red, green, blue));
            gd.drawString(code, (i + 1) * xx, codeY);

            // 將產生的四個隨機數組合在一起。
            randomCode.append(code);
        }
        Map<String,Object> map  =new HashMap<String,Object>();
        //存放驗證碼
        map.put("code", randomCode);
        //存放生成的驗證碼BufferedImage對象
        map.put("codePic", buffImg);
        return map;
    }
}
View Code
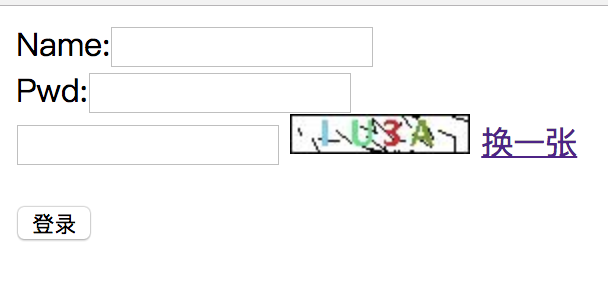
前端網頁代碼:
<!DOCTYPE html>
<html lang="en">
<head>
    <meta charset="UTF-8">
    <title>驗證登錄</title>
    <script src="js/jquery-3.3.1.min.js"></script>
</head>
<body>
    <form id="form">
        Name:<input type="text" name="name"><br/>
        Pwd:<input type="password" name="pwd"><br/>
        <input name="imgCode" type="text">
        <!-- 直接在img的src中填寫servlet請求 -->
        <img src="/getCodeImg" onclick="codeImg()" id="imgObj">
        <a href="#" onclick="codeImg()" >換一張</a>
        <br/>
        <p style="color: red" id="msg"></p>
        <input type="button" id="btn" value="登錄">
    </form>

</body>
<script>
    $(function () {
        //登錄驗證
        $("#btn").on("click",function () {
            $.ajax("login",{
                type:"post",
                data:$("#form").serialize(),
                success:function (data) {
                    //200 表示成功驗證
                    if(data==200){
                        location.href="success.html";
                    }else {
                        $("#msg").text(data);
                    }
                }
            });
        })
    })
    //改變圖片
    function codeImg() {
        var imgSrc = $("#imgObj");
        var src = imgSrc.attr("src");
        imgSrc.attr("src", chgUrl(src));
    }
    // 時間戳
    // 為了使每次生成圖片不一致,即不讓瀏覽器讀緩存,所以需要加上時間戳
    function chgUrl(url) {
        var timestamp = (new Date()).valueOf();
        //eg:  /getCodeImg?timestamp=1536379395200 截取成:/getCodeImg?timestamp
        url = url.substring(0, 21);
        if ((url.indexOf("?") >= 0)) {
            url = url + "=" + timestamp;
        } else {
            url = url + "?timestamp=" + timestamp;
        }
        return url;
    }
</script>
</html>
View Code
請求獲取製作的驗證碼:
/**
 * @author hh
 */
@WebServlet("/getCodeImg")
public class GetCodeImgServlet extends HttpServlet {
    @Override
    protected void service(HttpServletRequest req, HttpServletResponse resp) throws ServletException, IOException {
        // 調用工具類生成的驗證碼和驗證碼圖片
        Map<String, Object> codeMap = CodeUtil.generateCodeAndPic();
        //把驗證碼保存到session中
        HttpSession session=req.getSession();
        session.setAttribute("code",codeMap.get("code").toString());
        //禁止圖片緩存
        resp.setHeader("Pragma", "no-cache");
        resp.setHeader("Cache-Control", "no-cache");
        resp.setDateHeader("Expires", -1);
        //響應格式
        resp.setContentType("image/jpeg;charset=utf-8");
        // 將圖像輸出到Servlet輸出流中。
        try (ServletOutputStream sos = resp.getOutputStream()){
            ImageIO.write((RenderedImage) codeMap.get("codePic"), "jpeg", sos);
        } catch (IOException e) {
            // TODO Auto-generated catch block
            e.printStackTrace();
        }
    }
}
View Code
後臺校驗提交賬號密碼和驗證碼的值:
/**
 * @author hh
 */
@WebServlet("/login")
public class LoginServlet extends HttpServlet {
    @Override
    protected void service(HttpServletRequest req, HttpServletResponse resp) throws ServletException, IOException {
        req.setCharacterEncoding("utf-8");
        resp.setCharacterEncoding("utf-8");
        //獲取表單中的登錄名、密碼和填寫的驗證碼
        String name = req.getParameter("name");
        String pwd = req.getParameter("pwd");
        String imgCode = req.getParameter("imgCode");
        //獲取Session回話作用域存放的驗證碼值
        String code = (String)req.getSession().getAttribute("code");
        //進行校驗
        if("hh".equals(name)&&"123".equals(pwd)&&code.equals(imgCode)){
            resp.getWriter().print(200);
        }else if(!code.equals(imgCode)){
            resp.getWriter().print("驗證碼錯誤!");
        }else {
            resp.getWriter().print("賬號或者密碼錯誤!");
        }
    }
}
View Code
第二種:
第二種依賴了jar包,直接導入包,配置web.xml的請求servlet然後工具類就會自動保存到回話作用域
1.添加jar包依賴
如果你使用maven來統一管理jar包,則在工程的pom.xml中添加dependency
Xml代碼
<!-- 驗證碼生成工具 -->
            <dependency>
                <groupId>com.github.penggle</groupId>
                <artifactId>kaptcha</artifactId>
                <version>2.3.2</version>
            </dependency>
如果是非maven管理的項目,則直接在官網下載kaptcha的jar包,然後添加到項目lib庫中,下載地址:http://code.google.com/p/kaptcha/downloads/list
配置web.xml:
<?xml version="1.0" encoding="UTF-8"?>
<web-app xmlns="http://xmlns.jcp.org/xml/ns/javaee"
         xmlns:xsi="http://www.w3.org/2001/XMLSchema-instance"
         xsi:schemaLocation="http://xmlns.jcp.org/xml/ns/javaee http://xmlns.jcp.org/xml/ns/javaee/web-app_4_0.xsd"
         version="4.0">
    <servlet>
        <!-- 生成圖片的Servlet -->
        <servlet-name>Kaptcha</servlet-name>
        <servlet-class>com.google.code.kaptcha.servlet.KaptchaServlet</servlet-class>


        <!-- 是否有邊框 -->
        <init-param>
            <param-name>kaptcha.border</param-name>
            <param-value>no</param-value>
        </init-param>
        <!--字體顏色-->
        <init-param>
            <param-name>kaptcha.textproducer.font.color</param-name>
            <param-value>red</param-value>
        </init-param>
        <!-- 圖片寬度 -->
        <init-param>
            <param-name>kaptcha.image.width</param-name>
            <param-value>135</param-value>
        </init-param>
        <!-- 圖片高度 -->
        <init-param>
            <param-name>kaptcha.image.height</param-name>
            <param-value>50</param-value>
        </init-param>
        <!-- 使用哪些字元生成驗證碼 -->
        <!--<init-param>
            <param-name>kaptcha.textproducer.char.string</param-name>
            <param-value>ACDEFHKPRSTWX345679</param-value>
        </init-param>-->
        <!-- 字體大小 -->
        <init-param>
            <param-name>kaptcha.textproducer.font.size</param-name>
            <param-value>43</param-value>
        </init-param>
        <!-- 干擾線的顏色 -->
        <init-param>
            <param-name>kaptcha.noise.color</param-name>
            <param-value>black</param-value>
        </init-param>
        <!-- 字元個數 -->
        <init-param>
            <param-name>kaptcha.textproducer.char.length</param-name>
            <param-value>4</param-value>
        </init-param>
        <!-- 使用哪些字體 -->
        <init-param>
            <param-name>kaptcha.textproducer.font.names</param-name>
            <param-value>Arial</param-value>
        </init-param>
    </servlet>
    <servlet-mapping>
        <servlet-name>Kaptcha</servlet-name>
        <!-- 請求地址 -->
        <url-pattern>/getCode</url-pattern>
    </servlet-mapping>
</web-app>
View Code
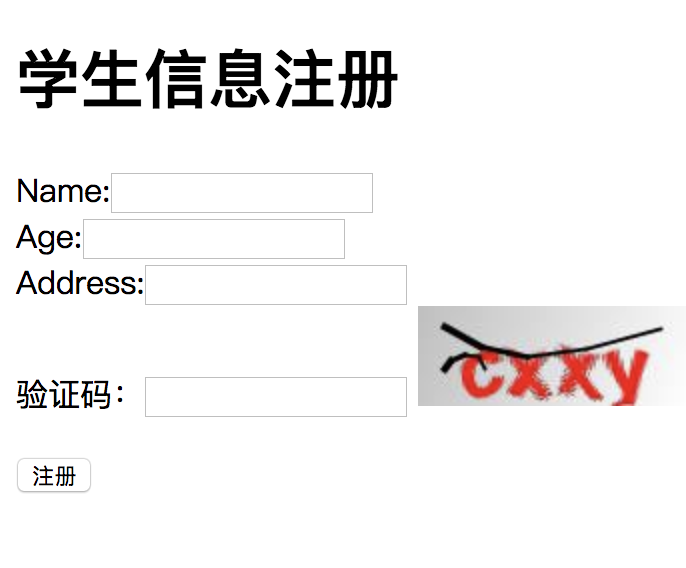
前端網頁代碼:
<!DOCTYPE html>
<html lang="en">
<head>
    <meta charset="UTF-8">
    <title>學生信息註冊</title>
    <script src="js/jquery-3.3.1.min.js"></script>
</head>
<body>
<h1>學生信息註冊</h1>
<form id="form">
    Name:<input type="text" name="name" required="required"><br/>
    Age:<input type="text" name="age" required="required"><br/>
    Address:<input type="text" name="address" required="required"><br/>
    驗證碼:<input name="imgCode" type="text" required="required">
    <!-- 直接在img的src中填寫servlet請求 -->
    <img src="/getCode" onclick="codeImg()" id="imgObj">
    <br/>
    <p style="color: red" id="msg"></p>
    <input type="button" id="btn" value="註冊">
</form>
</body>
<script>
    $(function () {
        //登錄驗證
        $("#btn").on("click",function () {
            $.ajax("regist",{
                type:"post",
                data:$("#form").serialize(),
                success:function (data) {
                    if(data.code==200){
                        alert(data.value);
                    }else {
                        $("#msg").text(data.value);
                    }
                }
            });
        })
    })
    //改變圖片
    function codeImg() {
        var imgSrc = $("#imgObj");
        var src = imgSrc.attr("src");
        imgSrc.attr("src", chgUrl(src));
    }
    // 時間戳
    // 為了使每次生成圖片不一致,即不讓瀏覽器讀緩存,所以需要加上時間戳
    function chgUrl(url) {
        var timestamp = (new Date()).valueOf();
        //eg:  /getCodeImg?timestamp=1536379395200 截取成:/getCodeImg?timestamp
        url = url.substring(0, 21);
        if ((url.indexOf("?") >= 0)) {
            url = url + "=" + timestamp;
        } else {
            url = url + "?timestamp=" + timestamp;
        }
        return url;
    }
</script>
</html>
View Code
後臺校驗的代碼:
package edu.nf.demo.servlet;

import com.google.code.kaptcha.Constants;
import com.google.gson.Gson;
import edu.nf.demo.service.StudentService;
import edu.nf.demo.vo.ResponseView;

import javax.servlet.ServletException;
import javax.servlet.annotation.WebServlet;
import javax.servlet.http.HttpServlet;
import javax.servlet.http.HttpServletRequest;
import javax.servlet.http.HttpServletResponse;
import java.io.IOException;

/**
 * @author hh
 */
@WebServlet("/regist")
public class StudentRegistServlet extends HttpServlet {
    @Override
    protected void service(HttpServletRequest req, HttpServletResponse resp) throws ServletException, IOException {
        req.setCharacterEncoding("utf-8");
        //取出頁面的值
        String name=req.getParameter("name");
        String age=req.getParameter("age");
        String address=req.getParameter("address");
        String code=req.getParameter("imgCode");
        //響應視圖
        ResponseView vo=new ResponseView();
        //從Session中獲取工具類自動保存的驗證碼的值
        String sessionCode=(String)req.getSession().getAttribute(Constants.KAPTCHA_SESSION_KEY);
        //判斷驗證碼
        if (!code.equalsIgnoreCase(sessionCode)){
            vo.setCode(403);
            vo.setValue("驗證碼錯誤");
        }else {
            int respCode = new StudentService().inserStudent(name,age,address);
            if (respCode==200){
                vo.setValue("註冊成功!");
            }else {
                vo.setCode(403);
                vo.setValue("註冊失敗!");
            }
        }
        //響應數據
        resp.setContentType("application/json;charset=utf-8");
        resp.getWriter().print(new Gson().toJson(vo));
    }
}
View Code


