小程式上傳圖片要先瞭解他其中的各個屬性值,在https://developers.weixin.qq.com/miniprogram/dev/api/media-picture.html內有詳細的介紹 今天在這裡主要來講下如何去上傳圖片併進行壓縮,瞭解下以下屬性值 先來看下頁面展示(點擊上傳圖片,從 ...
小程式上傳圖片要先瞭解他其中的各個屬性值,在https://developers.weixin.qq.com/miniprogram/dev/api/media-picture.html內有詳細的介紹
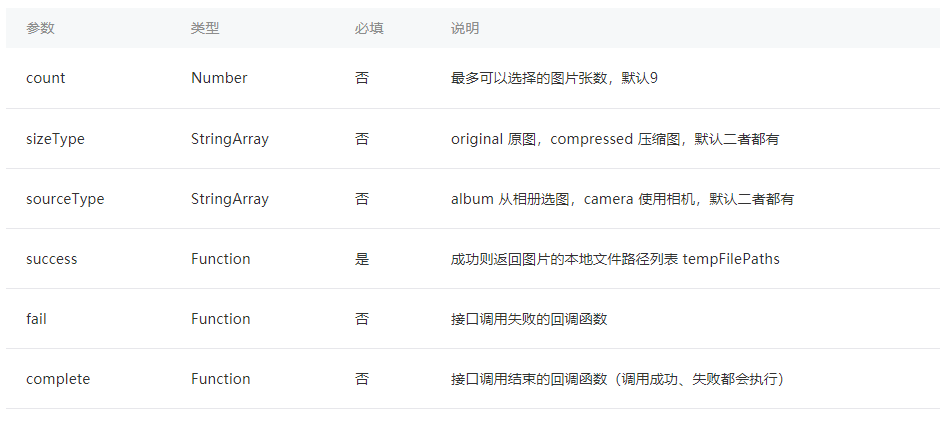
今天在這裡主要來講下如何去上傳圖片併進行壓縮,瞭解下以下屬性值

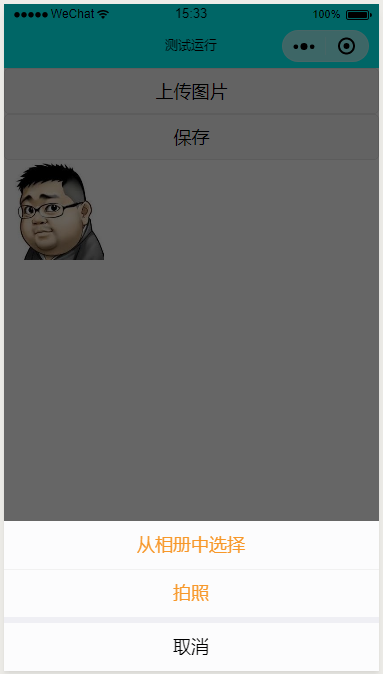
先來看下頁面展示(點擊上傳圖片,從相冊中選擇,上傳完圖片後又點了一次上傳)

來來來,上代碼
wxml代碼
<button bindtap='chooseImageTap'>上傳圖片</button>
<button bindtap='saveImage'>保存</button>
<canvas style="width: 300px; height: 200px;" canvas-id="myCanvas"></canvas>
當然最主要的還是js代碼咯
var app = getApp()
Page({
  data: {
    logo: null,
   pics:[]
  },
 chooseImageTap: function () {
    let _this = this;
    wx.showActionSheet({
      itemList: ['從相冊中選擇', '拍照'],//下麵顯示的數組是拍照還是別的
      itemColor: "#f7982a",//顯示文字的顏色
      success: function (res) {
        if (!res.cancel) {//選中判斷
          if (res.tapIndex == 0) {
            _this.chooseWxImage('album')
          } else if (res.tapIndex == 1) {
            _this.chooseWxImage('camera')
          }
        }
      }
    })

  },
 // 繪製圖片到canvas上
  chooseWxImage: function (type) {
   const ctx = wx.createCanvasContext('myCanvas')//畫布
    var that = this;
    wx.chooseImage({//上傳圖片事件
      count: 9,//數量
      sizeType: ['original', 'compressed'],//original 原圖,compressed 壓縮圖,預設二者都有
      sourceType: ['album', 'camera'], //album 從相冊選圖,camera 使用相機,預設二者都有
      success: function (res) {
        console.log(res)
        ctx.drawImage(res.tempFilePaths[0], 0, 0, 100, 100)//成功選定第一張。後面的四個值分別是left,top,width,height,來控制畫布上的圖片的位置和大小
        ctx.draw()
      }
    })
    },
saveImage: function () {//這裡觸發圖片上傳的方法
    var pics = this.data.pics;
    app.uploadimg({
      url: 'https://........',//這裡是你圖片上傳的介面
      path: pics//這裡是選取的圖片的地址數組
    });
  },
我的個人理解是這樣的,但可能會有些小錯誤,僅供大家借鑒,不適用於直接帶入使用,當然把圖片上傳到畫布上,並獲取到圖的地址,這裡是沒有問題的,可能最後的保存,最好多借鑒下別的,請大神斧正


