
用TabbarController進行模塊分類和管理,這裡推薦一個CYLTabBarController,只需兩個數組就可以使用和管理; 1.導入CYLTabBarController 使用cocoapods導入即可 pod 'CYLTabBarController', '~> 1.14.1',終端 ...
用TabbarController進行模塊分類和管理,這裡推薦一個CYLTabBarController,只需兩個數組就可以使用和管理;
1.導入CYLTabBarController
使用cocoapods導入即可 pod 'CYLTabBarController', '~> 1.14.1',終端 pod install 即可
2.配置
新建一個基於 NSObject 類 MainTabBarControllerConfig,用於配置CYLTabBarController及管理;頭文件引入
#import <CYLTabBarController.h>
.h
@interface MainTabBarControllerConfig : NSObject
///CYLTabBarController
@property (nonatomic,strong) CYLTabBarController *mainTabBarController;
@end
.m
@implementation MainTabBarControllerConfig
- (CYLTabBarController *)mainTabBarController{
if (!_mainTabBarController) {
UIEdgeInsets imageInsets = UIEdgeInsetsZero;
UIOffset titlePositionAdjustment = UIOffsetZero;
_mainTabBarController = [CYLTabBarController tabBarControllerWithViewControllers:[self arrayViewControllerItem] tabBarItemsAttributes:[self arrayAttributesItem] imageInsets:imageInsets titlePositionAdjustment:titlePositionAdjustment];
[self customizeTabBarAppearance:_mainTabBarController];
}
return _mainTabBarController;
}
- (NSArray *)arrayViewControllerItem{
BookcaseNavViewController *bookcaseNavi = [wkj_getSboardBookcase instantiateViewControllerWithIdentifier:@"BookcaseNavViewController"];
AskKaoLaNavViewController *askKlNavi = [wkj_getSboardAskKaoLa instantiateViewControllerWithIdentifier:@"AskKaoLaNavViewController"];
DiscoverNavViewController *discoverNavi = [wkj_getSboardDiscover instantiateViewControllerWithIdentifier:@"DiscoverNavViewController"];
UserNavViewController *userNavi = [wkj_getSboardUser instantiateViewControllerWithIdentifier:@"UserNavViewController"];
///返回需要載入的模塊
return @[bookcaseNavi,discoverNavi,askKlNavi,userNavi];
}
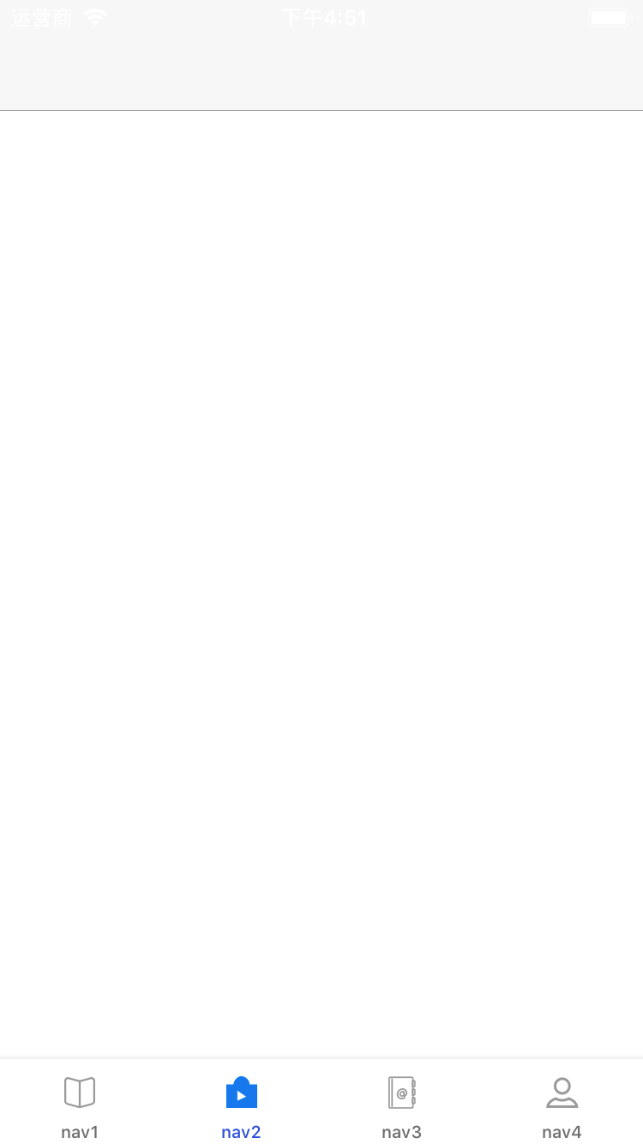
- (NSArray *)arrayAttributesItem{
NSDictionary *bookcaseItemsAttributes =@{CYLTabBarItemTitle : @"nav1",
CYLTabBarItemImage : @"bar_tk_01",
/* NSString and UIImage are supported*/
CYLTabBarItemSelectedImage : @"bar_tk_02",};
NSDictionary *discoverItemsAttributes = @{CYLTabBarItemTitle : @"nav2",
CYLTabBarItemImage : @"bar_kc_01",
CYLTabBarItemSelectedImage : @"bar_kc_02",};
NSDictionary *askklItemsAttributes = @{CYLTabBarItemTitle : @"nav3",
CYLTabBarItemImage : @"bar_dzs_01",
CYLTabBarItemSelectedImage : @"bar_dzs_02",};
NSDictionary *userItemsAttributes = @{CYLTabBarItemTitle : @"nav4",
CYLTabBarItemImage : @"bar_wd_01",
CYLTabBarItemSelectedImage : @"bar_wd_02"};
NSArray *tabBarItemsAttributes = @[bookcaseItemsAttributes,
discoverItemsAttributes,
askklItemsAttributes,
userItemsAttributes];
return tabBarItemsAttributes;
}
/**
* 更多TabBar自定義設置:比如:tabBarItem 的選中和不選中文字和背景圖片屬性、tabbar 背景圖片屬性等等
*/
- (void)customizeTabBarAppearance:(CYLTabBarController *)tabBarController {
// Customize UITabBar height
// 自定義 TabBar 高度
// tabBarController.tabBarHeight = CYLTabBarControllerHeight;
// set the text color for unselected state
// 普通狀態下的文字屬性
NSMutableDictionary *normalAttrs = [NSMutableDictionary dictionary];
normalAttrs[NSForegroundColorAttributeName] = [UIColor grayColor];
// set the text color for selected state
// 選中狀態下的文字屬性
NSMutableDictionary *selectedAttrs = [NSMutableDictionary dictionary];
selectedAttrs[NSForegroundColorAttributeName] = Wonderful_BlueColor6;
// set the text Attributes
// 設置文字屬性
UITabBarItem *tabBar = [UITabBarItem appearance];
[tabBar setTitleTextAttributes:normalAttrs forState:UIControlStateNormal];
[tabBar setTitleTextAttributes:selectedAttrs forState:UIControlStateSelected];
// Set the dark color to selected tab (the dimmed background)
// TabBarItem選中後的背景顏色
// [self customizeTabBarSelectionIndicatorImage];
// update TabBar when TabBarItem width did update
// If your app need support UIDeviceOrientationLandscapeLeft or UIDeviceOrientationLandscapeRight,
// remove the comment '//'
// 如果你的App需要支持橫豎屏,請使用該方法移除註釋 '//'
// [self updateTabBarCustomizationWhenTabBarItemWidthDidUpdate];
// set the bar shadow image
// This shadow image attribute is ignored if the tab bar does not also have a custom background image.So at least set somthing.
[[UITabBar appearance] setBackgroundImage:[[UIImage alloc] init]];
[[UITabBar appearance] setBackgroundColor:[UIColor whiteColor]];
[[UITabBar appearance] setShadowImage:[UIImage imageNamed:@"tapbar_top_line"]];
// set the bar background image
// 設置背景圖片
// UITabBar *tabBarAppearance = [UITabBar appearance];
// [tabBarAppearance setBackgroundImage:[UIImage imageNamed:@"tab_bar"]];
// remove the bar system shadow image
// 去除 TabBar 自帶的頂部陰影
// [[UITabBar appearance] setShadowImage:[[UIImage alloc] init]];
}
3.使用
在AppDelegate.m didFinishLaunchingWithOptions:(NSDictionary *)launchOptions 方法中
- (BOOL)application:(UIApplication *)application didFinishLaunchingWithOptions:(NSDictionary *)launchOptions {
    // Override point for customization after application launch.
//    /載入中間自定義按鈕
//    [TabbarPlusButton registerPlusButton];
    MainTabBarControllerConfig *tabbarConfig = [[MainTabBarControllerConfig alloc]init];
    CYLTabBarController *mainTabbarController = tabbarConfig.mainTabBarController;
    [self.window setRootViewController:mainTabbarController];
    return YES;
}
4.自定義按鈕
加入中間按鈕之前,確保上面的功能已經實現;新建一個基於 CYLPlusButton 的類 TabbarPlusButton,實現代理 CYLPlusButtonSubclassing
.h
@interface TabbarPlusButton : CYLPlusButton<CYLPlusButtonSubclassing>

@end
.m
@implementation TabbarPlusButton

- (instancetype)initWithFrame:(CGRect)frame {
    if (self = [super initWithFrame:frame]) {
        self.titleLabel.textAlignment = NSTextAlignmentCenter;
        self.adjustsImageWhenHighlighted = NO;
    }
    return self;
}

//上下結構的 button
- (void)layoutSubviews {
    [super layoutSubviews];

    // 控制項大小,間距大小
    // 註意:一定要根據項目中的圖片去調整下麵的0.7和0.9,Demo之所以這麼設置,因為demo中的 plusButton 的 icon 不是正方形。
    CGFloat const imageViewEdgeWidth   = self.bounds.size.width * 0.7;
    CGFloat const imageViewEdgeHeight  = imageViewEdgeWidth * 0.9;

    CGFloat const centerOfView    = self.bounds.size.width * 0.5;
    CGFloat const labelLineHeight = self.titleLabel.font.lineHeight;
    CGFloat const verticalMargin  = (self.bounds.size.height - labelLineHeight - imageViewEdgeHeight) * 0.5;

    // imageView 和 titleLabel 中心的 Y 值
    CGFloat const centerOfImageView  = verticalMargin + imageViewEdgeHeight * 0.5;
    CGFloat const centerOfTitleLabel = imageViewEdgeHeight  + verticalMargin * 2 + labelLineHeight * 0.5 + 5;

    //imageView position 位置
    self.imageView.bounds = CGRectMake(0, 0, imageViewEdgeWidth, imageViewEdgeHeight);
    self.imageView.center = CGPointMake(centerOfView, centerOfImageView);

    //title position 位置
    self.titleLabel.bounds = CGRectMake(0, 0, self.bounds.size.width, labelLineHeight);
    self.titleLabel.center = CGPointMake(centerOfView, centerOfTitleLabel);
}

#pragma mark -
#pragma mark - CYLPlusButtonSubclassing Methods

/*
 *
 Create a custom UIButton with title and add it to the center of our tab bar
 *
 */
+ (id)plusButton {
    TabbarPlusButton *button = [[TabbarPlusButton alloc] init];
    ///中間按鈕圖片
    UIImage *buttonImage = [UIImage imageNamed:@"post_normal"];
    [button setImage:buttonImage forState:UIControlStateNormal];
    [button setTitle:@"發佈" forState:UIControlStateNormal];
    [button setTitleColor:[UIColor grayColor] forState:UIControlStateNormal];

    [button setTitle:@"發佈" forState:UIControlStateSelected];
    [button setTitleColor:[UIColor blueColor] forState:UIControlStateSelected];

    button.titleLabel.font = [UIFont systemFontOfSize:9.5];
    [button sizeToFit]; // or set frame in this way `button.frame = CGRectMake(0.0, 0.0, 250, 100);`
    //    button.frame = CGRectMake(0.0, 0.0, 250, 100);
    //    button.backgroundColor = [UIColor redColor];

    // if you use `+plusChildViewController` , do not addTarget to plusButton.
    [button addTarget:button action:@selector(clickPublish) forControlEvents:UIControlEventTouchUpInside];
    return button;
}
/*
 *
 Create a custom UIButton without title and add it to the center of our tab bar
 *
 */
//+ (id)plusButton
//{
//
//    UIImage *buttonImage = [UIImage imageNamed:@"hood.png"];
//    UIImage *highlightImage = [UIImage imageNamed:@"hood-selected.png"];
//
//    CYLPlusButtonSubclass* button = [CYLPlusButtonSubclass buttonWithType:UIButtonTypeCustom];
//
//    button.autoresizingMask = UIViewAutoresizingFlexibleRightMargin | UIViewAutoresizingFlexibleLeftMargin | UIViewAutoresizingFlexibleBottomMargin | UIViewAutoresizingFlexibleTopMargin;
//    button.frame = CGRectMake(0.0, 0.0, buttonImage.size.width, buttonImage.size.height);
//    [button setBackgroundImage:buttonImage forState:UIControlStateNormal];
//    [button setBackgroundImage:highlightImage forState:UIControlStateHighlighted];
//    [button addTarget:button action:@selector(clickPublish) forControlEvents:UIControlEventTouchUpInside];
//
//    return button;
//}

#pragma mark -
#pragma mark - Event Response

- (void)clickPublish {
    CYLTabBarController *tabBarController = [self cyl_tabBarController];
    UIViewController *viewController = tabBarController.selectedViewController;

    UIActionSheet *actionSheet = [[UIActionSheet alloc] initWithTitle:nil
                                                             delegate:nil
                                                    cancelButtonTitle:@"取消"
                                               destructiveButtonTitle:nil
                                                    otherButtonTitles:@"拍照", @"從相冊選取", @"淘寶一鍵轉賣", nil];
    [actionSheet showInView:viewController.view];
}

#pragma mark - UIActionSheetDelegate

- (void)actionSheet:(UIActionSheet *)actionSheet didDismissWithButtonIndex:(NSInteger)buttonIndex {
    NSLog(@"buttonIndex = %@", @(buttonIndex));
}

#pragma mark - CYLPlusButtonSubclassing

//+ (UIViewController *)plusChildViewController {
//    UIViewController *plusChildViewController = [[UIViewController alloc] init];
//    plusChildViewController.view.backgroundColor = [UIColor redColor];
//    plusChildViewController.navigationItem.title = @"PlusChildViewController";
//    UIViewController *plusChildNavigationController = [[UINavigationController alloc]
//                                                   initWithRootViewController:plusChildViewController];
//    return plusChildNavigationController;
//}
//
//+ (NSUInteger)indexOfPlusButtonInTabBar {
//    return 4;
//}
//
//+ (BOOL)shouldSelectPlusChildViewController {
//    BOOL isSelected = CYLExternPlusButton.selected;
//    if (isSelected) {
//        NSLog(@"


