
由於工作要求最近在使用GridView完成圖片的批量上傳功能,我的例子當中包含仿微信圖片上傳、拍照、本地選擇、相片裁剪等功能,如果有需要的朋友可以看一下,希望我的實際經驗能對您有所幫助。 直接上圖,下麵的圖片就是點擊“加號”後彈出的對話框,通過對話框可以根據自己需求進行相片選擇。 項目結構: 下麵直 ...
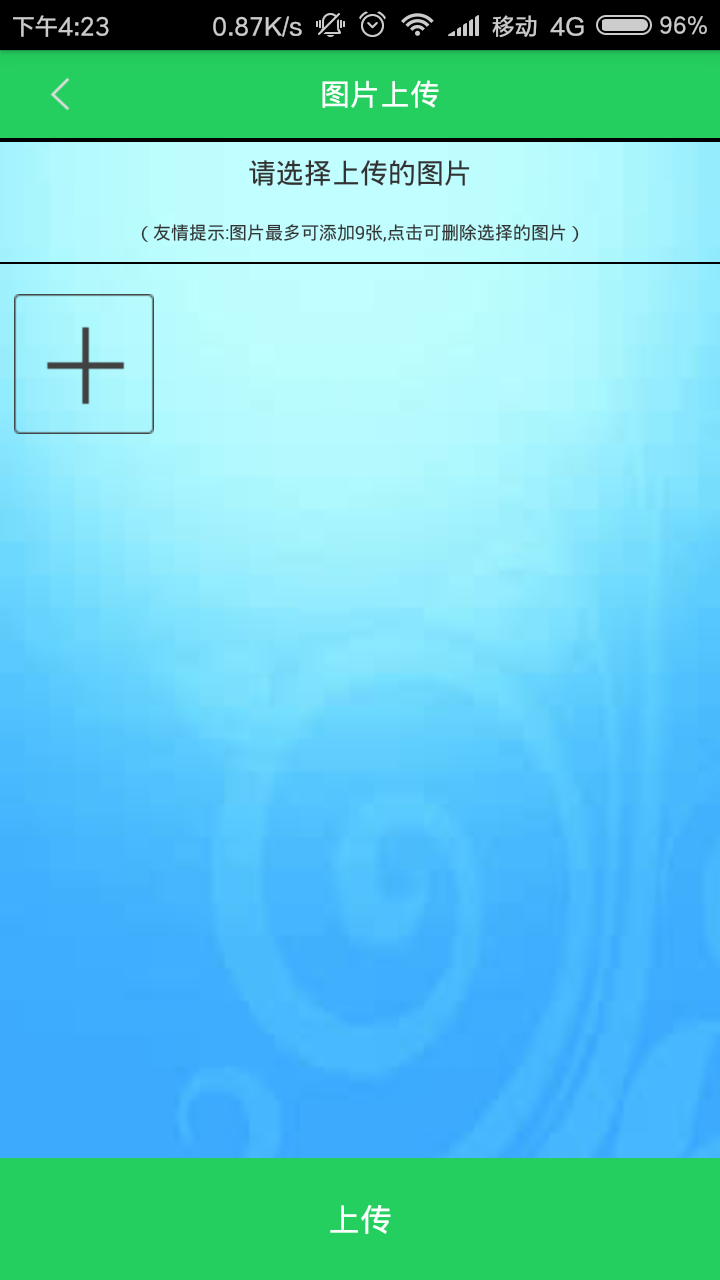
由於工作要求最近在使用GridView完成圖片的批量上傳功能,我的例子當中包含仿微信圖片上傳、拍照、本地選擇、相片裁剪等功能,如果有需要的朋友可以看一下,希望我的實際經驗能對您有所幫助。
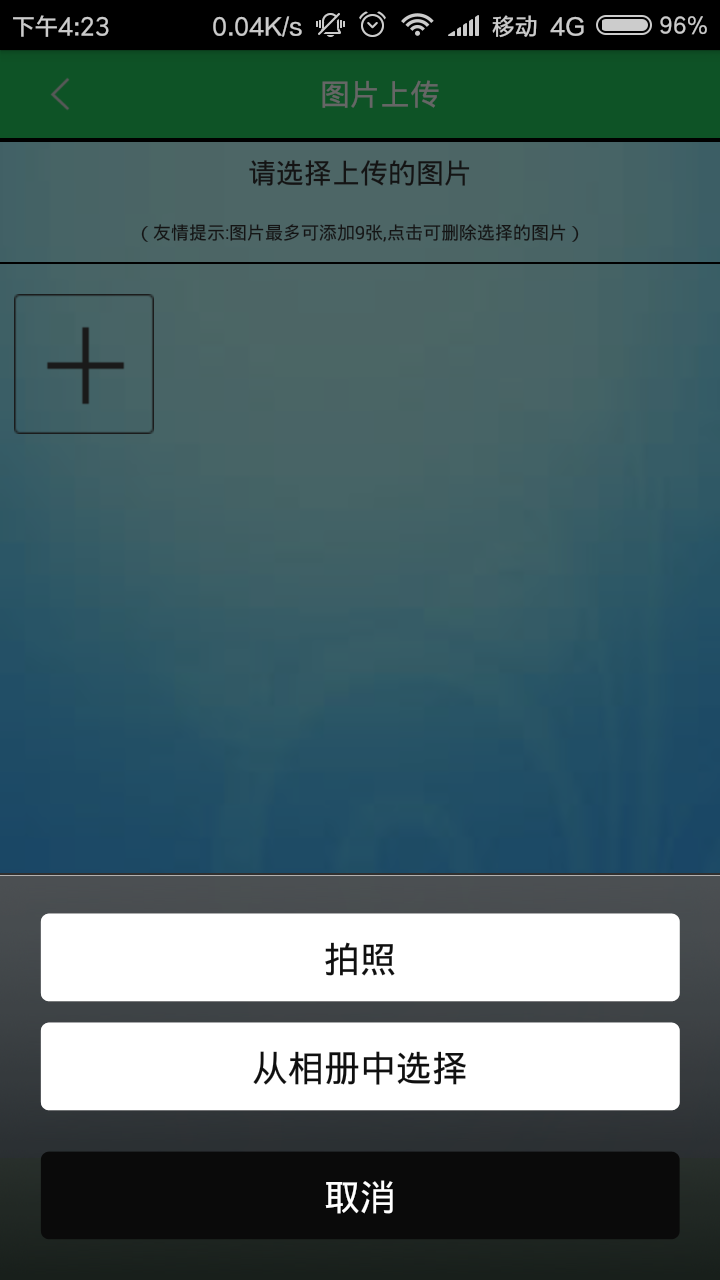
直接上圖,下麵的圖片就是點擊“加號”後彈出的對話框,通過對話框可以根據自己需求進行相片選擇。
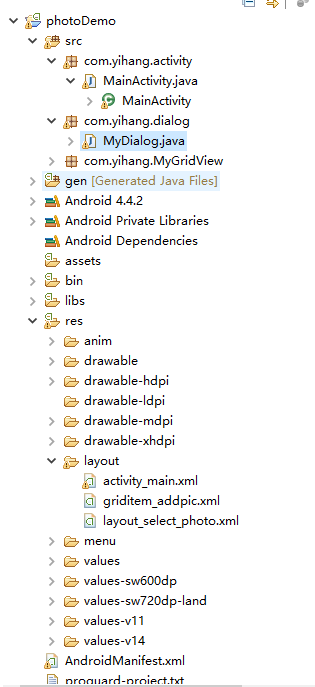
項目結構:
下麵直接上代碼。
整體的佈局文件activity_main.xml
  1 <LinearLayout xmlns:android="http://schemas.android.com/apk/res/android"
  2     xmlns:tools="http://schemas.android.com/tools"
  3     android:layout_width="match_parent"
  4     android:layout_height="match_parent"
  5     android:background="@drawable/index"
  6     android:orientation="vertical" >
  7
  8     <LinearLayout
  9         android:layout_width="match_parent"
 10         android:layout_height="44dp"
 11         android:background="#24cf5f"
 12         android:orientation="horizontal" >
 13
 14         <ImageView
 15             android:id="@+id/back"
 16             android:layout_width="match_parent"
 17             android:layout_height="20dp"
 18             android:layout_gravity="center"
 19             android:layout_weight="5"
 20             android:src="@drawable/back" />
 21
 22         <TextView
 23             android:layout_width="fill_parent"
 24             android:layout_height="44dp"
 25             android:layout_weight="1"
 26             android:gravity="center"
 27             android:paddingRight="40dp"
 28             android:text="圖片上傳"
 29             android:textColor="#FFFFFF"
 30             android:textSize="30px" />
 31     </LinearLayout>
 32
 33     <LinearLayout
 34         android:layout_width="match_parent"
 35         android:layout_height="1dp"
 36         android:background="#000000" />
 37
 38     <ScrollView
 39         android:layout_width="match_parent"
 40         android:layout_height="match_parent"
 41         android:layout_weight="1" >
 42
 43         <LinearLayout
 44             android:layout_width="match_parent"
 45             android:layout_height="match_parent"
 46             android:orientation="vertical" >
 47
 48             <LinearLayout
 49                 android:layout_width="match_parent"
 50                 android:layout_height="1dp"
 51                 android:background="#000000" />
 52
 53             <LinearLayout
 54                 android:layout_width="match_parent"
 55                 android:layout_height="60dp"
 56                 android:layout_weight="1"
 57                 android:orientation="vertical" >
 58
 59                 <TextView
 60                     android:layout_width="match_parent"
 61                     android:layout_height="match_parent"
 62                     android:layout_weight="1"
 63                     android:gravity="center"
 64                     android:text="請選擇上傳的圖片" />
 65
 66                 <TextView
 67                     android:layout_width="match_parent"
 68                     android:layout_height="match_parent"
 69                     android:layout_weight="1"
 70                     android:gravity="center"
 71                     android:text="(友情提示:圖片最多可添加9張,點擊可刪除選擇的圖片)"
 72                     android:textSize="18px" />
 73             </LinearLayout>
 74
 75             <LinearLayout
 76                 android:layout_width="match_parent"
 77                 android:layout_height="1dp"
 78                 android:background="#000000" />
 79
 80             <LinearLayout
 81                 android:layout_width="match_parent"
 82                 android:layout_height="match_parent"
 83                 android:layout_weight="1" >
 84
 85                 <com.yihang.MyGridView.MyGridView
 86                     android:id="@+id/gridView"
 87                     android:layout_width="match_parent"
 88                     android:layout_height="wrap_content"
 89                     android:layout_margin="5dp"
 90                     android:layout_weight="111"
 91                     android:columnWidth="90dp"
 92                     android:gravity="center"
 93                     android:horizontalSpacing="5dp"
 94                     android:numColumns="4"
 95                     android:stretchMode="columnWidth"
 96                     android:verticalSpacing="5dp" />
 97             </LinearLayout>
 98         </LinearLayout>
 99     </ScrollView>
100
101     <Button
102         android:id="@+id/bt_submit"
103         android:layout_width="match_parent"
104         android:layout_height="match_parent"
105         android:layout_gravity="bottom"
106         android:layout_weight="5.2"
107         android:background="#24cf5f"
108         android:text="上傳"
109         android:textColor="#FFFFFF"
110         android:textSize="16sp" />
111
112 </LinearLayout>
activity:MainActivity
package com.yihang.activity;

import java.io.ByteArrayOutputStream;
import java.io.File;
import java.util.ArrayList;
import java.util.HashMap;
import android.app.Activity;
import android.app.AlertDialog;
import android.app.AlertDialog.Builder;
import android.content.DialogInterface;
import android.content.Intent;
import android.content.pm.ActivityInfo;
import android.graphics.Bitmap;
import android.graphics.BitmapFactory;
import android.net.Uri;
import android.os.Bundle;
import android.os.Environment;
import android.provider.MediaStore;
import android.text.TextUtils;
import android.view.LayoutInflater;
import android.view.View;
import android.view.Window;
import android.view.WindowManager;
import android.widget.AdapterView;
import android.widget.AdapterView.OnItemClickListener;
import android.widget.GridView;
import android.widget.ImageView;
import android.widget.SimpleAdapter;
import android.widget.SimpleAdapter.ViewBinder;
import android.widget.Toast;

import com.yihang.dialog.MyDialog;
import com.yihang.dialog.MyDialog.OnButtonClickListener;
import com.yihang.photodemo.R;

public class MainActivity extends Activity implements
OnButtonClickListener, OnItemClickListener{
    private MyDialog dialog;// 圖片選擇對話框
    public static final int NONE = 0;
    public static final int PHOTOHRAPH = 1;// 拍照
    public static final int PHOTOZOOM = 2; // 縮放
    public static final int PHOTORESOULT = 3;// 結果
    public static final String IMAGE_UNSPECIFIED = "image/*";

    private GridView gridView; // 網格顯示縮略圖
    private final int IMAGE_OPEN = 4; // 打開圖片標記
    private String pathImage; // 選擇圖片路徑
    private Bitmap bmp; // 導入臨時圖片
    private ArrayList<HashMap<String, Object>> imageItem;
    private SimpleAdapter simpleAdapter; // 適配器

    @Override
    protected void onCreate(Bundle savedInstanceState) {
        super.onCreate(savedInstanceState);
        requestWindowFeature(Window.FEATURE_NO_TITLE);
        /*
         * 防止鍵盤擋住輸入框 不希望遮擋設置activity屬性 android:windowSoftInputMode="adjustPan"
         * 希望動態調整高度 android:windowSoftInputMode="adjustResize"
         */
        getWindow().setSoftInputMode(
                WindowManager.LayoutParams.SOFT_INPUT_ADJUST_PAN);
        // 鎖定屏幕
        setRequestedOrientation(ActivityInfo.SCREEN_ORIENTATION_PORTRAIT);
        setContentView(R.layout.activity_main);
        init();
        initData();
    }

    private void init() {
        gridView = (GridView) findViewById(R.id.gridView);
        gridView.setOnItemClickListener(this);
        dialog = new MyDialog(this);
        dialog.setOnButtonClickListener(this);
        // activity中調用其他activity中組件的方法
        LayoutInflater layout = this.getLayoutInflater();
        View view = layout.inflate(R.layout.layout_select_photo, null);


    }
    private void initData() {
        /*
         * 載入預設圖片添加圖片加號
         */
        bmp = BitmapFactory.decodeResource(getResources(),
                R.drawable.gridview_addpic); // 加號
        imageItem = new ArrayList<HashMap<String, Object>>();
        HashMap<String, Object> map = new HashMap<String, Object>();
        map.put("itemImage", bmp);
        imageItem.add(map);
        simpleAdapter = new SimpleAdapter(this, imageItem,
                R.layout.griditem_addpic, new String[] { "itemImage" },
                new int[] { R.id.imageView1 });
        simpleAdapter.setViewBinder(new ViewBinder() {
            @Override
            public boolean setViewValue(View view, Object data,
                    String textRepresentation) {
                // TODO Auto-generated method stub
                if (view instanceof ImageView && data instanceof Bitmap) {
                    ImageView i = (ImageView) view;
                    i.setImageBitmap((Bitmap) data);
                    return true;
                }
                return false;
            }
        });
        gridView.setAdapter(simpleAdapter);
    }


    @Override
    public void camera() {
        // TODO Auto-generated method stub
        Intent intent = new Intent(MediaStore.ACTION_IMAGE_CAPTURE);
        intent.putExtra(MediaStore.EXTRA_OUTPUT, Uri.fromFile(new File(
                Environment.getExternalStorageDirectory(), "temp.jpg")));
        startActivityForResult(intent, PHOTOHRAPH);
    }

    @Override
    public void gallery() {
        // TODO Auto-generated method stub
        Intent intent = new Intent(Intent.ACTION_PICK,
                android.provider.MediaStore.Images.Media.EXTERNAL_CONTENT_URI);
        startActivityForResult(intent, IMAGE_OPEN);

    }

    @Override
    public void cancel() {
        // TODO Auto-generated method stub
        dialog.cancel();
    }

    @Override
    protected void onActivityResult(int requestCode, int resultCode, Intent data) {
        // TODO Auto-generated method stub
        super.onActivityResult(requestCode, resultCode, data);

        if (resultCode == NONE)
            return;
        // 拍照
        if (requestCode == PHOTOHRAPH) {
            // 設置文件保存路徑這裡放在跟目錄下
            File picture = new File(Environment.getExternalStorageDirectory()
                    + "/temp.jpg");
            startPhotoZoom(Uri.fromFile(picture));
        }

        if (data == null)
            return;

        // 處理結果
        if (requestCode == PHOTORESOULT) {
            Bundle extras = data.getExtras();
            if (extras != null) {
                Bitmap photo = extras.getParcelable("data");
                ByteArrayOutputStream stream = new ByteArrayOutputStream();
                photo.compress(Bitmap.CompressFormat.JPEG, 75, stream);// (0-100)壓縮文件
                // 將圖片放入gridview中
                HashMap<String, Object> map = new HashMap<String, Object>();
                map.put("itemImage", photo);
                imageItem.add(map);
                simpleAdapter = new SimpleAdapter(this, imageItem,
                        R.layout.griditem_addpic, new String[] { "itemImage" },
                        new int[] { R.id.imageView1 });
                simpleAdapter.setViewBinder(new ViewBinder() {
                    @Override
                    public boolean setViewValue(View view, Object data,
                            String textRepresentation) {
                        // TODO Auto-generated method stub
                        if (view instanceof ImageView && data instanceof Bitmap) {
                            ImageView i = (ImageView) view;
                            i.setImageBitmap((Bitmap) data);
                            return true;
                        }
                        return false;
                    }
                });
                gridView.setAdapter(simpleAdapter);
                simpleAdapter.notifyDataSetChanged();
                dialog.dismiss();
            }

        }
        // 打開圖片
        if (resultCode == RESULT_OK && requestCode == IMAGE_OPEN) {
            startPhotoZoom(data.getData());
        }
        super.onActivityResult(requestCode, resultCode, data);

    }

    @Override
    protected void onResume() {
        // TODO Auto-generated method stub
        super.onResume();
        if (!TextUtils.isEmpty(pathImage)) {
            Bitmap addbmp = BitmapFactory.decodeFile(pathImage);
            HashMap<String, Object> map = new HashMap<String, Object>();
            map.put("itemImage", addbmp);
            imageItem.add(map);
            simpleAdapter = new SimpleAdapter(this, imageItem,
                    R.layout.griditem_addpic, new String[] { "itemImage" },
                    new int[] { R.id.imageView1 });
            simpleAdapter.setViewBinder(new ViewBinder() {
                @Override
                public boolean setViewValue(View view, Object data,
                        String textRepresentation) {
                    // TODO Auto-generated method stub
                    if (view instanceof ImageView && data instanceof Bitmap) {
                        ImageView i = (ImageView) view;
                        i.setImageBitmap((Bitmap) data);
                        return true;
                    }
                    return false;
                }
            });
            gridView.setAdapter(simpleAdapter);
            simpleAdapter.notifyDataSetChanged();
            // 刷新後釋放防止手機休眠後自動添加
            pathImage = null;
            dialog.dismiss();
        }

    }

    @Override
    public void onItemClick(AdapterView<?> parent, View v, int position, long id) {
        // TODO Auto-generated method stub
        if (imageItem.size() == 10) { // 第一張為預設圖片
            Toast.makeText(MainActivity.this, "圖片數9張已滿",
                    Toast.LENGTH_SHORT).show();
        } else if (position == 0) { // 點擊圖片位置為+ 0對應0張圖片
            // 選擇圖片
            dialog.show();

            // 通過onResume()刷新數據
        } else {
            dialog(position);
        }

    }

    /*
     * Dialog對話框提示用戶刪除操作 position為刪除圖片位置
     */
    protected void dialog(final int position) {
        AlertDialog.Builder builder = new Builder(MainActivity.this);
        builder.setMessage("確認移除已添加圖片嗎?");
        builder.setTitle("提示");
        builder.setPositiveButton("確認", new DialogInterface.OnClickListener() {
            @Override
            public void onClick(DialogInterface dialog, int which) {
                dialog.dismiss();
                imageItem.remove(position);
                simpleAdapter.notifyDataSetChanged();
            }
        });
        builder.setNegativeButton("取消", new DialogInterface.OnClickListener() {
            @Override
            public void onClick(DialogInterface dialog, int which) {
                dialog.dismiss();
            }
        });
        builder.create().show();
    }

    public void startPhotoZoom(Uri uri) {
        Intent intent = new Intent("com.android.camera.action.CROP");
        intent.setDataAndType(uri, IMAGE_UNSPECIFIED);
        intent.putExtra("crop", "true");
        // aspectX aspectY 是寬高的比例
        intent.putExtra("aspectX", 1);
        intent.putExtra("aspectY", 1);
        // outputX outputY 是裁剪圖片寬高
        intent.putExtra("outputX", 64);
        intent.putExtra("outputY", 64);
        intent.putExtra("return-data", true);
        startActivityForResult(intent, PHOTORESOULT);
    }

}
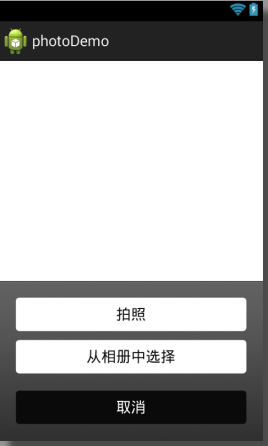
彈出的對話框(仿照微信來完成):MyDialog
 1 package com.yihang.dialog;
 2
 3 import com.yihang.photodemo.R;
 4
 5 import android.app.Dialog;
 6 import android.content.Context;
 7 import android.view.Gravity;
 8 import android.view.View;
 9 import android.view.ViewGroup;
10 import android.view.Window;
11 import android.view.View.OnClickListener;
12 /**
13  * 對話框實現類
14  * @author admin
15  *
16  */
17 public class MyDialog extends Dialog implements OnClickListener {
18
19     public MyDialog(Context context) {
20         super(context,R.style.myDialog);
21         //初始化佈局
22                 setContentView(R.layout.layout_select_photo);
23                 Window dialogWindow = getWindow();
24                 dialogWindow.setLayout(ViewGroup.LayoutParams.FILL_PARENT, ViewGroup.LayoutParams.WRAP_CONTENT);
25                 dialogWindow.setGravity(Gravity.BOTTOM);
26                 setCanceledOnTouchOutside(true);
27
28                 findViewById(R.id.btn_camera).setOnClickListener(this);
29                 findViewById(R.id.btn_gallery).setOnClickListener(this);
30                 findViewById(R.id.btn_cancel).setOnClickListener(this);
31     }
32
33     @Override
34     public void onClick(View v) {
35         // TODO Auto-generated method stub
36         switch (v.getId()) {
37         case R.id.btn_camera:
38             onButtonClickListener.camera();
39             break;
40         case R.id.btn_gallery:
41             onButtonClickListener.gallery();
42             break;
43         case R.id.btn_cancel:
44             onButtonClickListener.cancel();
45             break;
46
47         default:
48             break;
49         }
50     }
51     /**
52      * 按鈕的監聽器
53      * @author Orathee
54      * @date 2014年3月20日 下午4:28:39
55      */
56     public interface OnButtonClickListener{
57         void camera();
58         void gallery();
59         void cancel();
60     }
61     private OnButtonClickListener onButtonClickListener;
62
63     public OnButtonClickListener getOnButtonClickListener() {
64         return onButtonClickListener;
65     }
66
67     public void setOnButtonClickListener(OnButtonClickListener onButtonClickListener) {
68         this.onButtonClickListener = onButtonClickListener;
69     }
70
71 }
對話框的佈局文件:layout_select_photo.xml
<LinearLayout xmlns:android="http://schemas.android.com/apk/res/android"
    android:layout_width="fill_parent"
    android:layout_height="fill_parent"
    android:gravity="bottom">
    <LinearLayout
        android:layout_width="fill_parent"
        android:layout_height="wrap_content"
        android:orientation="vertical"
        android:background="@drawable/btn_style_alert_dialog_background"
        android:padding="20dp">

            <TextView
                android:id="@+id/btn_camera"
                android:layout_width="fill_parent"
                android:layout_height="wrap_content"
                android:textSize="18sp"
                android:background="@drawable/btn_style_alert_dialog_button"
                android:textColor="#0f0f0f"
                android:text="拍照"
                android:shadowDx="0.5"
                android:shadowDy="0.5"
                android:shadowRadius="0.5"
                android:shadowColor="#ffffff"
                android:layout_marginBottom="10dp"
                android:padding="10dp"
                android:gravity="center"/>

            <TextView
                android:id="@+id/btn_gallery"
                android:layout_width="fill_parent"
                android:layout_height="wrap_content"
                android:textSize="18sp"
                android:background="@drawable/btn_style_alert_dialog_button"
                android:textColor="#0f0f0f"
                android:text="從相冊中選擇"
                android:shadowDx="0.5"
                android:shadowDy="0.5"
                android:shadowRadius="0.5"
                android:shadowColor="#ffffff"
                android:layout_marginBottom="10dp"
                android:padding="10dp"
                android:gravity="center"/>

            <TextView
                android:id="@+id/btn_cancel"
                android:layout_width="fill_parent"
                android:layout_height="wrap_content"
                android:background="@drawable/btn_style_alert_dialog_cancel"
                android:textColor="#ffffff"
                android:textSize="18sp"
                android:text="取消"
                android:shadowDx="0.5"
                android:shadowDy="0.5"
                android:shadowRadius="0.5"
                android:shadowColor="#000000"
                android:layout_marginTop="10dp"
                android:padding="10dp"
                android:gravity="center"/>
    </LinearLayout>
</LinearLayout>
自定義的GridView:
 1 package com.yihang.MyGridView;
 2
 3 import android.content.Context;
 4 import android.util.AttributeSet;
 5 import android.widget.GridView;
 6
 7 public class MyGridView extends GridView {
 8
 9     public MyGridView(Context context, AttributeSet attrs) {
10         super(context, attrs);
11         // TODO Auto-generated constructor stub
12     }
13
14     public MyGridView(Context context) {
15         super(context);
16     }
17
18     public MyGridView(Context context, AttributeSet attrs, int defStyle) {
19         super(context);
20     }
21
22     @Override
23     protected void onMeasure(int widthMeasureSpec, int heightMeasureSpec) {
24         // TODO Auto-generated method stub
25         int expandSpec = MeasureSpec.makeMeasureSpec(Integer.MAX_VALUE >> 2,
26                 MeasureSpec.AT_MOST);
27         super.onMeasure(widthMeasureSpec, expandSpec);
28     }
29 }
源代碼下載地址:http://download.csdn.net/download/m0_38125535/9946940

