
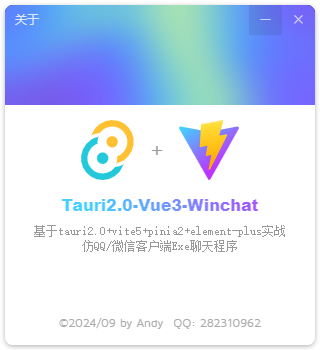
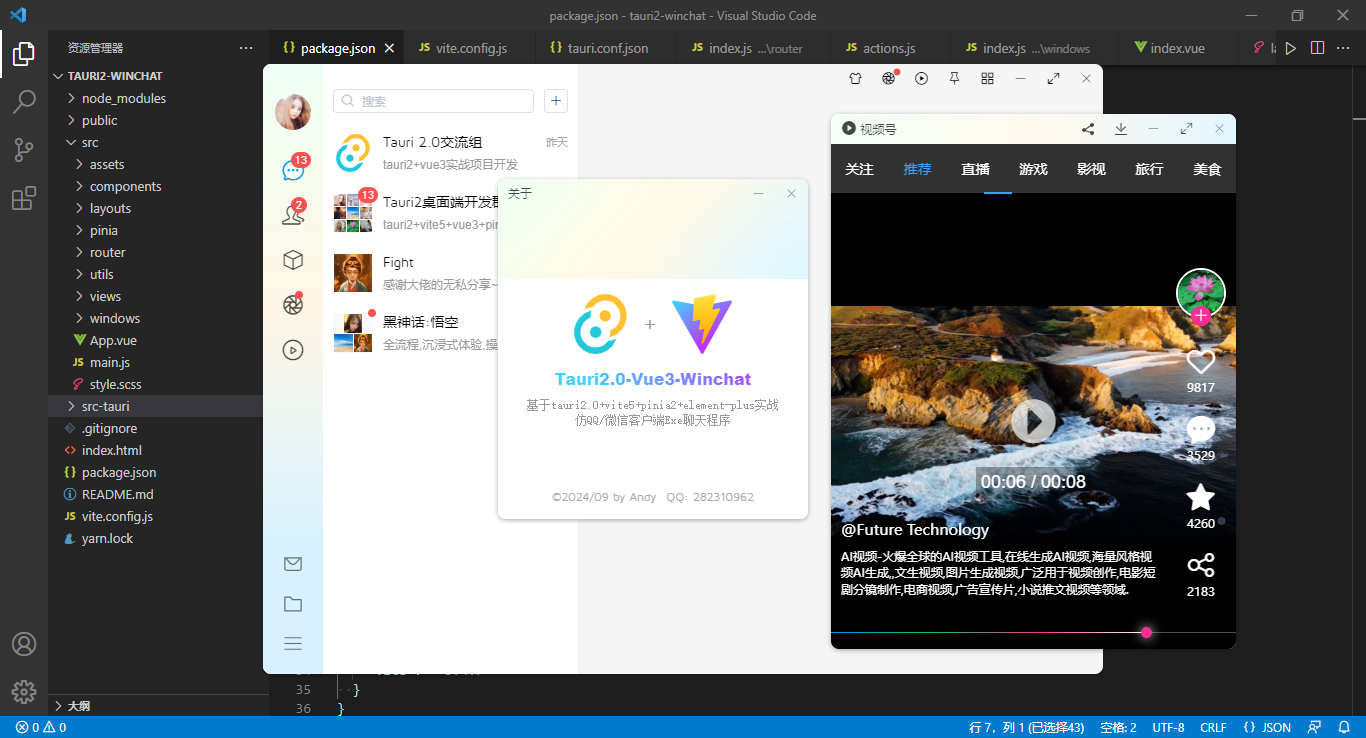
原創tauri2.0+vue3+pinai2仿QQ/微信客戶端聊天Exe程式TauriWinChat。 tauri2-vue3-winchat自研vite5+tauri2.0+vue3 setup+element-plus跨平臺仿QQ|微信桌面端聊天軟體。全新封裝tauri2多開視窗管理、自定義圓角 ...
原創tauri2.0+vue3+pinai2仿QQ/微信客戶端聊天Exe程式TauriWinChat。
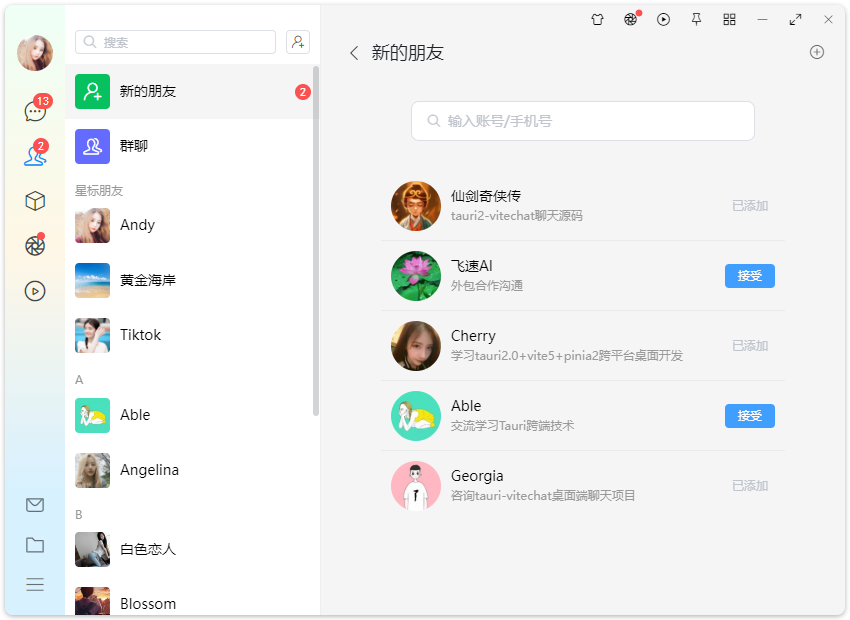
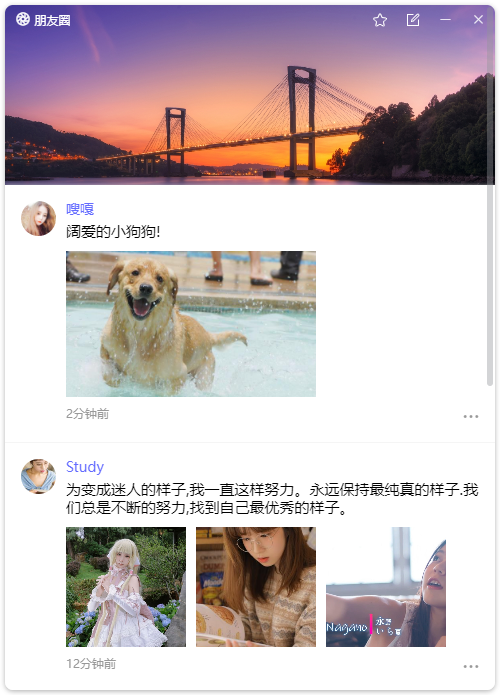
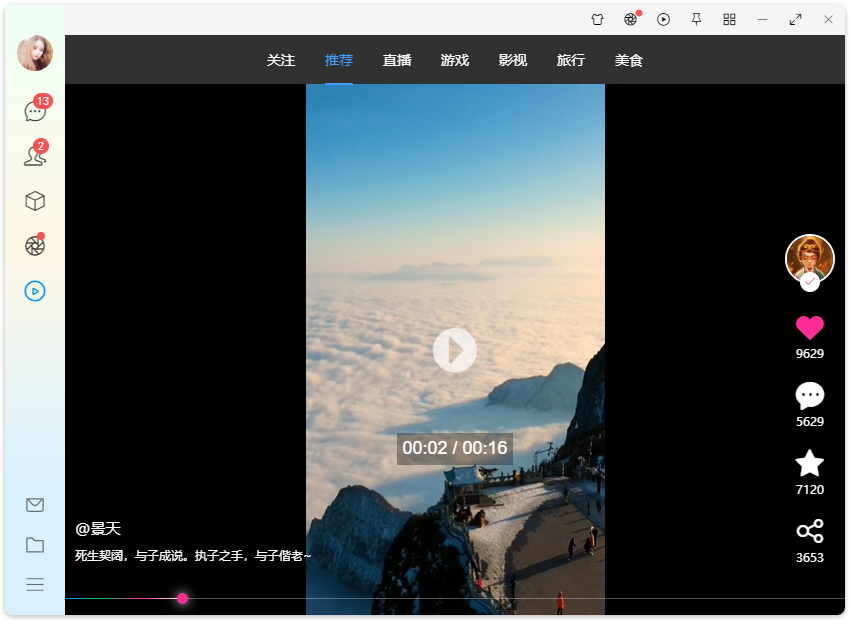
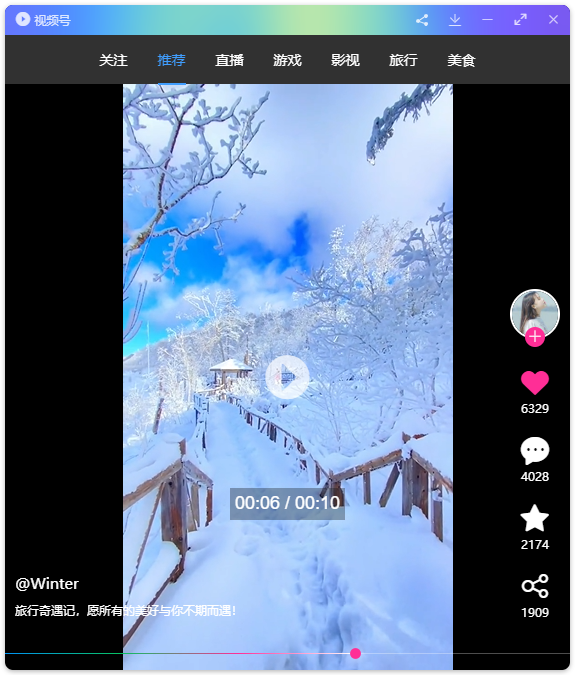
tauri2-vue3-winchat自研vite5+tauri2.0+vue3 setup+element-plus跨平臺仿QQ|微信桌面端聊天軟體。全新封裝tauri2多開視窗管理、自定義圓角陰影窗體。實現聊天、通訊錄、收藏、我的、朋友圈/小視頻等模塊。
技術棧
- 編碼器:VScode
- 技術框架:tauri2.0+vite^5.4.7+vue^3.5.8+vue-router^4.4.5
- 狀態管理:pinia^2.2.2
- 本地存儲:pinia-plugin-persistedstate^4.0.2
- UI組件庫:element-plus^2.8.3
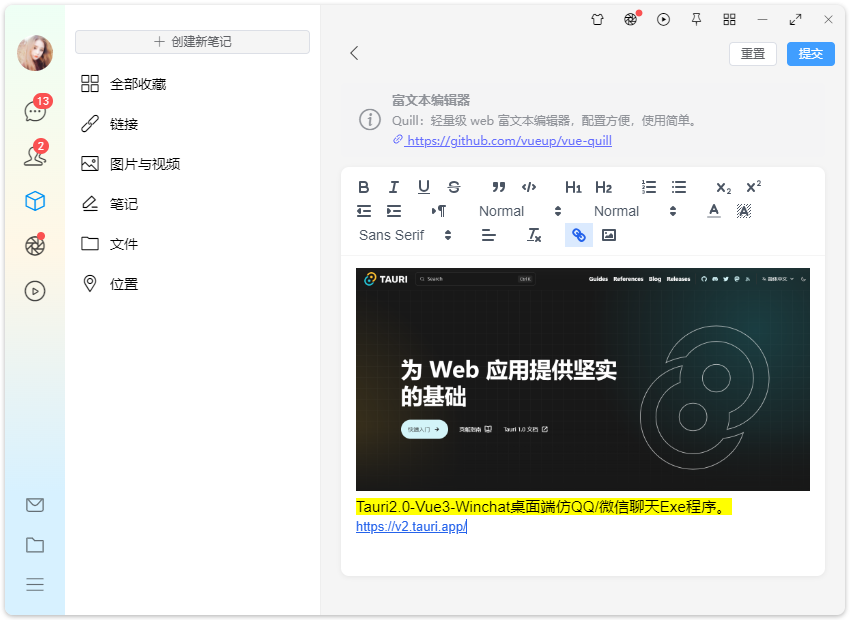
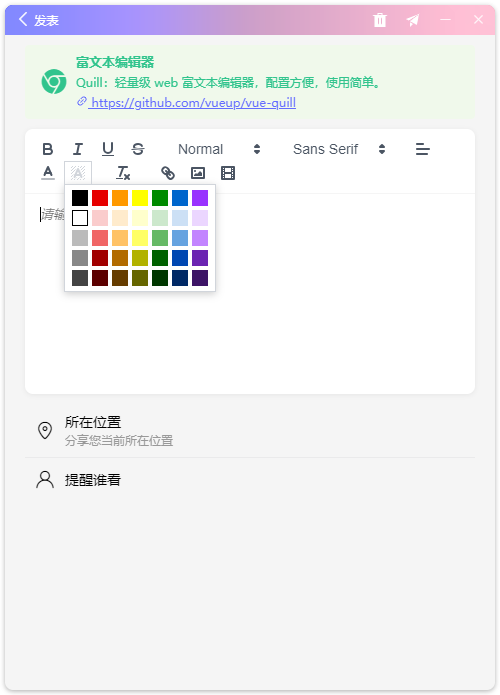
- 富文本編輯器:@vueup/vue-quill^1.2.0
- 樣式預處理:sass^1.79.3
- 小視頻滑動組件:swiper^11.1.14
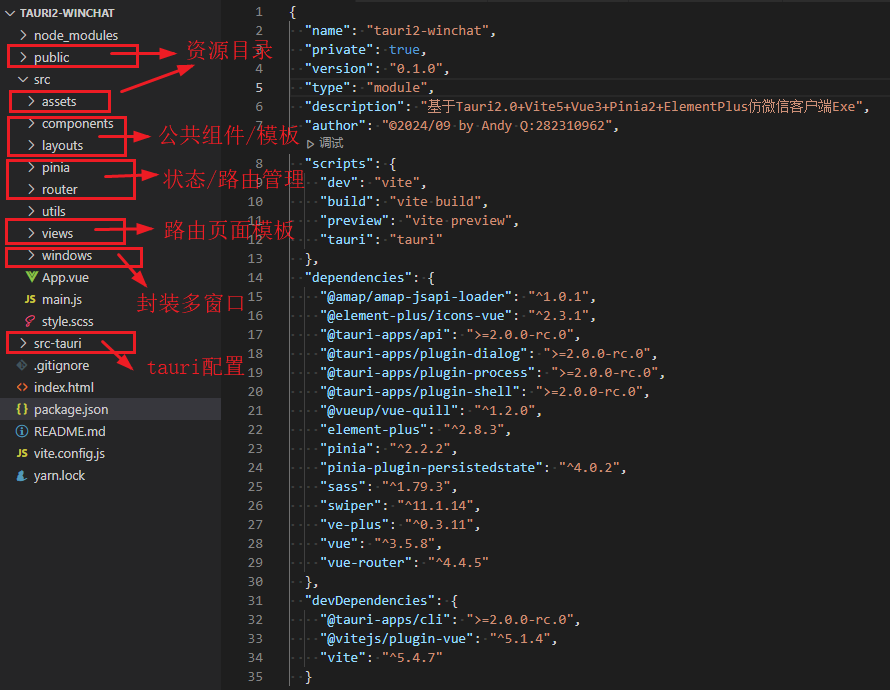
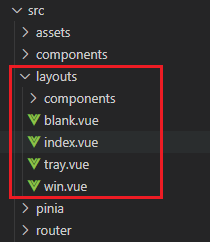
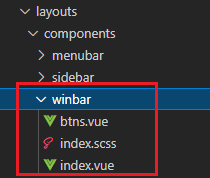
項目框架結構
vue3-taurichat桌面聊天項目採用最新跨平臺框架 tauri2.0 整合 vite5 搭建項目模板。
Tauri2.0-Vue3chat聊天程式已經同步到我的原創作品集,有需要的可以去看看~
vite.js整合tauri2.0創建多視窗|自定義托盤閃爍右鍵菜單
之前有分享過一篇介紹tauri2結合vite.js搭建桌面端項目、創建多視窗、自定義托盤閃爍及右鍵菜單。感興趣的可以去瞅瞅。
https://www.cnblogs.com/xiaoyan2017/p/18416811
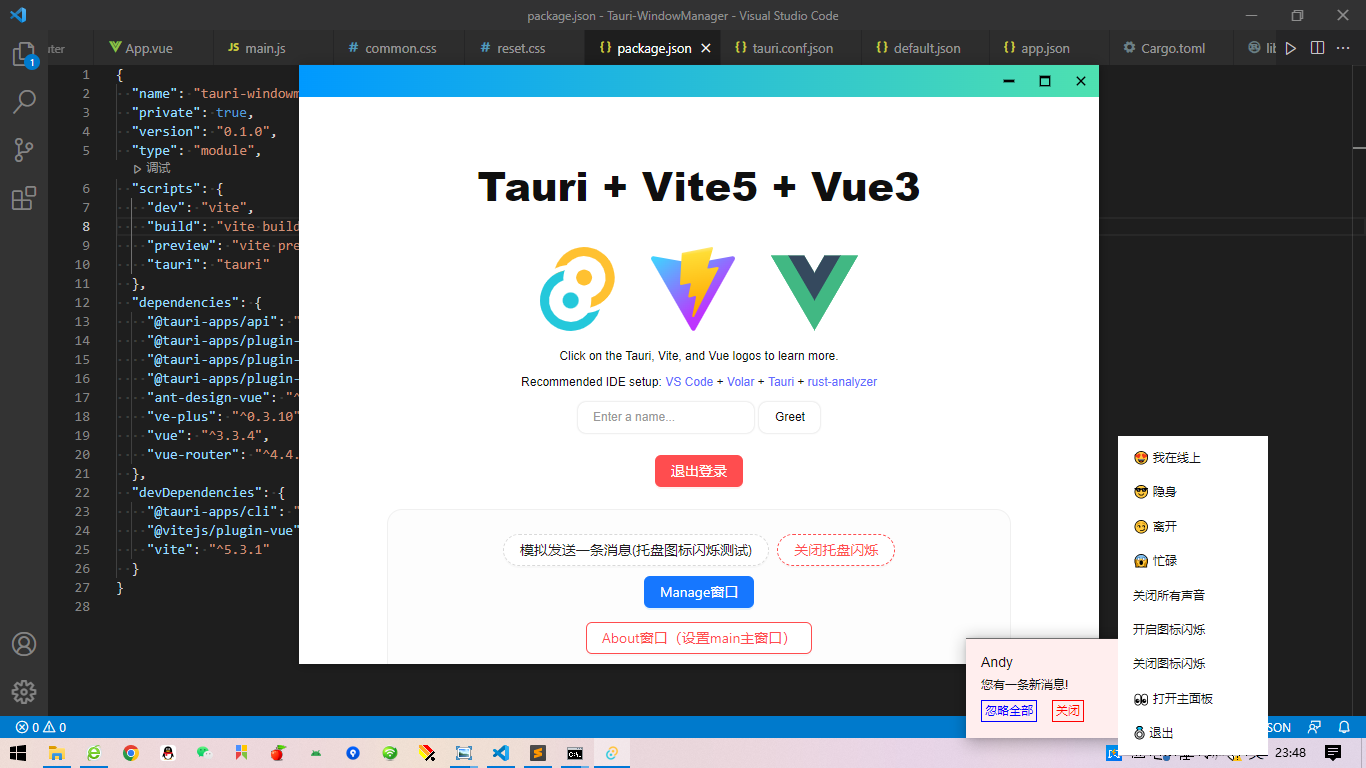
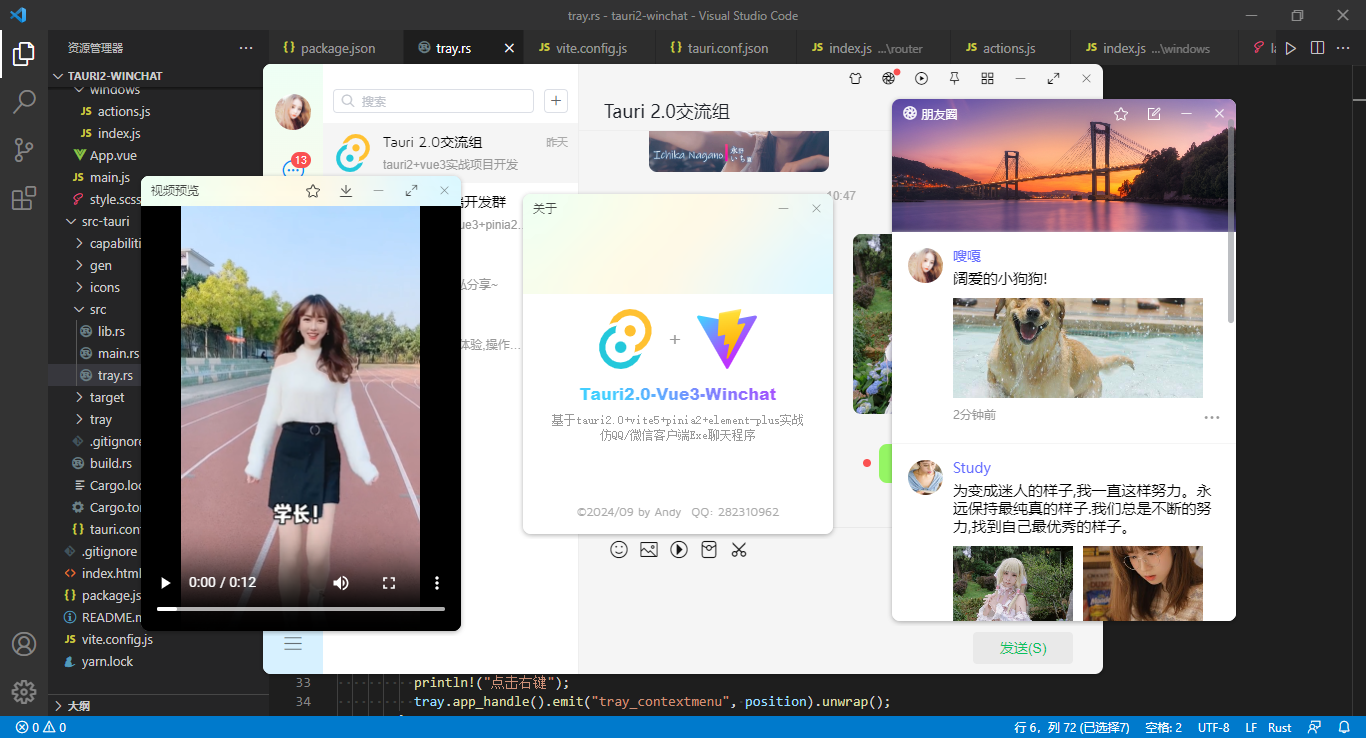
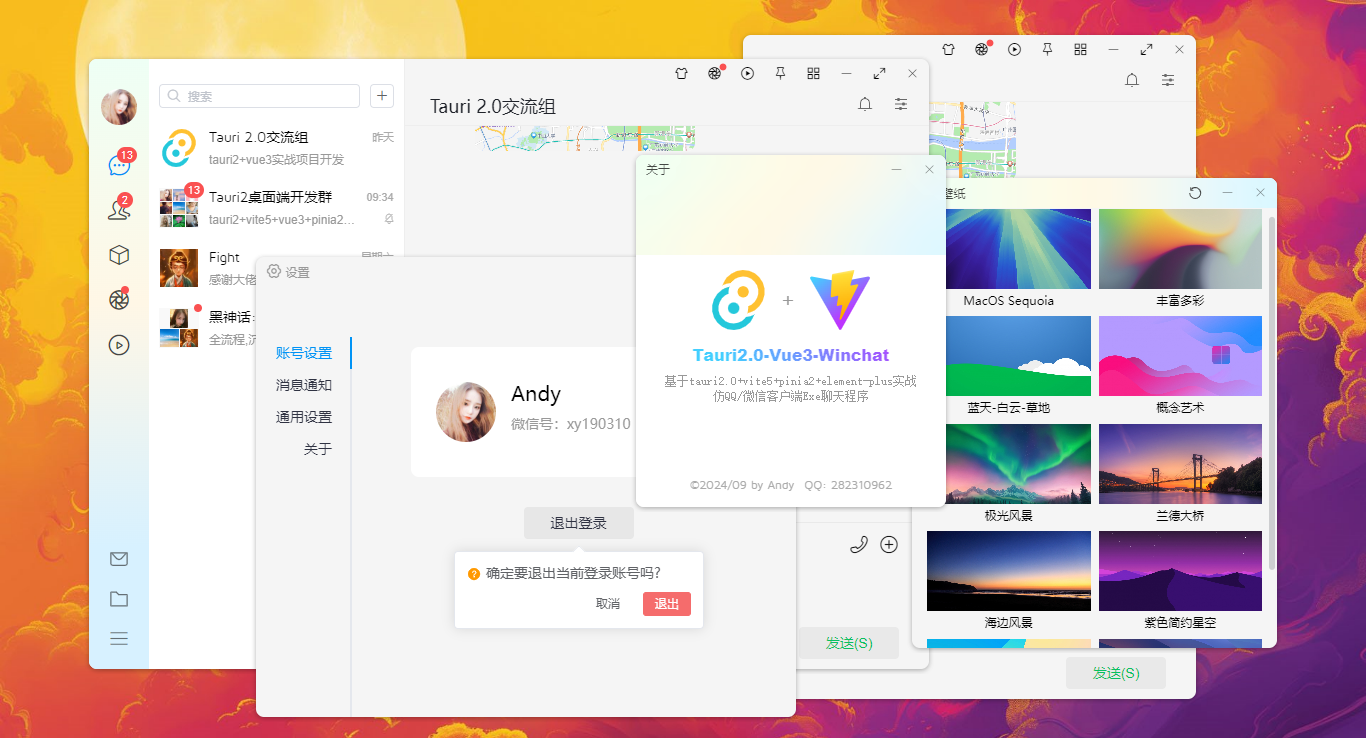
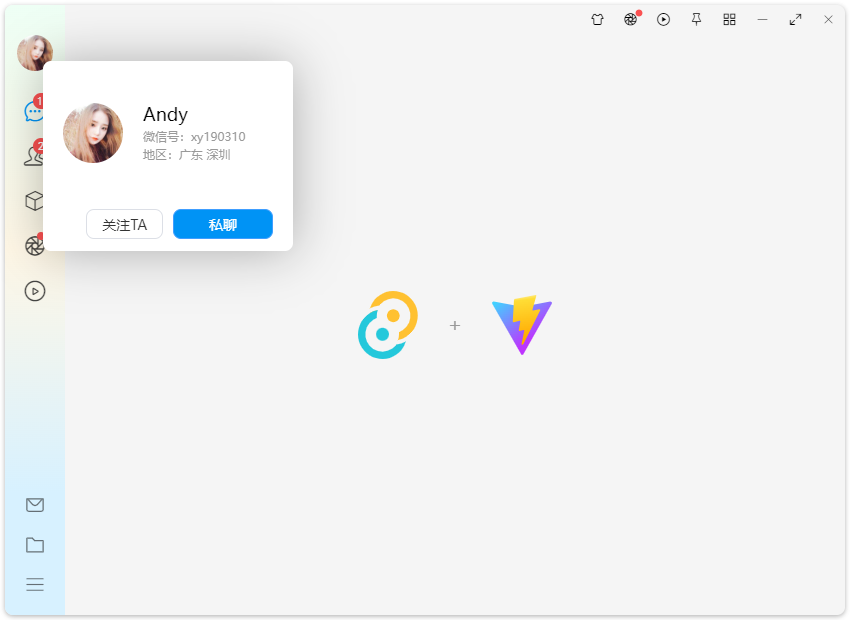
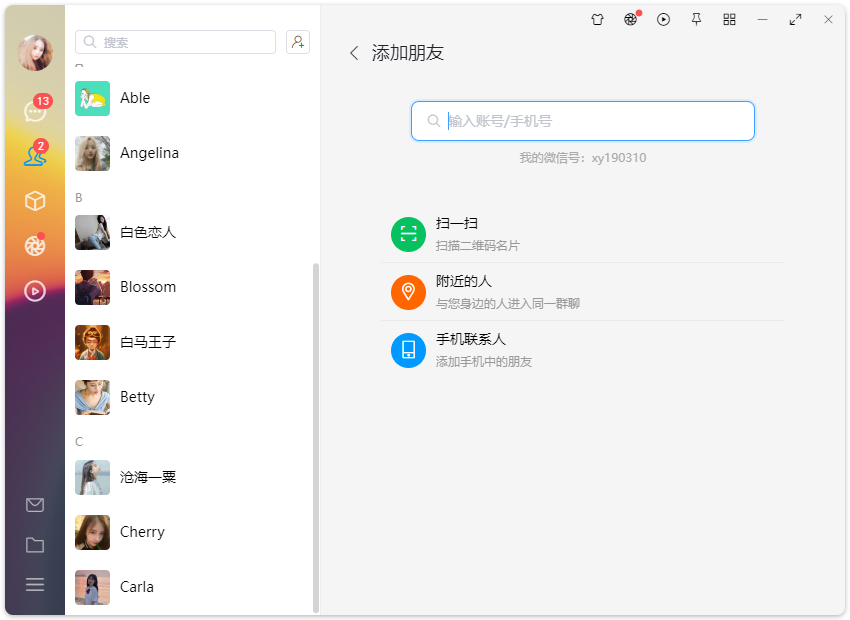
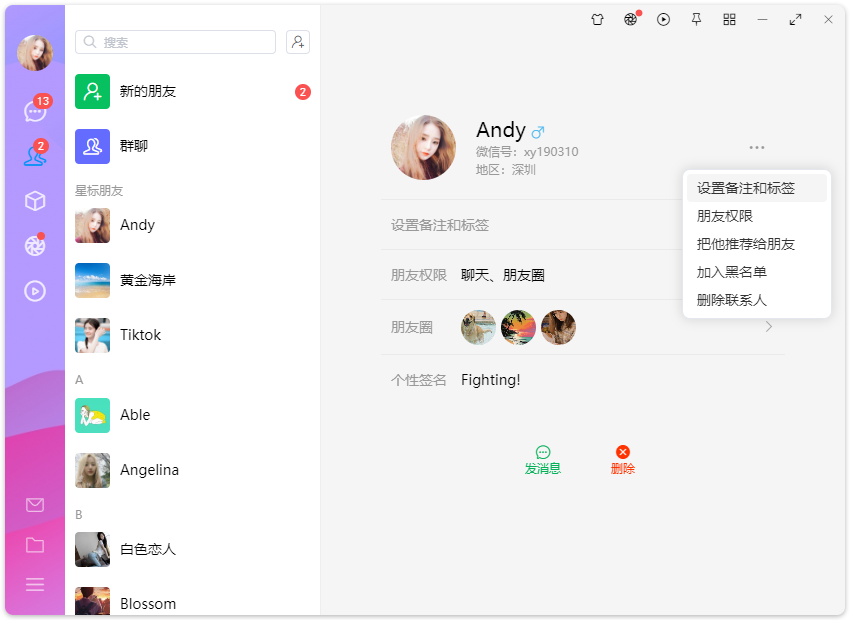
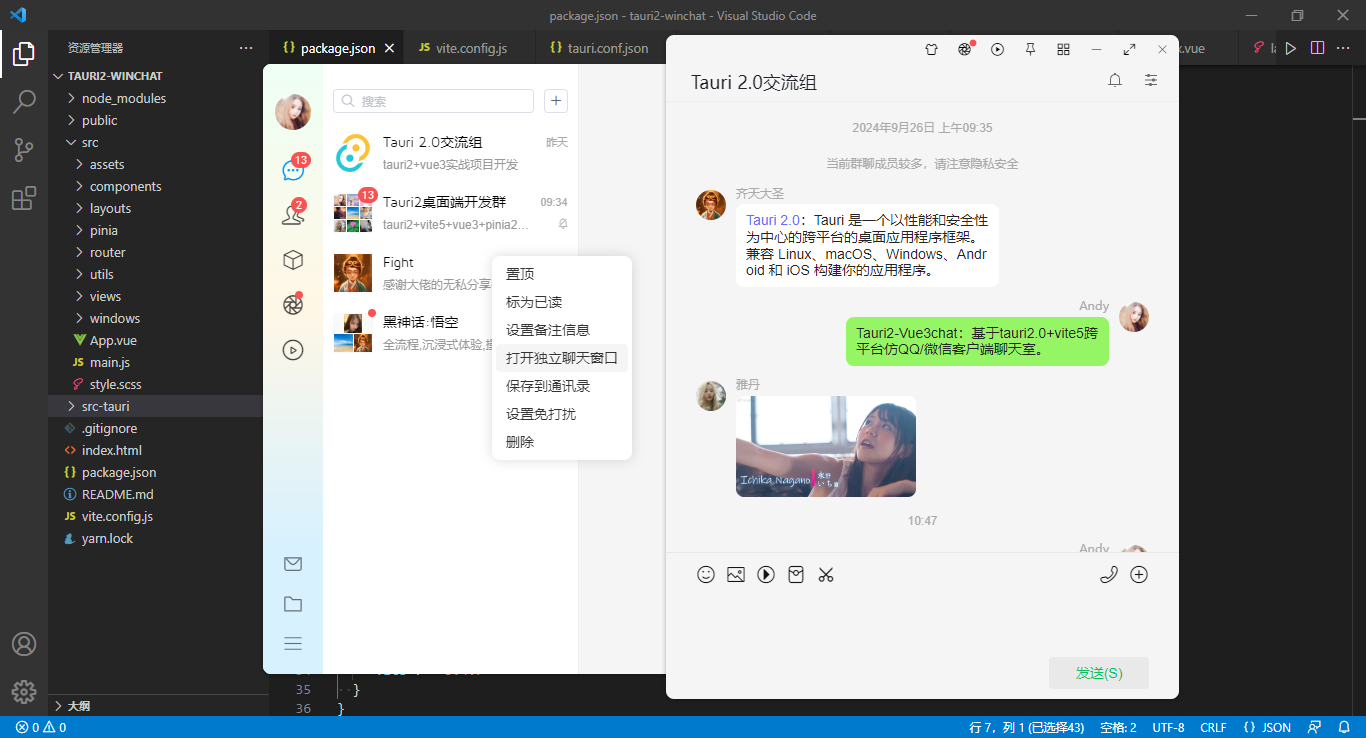
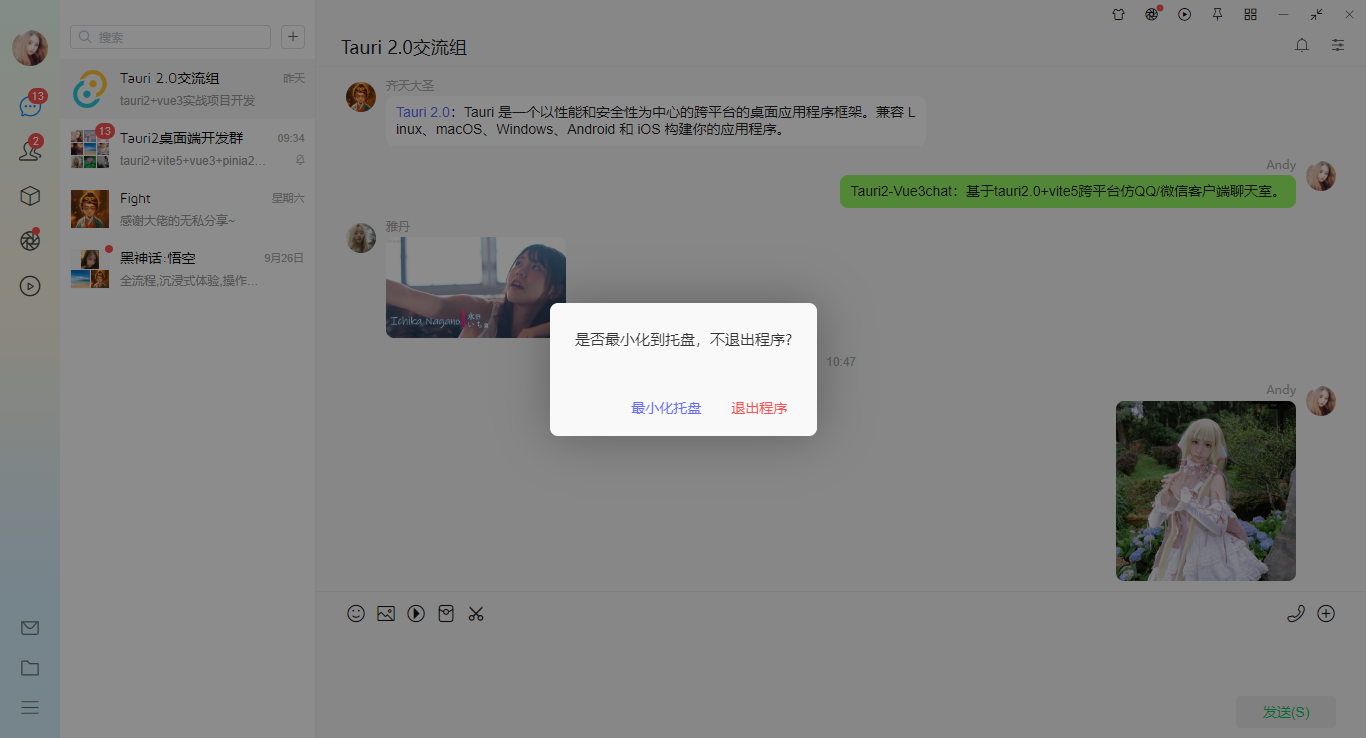
tauri2-vue3chat實現類似QQ登錄/主視窗切換,支持主題壁紙、置頂視窗、自定義最大化/最小化/關閉按鈕,聊天模塊支持圖片/視頻新視窗預覽、拖拽圖片到聊天區域。


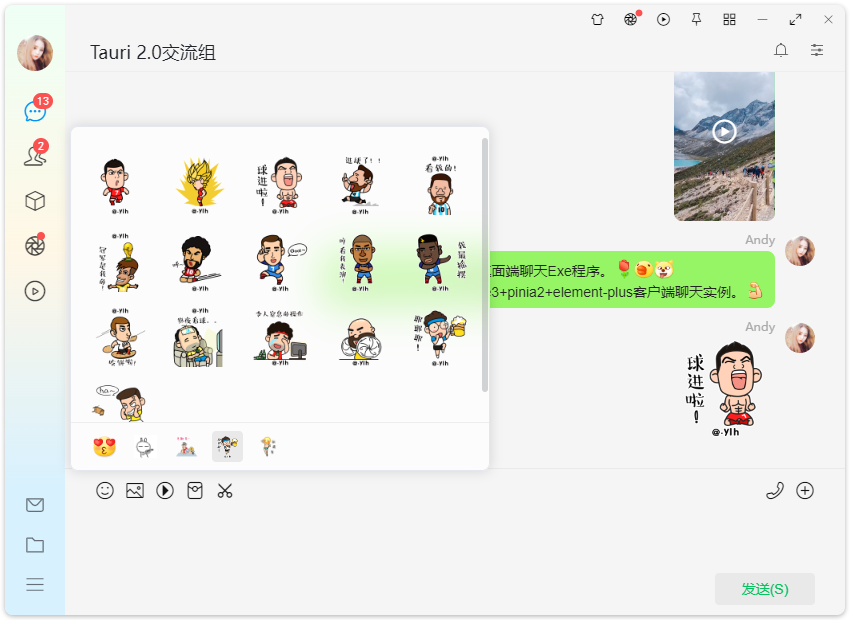

主入口main.js
/**
 * 主入口文件main.js
 */

import { createApp } from 'vue'
import './style.scss'
import App from './App.vue'

// 引入組件庫
import VEPlus from 've-plus'
import 've-plus/dist/ve-plus.css'
import ElementPlus from 'element-plus'
import 'element-plus/dist/index.css'

// 引入路由/狀態管理
import Router from './router'
import Pinia from './pinia'

createApp(App)
.use(VEPlus)
.use(ElementPlus)
.use(Router)
.use(Pinia)
.mount('#app')
Tauri2.0-Vue3chat佈局模板
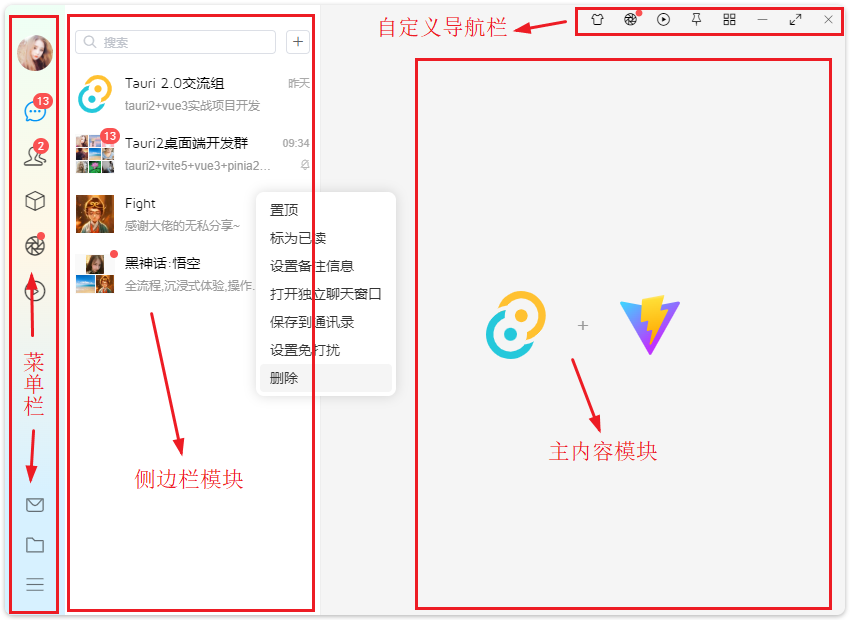
項目整體分為菜單欄+側邊欄+右側內容區+右上角導航條等模塊。
<template>
  <div class="vu__chatbox">
    <template v-if="!route?.meta?.isNewWin">
      <div class="vu__container flexbox flex-alignc flex-justifyc">
        <div class="vu__layout flexbox flex-col">
          <div class="vu__layout-body flex1 flexbox" @contextmenu.prevent>
            <!-- 菜單欄 -->
            <slot v-if="!route?.meta?.hideMenuBar" name="menubar">
              <MenuBar />
            </slot>

            <!-- 側邊欄 -->
            <div v-if="route?.meta?.showSideBar" class="vu__layout-sidebar flexbox">
              <aside class="vu__layout-sidebar__body flexbox flex-col">
                <slot name="sidebar">
                  <SideBar />
                </slot>
              </aside>
            </div>

            <!-- 主內容區 -->
            <div class="vu__layout-main flex1 flexbox flex-col">
              <ToolBar v-if="!route?.meta?.hideToolBar" />
              <router-view v-slot="{ Component, route }">
                <keep-alive>
                  <component :is="Component" :key="route.path" />
                </keep-alive>
              </router-view>
            </div>
          </div>
        </div>
      </div>
    </template>
    <template v-else>
      <WinLayout />
    </template>
  </div>
</template>
vite.js+tauri2.0實現無邊框圓角陰影拖拽窗體


項目採用 decorations: false 無邊框模式。結合 transparent: true 和 shadow: false 實現自定義圓角陰影視窗。
.vu__chatbox {height: calc(100vh); padding: 5px; overflow: hidden;}
.vu__layout {
  background-color: #f5f5f5;
  overflow: hidden;
  height: 100%; width: 100%;
  position: relative; z-index: 100;
  border-radius: 8px;
  box-shadow: 0 1px 5px 0 rgba(0, 0, 0, 0.15),0 1px 5px -1px rgba(0, 0, 0, 0.1),0 2px 5px rgba(0, 0, 0, 0.1);
}
- tauri2.0自定義系統最小化/最大化/關閉

<script setup>
  /**
   * tauri2.0自定義系統最大化/最小化/關閉
   * by andy  Q:282310962
   */

  import { ref } from 'vue'
  import { getCurrentWindow } from '@tauri-apps/api/window'
  import { listen } from '@tauri-apps/api/event'
  import { exit } from '@tauri-apps/plugin-process'

  import { authState } from '@/pinia/modules/auth'
  import { isTrue } from '@/utils'
  import { winSet } from '@/windows/actions'

  const authstate = authState()

  const props = defineProps({
    color: String,
    // 視窗是否可最小化
    minimizable: {type: [Boolean, String], default: true},
    // 視窗是否可最大化
    maximizable: {type: [Boolean, String], default: true},
    // 視窗是否可關閉
    closable: {type: [Boolean, String], default: true},
    // 層級
    zIndex: {type: [Number, String], default: 2024},

    // 關閉前回調,會暫停實例關閉 function(done),done用於關閉
        beforeClose: Function
  })

  const hasMaximized = ref(false)
  const isResizable = ref(true)
  const isMaximizable = ref(true)

  // 用戶是否可以手動調整視窗大小
  getCurrentWindow().isResizable().then(res => {
    isResizable.value = res
  })
  // 視窗是否可以最大化
  getCurrentWindow().isMaximizable().then(res => {
    isMaximizable.value = res
  })
  // 初始監聽視窗是否最大化
  getCurrentWindow().isMaximized().then(res => {
    hasMaximized.value = res
  })
  // 實時監聽視窗是否最大化
  listen('tauri://resize', async() => {
    hasMaximized.value = await getCurrentWindow().isMaximized()
  })

  // 最小化
  const handleWinMin = async() => {
    // winSet('minimize')
    await getCurrentWindow().minimize()
  }
  // 最大化/還原
  const handleWinToggle = async() => {
    // winSet('max2min')
    await getCurrentWindow().toggleMaximize()
  }
  // 關閉
  const handleClose = async() => {
    const isMajor = getCurrentWindow().label.indexOf('main') > -1
    if(isMajor) {
      let el = layer({
        type: 'android',
        content: '是否最小化到托盤,不退出程式?',
        layerStyle: 'background: #f9f9f9; border-radius: 8px;',
        closable: false,
        resize: false,
        btns: [
          {
            text: '最小化托盤',
            style: 'color: #646cff',
            click: () => {
              layer.close(el)
              // winSet('hide')
              await getCurrentWindow().hide()
            }
          },
          {
            text: '退出程式',
            style: 'color: #fa5151',
            click: async() => {
              authstate.logout()
              await exit()
            }
          }
        ]
      })
    }else {
      // winSet('close')
      await getCurrentWindow().close()
    }
  }
</script>

<template>
  <div class="ev__winbtns vu__drag" :style="{'z-index': zIndex}">
    <div class="ev__winbtns-actions vu__undrag" :style="{'color': color}">
      <a v-if="isTrue(minimizable)" class="wbtn min" title="最小化" @click="handleWinMin"><i class="wicon elec-icon elec-icon-min"></i></a>
      <a v-if="isTrue(maximizable) && isResizable && isMaximizable" class="wbtn toggle" :title="hasMaximized ? '向下還原' : '最大化'" @click="handleWinToggle">
        <i class="wicon elec-icon iconfont" :class="hasMaximized ? 've-icon-shrink' : 've-icon-arrowsalt'"></i>
      </a>
      <a v-if="isTrue(closable)" class="wbtn close" title="關閉" @click="handleClose"><i class="wicon elec-icon elec-icon-quit"></i></a>
    </div>
  </div>
</template>
tauri設置無邊框視窗後,拖拽功能直接在需要拖拽的元素設置 data-tauri-drag-region 屬性,另外tauri還支持css設置拖拽功能。
// 拖拽
.vu__drag {-webkit-app-region: drag;}
// 取消拖拽
.vu__undrag {-webkit-app-region: no-drag;}
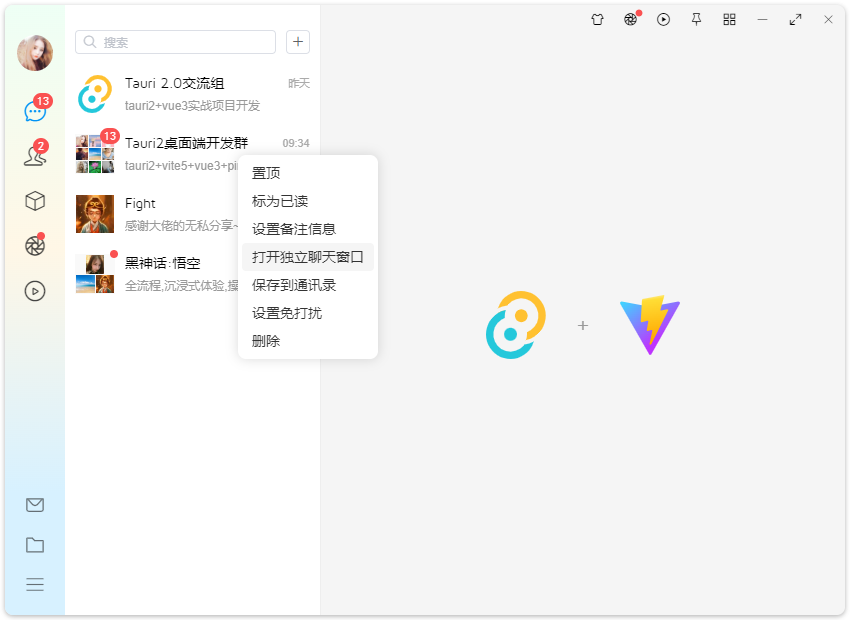
tauri2+vue3自定義托盤閃爍|托盤右鍵菜單

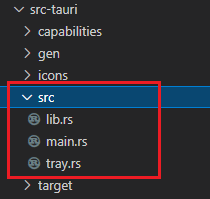
src-tauri/src目錄新建一個tray.rs托盤圖標文件。
/**
 * 自定義托盤圖標
 */

use tauri::{
  tray::{MouseButton, TrayIconBuilder, TrayIconEvent}, Emitter, Manager, Runtime
};

pub fn tray_create<R: Runtime>(app: &tauri::AppHandle<R>) -> tauri::Result<()> {
  let _ = TrayIconBuilder::with_id("tray")
    .tooltip("TAURI-WINCHAT")
    .icon(app.default_window_icon().unwrap().clone())
    .on_tray_icon_event(|tray, event| match event {
      TrayIconEvent::Click {
        id: _,
        position,
        rect: _,
        button,
        button_state: _,
      } => match button {
        MouseButton::Left {} => {
          let windows = tray.app_handle().webview_windows();
          for (key, value) in windows {
            println!("點擊左鍵: {}", key);
            if key == "main-login" || key == "main" {
              value.show().unwrap();
              value.unminimize().unwrap();
              value.set_focus().unwrap();
            }
          }
        }
        MouseButton::Right {} => {
          println!("點擊右鍵");
          tray.app_handle().emit("tray_contextmenu", position).unwrap();
        }
        _ => {}
      },
      TrayIconEvent::Enter {
        id: _,
        position,
        rect: _,
      } => {
        println!("滑鼠滑過托盤");
        tray.app_handle().emit("tray_mouseenter", position).unwrap();
      }
      TrayIconEvent::Leave {
        id: _,
        position,
        rect: _,
      } => {
        println!("滑鼠離開托盤");
        tray.app_handle().emit("tray_mouseleave", position).unwrap();
      }
      _ => {}
    })
    .build(app);
  Ok(())
}
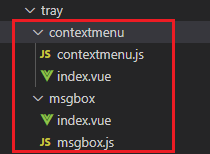
托盤閃爍提醒和右鍵菜單文件
export default async function TrayContextMenu() {
  console.log('create tray contextmenu...')

  const authstate = authState()

  // 右鍵菜單寬度
  let menuW = 150
  // 右鍵菜單高度
  let menuH = authstate.authorization ? 300 : 48

  let webview = new WebviewWindow('win-traymenu', {
    url: '/tray/contextmenu',
    title: '托盤右鍵菜單',
    width: menuW,
    height: menuH,
    x: window.screen.width,
    y: window.screen.height,
    skipTaskbar: true,
    transparent: true,
    shadow: false,
    decorations: false,
    center: false,
    resizable: false,
    alwaysOnTop: true,
    focus: true,
    visible: false
  })

  await webview.listen('tauri://window-created', async() => {
    const win = await WebviewWindow.getByLabel('win-traymenu')
    win.hide()
  })
  await webview.listen('tauri://blur', async() => {
    const win = await WebviewWindow.getByLabel('win-traymenu')
    win.hide()
  })
  await webview.listen('tauri://error', async(error) => {
    console.log('traymenu error!', error)
  })

  // 監聽托盤右鍵菜單事件
  listen('tray_contextmenu', async(event) => {
    console.log('tray_contextmenu: ', event)

    let position = event.payload
    const win = await WebviewWindow.getByLabel('win-traymenu')
    if(!win) return

    win.setAlwaysOnTop(true)
    win.setFocus()
    win.setPosition(new LogicalPosition(position.x - 5, position.y - menuH + 5))
    win.show()
  })
}
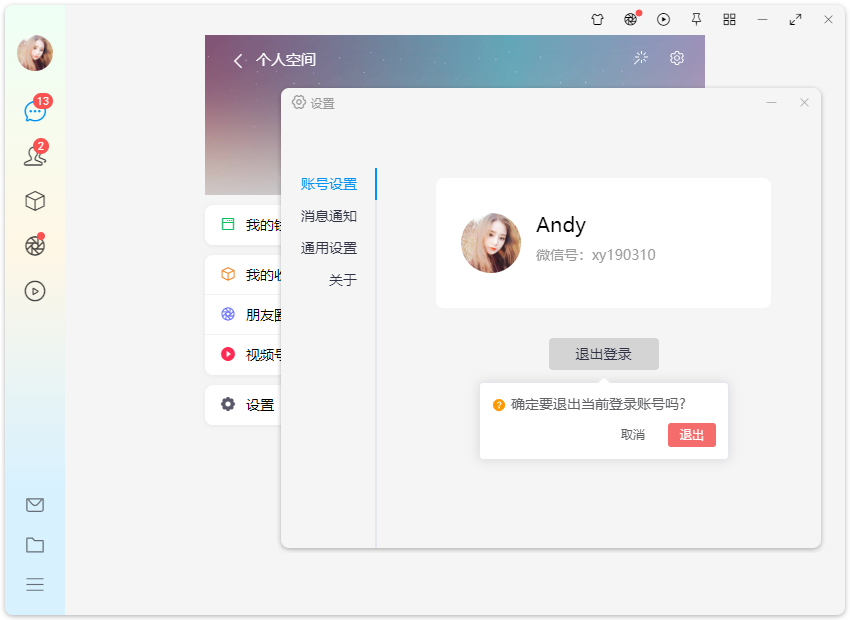
<template>
  <div class="vu__traymenu" @click="handleTrayMenu">
    <template v-if="authstate.authorization">
      <a class="menu"><img src="/static/tray-online.png" />我線上上</a>
      <a class="menu"><img src="/static/tray-busy.png" />忙碌</a>
      <a class="menu"><img src="/static/tray-nodisturb.png" />請勿打擾</a>
      <a class="menu"><img src="/static/tray-hide.png" />隱身</a>
      <a class="menu"><img src="/static/tray-offline.png" />離線</a>
      <a class="menu" @click="winTrayFlash(false)">關閉頭像閃動</a>
      <a class="menu" @click="handleSetting">設置</a>
      <a class="menu" @click="handleAbout">關於</a>
      <a class="menu" @click="handleMainWin"><el-icon size="12"><Monitor /></el-icon>打開主面板</a>
    </template>
    <a class="menu" @click="handleLogout"><el-icon size="12" color="red"><SwitchButton /></el-icon>退出</a>
  </div>
</template>
綜上就是Tauri2.0+Vue3實戰開發桌面端聊天項目的一些知識分享,希望對大家有些幫助~
最後附上兩個最新electron+vue3實例項目
https://www.cnblogs.com/xiaoyan2017/p/18396212
https://www.cnblogs.com/xiaoyan2017/p/18366451

本文為博主原創文章,未經博主允許不得轉載,歡迎大家一起交流 QQ(282310962) wx(xy190310)


