Harbor介紹與安裝部署,並實現通過http和https協議【自簽發SSL證書】訪問,客戶端如何通過Harbor鏡像倉庫實現鏡像的上傳【推送】與下載【拉取】。 ...
Harbor介紹與安裝部署,並實現通過http和https協議【自簽發SSL證書】訪問,客戶端如何通過Harbor鏡像倉庫實現鏡像的上傳【推送】與下載【拉取】。
Harbor介紹
Harbor,是一個英文單詞,意思是港灣,港灣是乾什麼的呢,就是停放貨物的,而貨物呢,是裝在集裝箱中的,說到集裝箱,就不得不提到Docker容器,因為docker容器的技術正是借鑒了集裝箱的原理。所以,Harbor正是一個用於存儲Docker鏡像的企業級Registry服務。
Docker容器應用的開發和運行離不開可靠的鏡像管理,雖然Docker官方也提供了公共的鏡像倉庫,但是從安全和效率等方面考慮,部署我們私有環境內的Registry也是非常必要的。Harbor是由VMware公司開源的企業級的Docker Registry管理項目,它包括許可權管理(RBAC)、LDAP、日誌審核、管理界面、自我註冊、鏡像複製和中文支持等功能。
機器規劃
| 伺服器名稱(hostname) | 操作系統版本 | 內網IP | 外網IP(模擬) | 安裝軟體 |
|---|---|---|---|---|
| docker01 | CentOS7.7 | 172.16.1.31 | 10.0.0.31 | docker、Harbor |
| docker02 | CentOS7.7 | 172.16.1.32 | 10.0.0.32 | docker |
SSL證書創建
如果要使用https訪問Harbor。那麼請按照如下生成SSL證書。
創建根證書
1 ## 創建CA私鑰
2 openssl genrsa -out ca.key 2048
3 ## 製作CA公鑰
4 openssl req -new -x509 -days 36500 -key ca.key -out ca.crt -subj "/C=CN/ST=BJ/L=BeiJing/O=BTC/OU=MOST/CN=zhang/[email protected]"
選項參數說明:
genrsa 生成私鑰
-out filename 標準輸出到filename文件
req 生成證書請求
-new 生成新證書簽署請求
-x509 專用於CA生成自簽證書;不自簽的時候不要加該選項
-days num 證書的有效期限
-key file 生成請求時用到的私鑰文件
-out filename 標準輸出到filename文件
subj內容詳解:
1 C             = 國家
2 ST            = 省/州
3 L             = 城市
4 O             = Organization Name
5 OU            = Organizational Unit Name
6 CN            = Common Name
7 emailAddress  = [email protected]
證書簽發
1 ## 創建私鑰
2 openssl genrsa -out httpd.key 1024
3 ## 生成簽發請求
4 openssl req -new -key httpd.key -out httpd.csr -subj "/C=CN/ST=BJ/L=BeiJing/O=BTC/OU=OPS/CN=zhang/[email protected]"
5 ## 使用CA證書進行簽發
6 openssl x509 -req -sha256 -in httpd.csr -CA ca.crt -CAkey ca.key -CAcreateserial -days 36500 -out httpd.crt
7 ## 驗證簽發證書是否有效
8 openssl verify -CAfile ca.crt httpd.crt
生成結果如下圖:
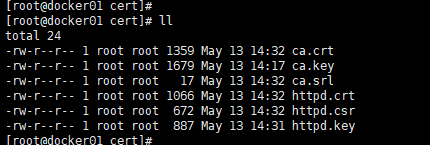
然後將httpd.key和httpd.crt,放到/etc/harbor/cert/目錄下,後面會用到。
安裝docker-ce
安裝腳本如下
 1 [root@docker01 harbor]# pwd
 2 /root/harbor
 3 [root@docker01 harbor]# cat install_docker-ce.sh
 4 #!/bin/sh
 5
 6 # 載入環境變數
 7 . /etc/profile
 8 . /etc/bashrc
 9
10 ## 設置 docker yum repository
11 yum install -y yum-utils device-mapper-persistent-data lvm2
12 yum-config-manager --add-repo http://mirrors.aliyun.com/docker-ce/linux/centos/docker-ce.repo
13
14 ## 安裝docker
15 yum install -y docker-ce
16 # yum install -y docker-ce-19.03.8
17
18 ## 啟動docker服務,這樣可以創建/etc/docker目錄
19 systemctl start docker
20
21 ## 配置daemon
22 ## 1、修改docker Cgroup Driver為systemd;2、日誌格式設定
23 ## 如果不修改,可能會碰到如下錯誤
24 ## [WARNING IsDockerSystemdCheck]: detected "cgroupfs" as the Docker cgroup driver. The recommended driver is "systemd".
25 ## Please follow the guide at https://kubernetes.io/docs/setup/cri/
26 cat > /etc/docker/daemon.json << EOF
27 {
28   "exec-opts": ["native.cgroupdriver=systemd"],
29   "log-driver": "json-file",
30   "log-opts": {
31     "max-size": "100m"
32   }
33 }
34 EOF
35
36 ## 開機自啟動
37 systemctl stop docker && systemctl daemon-reload && systemctl enable docker && systemctl start docker
安裝docker-compose
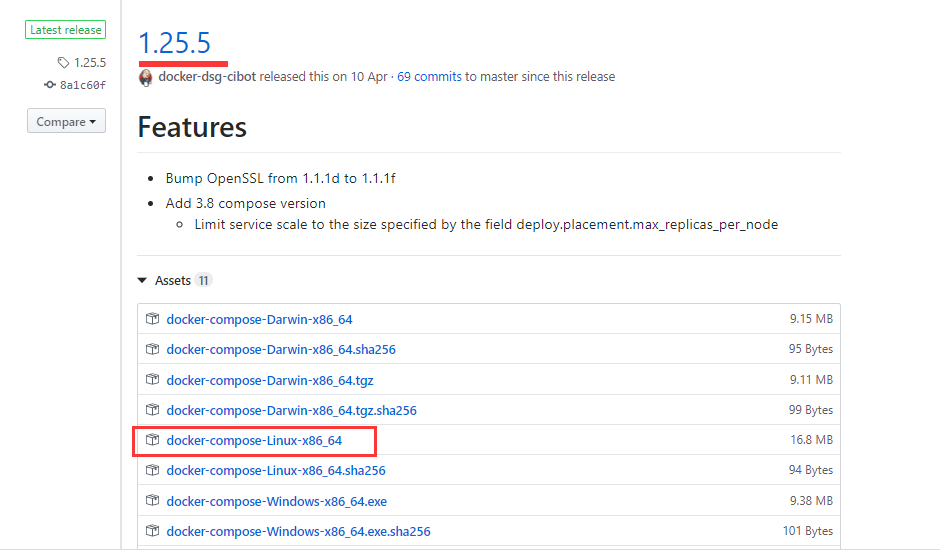
下載地址:
https://github.com/docker/compose
此次,我們使用的是 1.25.5 版本。
 1 [root@docker01 harbor]# ll
 2 total 17180
 3 -rw-r--r-- 1 root root 17586312 May 12 23:16 docker-compose-Linux-x86_64
 4 -rw-r--r-- 1 root root      958 May 12 23:00 install_docker-ce.sh
 5 [root@docker01 harbor]# chmod +x docker-compose-Linux-x86_64   # 添加執行許可權
 6 [root@docker01 harbor]# mv docker-compose-Linux-x86_64  /usr/local/sbin/docker-compose   # 移到指定目錄
 7 [root@docker01 harbor]# docker-compose version  # 版本查看
 8 docker-compose version 1.25.5, build 8a1c60f6
 9 docker-py version: 4.1.0
10 CPython version: 3.7.5
11 OpenSSL version: OpenSSL 1.1.0l  10 Sep 2019
安裝Harbor私有倉庫
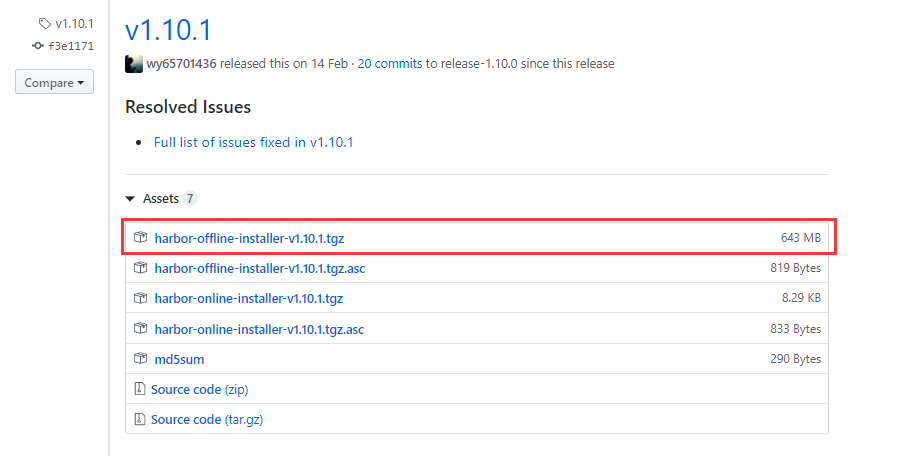
官網下載地址
https://github.com/goharbor/harbor
此次,我們使用的是 v1.10.1 版本。
 1 [root@docker01 harbor]# ll
 2 total 658284
 3 -rw-r--r-- 1 root root 674078519 May 12 17:25 harbor-offline-installer-v1.10.1.tgz
 4 -rw-r--r-- 1 root root       958 May 12 23:00 install_docker-ce.sh
 5 [root@docker01 harbor]#
 6 [root@docker01 harbor]# tar xf harbor-offline-installer-v1.10.1.tgz    # 解壓包
 7 [root@docker01 harbor]# cd harbor/
 8 [root@docker01 harbor]# ll
 9 total 662120
10 -rw-r--r-- 1 root root      3398 Feb 10 14:18 common.sh
11 -rw-r--r-- 1 root root 677974489 Feb 10 14:19 harbor.v1.10.1.tar.gz
12 -rw-r--r-- 1 root root      5882 Feb 10 14:18 harbor.yml
13 -rwxr-xr-x 1 root root      2284 Feb 10 14:18 install.sh
14 -rw-r--r-- 1 root root     11347 Feb 10 14:18 LICENSE
15 -rwxr-xr-x 1 root root      1749 Feb 10 14:18 prepare
harbor.yml配置文件修改內容【http訪問】
 1 # 這裡的hostname怎麼配置
 2 # 1、如果所有機器都在一個區域網,那麼配置內網IP
 3 # 2、如果機器跨網路,只能通過公網訪問,那麼配置本機外網IP或功能變數名稱
 4 hostname: 172.16.1.31
 5
 6 # http埠改為了5000,預設80埠
 7 http:
 8   # port for http, default is 80. If https enabled, this port will redirect to https port
 9   port: 5000
10
11 # 將https註釋掉,不然會報 ERROR:root:Error: The protocol is https but attribute ssl_cert is not set
12 # https related config
13 #https:
14   # https port for harbor, default is 443
15   #port: 443
16   # The path of cert and key files for nginx
17   #certificate: /your/certificate/path
18   #private_key: /your/private/key/path
19
20 # admin用戶的免密
21 harbor_admin_password: Harbor12345
22
23 # 數據存儲路徑
24 data_volume: /data
harbor.yml配置文件修改內容【https訪問】
放開了https配置,本次證書是自簽發的。
 1 # 這裡的hostname怎麼配置
 2 # 1、如果所有機器都在一個區域網,那麼配置內網IP
 3 # 2、如果機器跨網路,只能通過公網訪問,那麼配置本機外網IP或功能變數名稱
 4 hostname: 172.16.1.31
 5
 6 # http埠改為了5000,預設80埠
 7 http:
 8   # port for http, default is 80. If https enabled, this port will redirect to https port
 9   port: 5000
10
11 # https related config
12 https:
13   # https port for harbor, default is 443
14   port: 443
15   # The path of cert and key files for nginx
16   certificate: /etc/harbor/cert/httpd.crt
17   private_key: /etc/harbor/cert/httpd.key
18
19 # admin用戶的免密
20 harbor_admin_password: Harbor12345
21
22 # 數據存儲路徑
23 data_volume: /data
如果使用了https協議且埠是443,那麼當使用http訪問時,會自動跳轉到https。
部署Harbor
修改完配置文件後,在的當前目錄執行./install.sh,Harbor服務就會根據當前目錄下的docker-compose.yml開始下載依賴的鏡像,檢測並按照順序依次啟動。
 1 [root@docker01 harbor]# ll
 2 total 662120
 3 drwxr-xr-x 3 root root        20 May 12 23:47 common
 4 -rw-r--r-- 1 root root      3398 Feb 10 14:18 common.sh
 5 -rw-r--r-- 1 root root 677974489 Feb 10 14:19 harbor.v1.10.1.tar.gz
 6 -rw-r--r-- 1 root root      5921 May 12 23:54 harbor.yml
 7 drwxr-xr-x 2 root root        24 May 12 23:47 input
 8 -rwxr-xr-x 1 root root      2284 Feb 10 14:18 install.sh
 9 -rw-r--r-- 1 root root     11347 Feb 10 14:18 LICENSE
10 -rwxr-xr-x 1 root root      1749 Feb 10 14:18 prepare
11 [root@docker01 harbor]#
12 [root@docker01 harbor]# ./install.sh   # 啟動harbor
啟動結果如下圖

停止與啟動Harbor
如果修改了Harbor的配置文件harbor.yml,因為Harbor是基於docker-compose服務編排的,我們可以使用docker-compose命令重啟Harbor。
未修改配置文件,重啟Harbor命令:docker-compose start | stop | restart
當然個人建議:如果修改了harbor.yml文件,那麼停止使用docker-compose down,啟動使用 ./install.sh 。
 1 ##### 停止Harbor
 2 [root@docker01 harbor]# docker-compose down
 3 Stopping harbor-jobservice ... done
 4 Stopping nginx             ... done
 5 Stopping harbor-core       ... done
 6 Stopping registryctl       ... done
 7 Stopping redis             ... done
 8 Stopping harbor-portal     ... done
 9 Stopping harbor-db         ... done
10 Stopping registry          ... done
11 Stopping harbor-log        ... done
12 Removing harbor-jobservice ... done
13 Removing nginx             ... done
14 Removing harbor-core       ... done
15 Removing registryctl       ... done
16 Removing redis             ... done
17 Removing harbor-portal     ... done
18 Removing harbor-db         ... done
19 Removing registry          ... done
20 Removing harbor-log        ... done
21 Removing network harbor_harbor
22 ##### 啟動Harbor
23 [root@docker01 harbor]# docker-compose up -d
24 Creating network "harbor_harbor" with the default driver
25 Creating harbor-log ... done
26 Creating registryctl   ... done
27 Creating harbor-db     ... done
28 Creating redis         ... done
29 Creating registry      ... done
30 Creating harbor-portal ... done
31 Creating harbor-core   ... done
32 Creating nginx             ... done
33 Creating harbor-jobservice ... done
鏡像信息和容器信息
鏡像信息和容器信息如下
[root@docker01 ~]# docker images
REPOSITORY                      TAG                              IMAGE ID            CREATED             SIZE
goharbor/chartmuseum-photon     v0.9.0-v1.10.1                   0245d66323de        3 months ago        128MB
goharbor/harbor-migrator        v1.10.1                          a4f99495e0b0        3 months ago        364MB
goharbor/redis-photon           v1.10.1                          550a58b0a311        3 months ago        111MB
goharbor/clair-adapter-photon   v1.0.1-v1.10.1                   2ec99537693f        3 months ago        61.6MB
goharbor/clair-photon           v2.1.1-v1.10.1                   622624e16994        3 months ago        171MB
goharbor/notary-server-photon   v0.6.1-v1.10.1                   e4ff6d1f71f9        3 months ago        143MB
goharbor/notary-signer-photon   v0.6.1-v1.10.1                   d3aae2fc17c6        3 months ago        140MB
goharbor/harbor-registryctl     v1.10.1                          ddef86de6480        3 months ago        104MB
goharbor/registry-photon        v2.7.1-patch-2819-2553-v1.10.1   1a0c5f22cfa7        3 months ago        86.5MB
goharbor/nginx-photon           v1.10.1                          01276d086ad6        3 months ago        44MB
goharbor/harbor-log             v1.10.1                          1f5c9ea164bf        3 months ago        82.3MB
goharbor/harbor-jobservice      v1.10.1                          689368d30108        3 months ago        143MB
goharbor/harbor-core            v1.10.1                          14151d58ac3f        3 months ago        130MB
goharbor/harbor-portal          v1.10.1                          8a9856c37798        3 months ago        52.1MB
goharbor/harbor-db              v1.10.1                          18548720d8ad        3 months ago        148MB
goharbor/prepare                v1.10.1                          897a4d535ced        3 months ago        192MB
[root@docker01 ~]# docker ps
CONTAINER ID        IMAGE                                                     COMMAND                  CREATED             STATUS                             PORTS                       NAMES
6f57ce1d6a27        goharbor/nginx-photon:v1.10.1                             "nginx -g 'daemon of…"   29 seconds ago      Up 28 seconds (health: starting)   0.0.0.0:5000->8080/tcp      nginx
bd441d18ae54        goharbor/harbor-jobservice:v1.10.1                        "/harbor/harbor_jobs…"   29 seconds ago      Up 28 seconds (health: starting)                               harbor-jobservice
374fad48780e        goharbor/harbor-core:v1.10.1                              "/harbor/harbor_core"    30 seconds ago      Up 29 seconds (health: starting)                               harbor-core
89f8f4312c24        goharbor/harbor-portal:v1.10.1                            "nginx -g 'daemon of…"   31 seconds ago      Up 29 seconds (health: starting)   8080/tcp                    harbor-portal
4d0b294a38c4        goharbor/redis-photon:v1.10.1                             "redis-server /etc/r…"   31 seconds ago      Up 29 seconds (health: starting)   6379/tcp                    redis
cd9fafa019f5        goharbor/harbor-registryctl:v1.10.1                       "/home/harbor/start.…"   31 seconds ago      Up 29 seconds (health: starting)                               registryctl
a62616384f6c        goharbor/registry-photon:v2.7.1-patch-2819-2553-v1.10.1   "/home/harbor/entryp…"   31 seconds ago      Up 29 seconds (health: starting)   5000/tcp                    registry
dc453165b1fb        goharbor/harbor-db:v1.10.1                                "/docker-entrypoint.…"   31 seconds ago      Up 29 seconds (health: starting)   5432/tcp                    harbor-db
8256f54e69ee        goharbor/harbor-log:v1.10.1                               "/bin/sh -c /usr/loc…"   31 seconds ago      Up 30 seconds (healthy)            127.0.0.1:1514->10514/tcp   harbor-log
瀏覽器訪問
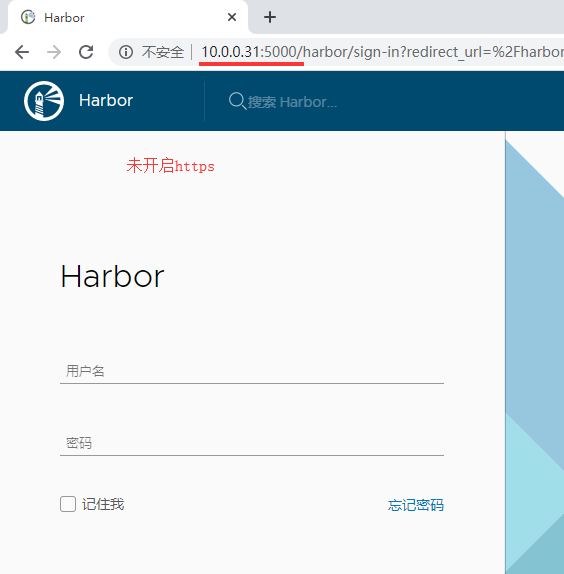
訪問地址如下:
1 http 訪問:http://10.0.0.31:5000/   或則  http://172.16.1.31:5000/
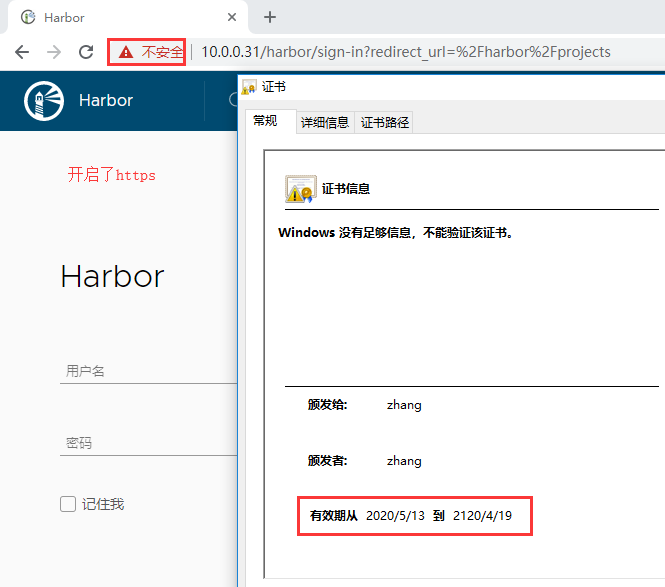
2 https訪問:https://10.0.0.31/       或者  https://172.16.1.31/
備註:
1、由於我使用的Vmware虛擬機,因此10.0.0.0/24網段【模擬外網】和172.16.1.0/24網路【內網】都可以訪問。生產環境是訪問內網還是外網,視具體情況而定。
2、這裡的訪問地址和harbor.yml中配置的hostname值無關。
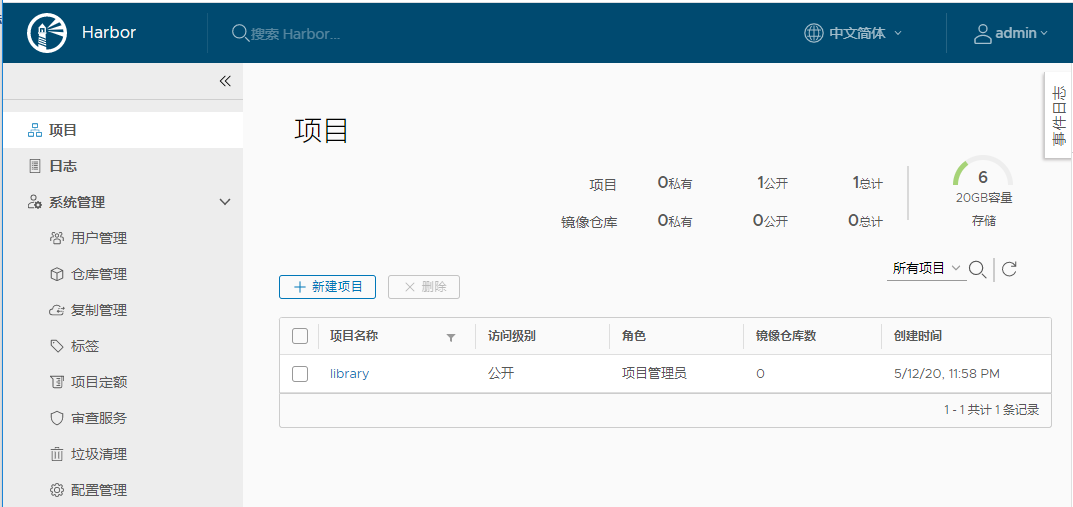
登錄後頁面
Harbor實現Docker鏡像上傳與下載
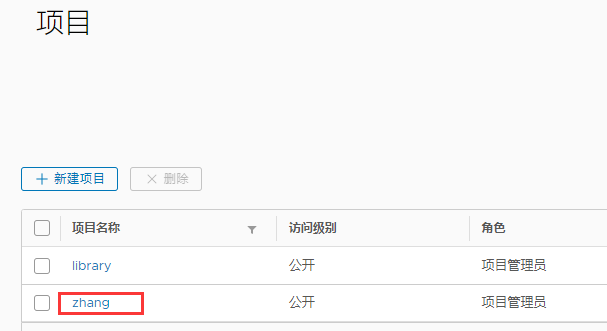
新建項目
根據你的項目名新建項目,這樣才能將鏡像推動到harbor鏡像中心。

客戶端http設置
Docker 預設不允許非 HTTPS 方式推送鏡像。我們可以通過 Docker 的配置選項來取消這個限制。
如果直接【上傳】或【拉取】鏡像會失敗,因為預設為https方式。
所有客戶端都需要添加這個配置,然後重啟 docker 服務。
 1 [root@docker01 ~]# vim /etc/docker/daemon.json
 2 {
 3   "exec-opts": ["native.cgroupdriver=systemd"],
 4   "log-driver": "json-file",
 5   "log-opts": {
 6     "max-size": "100m"
 7   },
 8   "insecure-registries": ["172.16.1.31:5000"]
 9 }
10 [root@docker01 ~]# systemctl restart docker   # 重啟docker服務
添加了 “insecure-registries”: [“172.16.1.31:5000”] 這行,其中172.16.1.31為內網IP地址。該文件必須符合 json 規範,否則 Docker 將不能啟動。
如果在Harbor所在的機器重啟了docker服務,記得要重新啟動Harbor。
客戶端登錄Harbor
客戶端登錄Harbor。
# docker login 172.16.1.31:5000 -u admin -p Harbor12345
查看登錄信息,這樣客戶端就可以直接拉取或者推送鏡像了。
 1 [root@docker01 ~]# cat ~/.docker/config.json
 2 {
 3     "auths": {
 4         "172.16.1.31:5000": {
 5             "auth": "YWRtaW46SGFyYm9yMTIzNDU="
 6         }
 7     },
 8     "HttpHeaders": {
 9         "User-Agent": "Docker-Client/19.03.8 (linux)"
10     }
11 }
Docker push鏡像上傳
1 [root@docker02 ~]# docker images
2 REPOSITORY                     TAG                 IMAGE ID            CREATED             SIZE
3 172.16.1.31:5000/zhang/nginx   1.17                ed21b7a8aee9        6 weeks ago         127MB
4 [root@docker02 ~]# docker push 172.16.1.31:5000/zhang/nginx:1.17    # 上傳鏡像
5 The push refers to repository [172.16.1.31:5000/zhang/nginx]
6 d37eecb5b769: Pushed
7 99134ec7f247: Pushed
8 c3a984abe8a8: Pushed
9 1.17: digest: sha256:7ac7819e1523911399b798309025935a9968b277d86d50e5255465d6592c0266 size: 948
說明:註意鏡像名格式
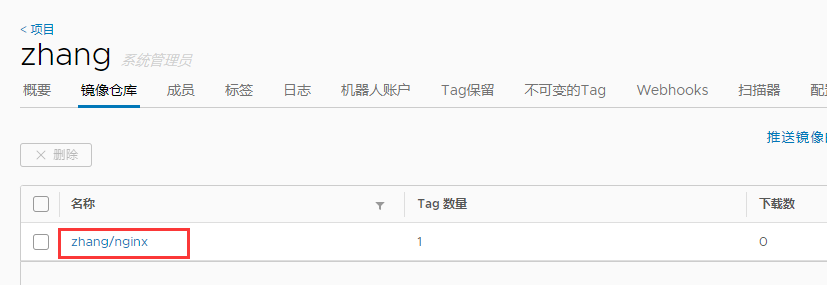
Harbor頁面信息
Docker pull鏡像拉取
 1 [root@docker01 ~]# docker images | grep 'zhang/nginx'
 2 [root@docker01 ~]# docker pull 172.16.1.31:5000/zhang/nginx:1.17    # 鏡像拉取
 3 1.17: Pulling from zhang/nginx
 4 c499e6d256d6: Pull complete
 5 74cda408e262: Pull complete
 6 ffadbd415ab7: Pull complete
 7 Digest: sha256:7ac7819e1523911399b798309025935a9968b277d86d50e5255465d6592c0266
 8 Status: Downloaded newer image for 172.16.1.31:5000/zhang/nginx:1.17
 9 172.16.1.31:5000/zhang/nginx:1.17
10 [root@docker01 ~]# docker images | grep 'zhang/nginx'
11 172.16.1.31:5000/zhang/nginx    1.17    ed21b7a8aee9     6 weeks ago      127MB
Harbor頁面信息

完畢!
———END———
如果覺得不錯就關註下唄 (-^O^-) !


