
本文收錄在Linux運維企業架構實戰系列 環境準備 系統:CentOS 7 IP:192.168.10.101 關閉selinux 和防火牆 一、準備 Python3 和 Python 虛擬環境 1、安裝依賴包 [root@centos7-1 opt]# yum -y install wget sq ...
本文收錄在Linux運維企業架構實戰系列
環境準備
- 系統:CentOS 7
- IP:192.168.10.101
- 關閉selinux 和防火牆
# CentOS 7
$ setenforce 0  # 可以設置配置文件永久關閉
$ systemctl stop iptables.service
$ systemctl stop firewalld.service

# CentOS6
$ setenforce 0
$ service iptables stop
一、準備 Python3 和 Python 虛擬環境
1、安裝依賴包
[root@centos7-1 opt]# yum -y install wget sqlite-devel xz gcc automake zlib-devel openssl-devel epel-release git
2、編譯安裝
[root@centos7-1 opt]# wget https://www.python.org/ftp/python/3.6.1/Python-3.6.1.tar.xz
[root@centos7-1 opt]# tar xvf Python-3.6.1.tar.xz && cd Python-3.6.1
[root@centos7-1 opt]# ./configure && make && make install
3、建立 Python 虛擬環境
因為 CentOS 6/7 自帶的是 Python2,而 Yum 等工具依賴原來的 Python,為了不擾亂原來的環境我們來使用 Python 虛擬環境
[root@centos7-1 opt]# cd /opt
[root@centos7-1 opt]# python3 -m venv py3
[root@centos7-1 opt]# source /opt/py3/bin/activate
註:看到下麵的提示符代表成功,以後運行 Jumpserver 都要先運行以上 source 命令,以下所有命令均在該虛擬環境中運行
(py3) [root@centos7-1 opt]#
二、安裝 Jumpserver 1.0.0
1、下載或 Clone 項目
項目提交較多 git clone 時較大,你可以選擇去 Github 項目頁面直接下載zip包。
(py3) [root@centos7-1 opt]# cd /opt/
(py3) [root@centos7-1 opt]# git clone --depth=1 https://github.com/jumpserver/jumpserver.git && cd jumpserver && git checkout master
2、安裝依賴 RPM 包
(py3) [root@centos7-1 jumpserver]# cd /opt/jumpserver/requirements
(py3) [root@centos7-1 jumpserver]# yum -y install $(cat rpm_requirements.txt) # 如果沒有任何報錯請繼續
3、安裝 Python 庫依賴
(py3) [root@centos7-1 requirements]# pip install -r requirements.txt # 不要指定-i參數,因為鏡像上可能沒有最新的包,如果沒有任何報錯請繼續
成功如下圖: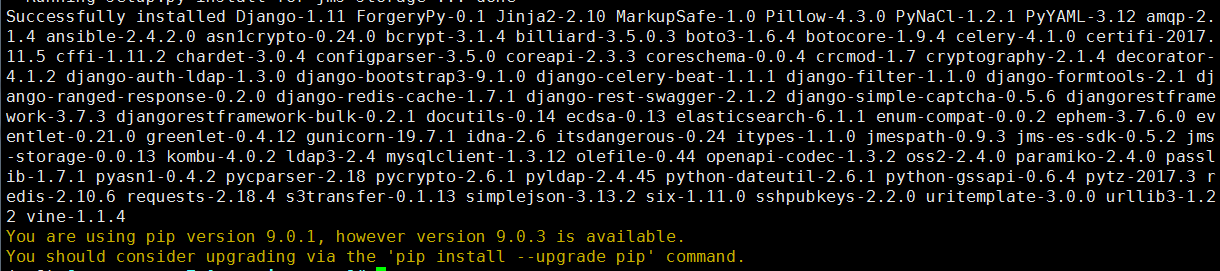
4、安裝 Redis, Jumpserver 使用 Redis 做 cache 和 celery broke
(py3) [root@centos7-1 requirements]# yum -y install redis
(py3) [root@centos7-1 requirements]# systemctl start redis
5、安裝 MySQL
本教程使用 Mysql 作為資料庫,如果不使用 Mysql 可以跳過相關 Mysql 安裝和配置
(1)# centos7
(py3) [root@centos7-1 requirements]# yum -y install mariadb mariadb-devel mariadb-server # centos7下安裝的是mariadb
(py3) [root@centos7-1 requirements]# systemctl start mariadb.service
(2)# centos6
$ yum -y install mysql mysql-devel mysql-server
$ service mysqld start
6、創建資料庫 Jumpserver 並授權
(py3) [root@centos7-1 requirements]# mysql
MariaDB [(none)]> create database jumpserver default charset 'utf8';
Query OK, 1 row affected (0.00 sec)
MariaDB [(none)]> grant all on jumpserver.* to 'jumpserver'@'127.0.0.1' identified by 'along';
Query OK, 0 rows affected (0.00 sec)
7、修改 Jumpserver 配置文件
(py3) [root@centos7-1 requirements]# cd /opt/jumpserver
(py3) [root@centos7-1 jumpserver]# cp config_example.py config.py
(py3) [root@centos7-1 jumpserver]# vim config.py # 我們計劃修改 DevelopmentConfig中的配置,因為預設jumpserver是使用該配置,它繼承自Config
class DevelopmentConfig(Config):    #找到這一段,進行下麵的配置
    DEBUG = True
    DB_ENGINE = 'mysql'
    DB_HOST = '127.0.0.1'
    DB_PORT = 3306
    DB_USER = 'jumpserver'
    DB_PASSWORD = 'along'
    DB_NAME = 'jumpserver'
註意: 配置文件是 Python 格式,不要用 TAB,而要用空格
8、生成資料庫表結構和初始化數據
(py3) [root@centos7-1 jumpserver]# cd /opt/jumpserver/utils
(py3) [root@centos7-1 utils]# bash make_migrations.sh
成功如下圖:

9、運行 Jumpserver
(py3) [root@centos7-1 utils]# cd /opt/jumpserver
(py3) [root@centos7-1 jumpserver]# python run_server.py all
10、瀏覽器訪問http://192.168.10.101:8080/
註意:
① 第一次運行時報錯,(這裡只是 Jumpserver, 沒有 Web Terminal,所以訪問 Web Terminal 會報錯)
② 終止腳本,再執行,就可以登錄了
(py3) [root@centos7-1 utils]# bash make_migrations.sh
賬號: admin 密碼: admin
③ 登錄成功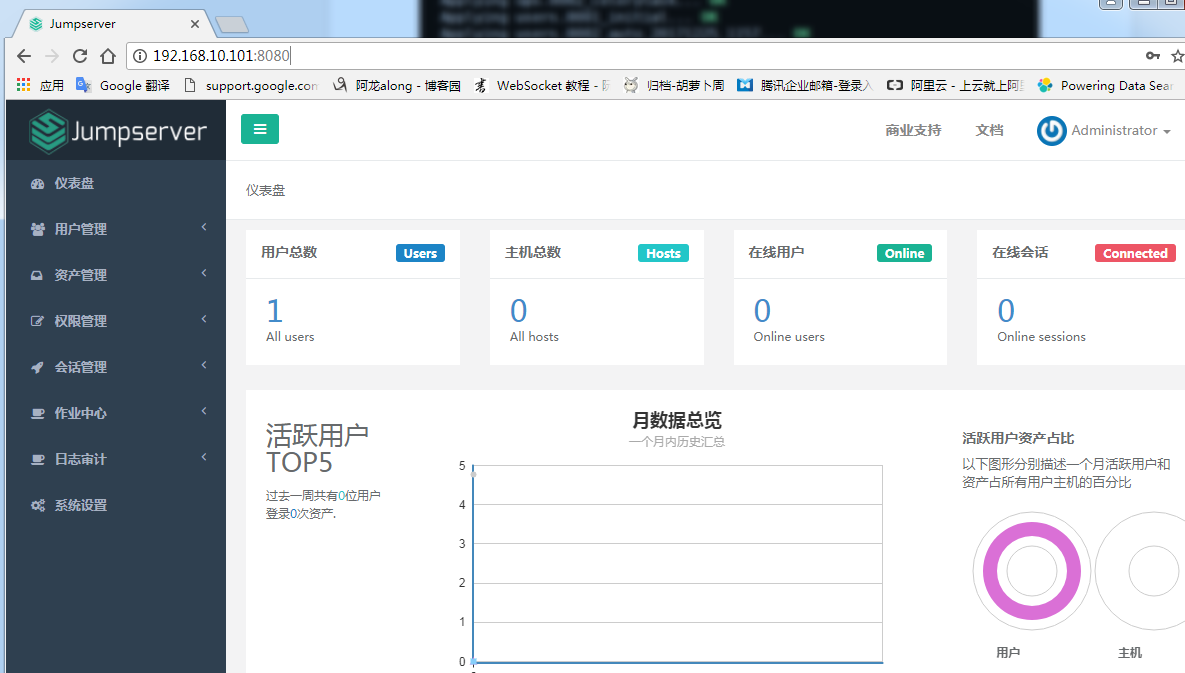
三、安裝 SSH Server 和 WebSocket Server: Coco
1、下載或 Clone 項目
新開一個終端,連接測試機,別忘了 source /opt/py3/bin/activate
[root@centos7-1 ~]# source /opt/py3/bin/activate
(py3) [root@centos7-1 ~]# cd /opt/
(py3) [root@centos7-1 opt]# git clone https://github.com/jumpserver/coco.git && cd coco && git checkout master
2、安裝依賴
(py3) [root@centos7-1 coco]# cd /opt/coco/requirements
(py3) [root@centos7-1 requirements]# yum -y install $(cat rpm_requirements.txt)
(py3) [root@centos7-1 requirements]# pip install -r requirements.txt
成功如下圖:

3、查看配置文件並運行
(1)運行
(py3) [root@centos7-1 requirements]# cd /opt/coco
(py3) [root@centos7-1 coco]# cp conf_example.py conf.py
(py3) [root@centos7-1 coco]# python run_server.py
(2)這時需要去 Jumpserver 管理後臺-會話管理-終端管理(http://192.168.10.101:8080/terminal/terminal/)接受 Coco 的註冊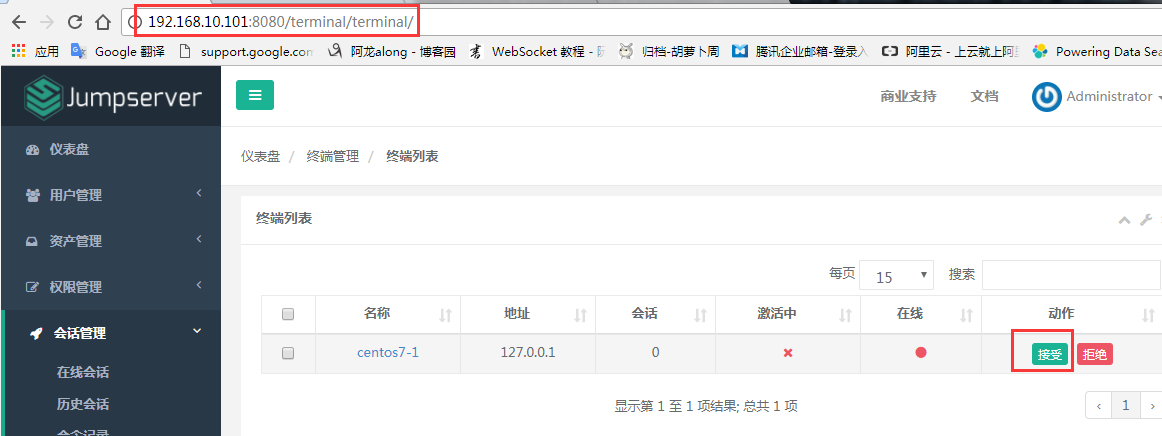
(3)命令行終端顯示連接成功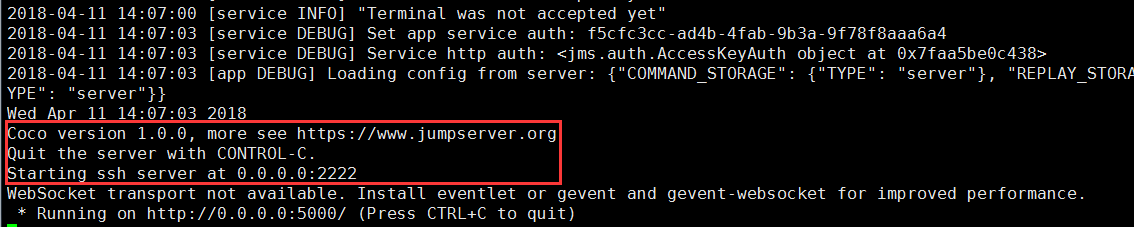
4、測試連接
(1)linux 連接
[root@centos7-1 ~]# ssh -p2222 [email protected] #新開一個終端去連接密碼: admin
(2)如果是用在 Windows 下,Xshell Terminal 登錄語法如下
$ssh [email protected] 2222
密碼: admin
如果能登陸代表部署成功
(3)登錄成功如下圖:

四、安裝 Web Terminal 前端: Luna
1、下載 Luna
Luna 已改為純前端,需要 Nginx 來運行訪問
訪問(https://github.com/jumpserver/luna/releases)下載對應版本的 release 包,直接解壓,不需要編譯
[root@centos7-1 ~]# cd /opt/
[root@centos7-1 opt]# wget https://github.com/jumpserver/luna/releases/download/v1.0.0/luna.tar.gz
2、解壓 Luna
[root@centos7-1 opt]# tar xvf luna.tar.gz
[root@centos7-1 opt]# ls /opt/luna 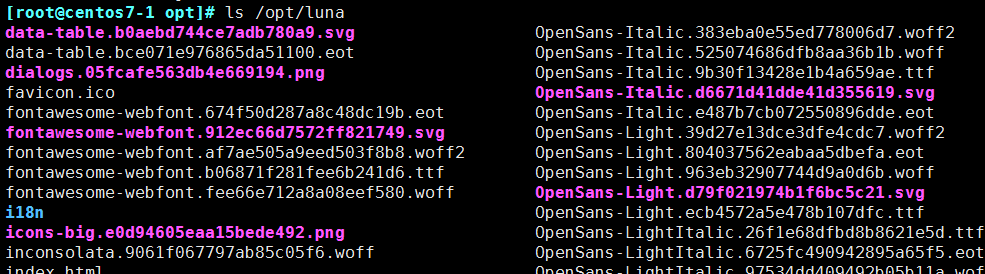
五、安裝 Windows 支持組件
因為手動安裝 guacamole 組件比較複雜,這裡提供打包好的 docker 使用, 啟動 guacamole
# 註意:這裡一定要改寫一下本機的IP地址, 否則會出錯
docker run --name jms_guacamole -d \
  -p 8081:8080 -v /opt/guacamole/key:/config/guacamole/key \
  -e JUMPSERVER_KEY_DIR=/config/guacamole/key \
  -e JUMPSERVER_SERVER=http://<填寫本機的IP地址>:8080 \
  registry.jumpserver.org/public/guacamole:1.0.0
這裡所需要註意的是 guacamole 暴露出來的埠是 8081,若與主機上其他埠衝突請自定義一下。
再次強調:修改 JUMPSERVER_SERVER 環境變數的配置,填上 Jumpserver 的內網地址, 這時 去 Jumpserver-會話管理-終端管理 接受[Gua]開頭的一個註冊
六、配置 Nginx 整合各組件
1、安裝 Nginx 根據喜好選擇安裝方式和版本
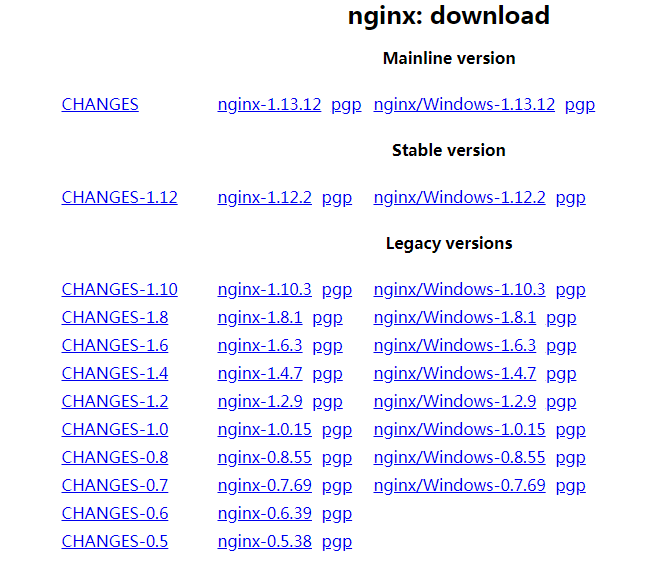
nginx 官網https://nginx.org/en/download.html
(1)安裝前準備
① 下載版本包,我以nginx-1.12.2為例
[root@centos7-1 nginx]# wget -c https://nginx.org/download/nginx-1.12.2.tar.gz
[root@centos7-1 nginx]# tar -xvf nginx-1.12.2.tar.gz
② 下載依賴包
[root@centos7-1 nginx]# yum install gc gcc gcc-c++ pcre-devel zlib-devel openssl-devel
③ 創建nginx用戶、組
[root@centos7-1 nginx-1.12.2]# groupadd nginx
[root@centos7-1 nginx-1.12.2]# useradd -s /sbin/nologin -g nginx -M nginx
(2)編譯安裝
[root@centos7-1 nginx-1.12.2]# ./configure --user=nginx --group=nginx --prefix=/mnt/nginx --with-http_stub_status_module --with-http_ssl_module --with-http_gzip_static_module
[root@centos7-1 nginx-1.12.2]# make && make install
[root@centos7-1 nginx-1.12.2]# cd /mnt/nginx/ # 完成

註釋:#指定運行許可權的用戶
--user=nginx
#指定運行的許可權用戶組
--group=nginx
#指定安裝路徑
--prefix=/usr/local/nginx
#支持nginx狀態查詢
--with-http_stub_status_module
#開啟ssl支持
--with-http_ssl_module
#開啟GZIP功能
--with-http_gzip_static_module
(3)使systemctl 控制nginx 服務
[root@centos7-1 nginx]# vim /usr/lib/systemd/system/nginx.service
[Unit]
Description=nginx - high performance web server
Documentation=http://nginx.org/en/docs/
After=network.target remote-fs.target nss-lookup.target

[Service]
Type=forking
PIDFile=/mnt/nginx/logs/nginx.pid
ExecStartPre=/mnt/nginx/sbin/nginx -t -c /mnt/nginx/conf/nginx.conf
ExecStart=/mnt/nginx/sbin/nginx -c /mnt/nginx/conf/nginx.conf
ExecReload=/bin/kill -s HUP $MAINPID
ExecStop=/bin/kill -s QUIT $MAINPID
PrivateTmp=true

[Install]
WantedBy=multi-user.target
2、準備配置文件
[root@centos7-1 ~]# vim /mnt/nginx/conf/nginx.conf 清除已有的server段
server {
    listen 80;

    proxy_set_header X-Real-IP $remote_addr;
    proxy_set_header Host $host;
    proxy_set_header X-Forwarded-For $proxy_add_x_forwarded_for;

    location /luna/ {
        try_files $uri / /index.html;
        alias /opt/luna/;
    }

    location /media/ {
        add_header Content-Encoding gzip;
        root /opt/jumpserver/data/;
    }

    location /static/ {
        root /opt/jumpserver/data/;
    }

    location /socket.io/ {
        proxy_pass       http://localhost:5000/socket.io/;
        proxy_buffering off;
        proxy_http_version 1.1;
        proxy_set_header Upgrade $http_upgrade;
        proxy_set_header Connection "upgrade";
    }

    location /guacamole/ {
        proxy_pass       http://localhost:8081/;
        proxy_buffering off;
        proxy_http_version 1.1;
        proxy_set_header X-Forwarded-For $proxy_add_x_forwarded_for;
        proxy_set_header Upgrade $http_upgrade;
        proxy_set_header Connection $http_connection;
        access_log off;
    }

    location / {
        proxy_pass http://localhost:8080;
    }
}
3、運行 Nginx
[root@centos7-1 ~]# /mnt/nginx/sbin/nginx -t # 檢查配置文件
[root@centos7-1 ~]# service nginx start
4、訪問 http://192.168.10.101


