
今天記錄一下驗證碼的實現,希望能夠幫助到大家! 首先我們看一下實現的效果: 此驗證碼的實現沒有用到太多的插件,話不多說直接上代碼,大家拿過去就可以用。 中間用到了org.apache.commons.lang3.RandomUtils工具類,需要pom配置: <!-- https://mvnrepo ...
今天記錄一下驗證碼的實現,希望能夠幫助到大家!
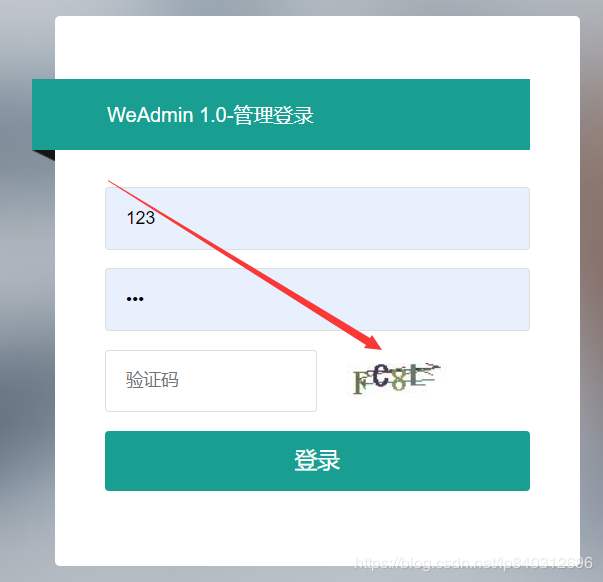
首先我們看一下實現的效果:
此驗證碼的實現沒有用到太多的插件,話不多說直接上代碼,大家拿過去就可以用。
中間用到了org.apache.commons.lang3.RandomUtils工具類,需要pom配置:
<!-- https://mvnrepository.com/artifact/org.apache.commons/commons-lang3 -->
        <dependency>
            <groupId>org.apache.commons</groupId>
            <artifactId>commons-lang3</artifactId>
            <version>3.10</version>
        </dependency>
1.驗證碼類
package com.youyou.login.util.validatecode;

import lombok.Data;

/**
* 驗證碼類
*/
public class VerifyCode {
    private String code;
    private byte[] imgBytes;
    private long expireTime;
    public String getCode() {
        return code;
    }
    public void setCode(String code) {
        this.code = code;
    }
    public byte[] getImgBytes() {
        return imgBytes;
    }
    public void setImgBytes(byte[] imgBytes) {
        this.imgBytes = imgBytes;
    }
    public long getExpireTime() {
        return expireTime;
    }
    public void setExpireTime(long expireTime) {
        this.expireTime = expireTime;
    }

}
2.驗證碼生成介面
package com.youyou.login.util.validatecode;

import java.io.IOException;
import java.io.OutputStream;

/**
* 驗證碼生成介面
*/
public interface IVerifyCodeGen {

/**
* 生成驗證碼並返回code,將圖片寫的os中
*
* @param width
* @param height
* @param os
* @return
* @throws IOException
*/
String generate(int width, int height, OutputStream os) throws IOException;

/**
* 生成驗證碼對象
*
* @param width
* @param height
* @return
* @throws IOException
*/
VerifyCode generate(int width, int height) throws IOException;
}
3.驗證碼生成實現類
package com.youyou.login.util.validatecode;

import com.youyou.util.RandomUtils;
import org.slf4j.Logger;
import org.slf4j.LoggerFactory;

import javax.imageio.ImageIO;
import java.awt.*;
import java.awt.image.BufferedImage;
import java.io.ByteArrayOutputStream;
import java.io.IOException;
import java.io.OutputStream;
import java.util.Random;

/**
* 驗證碼實現類
*/
public class SimpleCharVerifyCodeGenImpl implements IVerifyCodeGen {

private static final Logger logger = LoggerFactory.getLogger(SimpleCharVerifyCodeGenImpl.class);

private static final String[] FONT_TYPES = { "\u5b8b\u4f53", "\u65b0\u5b8b\u4f53", "\u9ed1\u4f53", "\u6977\u4f53", "\u96b6\u4e66" };

private static final int VALICATE_CODE_LENGTH = 4;

/**
* 設置背景顏色及大小,干擾線
*
* @param graphics
* @param width
* @param height
*/
private static void fillBackground(Graphics graphics, int width, int height) {
// 填充背景
graphics.setColor(Color.WHITE);
//設置矩形坐標x y 為0
graphics.fillRect(0, 0, width, height);

// 加入干擾線條
for (int i = 0; i < 8; i++) {
//設置隨機顏色演算法參數
graphics.setColor(RandomUtils.randomColor(40, 150));
Random random = new Random();
int x = random.nextInt(width);
int y = random.nextInt(height);
int x1 = random.nextInt(width);
int y1 = random.nextInt(height);
graphics.drawLine(x, y, x1, y1);
}
}

/**
* 生成隨機字元
*
* @param width
* @param height
* @param os
* @return
* @throws IOException
*/
@Override
public String generate(int width, int height, OutputStream os) throws IOException {
BufferedImage image = new BufferedImage(width, height, BufferedImage.TYPE_INT_RGB);
Graphics graphics = image.getGraphics();
fillBackground(graphics, width, height);
String randomStr = RandomUtils.randomString(VALICATE_CODE_LENGTH);
createCharacter(graphics, randomStr);
graphics.dispose();
//設置JPEG格式
ImageIO.write(image, "JPEG", os);
return randomStr;
}

/**
* 驗證碼生成
*
* @param width
* @param height
* @return
*/
@Override
public VerifyCode generate(int width, int height) {
VerifyCode verifyCode = null;
try (
//將流的初始化放到這裡就不需要手動關閉流
ByteArrayOutputStream baos = new ByteArrayOutputStream();
) {
String code = generate(width, height, baos);
verifyCode = new VerifyCode();
verifyCode.setCode(code);
verifyCode.setImgBytes(baos.toByteArray());
} catch (IOException e) {
logger.error(e.getMessage(), e);
verifyCode = null;
}
return verifyCode;
}

/**
* 設置字元顏色大小
*
* @param g
* @param randomStr
*/
private void createCharacter(Graphics g, String randomStr) {
char[] charArray = randomStr.toCharArray();
for (int i = 0; i < charArray.length; i++) {
//設置RGB顏色演算法參數
g.setColor(new Color(50 + RandomUtils.nextInt(100),
50 + RandomUtils.nextInt(100), 50 + RandomUtils.nextInt(100)));
//設置字體大小,類型
g.setFont(new Font(FONT_TYPES[RandomUtils.nextInt(FONT_TYPES.length)], Font.BOLD, 26));
//設置x y 坐標
g.drawString(String.valueOf(charArray[i]), 15 * i + 5, 19 + RandomUtils.nextInt(8));
}
}
}
4.工具類
package com.youyou.util;

import java.awt.*;
import java.util.Random;

public class RandomUtils extends org.apache.commons.lang3.RandomUtils {

private static final char[] CODE_SEQ = { 'A', 'B', 'C', 'D', 'E', 'F', 'G', 'H', 'J',
'K', 'L', 'M', 'N', 'P', 'Q', 'R', 'S', 'T', 'U', 'V', 'W',
'X', 'Y', 'Z', '2', '3', '4', '5', '6', '7', '8', '9' };

private static final char[] NUMBER_ARRAY = { '0', '1', '2', '3', '4', '5', '6', '7', '8', '9' };

private static Random random = new Random();

public static String randomString(int length) {
StringBuilder sb = new StringBuilder();
for (int i = 0; i < length; i++) {
sb.append(String.valueOf(CODE_SEQ[random.nextInt(CODE_SEQ.length)]));
}
return sb.toString();
}

public static String randomNumberString(int length) {
StringBuilder sb = new StringBuilder();
for (int i = 0; i < length; i++) {
sb.append(String.valueOf(NUMBER_ARRAY[random.nextInt(NUMBER_ARRAY.length)]));
}
return sb.toString();
}

public static Color randomColor(int fc, int bc) {
int f = fc;
int b = bc;
Random random = new Random();
if (f > 255) {
f = 255;
}
if (b > 255) {
b = 255;
}
return new Color(f + random.nextInt(b - f), f + random.nextInt(b - f), f + random.nextInt(b - f));
}

public static int nextInt(int bound) {
return random.nextInt(bound);
}
}
經過以上代碼,我們的驗證碼生成功能基本上已經實現了,現在還需要一個controller來調用它。
@ApiOperation(value = "驗證碼")
@GetMapping("/verifyCode")
public void verifyCode(HttpServletRequest request, HttpServletResponse response) {
IVerifyCodeGen iVerifyCodeGen = new SimpleCharVerifyCodeGenImpl();
try {
//設置長寬
VerifyCode verifyCode = iVerifyCodeGen.generate(80, 28);
String code = verifyCode.getCode();
LOGGER.info(code);
//將VerifyCode綁定session
request.getSession().setAttribute("VerifyCode", code);
//設置響應頭
response.setHeader("Pragma", "no-cache");
//設置響應頭
response.setHeader("Cache-Control", "no-cache");
//在代理伺服器端防止緩衝
response.setDateHeader("Expires", 0);
//設置響應內容類型
response.setContentType("image/jpeg");
response.getOutputStream().write(verifyCode.getImgBytes());
response.getOutputStream().flush();
} catch (IOException e) {
LOGGER.info("", e);
}
}
搞定!後臺編寫到此結束了。那麼又會有博友說了:“說好的實現效果呢?”
好吧,那麼我們繼續前端的代碼編寫。
前端代碼:
<html> <body> <div> <input id="code" placeholder="驗證碼" type="text" class="" style="width:170px"> <!-- 驗證碼 顯示 --> <img οnclick="javascript:getvCode()" id="verifyimg" style="margin-left: 20px;"/> </div> <script type="text/javascript"> getvCode(); /** * 獲取驗證碼 * 將驗證碼寫到login.html頁面的id = verifyimg 的地方 */ function getvCode() { document.getElementById("verifyimg").src = timestamp("http://127.0.0.1:81/verifyCode"); } //為url添加時間戳 function timestamp(url) { var getTimestamp = new Date().getTime(); if (url.indexOf("?") > -1) { url = url + "×tamp=" + getTimestamp } else { url = url + "?timestamp=" + getTimestamp } return url; }; </script> </body> </html>
可以實現點擊圖片更換驗證碼。
實現效果:

當然文章開頭的截圖是我系統中的截圖,需要大家自己去根據自己的情況去開發前端了。
原文鏈接:https://blog.csdn.net/qq_37651267/article/details/99305573


