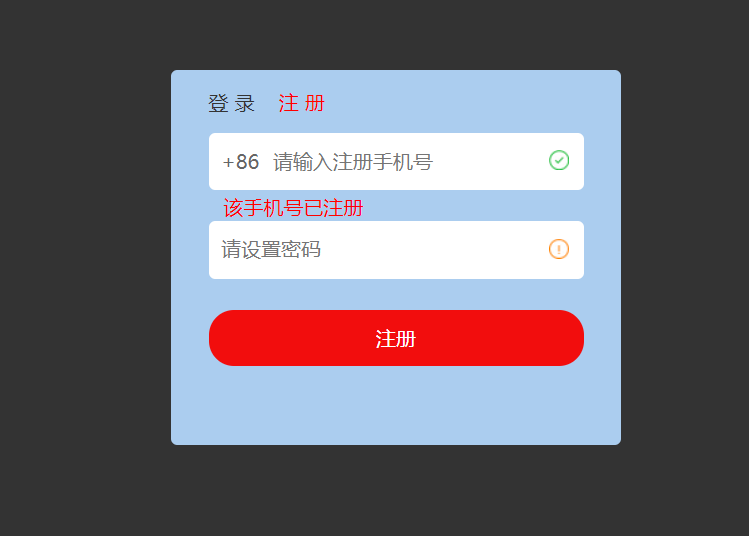
ajax實例,檢測用戶與註冊 檢測用戶名是否被占用: 在用戶填寫完用戶名之後,ajax會非同步向伺服器發送請求,判斷用戶名是否存在 首先寫好靜態頁面: index.html <!DOCTYPE html> <html lang="en"> <head> <meta charset="UTF-8"> < ...
ajax實例,檢測用戶與註冊
檢測用戶名是否被占用:
在用戶填寫完用戶名之後,ajax會非同步向伺服器發送請求,判斷用戶名是否存在
首先寫好靜態頁面:
index.html
<!DOCTYPE html>
<html lang="en">
<head>
    <meta charset="UTF-8">
    <title>index</title>
    <style>
        *{
            margin:0;
            padding:0;
        }
        body{
            background-color: #333;
        }
        a{
            text-decoration: none;
        }
        .box{
            width:300px;
            height:270px;
            margin:80px auto;
            background-color: #abcdef;
            border-radius: 5px;
            padding:15px 30px;
        }
        .box .title{
            height:15px;
            margin-bottom:20px;
        }
        .box .title span{
            font-size:16px;
            color:#333;
            margin-right:15px;
        }
        .box .title span.current{
            color:red;
        }
        .box div{
            width:280px;
            height:30px;
            margin-bottom:25px;
            padding:8px 10px;
            background-color: #fff;
            border-radius: 5px;
            color:#666;
            position: relative;
        }
        .box div span{
            display: inline-block;
            padding-top:4px;
            padding-right:6px;
        }
        .box div input{
            border:none;
            outline:none;
            font-size:16px;
            color:#666;
            margin-top:5px;
        }
        .box div i{
            width:16px;
            height:16px;
            position: absolute;
            top:14px;
            right:12px;
        }
        .box div i.ok{
            background:url(icon.png) no-repeat 0 -67px;
        }
        .box div i.no{
            background:url(icon.png) no-repeat -17px -67px;
        }
        .box div .info{
            color:red;
            margin-top:16px;
            padding-left:2px;
        }
        .button{
            margin-top:7px;
        }
        .button a{
            display: block;
            text-align: center;
            height:45px;
            line-height:45px;
            background-color: #f20d0d;
            border-radius:20px;
            color:#fff;
            font-size:16px;
        }
    </style>
</head>
<body>
    <div class="box">
        <p class="title">
            <span>登 錄</span>
            <span class="current">註 冊</span>
        </p>
        <div>
            <span>+86</span>
            <input type="text" name="user" id="user" placeholder="請輸入註冊手機號" autocomplete="off">
            <i class="ok"></i>
            <p class="info">該手機號已註冊</p>
        </div>
        <div>
            <input type="password" name="pwd" id="pwd" placeholder="請設置密碼" autocomplete="off">
            <i class="no"></i>
            <p class="info"></p>
        </div>
        <p class="button">
            <a href="javascript:void(0)" id="btn" class="btn">註冊</a>
        </p>
    </div>
    <script src="ajax.js"></script>
</body>
</html>
效果圖

然後是仿照jquery的$.ajax(),使用js封裝了一個ajax方法(只是為了熟悉運行原理,實際項目可以直接用jquery封裝好的)
ajax.js
//仿寫jquery的ajax方法
var $={
    ajax:function(options){
        var xhr=null;//XMLHttpRequest對象
        var url=options.url,//必填
            type=options.type || "get",
            async=typeof(options.async)==="undefined"?true:options.async,
            data=options.data || null,
            params="",//傳遞的參數
            callback=options.success,//成功的回調
            error=options.error;//失敗的回調

        //post傳參的轉換,將對象字面量形式轉為字元串形式
        // data:{user:"13200000000",pwd:"123456"}
        // xhr.send("user=13200000000&pwd=123456")
        if(data){
            for(var i in data){
                params+=i+"="+data[i]+"&";
            }
            params=params.replace(/&$/,"");//正則替換,以&結尾的將&轉為空
        }

        //根據type值修改傳參
        if(type==="get"){
            url+="?"+params;
        }
        console.log(url);

        //IE7+,其他瀏覽器
        if(typeof XMLHttpRequest!="undefined"){
            xhr=new XMLHttpRequest();//返回xhr對象的實例
        }else if(typeof ActiveXObject!="undefined"){
            //IE7及以下
            //所有可能出現的ActiveXObject版本
            var arr=["Microsoft.XMLHTTP","MSXML2.XMLHTTP.6.0","MSXML2.XMLHTTP.5.0","MSXML2.XMLHTTP.4.0","MSXML2.XMLHTTP.3.0","MSXML2.XMLHTTP.2.0"];
            //迴圈
            for(var i=0,len=arr.length;i<len;i++){
                try{
                    xhr=new ActiveXObject(arr[i]);//任意一個版本支持,即可退出迴圈
                    break;
                }catch(e){

                }
            }
        }else{
            //都不支持
            throw new Error("您的瀏覽器不支持XHR對象!");
        }

        //響應狀態變化的函數
        xhr.onreadystatechange=function(){
            if(xhr.readyState===4){
                if((xhr.status>=200&&xhr.status<300) || xhr.status===304){
                    callback&&callback(JSON.parse(xhr.responseText));//如果存在回調則執行回調
                }else{
                    error&&error();
                }
            }
        }

        //創建HTTP請求
        xhr.open(type,url,async);
        //設置HTTP頭
        xhr.setRequestHeader("Content-type","application/x-www-form-urlencoded");
        //發送請求
        xhr.send(params);
    },
  jsonp:function(){

  }

}
下麵放出所有代碼:
index.html
<!DOCTYPE html>
<html lang="en">
<head>
    <meta charset="UTF-8">
    <title>index</title>
    <style>
        *{
            margin:0;
            padding:0;
        }
        body{
            background-color: #333;
        }
        a{
            text-decoration: none;
        }
        .box{
            width:300px;
            height:270px;
            margin:80px auto;
            background-color: #abcdef;
            border-radius: 5px;
            padding:15px 30px;
        }
        .box .title{
            height:15px;
            margin-bottom:20px;
        }
        .box .title span{
            font-size:16px;
            color:#333;
            margin-right:15px;
            cursor:pointer;
        }
        .box .title span.current{
            color:red;
        }
        .box div{
            width:280px;
            height:30px;
            margin-bottom:25px;
            padding:8px 10px;
            background-color: #fff;
            border-radius: 5px;
            color:#666;
            position: relative;
        }
        .box div span{
            display: inline-block;
            padding-top:4px;
            padding-right:6px;
        }
        .box div input{
            border:none;
            outline:none;
            font-size:16px;
            color:#666;
            margin-top:5px;
        }
        .box div i{
            width:16px;
            height:16px;
            position: absolute;
            top:14px;
            right:12px;
        }
        .box div i.ok{
            background:url(icon.png) no-repeat 0 -67px;
        }
        .box div i.no{
            background:url(icon.png) no-repeat -17px -67px;
        }
        .box div .info{
            color:red;
            margin-top:16px;
            padding-left:2px;
        }
        .button{
            margin-top:7px;
        }
        .button a{
            display: none;
            text-align: center;
            height:45px;
            line-height:45px;
            background-color: #f20d0d;
            border-radius:20px;
            color:#fff;
            font-size:16px;
        }
        .button a.show{
            display: block;
        }
    </style>
</head>
<body>
    <div class="box">
        <p class="title" id="title">
            <span>登 錄</span>
            <span class="current">註 冊</span>
        </p>
        <div>
            <span>+86</span>
            <input type="text" name="user" id="user" placeholder="請輸入註冊手機號" autocomplete="off" data-check="reg">
            <i id="userIco"></i>
            <p class="info" id="userInfo"></p>
        </div>
        <div>
            <input type="password" name="pwd" id="pwd" placeholder="請設置密碼" autocomplete="off">
            <i id="pwdIco"></i>
            <p class="info" id="pwdInfo"></p>
        </div>
        <p class="button">
            <a href="javascript:void(0)" id="btn" class="btn show">註冊</a>
            <a href="javascript:void(0)" id="btn2" class="btn">登錄</a>
        </p>
    </div>
    <script src="ajax.js"></script>
    <script>
        var user=document.getElementById("user"),
            userIco=document.getElementById("userIco"),
            userInfo=document.getElementById("userInfo"),
            pwd=document.getElementById("pwd"),
            pwdIco=document.getElementById("pwdIco"),
            pwdInfo=document.getElementById("pwdInfo"),
            btn=document.getElementById("btn"),
            btn2=document.getElementById("btn2"),
            title=document.getElementById("title").getElementsByTagName("span"),
            userPattern=/^[1]\d{10}$/,//手機號格式的正則,
            pwdPattern=/^\w{5,10}$/,
            isRepeat=false;//預設不重覆


