
我們編寫一個能夠用過按鈕動態更替碎片的APP,首先在主頁上顯示第一個碎片,點擊按鈕後可以替換到第二個碎片,或者刪除已經替換掉的第二個碎片。 一.MainActivity.java import androidx.fragment.app.FragmentActivity; import androi ...
我們編寫一個能夠用過按鈕動態更替碎片的APP,首先在主頁上顯示第一個碎片,點擊按鈕後可以替換到第二個碎片,或者刪除已經替換掉的第二個碎片。
一.MainActivity.java
import androidx.fragment.app.FragmentActivity;
import androidx.fragment.app.FragmentManager;
import androidx.fragment.app.FragmentTransaction;

import android.os.Bundle;
import android.util.Log;
import android.view.View;
import android.widget.Button;

public class MainActivity extends FragmentActivity {

    public MainActivity() {
        Log.e("TAG", "MainActivity()..");
    }

    @Override
    protected void onCreate(Bundle savedInstanceState) {
        Log.e("TAG", "MainActivity onCreate()..");
        super.onCreate(savedInstanceState);
        setContentView(R.layout.activity_main);//重寫onCreate()方法


        // 創建Fragment對象
        final MyFragment1 fragment1 = new MyFragment1();
        // 得到FragmentManager
        FragmentManager manager = getSupportFragmentManager();
        // 得到FragmentTransacation
        FragmentTransaction transaction = manager.beginTransaction();
        // 添加Fragment對象並提交
        transaction.add(R.id.ll_main, fragment1).commit();

        Button button1=(Button)findViewById(R.id.fragment_1);
        button1.setOnClickListener(new View.OnClickListener() {
            @Override
            public void onClick(View view) {
                showFragment2();
            }
        });
        Button button2=(Button)findViewById(R.id.fragment_2);
        button2.setOnClickListener(new View.OnClickListener() {
            @Override
            public void onClick(View view) {
                deleteFragment2();
            }
        });

    }
    private MyFragment2 fragment2;
    public void showFragment2() {
        // 創建Fragment對象
        fragment2 = new MyFragment2();
        // 得到FragmentManager
        FragmentManager manager = getSupportFragmentManager();
        // 得到FragmentTransacation
        FragmentTransaction transaction = manager.beginTransaction();

        //將當前操作添加到回退棧, 這樣點擊back回到上一個狀態
        transaction.addToBackStack(null);

        // 替換Fragment對象並提交
        transaction.replace(R.id.ll_main, fragment2).commit();
    }
    public void deleteFragment2() {

        // 得到FragmentManager
        FragmentManager manager = getSupportFragmentManager();
        // 得到FragmentTransacation
        FragmentTransaction transaction = manager.beginTransaction();
        // 移除Fragment對象並提交
        transaction.remove(fragment2).commit();
    }
}
二.activity_main.xml
<?xml version="1.0" encoding="utf-8"?>
<LinearLayout xmlns:android="http://schemas.android.com/apk/res/android"
    xmlns:app="http://schemas.android.com/apk/res-auto"
    xmlns:tools="http://schemas.android.com/tools"
    android:layout_width="match_parent"
    android:layout_height="match_parent"
    android:orientation="vertical"
    tools:context=".MainActivity">
    <LinearLayout
        android:orientation="horizontal"
        android:layout_width="match_parent"
        android:layout_height="wrap_content">
<Button

    android:id="@+id/fragment_1"
    android:text="切換至第二個碎片"
    android:layout_width="0dp"
    android:layout_weight="1"
    android:layout_height="wrap_content" />
    <Button
        android:id="@+id/fragment_2"
        android:text="刪除第二個碎片"
        android:layout_width="0dp"
        android:layout_weight="1"
        android:layout_height="wrap_content" />
    </LinearLayout>
<LinearLayout
    android:id="@+id/ll_main"
    android:orientation="horizontal"
    android:layout_width="match_parent"
    android:layout_height="match_parent">


</LinearLayout>
</LinearLayout>
編寫好的界面如下圖所示: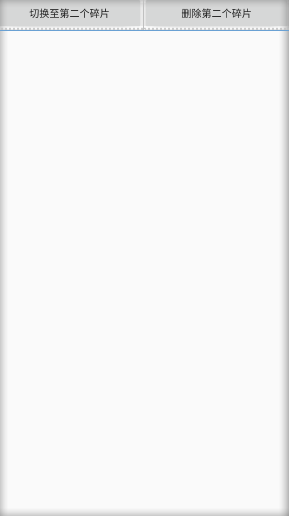
三.MyFragment1.java
import android.os.Bundle;

import androidx.fragment.app.Fragment;

import android.util.Log;
import android.view.LayoutInflater;
import android.view.View;
import android.view.ViewGroup;
import android.widget.TextView;


public class MyFragment1 extends Fragment {


    public MyFragment1() {
        // Required empty public constructor
    }


    @Override
    public void onCreate(Bundle savedInstanceState) {
        super.onCreate(savedInstanceState);

    }

    @Override
    public View onCreateView(LayoutInflater inflater, ViewGroup container,
                             Bundle savedInstanceState) {
        // Inflate the layout for this fragment
        return inflater.inflate(R.layout.fragment_my_fragment1, container,false);
    }


}
四.MyFragment2.java
import android.os.Bundle;

import androidx.fragment.app.Fragment;

import android.util.Log;
import android.view.LayoutInflater;
import android.view.View;
import android.view.ViewGroup;
import android.widget.TextView;


public class MyFragment2 extends Fragment {
    public MyFragment2() {
        // Required empty public constructor
    }


    @Override
    public void onCreate(Bundle savedInstanceState) {
        super.onCreate(savedInstanceState);

    }

    @Override
    public View onCreateView(LayoutInflater inflater, ViewGroup container,
                             Bundle savedInstanceState) {
        // Inflate the layout for this fragment
        return inflater.inflate(R.layout.fragment_my_fragment2, container,false);
    }

}
五.fragment1.xml
<?xml version="1.0" encoding="utf-8"?>
<FrameLayout xmlns:android="http://schemas.android.com/apk/res/android"
    xmlns:tools="http://schemas.android.com/tools"
    android:layout_width="match_parent"
    android:layout_height="match_parent"
    tools:context=".MyFragment1">

    <!-- TODO: Update blank fragment layout -->
    <TextView
        android:layout_width="match_parent"
        android:layout_height="match_parent"
        android:text="這是第一個碎片" />

</FrameLayout>
六.fragment2.xml
<?xml version="1.0" encoding="utf-8"?>
<FrameLayout xmlns:android="http://schemas.android.com/apk/res/android"
    xmlns:tools="http://schemas.android.com/tools"
    android:layout_width="match_parent"
    android:layout_height="match_parent"
    tools:context=".MyFragment2">

    <!-- TODO: Update blank fragment layout -->
    <TextView
        android:layout_width="match_parent"
        android:layout_height="match_parent"
        android:text="這是第二個碎片" />

</FrameLayout>
完畢

