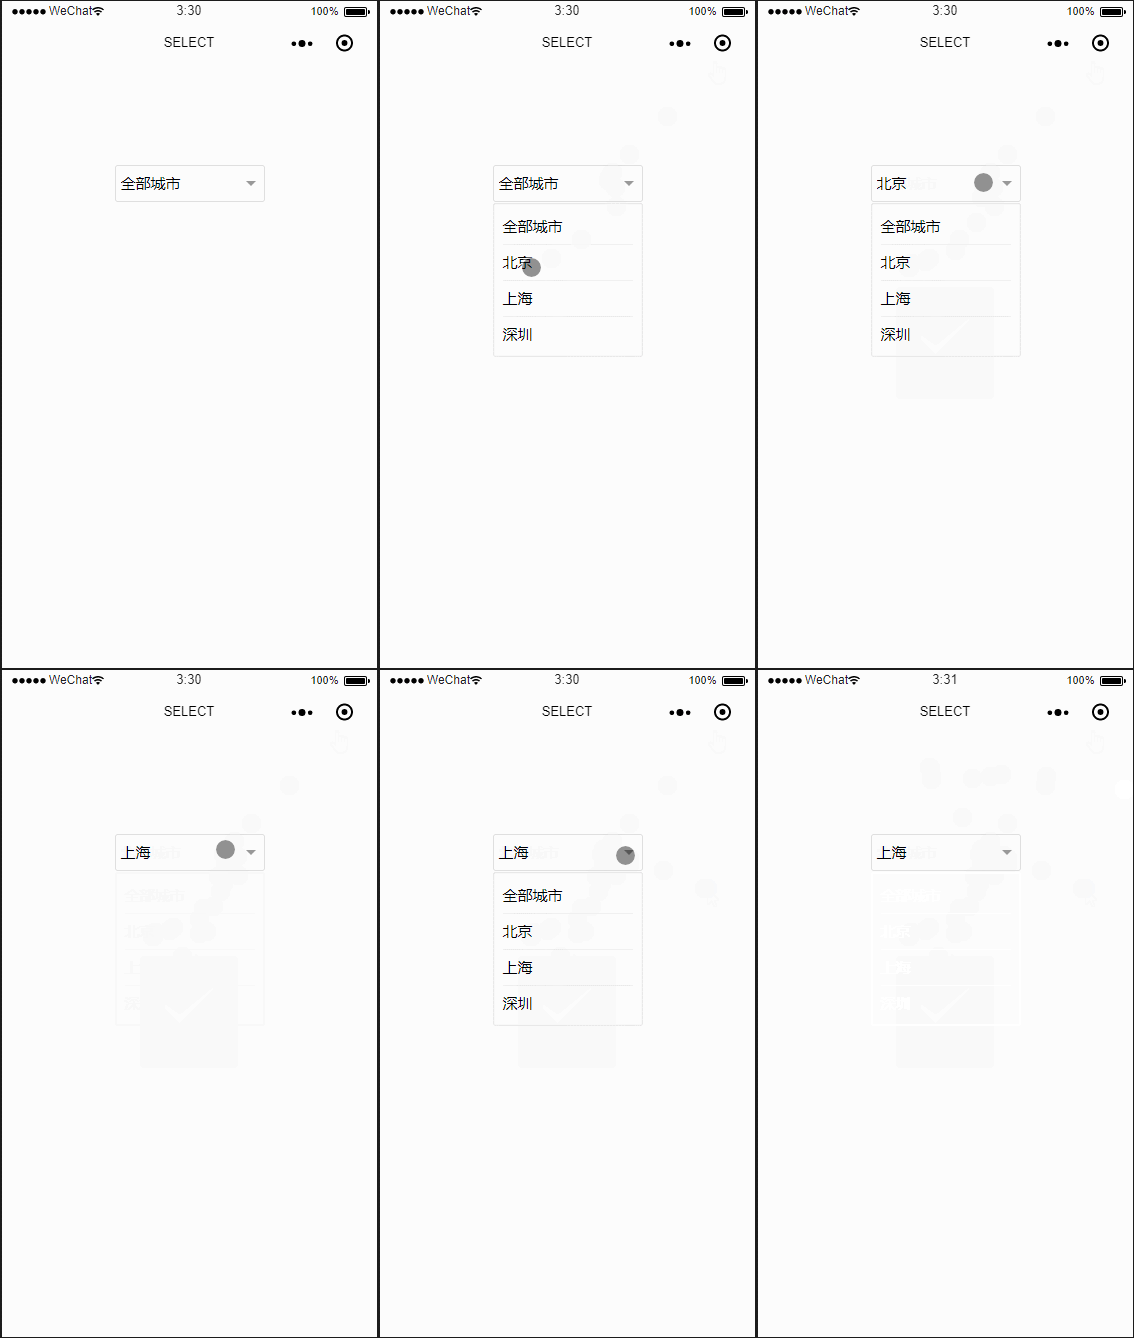
一、源碼地址 https://github.com/imxiaoer/WeChatMiniSelect 二、效果圖 錄屏圖片質量較差,所以大家會看到殘影(捂臉) 三、組件源碼 1. select.wxml 說明:用 catchtap 而不用 bindtap 是為了阻止事件冒泡,為了實現點擊頁面其他地 ...
一、源碼地址
https://github.com/imxiaoer/WeChatMiniSelect
二、效果圖

錄屏圖片質量較差,所以大家會看到殘影(捂臉)
三、組件源碼
1. select.wxml
<view class="select-box">
  <view class="select-current" catchtap="openClose">
    <text class="current-name">{{current.name}}</text>
  </view>
  <view class="option-list" wx:if="{{isShow}}" catchtap="optionTap">
    <text class="option"
      data-id="{{defaultOption.id}}"
      data-name="{{defaultOption.name}}">{{defaultOption.name}}
    </text>
    <text class="option"
      wx:for="{{result}}"
      wx:key="{{item.id}}"
      data-id="{{item.id}}"
      data-name="{{item.name}}">{{item.name}}
    </text>
  </view>
</view>
說明:用 catchtap 而不用 bindtap 是為了阻止事件冒泡,為了實現點擊頁面其他地方關閉 select, 所以在父頁面(index.wxml)最外層綁定了 bindtap="close" 方法, 不阻止冒泡的話會執行父組件的 close 方法
2. select.js
Component({
  properties: {
    options: {
      type: Array,
      value: []
    },
    defaultOption: {
      type: Object,
      value: {
        id: '000',
        name: '全部城市'
      }
    },
    key: {
      type: String,
      value: 'id'
    },
    text: {
      type: String,
      value: 'name'
    }
  },
  data: {
    result: [],
    isShow: false,
    current: {}
  },
  methods: {
    optionTap(e) {
      let dataset = e.target.dataset
      this.setData({
        current: dataset,
        isShow: false
      });

      // 調用父組件方法,並傳參
      this.triggerEvent("change", { ...dataset })
    },
    openClose() {
      this.setData({
        isShow: !this.data.isShow
      })
    },

    // 此方法供父組件調用
    close() {
      this.setData({
        isShow: false
      })
    }
  },
  lifetimes: {
    attached() {
      // 屬性名稱轉換, 如果不是 { id: '', name:'' } 格式,則轉為 { id: '', name:'' } 格式
      let result = []
      if (this.data.key !== 'id' || this.data.text !== 'name') {
        for (let item of this.data.options) {
          let { [this.data.key]: id, [this.data.text]: name } = item
          result.push({ id, name })
        }
      }
      this.setData({
        current: Object.assign({}, this.data.defaultOption),
        result: result
      })
    }
  }
})
說明:properties中的 key 和 text 是為了做屬性名轉換。比如我現在的數據結構如下:
[{
      city_id: '001',
      city_name: '北京'
    }, {
      city_id: '002',
      city_name: '上海'
    }, {
      city_id: '003',
      city_name: '深圳'
 }]
而 select 組件要求的數據結構是:
[{
      id: '001',
      name: '北京'
    }, {
      id: '002',
      name: '上海'
    }, {
      id: '003',
      name: '深圳'
}]
因此我們就要將 city_id 轉換成 id,city_name 轉換成 name。 怎麼實現屬性名轉換呢? 就是通過 key 和 text 這兩個參數。
3. select.json
{
  "component": true,
  "usingComponents": {}
}
4. select.wxss
.select-box {
  position: relative;
  width: 100%;
  font-size: 30rpx;
}

.select-current {
  position: relative;
  width: 100%;
  padding: 0 10rpx;
  line-height: 70rpx;
  border: 1rpx solid #ddd;
  border-radius: 6rpx;
  box-sizing: border-box;
}

.select-current::after {
  position: absolute;
  display: block;
  right: 16rpx;
  top: 30rpx;
  content: '';
  width: 0;
  height: 0;
  border: 10rpx solid transparent;
  border-top: 10rpx solid #999;
}

.current-name {
  display: block;
  width: 85%;
  height: 100%;
  word-wrap: normal;
  overflow: hidden;
}

.option-list {
  position: absolute;
  left: 0;
  top: 76rpx;
  width: 100%;
  padding: 12rpx 20rpx 10rpx 20rpx;
  border-radius: 6rpx;
  box-sizing: border-box;
  z-index: 99;
  box-shadow: 0rpx 0rpx 1rpx 1rpx rgba(0, 0, 0, 0.2) inset;
  background-color: #fff;
}

.option {
  display: block;
  width: 100%;
  line-height: 70rpx;
  border-bottom: 1rpx solid #eee;
}

.option:last-child {
  border-bottom: none;
  padding-bottom: 0;
}
四、組件的使用
index.wxml
<view class="container" bindtap="close">
  <view class="select-wrap">
    <select id="select" options="{{options}}" key="city_id" text="city_name" bind:change="change"></select>
  </view>
</view>


