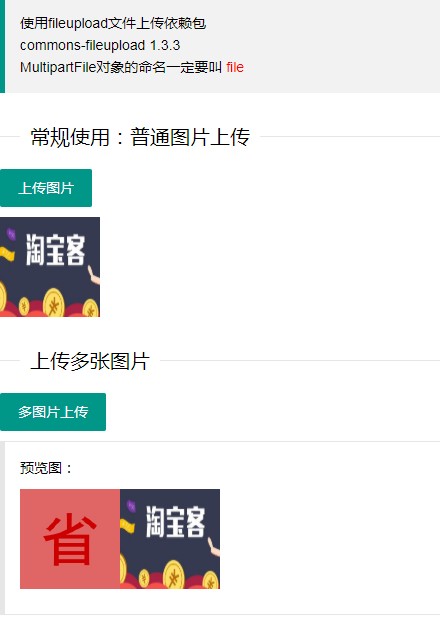
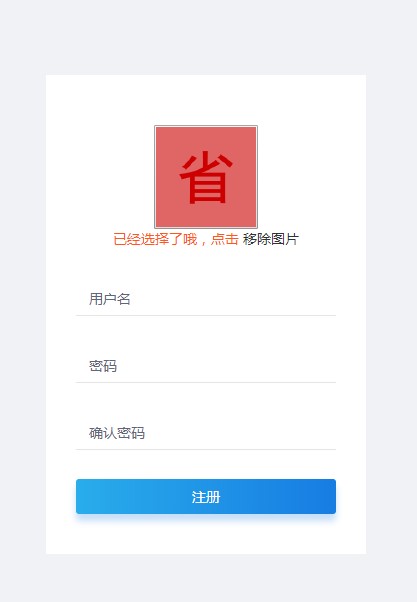
layui(諧音:類UI) 是一款採用自身模塊規範編寫的前端 UI 框架,遵循原生 HTML/CSS/JS 的書寫與組織形式,門檻極低,拿來即用。 layui文件上傳示例地址:https://www.layui.com/demo/upload.html 本次教程是基於springboot2.0的。 ...
layui(諧音:類UI) 是一款採用自身模塊規範編寫的前端 UI 框架,遵循原生 HTML/CSS/JS 的書寫與組織形式,門檻極低,拿來即用。
layui文件上傳示例地址:https://www.layui.com/demo/upload.html
本次教程是基於springboot2.0的。
測試中把layui官網的文件上傳都實現了一遍。
然後還在自行寫了一個登錄註冊,使用了上傳圖像。因為只是測試,所以寫的不規範,諒解。。。
發一些項目截圖,覺得對自己有用的朋友可以自行下載看看。
這個測試項目我發佈在了GitHub上。可以自行下載。如果有什麼問題的地方請大佬一定要留言告訴小弟我,感激不盡!
地址:https://github.com/hunmeng/jpa01
不下載繼續看文章也是可以的。往下滑
 ..
..  ..
..  ..
..
廢話少說,進入主題。
在pom文件導入commons-fileupload 1.3.3依賴或者jar包
        <!--上傳文件依賴-->
        <dependency>
            <groupId>commons-fileupload</groupId>
            <artifactId>commons-fileupload</artifactId>
            <version>1.3.3</version>
        </dependency>
1.導入完畢之後配置bean
@Configuration
public class SpringBean {

    //設置文件上傳的配置
    @Bean(name = "multipartResolver")
    public CommonsMultipartResolver multipartResolver(){
        CommonsMultipartResolver resolver = new CommonsMultipartResolver();
        resolver.setDefaultEncoding("UTF-8");
        resolver.setMaxUploadSize(52428800);//設置上傳文件的最大值
        resolver.setResolveLazily(true);
        return resolver;
    }
}
2.在yml配置文件
file:
  staticAccessPath: /upload/**
  uploadFolder: G://upload/
3.然後配置文件夾映射,不然無法在項目中獲取電腦上的文件
不過這個好像和文件上傳沒有關係,哈哈哈。想配置的就配置一下吧,反正之後獲取圖片時也會配置的。
@Configuration
public class WebMvcConfig extends WebMvcConfigurerAdapter {


    @Value("${file.staticAccessPath}")
    private String staticAccessPath;
    @Value("${file.uploadFolder}")
    private String uploadFolder;

    @Override
    public void addResourceHandlers(ResourceHandlerRegistry registry) {
        registry.addResourceHandler(staticAccessPath).addResourceLocations("file:" + uploadFolder);
        registry.addResourceHandler("/static/**").addResourceLocations("classpath:/static/");
    }

}
4.之後創建一個實體類,當然你也可以不創建,直接把MultipartFile寫在方法參數中,但是一定要做註意參數命名一定要是file,一定要是file,一定要是file。重要的事情說三遍。
實體類中MultipartFile屬性名也必須叫file。寫實體類的好處是可以方便攜帶其他的參數,比如和圖片綁定的用戶id等等
//實體類
public class FileVo implements Serializable {

    private
file;

    public FileVo(MultipartFile multipartFile) {
        this.file = multipartFile;
    }

    public FileVo(){}

    public MultipartFile getFile() {
        return file;
    }

    public void setFile(MultipartFile file) {
        this.file = file;
    }
}
5.然後在Controller層加入以下方法。因為只是測試所以就寫到了controller層,當然你也可以把文件上傳方法放到util類,或者service層
@RestController
@RequestMapping("/upload")
public class UploadController {

    @Value("${file.uploadFolder}")
    private String uploadFolder;

    /**
     * UUID隨機的命名
     * 普通上傳,多圖片上傳
     * @param fileVo
     * @return
     */
    @RequestMapping("/randomUplad")
    public Map randomUplad(FileVo fileVo){
        System.out.println("fileVo:"+fileVo.getFile());
        String fileUrl = fileUpload(fileVo,true);
        return this.file(fileUrl);
    }

    /**
     * 上傳文件的全名稱命名
     * 指定允許上傳的文件類型,允許上傳的文件尾碼,視頻
     * @param fileVo
     * @return
     */
    @RequestMapping("/nameUplad")
    public Map nameUplad(FileVo fileVo){
        System.out.println("fileVo:"+fileVo.getFile());
        String fileUrl = fileUpload(fileVo,false);
        return this.file(fileUrl);
    }


    /**
     * 文件上傳,隨機UUID
     * @param fileVo 上傳的實體
     * @param b 判斷是用隨機的uuid還是文件的名稱,預設為UUID
     * @return 上傳的URL地址
     */
    public String fileUpload(FileVo fileVo,boolean b) {
        if (fileVo.getFile()==null) {
            return null;
        }
        //隨機一個id
        String name = fileVo.getFile().getOriginalFilename();
        if (b) {   //判斷是否用什麼命名,true為UUID,false為上傳文件的全名稱
            //獲取文件的尾碼
            String[] split = name.split("\\.");     //  匹配小數點(.)必須轉義,否則split方法無效
            name = UUID.randomUUID().toString().replaceAll("-", "")+"."+split[split.length-1];
        }
        String fileUrl = this.uploadFolder+"/"+name;
        System.out.println("fileUrl:"+fileUrl);
        File file = new File(fileUrl);
        try {
            fileVo.getFile().transferTo(file);
        } catch (IOException e) {
            fileUrl = null;
        }
        return fileUrl;
    }

    @RequestMapping("/fileUploads")
    public Map fileUploads(MultipartFile file[]){


        return this.file(null);
    }

    /**
     * 返回是否上傳成功的參數
     * @param url
     * @return
     */
    public Map file(String url){
        Map map = new HashMap();
        if (url==null||url=="") {
            map.put("msg","上傳失敗");
            map.put("code",500);
            return map;
        }
        map.put("msg","上傳成功");
        map.put("code",200);
        map.put("url",url);
        return map;
    }

}
6.最後就是前端 的的代碼了,註意導入layui的js和css!
這裡的代碼基本上都是https://www.layui.com/demo/upload.html里的,只修改了提交的地址罷了。
<!DOCTYPE html> <html> <head> <meta charset="utf-8"> <title>layui文件上傳</title> <meta name="renderer" content="webkit"> <meta http-equiv="X-UA-Compatible" content="IE=edge,chrome=1"> <meta name="viewport" content="width=device-width, initial-scale=1, maximum-scale=1"> <link rel="stylesheet" href="//res.layui.com/layui/dist/css/layui.css" media="all"> <!-- 註意:如果你直接複製所有代碼到本地,上述css路徑需要改成你本地的 --> </head> <body> <blockquote class="layui-elem-quote">使用fileupload文件上傳依賴包 <p> commons-fileupload 1.3.3 </p> <p> MultipartFile對象的命名一定要叫 <font color="red" >file</font> </p> </blockquote> <fieldset class="layui-elem-field layui-field-title" style="margin-top: 30px;"> <legend>常規使用:普通圖片上傳</legend> </fieldset> <div class="layui-upload"> <button type="button" class="layui-btn" id="test1">上傳圖片</button> <div class="layui-upload-list"> <img class="layui-upload-img" id="demo1"> <p id="demoText"></p> </div> </div> <fieldset class="layui-elem-field layui-field-title" style="margin-top: 30px;"> <legend>上傳多張圖片</legend> </fieldset> <div class="layui-upload"> <button type="button" class="layui-btn" id="test2">多圖片上傳</button> <blockquote class="layui-elem-quote layui-quote-nm" style="margin-top: 10px;"> 預覽圖: <div class="layui-upload-list" id="demo2"></div> </blockquote> </div> <fieldset class="layui-elem-field layui-field-title" style="margin-top: 30px;"> <legend>指定允許上傳的文件類型</legend> </fieldset> <button type="button" class="layui-btn" id="test3"><i class="layui-icon"></i>上傳文件</button> <button type="button" class="layui-btn layui-btn-primary" id="test4"><i class="layui-icon"></i>只允許壓縮文件</button> <button type="button" class="layui-btn" id="test5"><i class="layui-icon"></i>上傳視頻</button> <button type="button" class="layui-btn" id="test6"><i class="layui-icon"></i>上傳音頻</button> <div style="margin-top: 10px;"> <!-- 示例-970 --> <ins class="adsbygoogle" style="display:inline-block;width:970px;height:90px" data-ad-client="ca-pub-6111334333458862" data-ad-slot="3820120620"></ins> </div> <fieldset class="layui-elem-field layui-field-title" style="margin-top: 30px;"> <legend>設定文件大小限制</legend> </fieldset> <button type="button" class="layui-btn layui-btn-danger" id="test7"><i class="layui-icon"></i>上傳圖片</button> <div class="layui-inline layui-word-aux"> 這裡以限制 60KB 為例 </div> <fieldset class="layui-elem-field layui-field-title" style="margin-top: 30px;"> <legend>同時綁定多個元素,並將屬性設定在元素上</legend> </fieldset> <button class="layui-btn demoMore" lay-data="{url: '/upload/nameUplad'}">上傳A</button> <button class="layui-btn demoMore" lay-data="{url: '/upload/nameUplad', size:5}">上傳B</button> <button class="layui-btn demoMore" lay-data="{url: '/upload/nameUplad', accept: 'file',size:10}">上傳C</button> <fieldset class="layui-elem-field layui-field-title" style="margin-top: 30px;"> <legend>選完文件後不自動上傳</legend> </fieldset> <div class="layui-upload"> <button type="button" class="layui-btn layui-btn-normal" id="test8">選擇文件</button> <button type="button" class="layui-btn" id="test9">開始上傳</button> </div> <fieldset class="layui-elem-field layui-field-title" style="margin-top: 30px;"> <legend>拖拽上傳</legend> </fieldset> <div class="layui-upload-drag" id="test10"> <i class="layui-icon"></i> <p>點擊上傳,或將文件拖拽到此處</p> </div> <fieldset class="layui-elem-field layui-field-title" style="margin-top: 30px;"> <legend>高級應用:製作一個多文件列表</legend> </fieldset> <div class="layui-upload"> <button type="button" class="layui-btn layui-btn-normal" id="testList">選擇多文件</button> <div class="layui-upload-list"> <table class="layui-table"> <thead> <tr><th>文件名</th> <th>大小</th> <th>狀態</th> <th>操作</th> </tr></thead> <tbody id="demoList"></tbody> </table> </div> <button type="button" class="layui-btn" id="testListAction">開始上傳</button> </div> <fieldset class="layui-elem-field layui-field-title" style="margin-top: 30px;"> <legend>綁定原始文件域</legend> </fieldset> <input type="file" name="file" id="test20"> <script src="//res.layui.com/layui/dist/layui.js" charset="utf-8"></script> <!-- 註意:如果你直接複製所有代碼到本地,上述js路徑需要改成你本地的 --> <script> layui.use('upload', function(){ var $ = layui.jquery ,upload = layui.upload; //普通圖片上傳 var uploadInst = upload.render({ elem: '#test1' ,url: '/upload/randomUplad' ,before: function(obj){ //預讀本地文件示例,不支持ie8 obj.preview(function(index, file, result){ $('#demo1').attr('src', result); //圖片鏈接(base64) $('#demo1').attr('height', "100px"); $('#demo1').attr('width', "100px"); }); } ,done: function(res){ //如果上傳失敗 layer.msg(res.code+"---"+res.msg+"---"+res.url); //上傳成功 } ,error: function(){ //演示失敗狀態,並實現重傳 var demoText = $('#demoText'); demoText.html('<span style="color: #FF5722;">上傳失敗</span> <a class="layui-btn layui-btn-xs demo-reload">重試</a>'); demoText.find('.demo-reload').on('click', function(){ uploadInst.upload(); }); } }); //多圖片上傳 upload.render({ elem: '#test2' ,url: '/upload/randomUplad' ,multiple: true ,before: function(obj){ //預讀本地文件示例,不支持ie8 obj.preview(function(index, file, result){ $('#demo2').append('<img width="100px;" height="100px;" src="'+ result +'" alt="'+ file.name +'" class="layui-upload-img">') }); } ,done: function(res){ layer.msg(res.code+"---"+res.msg+"---"+res.url); //上傳完畢 } }); //指定允許上傳的文件類型 upload.render({ elem: '#test3' ,url: '/upload/nameUplad' ,accept: 'file' //普通文件 ,done: function(res){ layer.msg(res.code+"---"+res.msg+"---"+res.url); console.log(res) } }); upload.render({ //允許上傳的文件尾碼 elem: '#test4' ,url: '/upload/nameUplad' ,accept: 'file' //普通文件 ,exts: 'zip|rar|7z' //只允許上傳壓縮文件 ,done: function(res){ layer.msg(res.code+"---"+res.msg+"---"+res.url); console.log(res) } }); upload.render({ elem: '#test5' ,url: '/upload/nameUplad' ,accept: 'video' //視頻 ,done: function(res){ layer.msg(res.code+"---"+res.msg+"---"+res.url); console.log(res) } }); upload.render({ elem: '#test6' ,url:


