
案例環境: 一、Nginx隱藏版本號 方式一:修改配置文件 配置版本號隱藏 方式二:修改源碼包 二、網頁緩存、連接超時、網頁壓縮傳輸 1.網頁緩存: 作用:頁面緩存一般針對靜態網頁進行設置,對動態網頁不用設置緩存時間。方便客戶端在日後進行相同內容的請求時直接返回,以避免重覆請求,加快了訪問速度 配置 ...
案例環境:
| 系統類型 | IP地址 | 主機名 | 所需軟體 |
| Centos 6.5 | 192.168.100.150 | www.linuxfan.cn | nginx-1.6.2.tar.gz |
一、Nginx隱藏版本號
方式一:修改配置文件
配置版本號隱藏
[root@www ~]# curl -I http://www.linuxfan.cn            ##選項為-i
HTTP/1.1 200 OK
Server: nginx/1.6.2
Date: Wed, 11 Jul 2018 16:43:05 GMT
Content-Type: text/html
Content-Length: 612
Last-Modified: Wed, 11 Jul 2018 16:40:55 GMT
Connection: keep-alive
ETag: "5b463317-264"
Accept-Ranges: bytes
[root@www ~]# vi  /usr/local/nginx/conf/nginx.conf          ##在http{}內添加即可
     20     server_tokens off;
:wq
[root@www ~]# nginx -t                   ##檢查nginx配置文件語法
nginx: the configuration file /usr/local/nginx/conf/nginx.conf syntax is ok
nginx: configuration file /usr/local/nginx/conf/nginx.conf test is successful
[root@www ~]# killall  -9  nginx
[root@www ~]# nginx
[root@www ~]# curl -I http://www.linuxfan.cn
HTTP/1.1 200 OK
Server: nginx                           ##版本已經隱藏
Date: Fri, 08 Dec 2017 22:56:00 GMT
Content-Type: text/html
Content-Length: 612
Last-Modified: Fri, 08 Dec 2017 22:47:50 GMT
Connection: keep-alive
ETag: "5a2b1696-264"
Accept-Ranges: bytes
方式二:修改源碼包
[root@localhost ~]# yum -y install pcre-devel zlib-devel popt-devel openssl-*
[root@localhost ~]# useradd -M -s /sbin/nologin nginx
[root@localhost ~]# tar zxf nginx-1.6.2.tar.gz -C /usr/src/
[root@localhost ~]# cd /usr/src/nginx-1.6.2/
[root@localhost nginx-1.6.2]# vim src/core/nginx.h           ##修改源代碼實現隱藏版本
 13 #define NGINX_VERSION      "6.6.6"
 14 #define NGINX_VER          "linuxfan.cn/" NGINX_VERSION
 15
 16 #define NGINX_VAR          "linuxfan.cn"
:wq
[root@localhost nginx-1.6.2]# ./configure --prefix=/usr/local/nginx --user=nginx --group=nginx --with-file-aio --with-http_stub_status_module --with-http_gzip_static_module --with-http_flv_module --with-http_ssl_module --with-pcre && make && make install
[root@localhost nginx-1.6.2]# cd
[root@localhost ~]# ln -s /usr/local/nginx/sbin/nginx /usr/local/sbin/
[root@localhost ~]# nginx
[root@localhost ~]# curl  -I  http://www.linuxfan.cn
HTTP/1.1 200 OK
Server: linuxfan.cn/6.6.6
Date: Fri, 08 Dec 2017 23:06:20 GMT
Content-Type: text/html
Content-Length: 612
Last-Modified: Fri, 08 Dec 2017 23:05:45 GMT
Connection: keep-alive
ETag: "5a2b1ac9-264"
Accept-Ranges: bytes
二、網頁緩存、連接超時、網頁壓縮傳輸
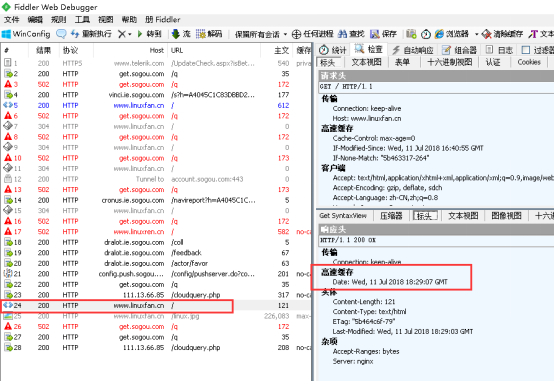
1.網頁緩存:
作用:頁面緩存一般針對靜態網頁進行設置,對動態網頁不用設置緩存時間。方便客戶端在日後進行相同內容的請求時直接返回,以避免重覆請求,加快了訪問速度
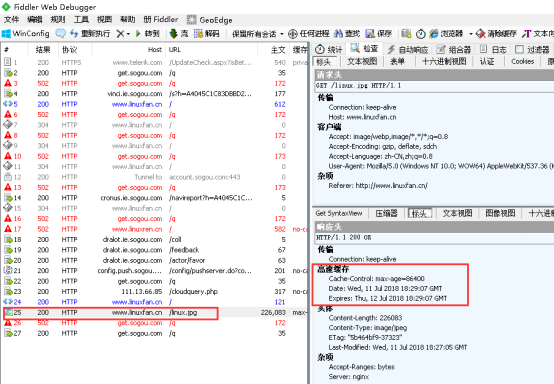
配置nginx緩存:
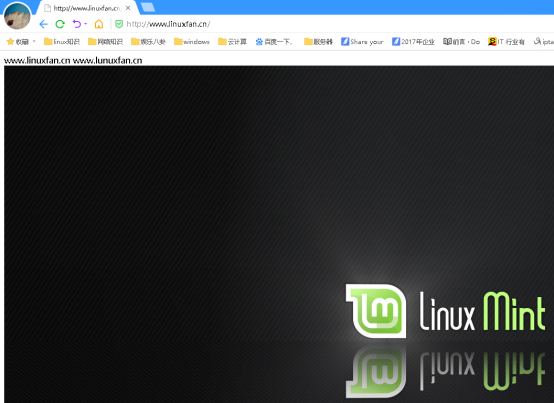
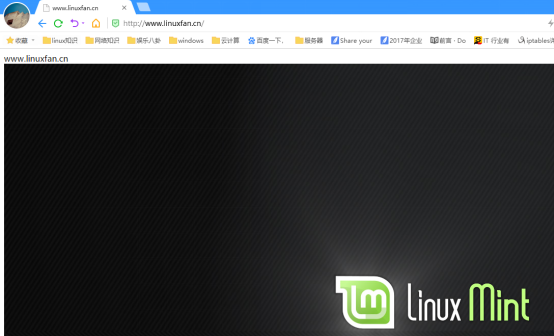
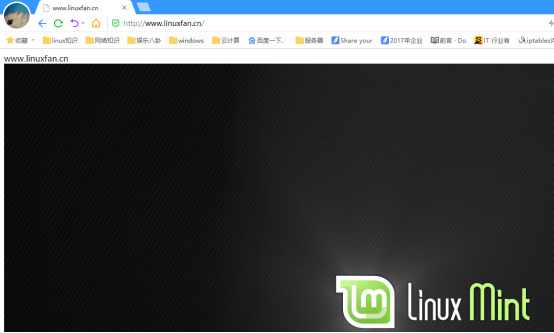
[root@www ~]# cat <<END >/usr/local/nginx/html/index.html
<html>
<head>
<title>www.linuxfan.cn</title>
</head>
<body>
www.linuxfan.cn
<img src="./linux.jpg"/>
</body>
</html>
END
[root@www ~]# ls /usr/local/nginx/html/
index.html  linux.jpg
[root@www ~]# vi /usr/local/nginx/conf/nginx.conf
     55         location  ~  \.(gif|jpg|jpeg|png|bmp|ico)$   {
     56             expires 1d;
     57         }
     58         location  ~  .*\.(js|css)$   {
     59             expires 1h;
     60         }
:wq
[root@www ~]# nginx -t
nginx: the configuration file /usr/local/nginx/conf/nginx.conf syntax is ok
nginx: configuration file /usr/local/nginx/conf/nginx.conf test is successful
[root@www ~]# killall  -9  nginx
[root@www ~]# nginx
客戶端訪問驗證:
2.連接超時:
作用:在企業網站中,為了避免同一個客戶長時間占用連接,造成伺服器資源浪費,可以設置相應的連接超時參數,實現控制連接訪問時間
配置項:
| keepalived_timeout | 設置連接保持超時時間,一般可只設置該參數,預設為 65 秒,可根據網站的情況設置,或者關閉,可在 http 段、 server 段、或者 location 段設置 |
| client_header_timeout | 指定等待客戶端發送請求頭的超時時間 |
| client_body_timeout | 設置請求體讀取超時時間 |
註意: 若出現超時,會返回 408 報錯
[root@www ~]# vi /usr/local/nginx/conf/nginx.conf
     32     keepalive_timeout  65;
     33     client_header_timeout 60;
     34     client_body_timeout 60;
:wq
[root@www ~]# killall  -9  nginx
[root@www ~]# nginx -t
nginx: the configuration file /usr/local/nginx/conf/nginx.conf syntax is ok
nginx: configuration file /usr/local/nginx/conf/nginx.conf test is successful
[root@www ~]# nginx
3.網頁壓縮傳輸:
作用:將服務端傳輸的網頁文件壓縮傳輸,使其更加快速、減少帶寬的占用
配置:
[root@www ~]# vi /usr/local/nginx/conf/nginx.conf
     37     gzip on;              ##開啟 gzip 壓縮輸出
     38     gzip_min_length 1k;             ##用於設置允許壓縮的頁面最小位元組數
     39     gzip_buffers 4 16k;             ##表示申請4 個單位為 16k 的記憶體作為壓縮結果流緩存,預設值是申請與原始數據大小相同的記憶體空間來儲存 gzip 壓縮結果
     40     gzip_http_version 1.1;            # #設置識別 http 協議版本,預設是 1.1
     41     gzip_comp_level 2;             ##gzip 壓縮比, 1-9 等級
     42   gzip_types text/plain text/javascript application/x-javascript text/css text/xml application/xml application/xml+rss;         ##壓縮類型,是就對哪些網頁文檔啟用壓縮功能
[root@www ~]# nginx -t
nginx: the configuration file /usr/local/nginx/conf/nginx.conf syntax is ok
nginx: configuration file /usr/local/nginx/conf/nginx.conf test is successful
[root@www ~]# killall nginx
[root@www ~]# nginx
三、訪問控制、定義錯誤頁面、自動索引、目錄別名
1.訪問控制:
作用:限制訪問網站資源
配置項:
| auth_basic "Nginx Status"; | 認證提示文字 |
| auth_basic_user_file /usr/local/nginx/conf/user.conf; | 認證用戶文件,可以使用apache提供的htpasswd命令來生成文件 |
| allow 192.168.100.1; | 允許客戶端ip地址 |
| deny 192.168.100.0/24; | 拒絕的網段 |
配置:
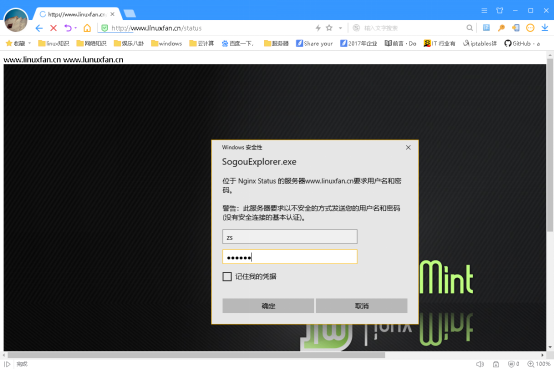
[root@www ~]# yum -y install httpd-tools
[root@www ~]# htpasswd -c /usr/local/nginx/conf/user.conf zs
[root@www ~]# cat /usr/local/nginx/conf/user.conf
zs:VJVdQdVHEIvZo
[root@www ~]# vi /usr/local/nginx/conf/nginx.conf
     70         location /status        {
     71                 stub_status on;
     72                 access_log off;
     73                 auth_basic "Nginx Status";
     74                 auth_basic_user_file /usr/local/nginx/conf/user.conf;
     75                 allow 192.168.100.1;
     76                 deny 192.168.100.0/24;
     77         }
[root@ www ~]# killall -9 nginx
[root@ www ~]# nginx
客戶端訪問驗證:
2.定義錯誤頁面:
作用:根據客戶端的訪問網站的返回狀態碼,為其指定到特定的錯誤頁面
配置:
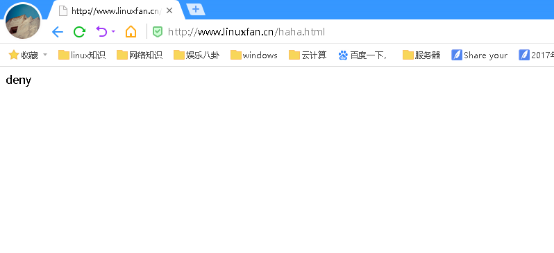
[root@ www ~]# vi /usr/local/nginx/conf/nginx.conf
     78         error_page 403 404 /404.html;
     79         location = /404.html {
     80         root html;
     81         }
[root@ www ~]# echo "deny" >>/usr/local/nginx/html/404.html
[root@ www ~]# killall -9 nginx
[root@www ~]# nginx
客戶端訪問驗證:
3.自動索引:
作用:將網站轉化為類似ftp的站點,作為共用文件的工具
配置:
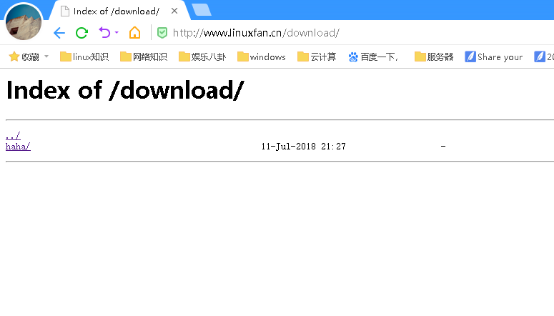
[root@www ~]# mkdir  -p  /usr/local/nginx/html/download/haha/
[root@www ~]# touch /usr/local/nginx/html/download/haha/{1..10}.txt
[root@www ~]# vi /usr/local/nginx/conf/nginx.conf
     82         location /download {
     83                 autoindex on;
     84         }
[root@www ~]# killall -9 nginx
[root@www ~]# nginx
客戶端訪問測試:
4.目錄別名:
作用:將功能變數名稱尾碼的路徑設置一個別名,通過多種方式訪問
配置:
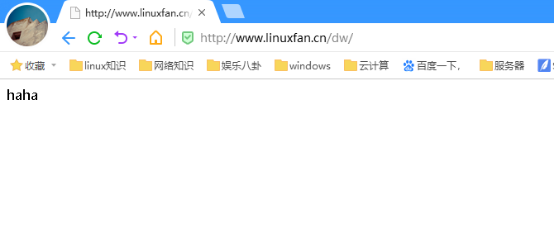
[root@www ~]# vi /usr/local/nginx/conf/nginx.conf
     85         location /dw {
     86                 alias /usr/local/nginx/html/haha/;
     87         }
[root@www ~]# mkdir /usr/local/nginx/html/haha
[root@www ~]# echo "haha" >/usr/local/nginx/html/haha/index.html
[root@www ~]# killall -9 nginx
[root@www ~]# nginx
客戶端訪問測試:

四、日誌分割
方式:腳本方式
技術要點:
a.剪切日誌後,使用kill -USR1發送信號重新生成日誌文件,同時還不影響網站請求處理進程。
b.錯誤時通過echo和tee -a命令將錯誤顯示的同時寫入到日誌文件/var/log/messages。
[root@www ~]# vi /root/cut_nginx_log.sh
#!/bin/bash
# by www.linuxfan.cn cut_nginx_log.sh
datetime=$(date -d "-1 day" "+%Y%m%d")
log_path="/usr/local/nginx/logs"
pid_path="/usr/local/nginx/logs/nginx.pid"
mkdir -p $log_path/backup
if [ -f $pid_path ]
then
mv $log_path/access.log $log_path/backup/access.log-$datetime
kill -USR1 $(cat $pid_path)  ##USR1通常被用來告知應用程式重載配置文件;
find $log_path/backup -mtime +30 | xargs rm -f
else
echo "Error,Nginx is not working!"  >> /var/log/messages
fi
:wq
[root@www ~]# chmod +x /root/cut_nginx_log.sh
[root@www ~]# echo "0 0 * * * /root/cut_nginx_log.sh" >>/var/spool/cron/root
[root@www ~]# crontab -l
0 0 * * * /root/cut_nginx_log.sh
[root@www ~]# sh -x /root/cut_nginx_log.sh
[root@www ~]# ls /usr/local/nginx/logs/
access.log  backup  error.log  nginx.pid
[root@www ~]# ls /usr/local/nginx/logs/backup/
access.log-20171208
五、防盜鏈
作用:防盜鏈就是防止別人盜用伺服器中的圖片、文件、視頻等相關資源。防盜鏈:是通過location + rewrite實現的
應用舉例:
location ~* \.(wma|wmv|asf|mp3|mmf|zip|rar|jpg|gif|png|swf|flv)$ {
valid_referers none blocked *.linuxfan.cn linuxfan.cn;
if ($invalid_referer) {
rewrite ^/ http://www.linuxfan.cn/error.jpg;
第一行: wma|wmv|asf|mp3|mmf|zip|rar|jpg|gif|png|swf|flv 表示對這些尾碼的文件進行防盜鏈。
第二行:valid_referers表示被允許的URL,none表示瀏覽器中 referer(Referer 是 header 的一部分,當瀏覽器向 web 伺服器發送請求的時候,一般會帶上 Referer,告訴伺服器我是從哪個頁面鏈接過來的,伺服器基此可以獲得一些信息用於處理) 為空的情況,就直接在瀏覽器訪問圖片,blocked referer 不為空的情況,但是值被代理或防火牆刪除了,這些值不以http://或 https://開頭,*.linuxfan是匹配URL的功能變數名稱。
第三行:if{}判斷如果是來自於invalid_referer(不被允許的URL)鏈接,即不是來自第二行指定的URL,就強制跳轉到錯誤頁面,當然直接返回 404 (return 404)也是可以的,也可以是圖片。
註意:防盜鏈測試時,不要和expires配置一起使用。
案例環境:
| 系統類型 | IP地址 | 主機名 | 所需軟體 |
| Centos 6.5 | 192.168.100.150 | www.linuxfan.cn | nginx-1.6.2.tar.gz |
| Centos 6.5 | 192.168.100.151 | www.linuxren.cn | nginx-1.6.2.tar.gz |
1.搭建並配置www.linuxfan.cn
[root@linuxfan ~]# yum -y install pcre-devel zlib-devel popt-devel openssl-devel openssl
[root@linuxfan ~]# useradd -M -s /sbin/nologin nginx
[root@linuxfan ~]# tar zxvf nginx-1.6.2.tar.gz -C /usr/src/
[root@linuxfan ~]# cd /usr/src/nginx-1.6.2/
[root@linuxfan nginx-1.6.2]#  ./configure --prefix=/usr/local/nginx --user=nginx --group=nginx --with-file-aio --with-http_stub_status_module --with-http_gzip_static_module --with-http_flv_module --with-http_ssl_module --with-pcre && make && make install
[root@linuxfan nginx-1.6.2]# cd
[root@linuxfan ~]# ln -s /usr/local/nginx/sbin/nginx /usr/local/sbin/
[root@linuxfan ~]# nginx
[root@linuxfan ~]# netstat -utlpn |grep 80
tcp        0      0 0.0.0.0:80                  0.0.0.0:*                   LISTEN      5618/nginx
[root@linuxfan ~]# vi /usr/local/nginx/html/index.html
<html>
<head>
<title>www.linuxfan.cn</title>
</head>
<body>
www.lunuxfan.cn
<img src="./linux.jpg"/>
</body>
</html>
[root@linuxfan ~]# ls /usr/local/nginx/html/
index.html  linux.jpg
客戶端訪問測試:
2.搭建並配置www.linuxren.cn
[root@linuxren ~]# yum -y install pcre-devel zlib-devel popt-devel openssl-devel openssl
[root@linuxren ~]# useradd -M -s /sbin/nologin nginx
[root@linuxren ~]# tar zxvf nginx-1.6.2.tar.gz -C /usr/src/
[root@linuxren ~]# cd /usr/src/nginx-1.6.2/
[root@linuxren nginx-1.6.2]#  ./configure --prefix=/usr/local/nginx --user=nginx --group=nginx --with-file-aio --with-http_stub_status_module --with-http_gzip_static_module --with-http_flv_module --with-http_ssl_module --with-pcre && make && make install
[root@linuxren nginx-1.6.2]# cd
[root@linuxren ~]# ln -s /usr/local/nginx/sbin/nginx /usr/local/sbin/
[root@linuxren ~]# nginx
[root@linuxren ~]# netstat -utlpn |grep 80
tcp        0      0 0.0.0.0:80                  0.0.0.0:*                   LISTEN      5618/nginx
[root@linuxren ~]# vi /usr/local/nginx/html/index.html
<html>
<head>
<title>www.linuxren.cn</title>
</head>
<body>
www.linuxren.cn
<img src="http://www.linuxfan.cn/linux.jpg"/>
</body>
</html>
客戶端訪問測試:

3.為linuxfan主機設置防盜鏈
[root@linuxfan ~]# vi /usr/local/nginx/conf/nginx.conf
      location ~* \.(wma|wmv|asf|mp3|mmf|zip|rar|jpg|gif|png|swf|flv|jpeg) {
                  valid_referers nonde blocked  *.linuxfan.cn  linuxfan.cn;
                  if  ($invalid_referer){
                          rewrite  ^/  http://www.linuxfan.cn/error.jpg;
                      }
              }
##註意:不得存在以下配置:
     55         location  ~  \.(gif|jpg|jpeg|png|bmp|ico)$   {
     56             expires 1d;
     57         }
[root@linuxfan ~]# killall -9 nginx
[root@ linuxfan ~]# nginx
4.清空瀏覽器的緩存,再次訪問網站測試
六、虛擬主機
作用:在同一臺伺服器上部署多個網站,減免資源的占用
實現方式:
1.不同IP,不同功能變數名稱,相同埠
2.相同IP,相同功能變數名稱,不同埠
3.相同IP,相同埠,不同功能變數名稱
案例環境:
| 系統類型 | IP地址 | 主機名 | 所需軟體 |
| Centos 6.5 | 192.168.100.151 | www.linuxren.cn | nginx-1.6.2.tar.gz |
方式一:不同IP,不同功能變數名稱,相同埠
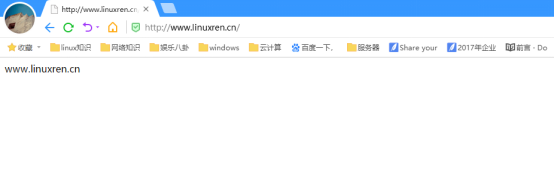
[root@linuxren ~]# ip a |grep 192.168.100
    inet 192.168.100.151/24 brd 192.168.100.255 scope global eth0
    inet 192.168.100.200/24 brd 192.168.100.255 scope global secondary eth0:0
[root@linuxren ~]# vi /usr/local/nginx/conf/nginx.conf
worker_processes 1;
        events {
           use epoll;
           worker_connections 4096;
                }
http {
        include mime.types;
        default_type application/octet-stream;
        log_format main '$remote_addr -$remote_user [$time_local] "$request"'
                        '$status $body_bytes_sent "$http_referer" '
                        '"$http_user_agent" "$http_x_forwarded_for" ';
        access_log logs/access.log main;
        sendfile  on;
        keepalive_timeout 65;
  server {
    listen 192.168.100.151:80;
    server_name www.linuxfan.cn;
    charset utf-8;
    access_log logs/linuxfan.access.log main;
    location / {
     root /var/www/linuxfan/;
     index index.html index.php;
       }
     }
  server {
    listen 192.168.100.200:80;
    server_name www.linuxren.cn;
    charset utf-8;
    access_log logs/linuxren.access.log main;
    location / {
     root  /var/www/linuxren/;
     index index.html index.php;
       }
     }
  }
[root@linuxren ~]# mkdir -p /var/www/linuxfan
[root@linuxren ~]# mkdir -p /var/www/linuxren
[root@linuxren ~]# echo "www.linuxfan.cn" >/var/www/linuxfan/index.html
[root@linuxren ~]# echo "www.linuxren.cn" >/var/www/linuxren/index.html
[root@linuxren ~]# killall -9 nginx
[root@linuxren ~]# nginx
客戶端訪問測試:
方式二:相同IP,不同功能變數名稱,相同埠
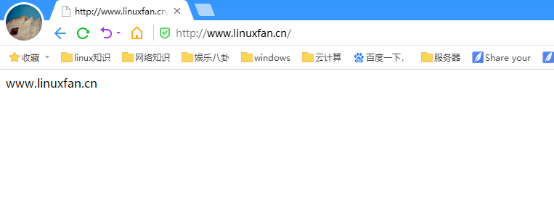
[root@linuxren ~]# vi /usr/local/nginx/conf/nginx.conf
worker_processes 1;
        events {
           use epoll;
           worker_connections 4096;
                }
http {
        include mime.types;
        default_type application/octet-stream;
        log_format main '$remote_addr -$remote_user [$time_local] "$request"'
                        '$status $body_bytes_sent "$http_referer" '
                        '"$http_user_agent" "$http_x_forwarded_for" ';
        access_log logs/access.log main;
        sendfile  on;
        keepalive_timeout 65;
  server {
    listen 192.168.100.151:80;
    server_name www.linuxfan.cn;
    charset utf-8;
    access_log logs/linuxfan.access.log main;
    location / {
     root /var/www/linuxfan/;
     index index.html index.php;
       }
     }
  server {
    listen 192.168.100.151:80;
    server_name www.linuxren.cn;
    charset utf-8;
    access_log logs/linuxren.access.log main;
    location / {
     root  /var/www/linuxren/;
     index index.html index.php;
       }
     }
  }
[root@linuxren ~]# killall -9 nginx
[root@linuxren ~]# nginx
客戶端訪問測試:
方式三:相同IP,不同埠,相同功能變數名稱
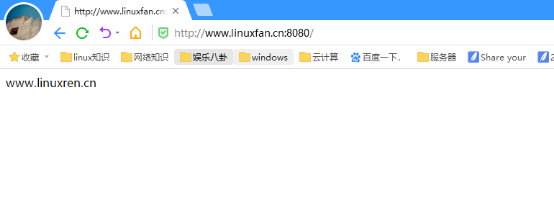
[root@linuxren ~]# vi /usr/local/nginx/conf/nginx.conf
worker_processes 1;
        events {
           use epoll;
           worker_connections 4096;
                }
http {
        include mime.types;
        default_type application/octet-stream;
        log_format main '$remote_addr -$remote_user [$time_local] "$request"'
                        '$status $body_bytes_sent "$http_referer" '
                        '"$http_user_agent" "$http_x_forwarded_for" ';
        access_log logs/access.log main;
        sendfile  on;
        keepalive_timeout 65;
  server {
    listen 192.168.100.151:80;
    server_name www.linuxfan.cn;
    charset utf-8;
    access_log logs/linuxfan.access.log main;
    location / {
     root /var/www/linuxfan/;
     index index.html index.php;
       }
     }
  server {
    listen 192.168.100.151:8080;
    server_name www.linuxfan.cn;
    charset utf-8;
    access_log logs/linuxren.access.log main;
    location / {
     root  /var/www/linuxren/;
     index index.html index.php;
       }
     }
  }
[root@linuxren ~]# killall -9 nginx
[root@linuxren ~]# nginx
客戶端訪問測試:
七、平滑升級
原理:
1.Nginx 的主進程( master process)啟動後完成配置載入和埠綁定等動作, fork 出指定數量的工作進程( worker process),這些子進程會持有監聽埠的文件描述符( fd),並通過在該描述符上添加監聽事件來接受連接( accept)
2.Nginx 主進程在啟動完成後會進入等待狀態,負責響應各類系統消息,如 SIGCHLD、 SIGHUP、SIGUSR2 等
3.主進程支持的信號:
TERM, INT: 立刻退出; QUIT: 等待工作進程結束後再退出
KILL: 強制終止進程; HUP: 重新載入配置文件,使用新的配置啟動工作進程,並逐步關閉舊進程。
USR1: 重新打開日誌文件; USR2: 啟動新的主進程,實現熱升級
WINCH: 逐步關閉工作進程及工作進程支持的信號;
過程:
1.查看舊版 nginx 的編譯參數;
2.編譯新版本 Nginx 源碼包,安裝路徑需與舊版一致,註意:不要執行 make install;
3.備份二進位文件,用新版本的替換;
4.確保配置文件無報錯;
5.發送 USR2 信號:向主進程( master)發送 USR2 信號, Nginx 會啟動一個新版本的 master 進程和對應工作進程,和舊版一起處理請求;
6.發送 WINCH 信號:向舊的 Nginx 主進程( master)發送 WINCH 信號,它會逐步關閉自己的工作進程(主進程不退出),這時所有請求都會由新版 Nginx 處理;
7.發送 QUIT 信號:升級完畢,可向舊的 Nginx 主進程( master)發送( QUIT、 TERM、或者 KILL)信號,使舊的主進程退出;
8.驗證 nginx 版本號,並訪問測試;
配置:
準備軟體包並查看舊版安裝選項
[root@linuxren ~]# ls nginx-1.*
nginx-1.12.0.tar.gz  nginx-1.6.2.tar.gz
[root@linuxren ~]# nginx -V
nginx version: nginx/1.6.2
built by gcc 4.4.7 20120313 (Red Hat 4.4.7-4) (GCC)
TLS SNI support enabled
configure arguments: --prefix=/usr/local/nginx --user=nginx --group=nginx --with-file-aio --with-http_stub_status_module --with-http_gzip_static_module --with-http_flv_module --with-http_ssl_module --with-pcre
安裝新版本Nginx
[root@linuxren ~]# tar zxvf nginx-1.12.0.tar.gz -C /usr/src/
[root@linuxren ~]# cd /usr/src/nginx-1.12.0/
[root@linuxren nginx-1.12.0]# ./configure --prefix=/usr/local/nginx --user=nginx --group=nginx --with-file-aio --with-http_stub_status_module --with-http_gzip_static_module --with-http_flv_module --with-http_ssl_module --with-pcre && make        ##不能加make install,如若添加,則覆蓋了
[root@linuxren nginx-1.12.0]# mv /usr/local/nginx/sbin/nginx   /usr/local/nginx/sbin/nginx.old
[root@linuxren nginx-1.12.0]# cp objs/nginx /usr/local/nginx/sbin/
[root@linuxren nginx-1.12.0]# nginx -t
nginx: the configuration file /usr/local/nginx/conf/nginx.conf syntax is ok
nginx: configuration file /usr/local/nginx/conf/nginx.conf test is successful
使用信號實現熱升級
[root@linuxren ~]# ps aux |grep nginx  |grep -v grep
root       6059(老版本主進程)  0.0  0.2  45000  1032 ?        Ss   13:03   0:00 nginx: master process nginx
nginx      6060  0.0  0.3  45432  1624 ?        S    13:03   0:00 nginx: worker process
[root@linuxren ~]# kill -USR2 6059                   ##發送 USR2 信號:向主進程( master)發送 USR2 信號, Nginx 會啟動一個新版本的 master 進程和對應工作進程,和舊版一起處理請求。
[root@linuxren ~]# kill -WINCH $(cat /usr/local/nginx/logs/nginx.pid)            ##關閉老版本的worker進程
[root@linuxren ~]# kill -QUIT $(cat /usr/local/nginx/logs/nginx.pid)            ##關閉老版本的master進程
[root@linuxren ~]# /usr/local/nginx/sbin/nginx                    ##重新載入新版本的命令
[root@linuxren ~]# ps aux |grep nginx |grep -v grep
root      3864  0.0  0.2  45192  1188 ?        Ss   03:24   0:00 nginx: master process /usr/local/nginx/sbin/nginx
nginx     3865  0.0  0.6  46904  3052 ?        S    03:24   0:00 nginx: worker process
[root@linuxren ~]# nginx -V
nginx version: nginx/1.12.0
built by gcc 4.4.7 20120313 (Red Hat 4.4.7-4) (GCC)
built with OpenSSL 1.0.1e-fips 11 Feb 2013
TLS SNI support enabled
configure arguments: --prefix=/usr/local/nginx --user=nginx --group=nginx --with-file-aio --with-http_stub_status_module --with-http_gzip_static_module --with-http_flv_module --with-http_ssl_module --with-pcre
八、UA實現手機電腦頁面分離、拒絕http客戶端測試、拒絕惡意請求
作用:網站適配PC和手機設備,首先要能做出準確的判斷。HTTP請求的Header中的User-Agent可以區分客戶端的瀏覽器類型,可以通過User-Agent來判斷客戶端的設備
配置:
[root@linuxfan ~]# mkdir -p /var/www/shouji
[root@linuxfan ~]# mkdir -p /var/www/diannao
[root@linuxfan ~]# cat <<END >>/var/www/shouji/index.html
my name is iphone!!!

