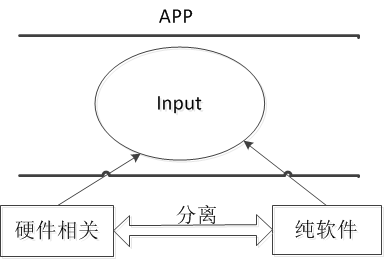
下麵以一個按鍵的實驗作為驅動分離時間簡單學習: 1 #include <linux/module.h> 2 #include <linux/version.h> 3 4 #include <linux/init.h> 5 6 #include <linux/kernel.h> 7 #include ...

下麵以一個按鍵的實驗作為驅動分離時間簡單學習:

 1 #include <linux/module.h>
 2 #include <linux/version.h>
 3
 4 #include <linux/init.h>
 5
 6 #include <linux/kernel.h>
 7 #include <linux/types.h>
 8 #include <linux/interrupt.h>
 9 #include <linux/list.h>
10 #include <linux/timer.h>
11 #include <linux/init.h>
12 #include <linux/serial_core.h>
13 #include <linux/platform_device.h>
14
15
16 /* 分配/設置/註冊一個platform_device */
17
18 static struct resource led_resource[] = {
19     [0] = {
20         .start = 0x56000050,
21         .end   = 0x56000050 + 8 - 1,
22         .flags = IORESOURCE_MEM,
23     },
24     [1] = {
25         .start = 5,
26         .end   = 5,
27         .flags = IORESOURCE_IRQ,
28     }
29
30 };
31
32 static void led_release(struct device * dev)
33 {
34 }
35
36
37 static struct platform_device led_dev = {
38     .name         = "myled",
39     .id       = -1,
40     .num_resources    = ARRAY_SIZE(led_resource),
41     .resource     = led_resource,
42     .dev = {
43         .release = led_release,
44     },
45 };
46
47 static int led_dev_init(void)
48 {
49     platform_device_register(&led_dev);
50     return 0;
51 }
52
53 static void led_dev_exit(void)
54 {
55     platform_device_unregister(&led_dev);
56 }
57
58 module_init(led_dev_init);
59 module_exit(led_dev_exit);
60
61 MODULE_LICENSE("GPL");
led_dev.c

  1 /* 分配/設置/註冊一個platform_driver */
  2
  3 #include <linux/module.h>
  4 #include <linux/version.h>
  5
  6 #include <linux/init.h>
  7 #include <linux/fs.h>
  8 #include <linux/interrupt.h>
  9 #include <linux/irq.h>
 10 #include <linux/sched.h>
 11 #include <linux/pm.h>
 12 #include <linux/sysctl.h>
 13 #include <linux/proc_fs.h>
 14 #include <linux/delay.h>
 15 #include <linux/platform_device.h>
 16 #include <linux/input.h>
 17 #include <linux/irq.h>
 18 #include <asm/uaccess.h>
 19 #include <asm/io.h>
 20
 21 static int major;
 22
 23
 24 static struct class *cls;
 25 static volatile unsigned long *gpio_con;
 26 static volatile unsigned long *gpio_dat;
 27 static int pin;
 28
 29 static int led_open(struct inode *inode, struct file *file)
 30 {
 31     //printk("first_drv_open\n");
 32     /* 配置為輸出 */
 33     *gpio_con &= ~(0x3<<(pin*2));
 34     *gpio_con |= (0x1<<(pin*2));
 35     return 0;
 36 }
 37
 38 static ssize_t led_write(struct file *file, const char __user *buf, size_t count, loff_t * ppos)
 39 {
 40     int val;
 41
 42     //printk("first_drv_write\n");
 43
 44     copy_from_user(&val, buf, count); //    copy_to_user();
 45
 46     if (val == 1)
 47     {
 48         // 點燈
 49         *gpio_dat &= ~(1<<pin);
 50     }
 51     else
 52     {
 53         // 滅燈
 54         *gpio_dat |= (1<<pin);
 55     }
 56
 57     return 0;
 58 }
 59
 60
 61 static struct file_operations led_fops = {
 62     .owner  =   THIS_MODULE,    /* 這是一個巨集,推向編譯模塊時自動創建的__this_module變數 */
 63     .open   =   led_open,
 64     .write    =    led_write,
 65 };
 66
 67 static int led_probe(struct platform_device *pdev)
 68 {
 69     struct resource        *res;
 70
 71     /* 根據platform_device的資源進行ioremap */
 72     res = platform_get_resource(pdev, IORESOURCE_MEM, 0);
 73     gpio_con = ioremap(res->start, res->end - res->start + 1);
 74     gpio_dat = gpio_con + 1;
 75
 76     res = platform_get_resource(pdev, IORESOURCE_IRQ, 0);
 77     pin = res->start;
 78
 79     /* 註冊字元設備驅動程式 */
 80
 81     printk("led_probe, found led\n");
 82
 83     major = register_chrdev(0, "myled", &led_fops);
 84
 85     cls = class_create(THIS_MODULE, "myled");
 86
 87     class_device_create(cls, NULL, MKDEV(major, 0), NULL, "led"); /* /dev/led */
 88
 89     return 0;
 90 }
 91
 92 static int led_remove(struct platform_device *pdev)
 93 {
 94     /* 卸載字元設備驅動程式 */
 95     /* iounmap */
 96     printk("led_remove, remove led\n");
 97
 98     class_device_destroy(cls, MKDEV(major, 0));
 99     class_destroy(cls);
100     unregister_chrdev(major, "myled");
101     iounmap(gpio_con);
102
103     return 0;
104 }
105
106
107 struct platform_driver led_drv = {
108     .probe        = led_probe,
109     .remove        = led_remove,
110     .driver        = {
111         .name    = "myled",
112     }
113 };
114
115
116 static int led_drv_init(void)
117 {
118     platform_driver_register(&led_drv);
119     return 0;
120 }
121
122 static void led_drv_exit(void)
123 {
124     platform_driver_unregister(&led_drv);
125 }
126
127 module_init(led_drv_init);
128 module_exit(led_drv_exit);
129
130 MODULE_LICENSE("GPL");
led_drv.c

 1 #include <sys/types.h>
 2 #include <sys/stat.h>
 3 #include <fcntl.h>
 4 #include <stdio.h>
 5
 6 /* led_test on
 7  * led_test off
 8  */
 9 int main(int argc, char **argv)
10 {
11     int fd;
12     int val = 1;
13     fd = open("/dev/led", O_RDWR);
14     if (fd < 0)
15     {
16         printf("can't open!\n");
17     }
18     if (argc != 2)
19     {
20         printf("Usage :\n");
21         printf("%s <on|off>\n", argv[0]);
22         return 0;
23     }
24
25     if (strcmp(argv[1], "on") == 0)
26     {
27         val  = 1;
28     }
29     else
30     {
31         val = 0;
32     }
33
34     write(fd, &val, 4);
35     return 0;
36 }
led_test.c


