我們知道VMware的網路適配器類型有多種,例如E1000、VMXNET、VMXNET 2 (Enhanced)、VMXNET3等,就性能而言,一般VMXNET3要優於E1000,下麵介紹如果將Linux虛擬機的網路適配器類型從E1000改為VMXNET3。本文測試環境如下 操作系統 :Oracle... ...
我們知道VMware的網路適配器類型有多種,例如E1000、VMXNET、VMXNET 2 (Enhanced)、VMXNET3等,就性能而言,一般VMXNET3要優於E1000,下麵介紹如果將Linux虛擬機的網路適配器類型從E1000改為VMXNET3。本文測試環境如下
操作系統 :Oracle Linux Server release 5.7
虛擬機版本 :Vmware 5.1
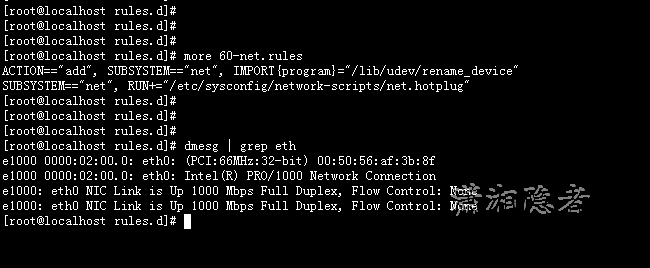
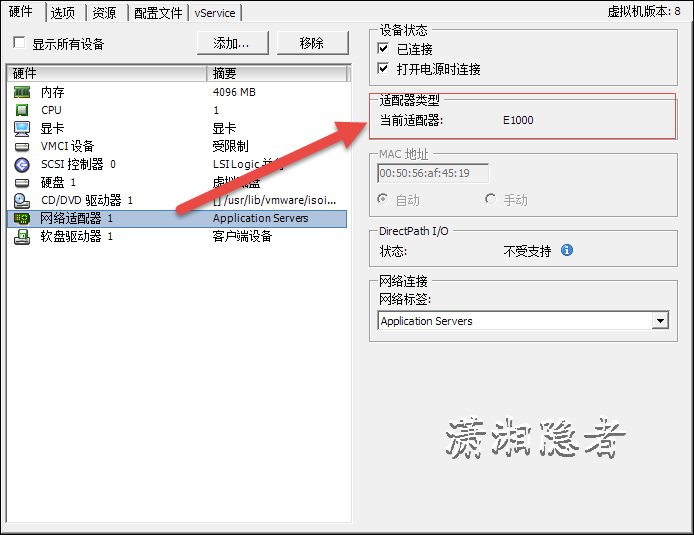
如下所示,測試前,我們可以先看看網卡類型為e1000, 此版本的Linux似乎沒有配置文件/etc/udev/rules.d/70-persistent-net.rules。只有配置文件60-net.rules.具體信息請見下圖
方法1:在vSphere Client中更改適配器類型
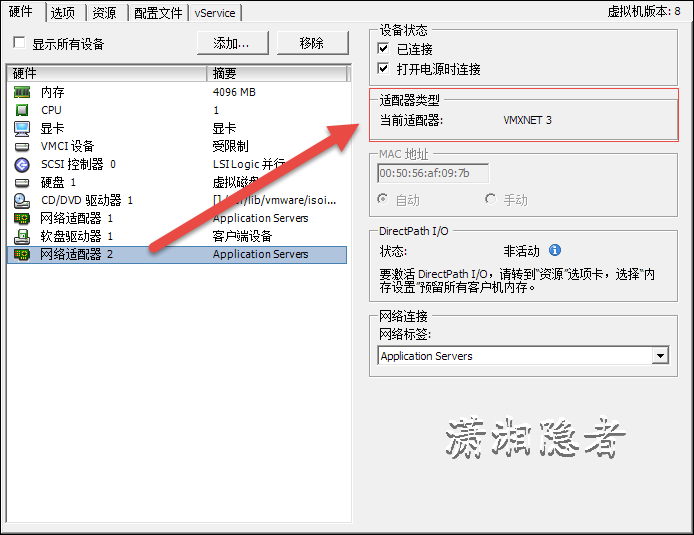
我們通過vSphere Client客戶端,添加網路適配器2(適配器類型為VMXNET3),然後刪除網路適配器1,重啟伺服器
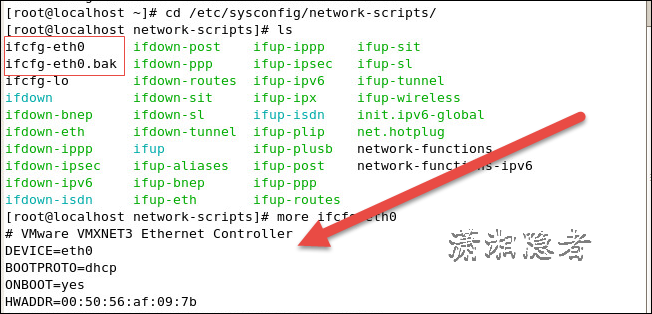
重啟後,在/etc/sysconfig/network-scripts/下,你會看到有ifcfg-eth0和ifcfg-eth0.bak兩個配置文件,系統自動生成了新的配置文件並將原來的配置文件重命名了
如下所示,新生成的配置文件ifcfg-eth0是動態獲取IP,需要重新配置網路信息,重啟網路服務即可即可解決問題。
[root@localhost ~]# more /etc/sysconfig/network-scripts/ifcfg-eth0# VMware VMXNET3 Ethernet ControllerDEVICE=eth0
BOOTPROTO=dhcp
ONBOOT=yes
HWADDR=00:50:56:af:09:7b
[root@localhost ~]# more /etc/sysconfig/network-scripts/ifcfg-eth0.bak # Intel Corporation 82545EM Gigabit Ethernet Controller (Copper)DEVICE=eth0
BOOTPROTO=static
HWADDR=00:50:56:AF:45:19
ONBOOT=yes
IPADDR=192.168.9.24
GATEWAY=192.168.9.8
NETMASK=255.255.255.0
註意,在我多次測試驗證過程中,如果伺服器沒有安裝Vmware Tools,那麼在操作過程中就會遇到“Device eth0 does not seem to be present, delaying initialization”,查看當前的eth設備,你會發現只有lo設備。怎麼都搞不定。這個可不像Linux 克隆虛擬機引起的“Device eth0 does not seem to be present, delaying initialization”那樣輕鬆搞定
[root@localhost1 ~]# ls /sys/class/net/lo
[root@localhost ~]#
方法2:修改.vmx 文件來更改適配器類型
1:關閉LNTEST虛擬機。
2:選擇LNTEST,單擊右鍵選擇“從清單中移除”
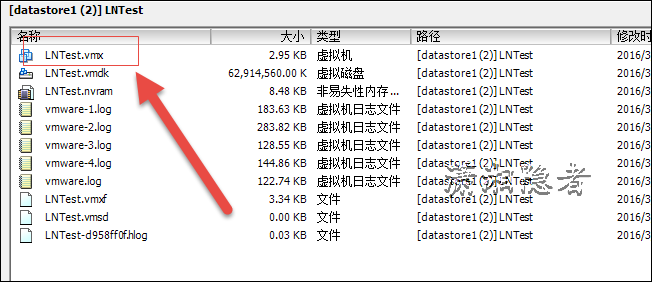
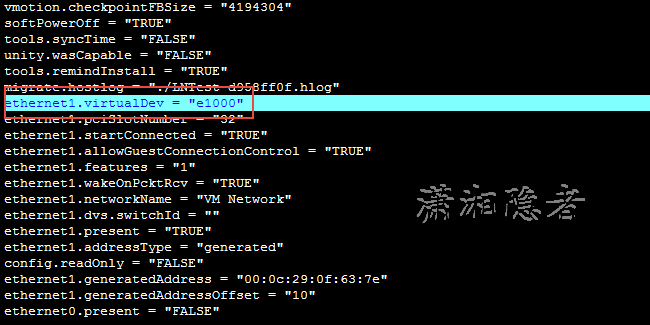
3:在數據存儲瀏覽器中找到LNTest對應的目錄,找到LNTest.vmx文件。找到參數ethernet1.virtualDev(有可能為ethernet0)將其值從"e1000"改為"vmxnet3"
vmotion.checkpointFBSize = "4194304"softPowerOff = "TRUE"tools.syncTime = "FALSE"unity.wasCapable = "FALSE"tools.remindInstall = "TRUE"migrate.hostlog = "./LNTest-d958ff0f.hlog"ethernet1.virtualDev = "vmxnet3"ethernet1.pciSlotNumber = "32"ethernet1.startConnected = "TRUE"ethernet1.allowGuestConnectionControl = "TRUE"ethernet1.features = "1"ethernet1.wakeOnPcktRcv = "TRUE"ethernet1.networkName = "VM Network"ethernet1.dvs.switchId = ""ethernet1.present = "TRUE"ethernet1.addressType = "generated"config.readOnly = "FALSE"ethernet1.generatedAddress = "00:0c:29:0f:63:7e"ethernet1.generatedAddressOffset = "10"ethernet0.present = "FALSE"
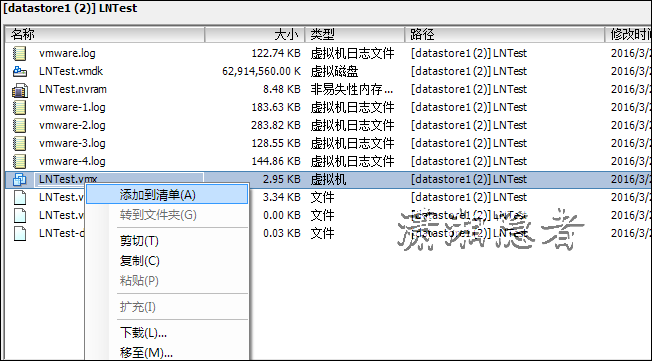
4: 選擇vmx文件,將其“添加到清單”,然後重啟電源,一切搞定,都不需要修改任何網路配置信息。
方法3:使用PowerCLI修改網路適配器類型
PowerCLI,即VMware vSphere PowerCLI 是一款功能強大的命令行工具來修改。 這個方法沒有實際驗證過,不過看其介紹,似乎是最簡單的一種方法。
Change the Adapter Type with PowerCLI
The easiest method to change the adapter type is by using this little PowerCLI command. Just replace <VM> with your virtual machines name. You can run this script without disruption while the virtual machine is running but it’s not active until you have powered off the virtual machine. A reboot does not activate the configuration.
Get-VM -name "<VM>" | Get-NetworkAdapter | Where { $_.Type -eq "E1000"} | Set-NetworkAdapter -Type "vmxnet3"
Prior to change please make sure that your operating system contains the vmxnet3 driver or you have installed the VMware Tools. To check the required kernel module type “modprobe vmxnet3“. If you don’t get an error message you should be fine.
參考資料:
http://www.virten.net/2013/02/migrate-e1000-adapter-to-vmxnet3-with-linux-virtual-machines/

