
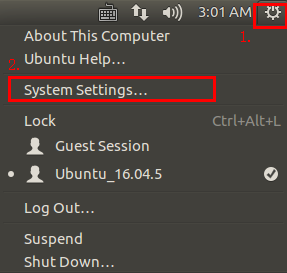
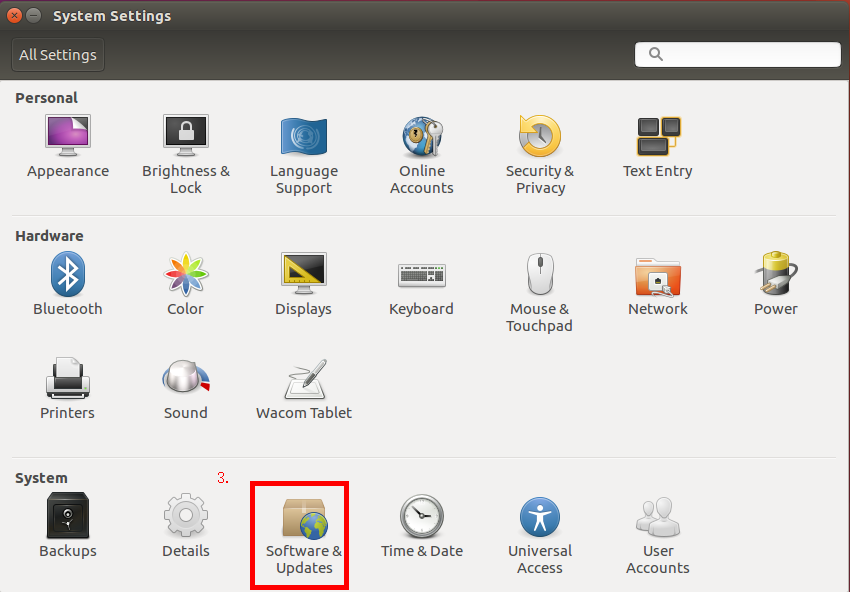
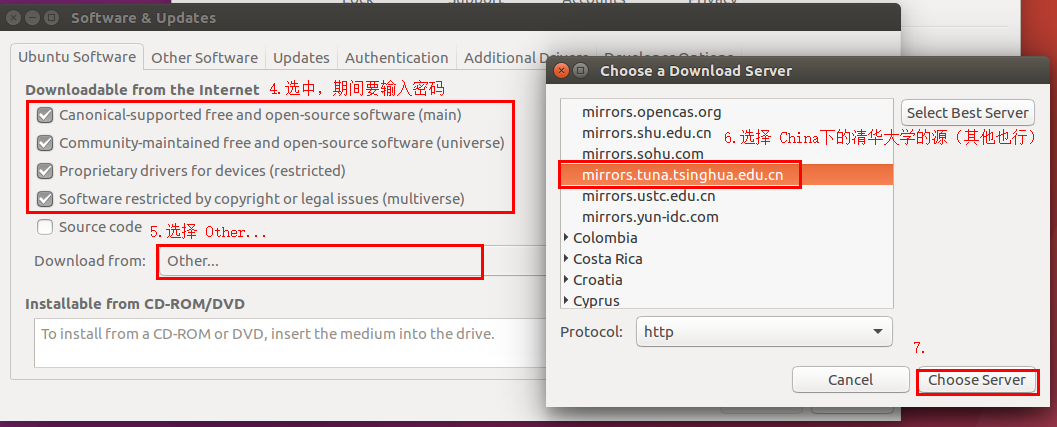
1. 配置安裝源 因為預設是使用Ubuntu官方伺服器,國內電腦使用外國伺服器較慢,所以需使用國內的伺服器(以下清華大學伺服器為例)。 方法一: (此過程很慢,實在不動就取消吧,載入一部分也夠用,以後要用在去把源寫入文件) 方法二: 1.到清華官網複製源列表 2.打開終端輸入: 3.把複製的源列表粘 ...
1. 配置安裝源
因為預設是使用Ubuntu官方伺服器,國內電腦使用外國伺服器較慢,所以需使用國內的伺服器(以下清華大學伺服器為例)。方法一:
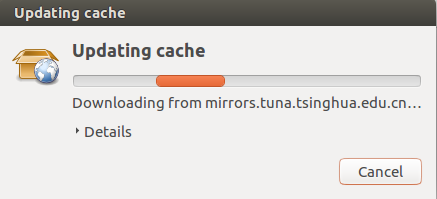
(此過程很慢,實在不動就取消吧,載入一部分也夠用,以後要用在去把源寫入文件)
方法二:
1.清華大學開源軟體鏡像站官網複製源列表

2.打開終端輸入:
sudo cp /etc/apt/source.list /etc/apt/source.list.bash
sudo gedit /etc/apt/source.list
3.把複製的源列表粘貼到文件中,保存
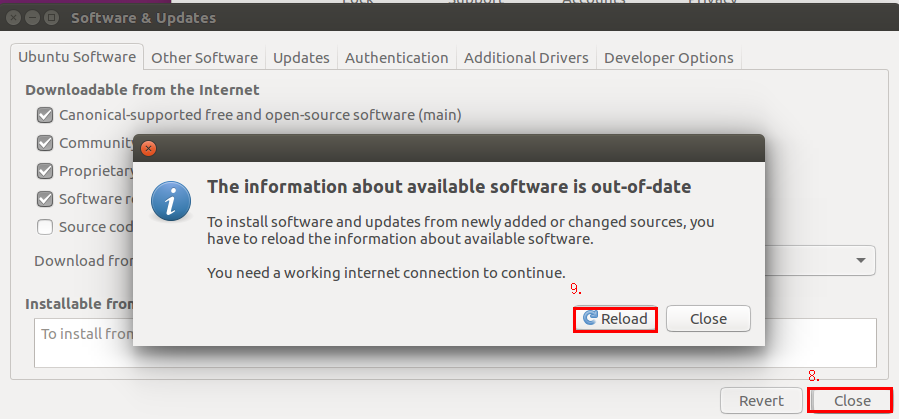
4.終端輸入: sudo apt-get update
5.等待...(時間不短)
附:16.04LTS 軟體源文件
# 預設註釋了源碼鏡像以提高 apt update 速度,如有需要可自行取消註釋
deb https://mirrors.tuna.tsinghua.edu.cn/ubuntu/ xenial main restricted universe multiverse
# deb-src https://mirrors.tuna.tsinghua.edu.cn/ubuntu/ xenial main restricted universe multiverse
deb https://mirrors.tuna.tsinghua.edu.cn/ubuntu/ xenial-updates main restricted universe multiverse
# deb-src https://mirrors.tuna.tsinghua.edu.cn/ubuntu/ xenial-updates main restricted universe multiverse
deb https://mirrors.tuna.tsinghua.edu.cn/ubuntu/ xenial-backports main restricted universe multiverse
# deb-src https://mirrors.tuna.tsinghua.edu.cn/ubuntu/ xenial-backports main restricted universe multiverse
deb https://mirrors.tuna.tsinghua.edu.cn/ubuntu/ xenial-security main restricted universe multiverse
# deb-src https://mirrors.tuna.tsinghua.edu.cn/ubuntu/ xenial-security main restricted universe multiverse

# 預發佈軟體源,不建議啟用
# deb https://mirrors.tuna.tsinghua.edu.cn/ubuntu/ xenial-proposed main restricted universe multiverse
# deb-src https://mirrors.tuna.tsinghua.edu.cn/ubuntu/ xenial-proposed main restricted universe multiverse
2. 安裝搜狗輸入法
1.加入ubuntu kylin的apt源
sudo gedit /etc/apt/sources.list.d/ubuntukylin.list
2.不論文件是否為空,加入下麵一行:
deb http://archive.ubuntukylin.com:10006/ubuntukylin trusty main
3.更新,安裝
sudo apt-get update
sudo apt-get install sogoupinyin 這條命令會自動把fcitx的依賴安裝上。(如果之前沒有安裝)
4.配置
(有個提示,此時最好點擊 remind me later,要不然會下載很長時間)

重啟或註銷,桌面右上角會出現  ,
,
選擇Input Method選項卡,然後點擊左下角加號,彈出的選項卡中取消勾選”Only Show Current Language”選項,搜索”sogou”定位到搜狗拼音輸入法,確定。
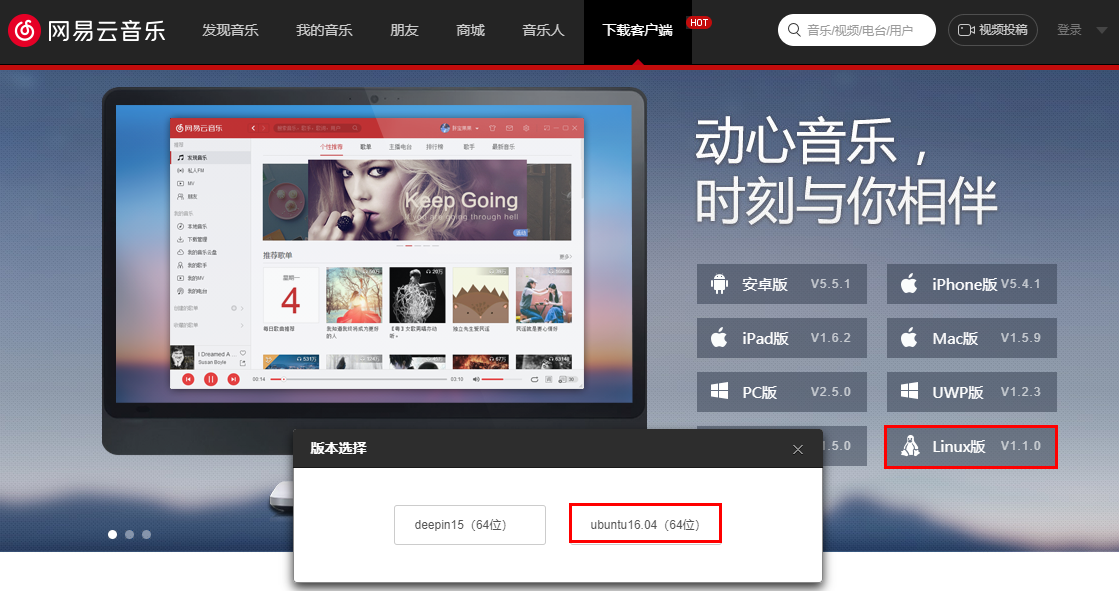
3. 安裝網易雲音樂客戶端
1.官網下載deb包
2.終端里cd到deb包的下載目錄
3.安裝
sudo dpkg -i netease-cloud-music_1.0.0_amd64_ubuntu16.04.deb
如果出現依賴性錯誤,解決下依賴問題,然後重新走一遍安裝
sudo apt-get -f install
4.運行: sudo netease-cloud-music


