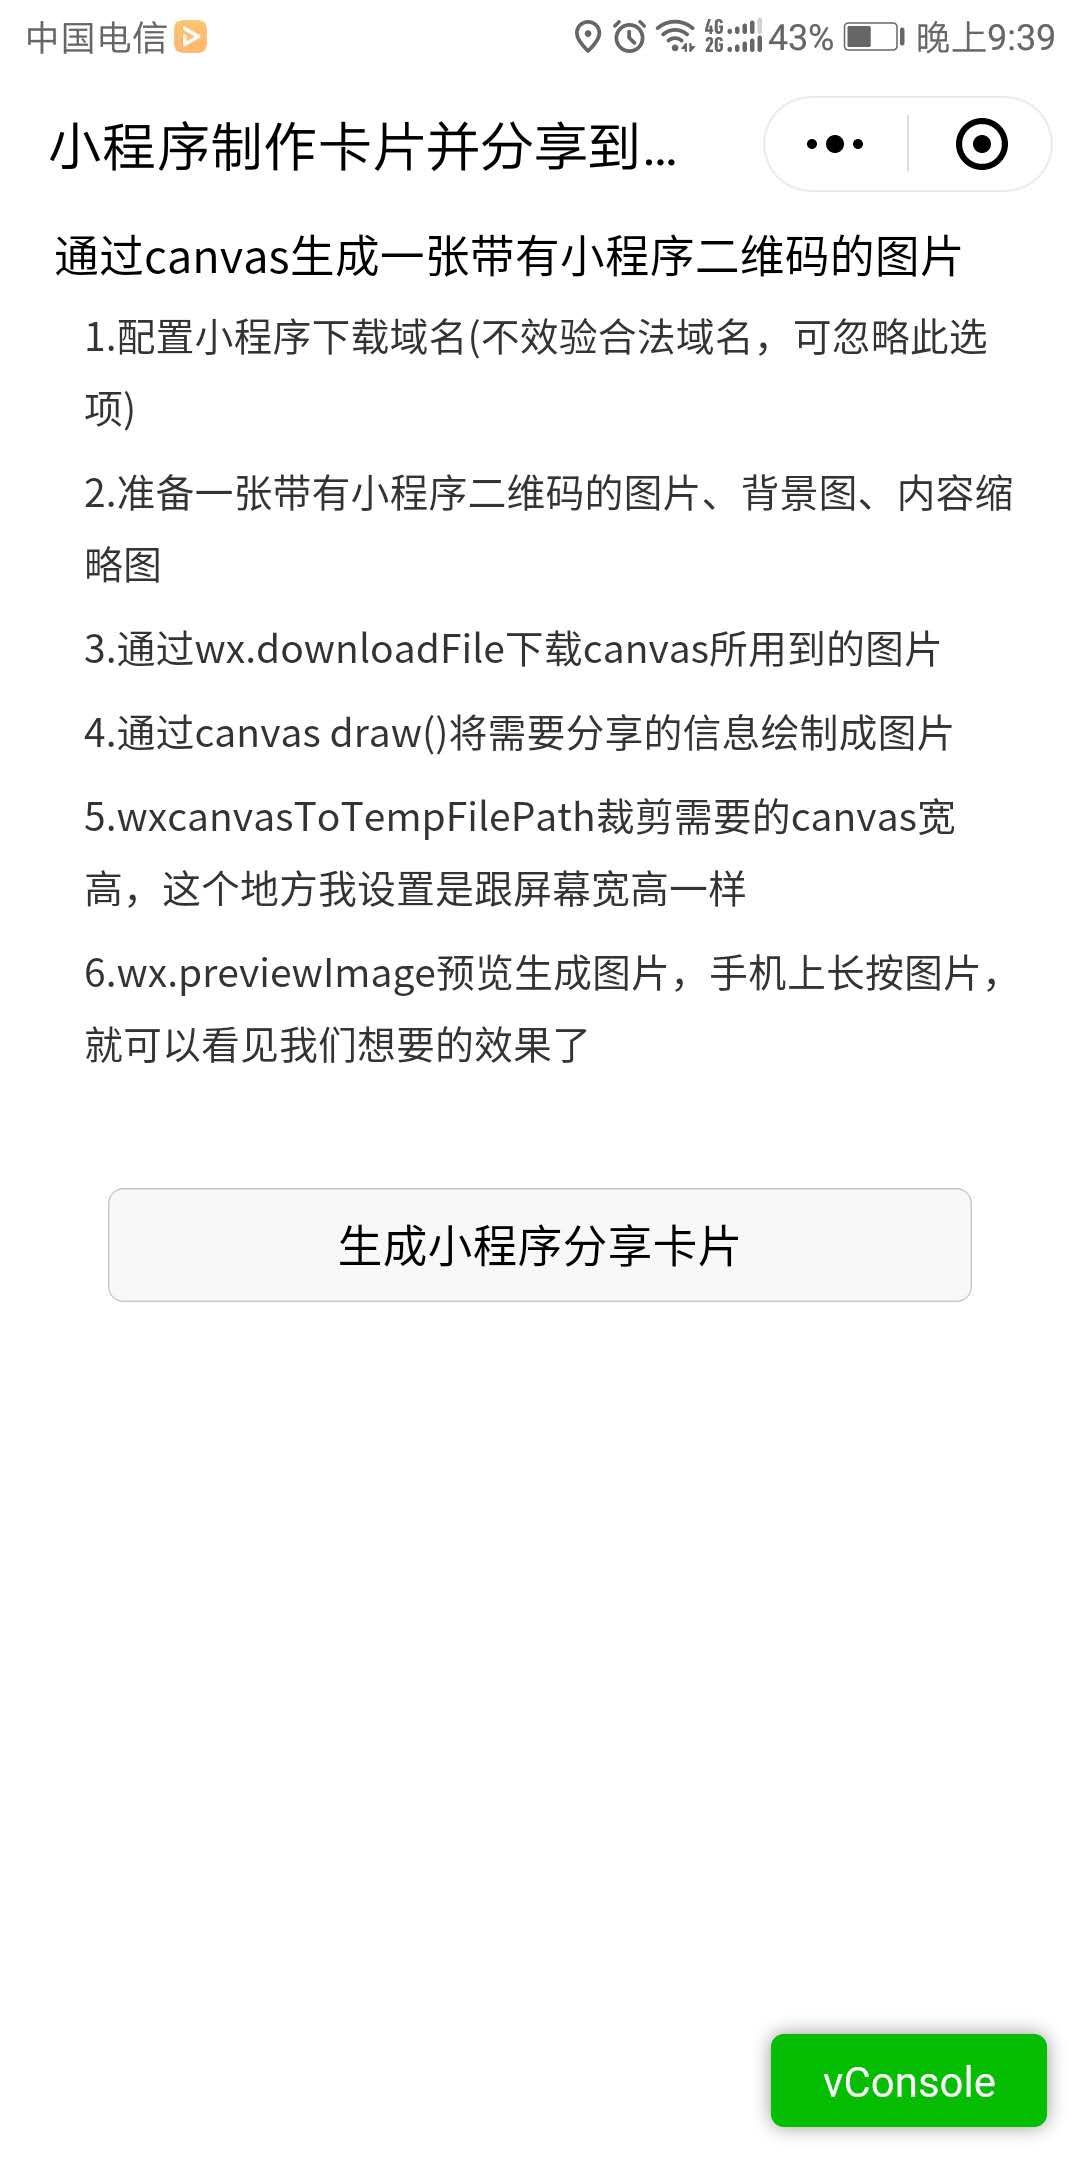
小程式提供onShareAppMessage 函數,此函數只支持分享給我微信朋友。小程式如何分享到朋友圈呢? 我提供的方法是,使用canvas繪製一張圖片,並用wx.previewImage預覽圖片,然後長按圖片保存圖片到手機。再通過發朋友圈的方式,選擇保存的圖片,當用戶瀏覽朋友圈時,可以長按圖片、 ...
小程式提供onShareAppMessage 函數,此函數只支持分享給我微信朋友。小程式如何分享到朋友圈呢?
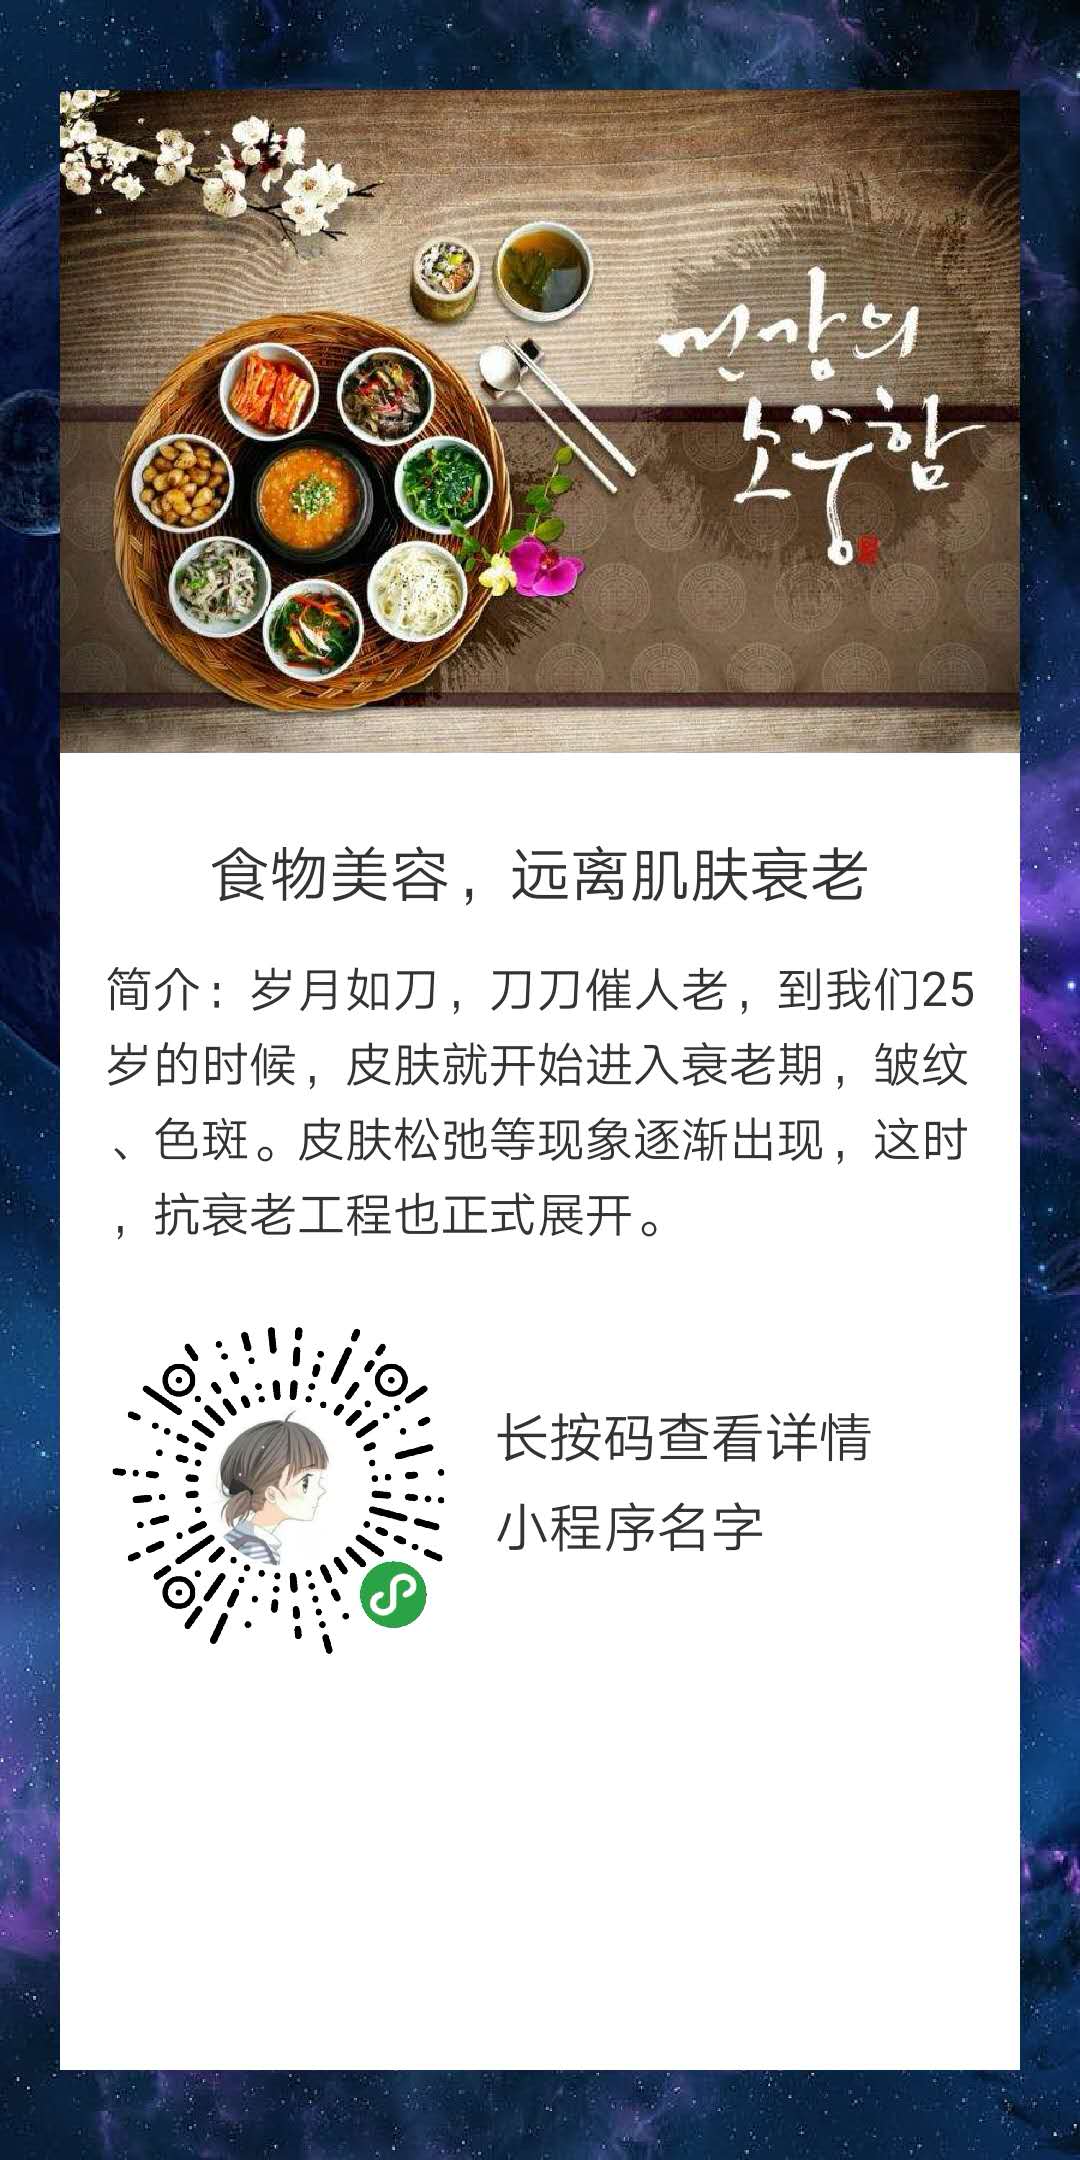
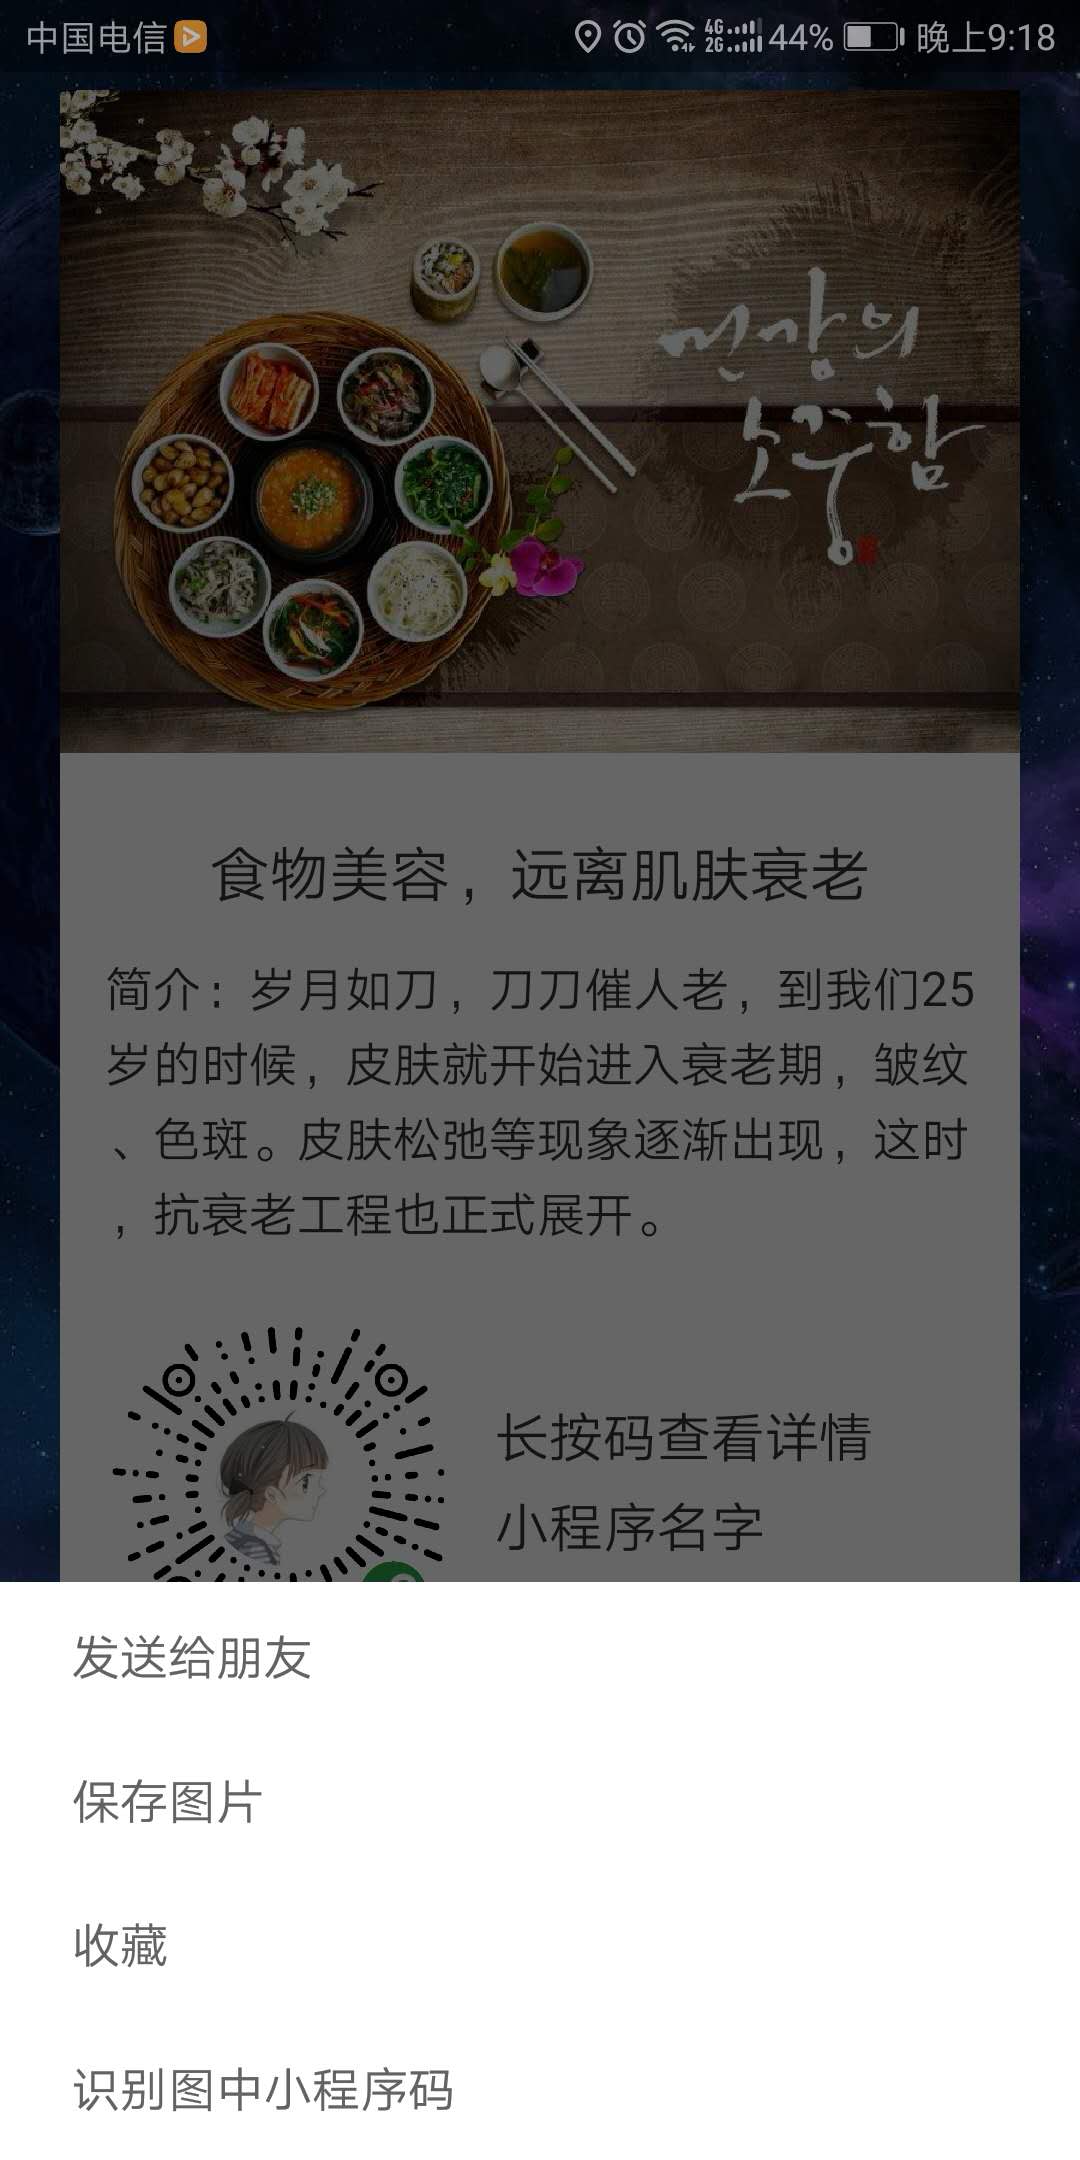
我提供的方法是,使用canvas繪製一張圖片,並用wx.previewImage預覽圖片,然後長按圖片保存圖片到手機。再通過發朋友圈的方式,選擇保存的圖片,當用戶瀏覽朋友圈時,可以長按圖片、識別圖中二維碼進入小程式。
效果展示


準備工作和小程式配置(步驟一和步驟二)
配置小程式下載功能變數名稱(不效驗合法功能變數名稱,可忽略此選項) 準備一張帶有小程式二維碼的圖片、一張背景圖、內容縮略圖1 Page({ 2 data: { 3 bgImg: "http://image.lqmohun.com/canvasbg.jpg", //背景圖 4 dataImg: "http://image.lqmohun.com/ceshi.jpg", //內容縮略圖 5 ewrImg: "http://image.lqmohun.com/erweima.jpg", //小程式二維碼圖片 6 systemInfo: null, //系統類型 7 canvasWidth:0, //canvas的寬 8 canvasHeight: 0 //canvas的高 9 },
步驟三:下載需要的圖片資源到本地
 1   downloadImages: function () {
 2
 3     let that = this;
 4     wx.downloadFile({  //背景圖
 5       url: that.data.bgImg,
 6       success: function (res) {
 7         wx.downloadFile({  //內容縮略圖
 8           url: that.data.dataImg,
 9           success: function (res1) {
10             wx.downloadFile({
11               url: that.data.ewrImg,
12               success: function (res2) {//  小程式二維碼圖
13                 that.convas(res.tempFilePath, res1.tempFilePath, res2.tempFilePath);
14               },
15               fail: function () {
16               }
17             });
18           }
19         });
20       }
21     })
22   },
步驟四:將需要分享的信息繪製成圖片
 1  convas: function (bgImg, dataImg, ewrImg) {
 2     let that = this;
 3     var ctx = wx.createCanvasContext('myCanvas');
 4     var scWidth = that.data.systemInfo.windowWidth;
 5     var scHeight = that.data.systemInfo.screenHeight;
 6     var defaultHeight = 0.020 * that.data.systemInfo.screenHeight;
 7     //第一步:刻畫背景圖
 8     ctx.drawImage(bgImg, 0, 0, scWidth, scHeight);
 9     //第二步:刻畫背景色
10     ctx.setFillStyle('white');
11     ctx.fillRect(20, 30, scWidth-40, scHeight-60);
12     //第三步:刻畫內容縮略圖
13     var imgHeight = parseInt(this.imageProportion());
14     ctx.drawImage(dataImg, 20, 30, scWidth - 40, imgHeight);
15     //第三步:刻畫標題
16     ctx.setFontSize(0.056 * scWidth);
17     ctx.setFillStyle('#333333');
18     ctx.setTextAlign('center');
19     ctx.fillText("食物美容,遠離肌膚衰老", (scWidth) / 2, imgHeight + 63 + defaultHeight );
20     //第四步:刻畫內容;(備註:canvas好像沒有自動換行,有需要此步驟的同學,可根據canvas寬度,設置文字個數)
21     ctx.setFontSize(0.044 * scWidth)
22     ctx.setFillStyle('#333333');
23     ctx.setTextAlign('left');
24     ctx.fillText("簡介:歲月如刀,刀刀催人老,到我們25", 35, imgHeight + 100 + defaultHeight);
25     ctx.fillText("歲的時候,皮膚就開始進入衰老期,皺紋", 35, imgHeight + 125 + defaultHeight);
26     ctx.fillText("、色斑。皮膚鬆弛等現象逐漸出現,這時", 35, imgHeight + 150 + defaultHeight);
27     ctx.fillText(",抗衰老工程也正式展開。", 35, imgHeight + 175 + defaultHeight);
28   //  第五步:刻畫小程式碼
29     ctx.drawImage(ewrImg, 35, imgHeight + 200 + defaultHeight, 120, 120);
30     //第六步:提示用戶,長按圖片下載或分享
31     ctx.setFontSize(0.050 * scWidth)
32     ctx.setFillStyle('#333333')
33     ctx.fillText('長按碼查看詳情', 165, imgHeight + 250 + defaultHeight);
34     ctx.fillText('小程式名字', 165, imgHeight + 280 + defaultHeight);
35     //第七步將之前在繪圖上下文中的描述(路徑、變形、樣式)畫到 canvas 中
36
37     ctx.draw(false, function (e) {
38       //第八步:生成圖片並預覽
39       that.imageGeneratePreview();
40     });
41   }
小程式canvas做測試時,文字好像不能自動換行。提供一種比較笨的方法,根據屏幕寬度判斷文字個數,迴圈繪製文字就行了;
this.imageProportion()的方法獲取縮略圖等比例縮小之後的寬高
defaultHeight不同寬高屏幕,繪製內容上下間距優化
步驟五:將canvas畫布導出成指定大小圖片、並預覽
 1 imageGeneratePreview: function () {
 2     let that=this;
 3     //把當前畫布指定區域的內容導出生成指定大小的圖片,並返迴文件路徑
 4     wx.canvasToTempFilePath({
 5       width: this.data.systemInfo.windowWidth,
 6       height: this.data.systemInfo.screenHeight,
 7       destWidth: this.data.systemInfo.windowWidth * 3,
 8       destHeight: this.data.systemInfo.screenHeight * 3,
 9       canvasId: 'myCanvas',
10       success: function (res) {
11         //預覽圖片
12         wx.previewImage({
13           urls: res.tempFilePath.split(','),   // 需要預覽的圖片http鏈接列表
14           fail: function (res) {
15             console.log("預覽圖片失敗" + res)
16           }
17         })
18       },
19       fail: function (res) {
20         console.log("出錯了:"+JSON.stringify(res));
21       },complete:function(){
22         wx.hideLoading();
23       }
24     })
25   },
備註: 測試手機(蘋果5,華為) 本文章只提供一種思路,具體排版還請以實際項目為主


