背景 我們或多或少都使用過各式各樣的富文本編輯器,其中有一個很方便功能,複製一張圖片然後粘貼進文本框,這張圖片就被上傳了,那麼這個方便的功能是如何實現的呢? 原理分析 提取操作:複製= 粘貼= 上傳 在這個操作過程中,我們需要做的就是:監聽粘貼事件= 獲取剪貼板里的內容= 發請求上傳 為方便理解下文
背景
我們或多或少都使用過各式各樣的富文本編輯器,其中有一個很方便功能,複製一張圖片然後粘貼進文本框,這張圖片就被上傳了,那麼這個方便的功能是如何實現的呢?
原理分析
提取操作:複製=>粘貼=>上傳
在這個操作過程中,我們需要做的就是:監聽粘貼事件=>獲取剪貼板里的內容=>發請求上傳
為方便理解下文,需要先明白幾點:
- 我們只能上傳網頁圖(在網頁上右鍵圖片,然後複製)和截圖(截圖工具截的圖片,eg:qq截圖),不能粘貼上傳系統里的圖片(從桌面上、硬碟里複製),他們是存在完全不同的地方的。
- 截圖工具截的圖與在網頁點擊右鍵複製的圖是有些不同的,因此處理方式也不一樣。
- 知悉paste event這個事件:當進行粘貼(右鍵paste/ctrl+v)操作時,該動作將觸發名為'paste'的剪貼板事件,這個事件的觸發是在剪貼板里的數據插入到目標元素之前。如果目標元素(游標所在位置)是可編輯的元素(eg:設置了contenteditable屬性的div。textarea並不行。),粘貼動作將把剪貼板里的數據,以最合適的格式,插入到目標元素里;如果目標元素不可編輯,則不會插入數據,但依然觸發paste event。數據在粘貼的過程中是只讀的。此段是翻譯於w3.org_the-paste-action。
可惜的是,經過試驗,發現chrome(當前最新版)、firefox(當前最新版)、ie11對paste事件的實現並不是完全按照w3c來的,各自也有區別(w3c的paste標準也因此只是草案階段)。
test代碼及截圖如下:
chrome:
<textarea ></textarea>
<div contenteditable style="width: 100px;height: 100px; border:1px solid">
</div>
<script>
document.addEventListener('paste', function (event) {
    console.log(event)
})
</script> 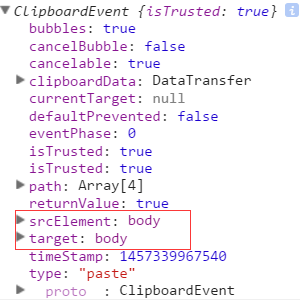
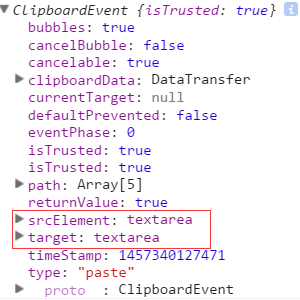
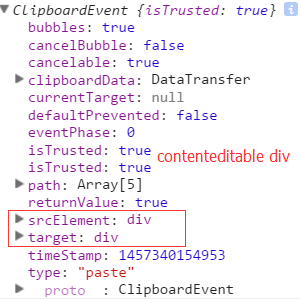
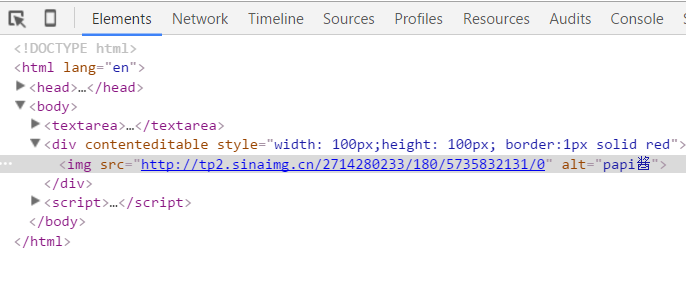
- event有clipboardData屬性,且clipboardData有item屬性,clipboardData.item中的元素(對象)有type和kind屬性;
- 無論在哪進行粘貼,均可觸發paste事件;
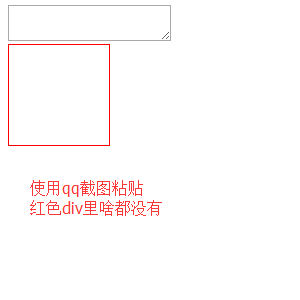
- 在div(未特殊聲明時,本文div均指設置了contenteditable屬性的div) 里粘貼截圖,不顯示圖片。img.src為base64編碼字元串;
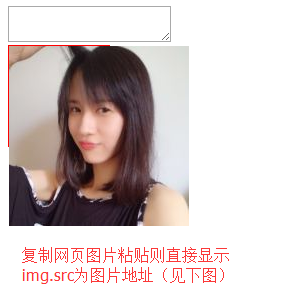
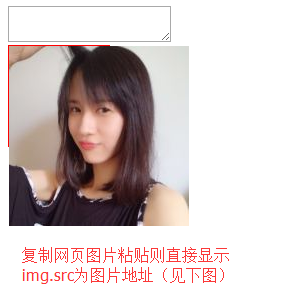
- 在div里粘貼網頁圖片,直接顯示圖片,img.src為圖片地址。
firefox:

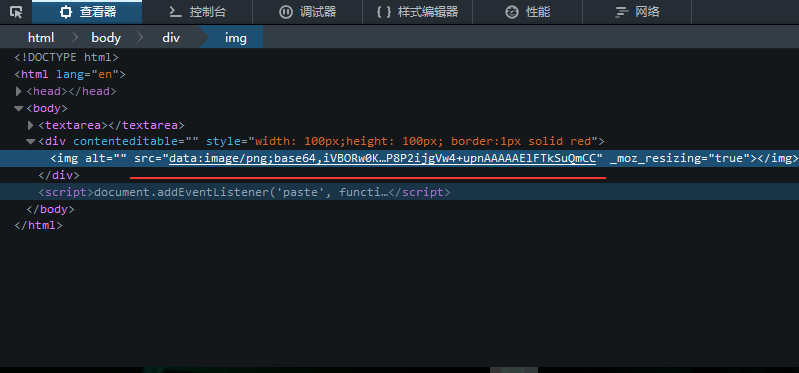
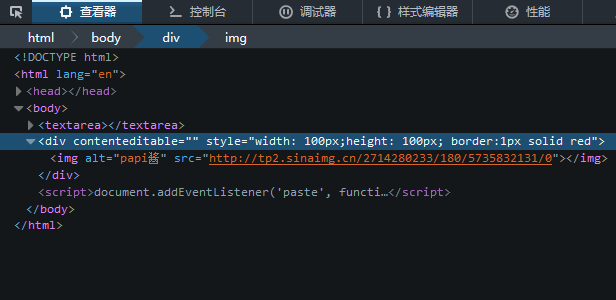
- event有clipboardData屬性,clipboardData沒有item屬性;
- 只有在textarea里或者div里粘貼才觸發paste事件;
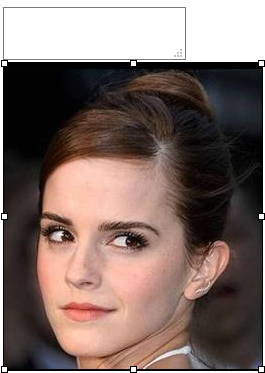
- 在div里粘貼截圖,直接顯示圖片,img.src為base64編碼字元串;
- 在div里粘貼網頁圖片,表現同chrome。
ie11:(不截圖了,可自行試驗,其他瀏覽器同理<( ̄▽ ̄)/,因為懶...)
- event沒有clipboardData屬性;
- 只在div里粘貼才觸發paste事件;
- 在div里粘貼截圖,直接顯示圖片,img.src為base64編碼字元串;
- 在div里粘貼網頁圖片,表現同chrome。
監聽了paste事件,也知道了表現形式,接下來就是如何獲取數據了:
chrome有特定的方法,利用clipboardData.items、getAsFile()、new FileReader()等api可以在paste回調函數里獲取到剪貼板里圖片的base64編碼字元串(無論是截圖粘貼的還是網頁圖片複製粘貼的),ie11,firefox沒有這樣的api,不過依然有辦法可以獲取,因為數據已經表現在img的src里了,對於截圖粘貼的,直接取img的src屬性值(base64),對於網頁粘貼的,則把地址傳給後臺,然後根據地址down下來,存在自己的伺服器,最後把新地址返回來交給前端展示就ok了。為了保持一致性便於管理,統一將所有情況(截圖、網頁)中的img的src屬性替換為自己存儲的地址。因此可以得到以下核心代碼(註釋很全哦~~):
html展示:
<head>
<meta charset="UTF-8">
<title>Document</title>
<style>
body {
    display: -webkit-flex;
    display: flex;
    -webkit-justify-content: center;
    justify-content: center;
}
#tar_box {
    width: 500px;
    height: 500px;
    border: 1px solid red;
}
</style>
前端js處理邏輯:
document.addEventListener('paste', function (event) {
    console.log(event)
    var isChrome = false;
    if ( event.clipboardData || event.originalEvent ) {
        //not for ie11   某些chrome版本使用的是event.originalEvent
        var clipboardData = (event.clipboardData || event.originalEvent.clipboardData);
        if ( clipboardData.items ) {
            // for chrome
            var    items = clipboardData.items,
                len = items.length,
                blob = null;
            isChrome = true;
            //items.length比較有意思,初步判斷是根據mime類型來的,即有幾種mime類型,長度就是幾(待驗證)
            //如果粘貼純文本,那麼len=1,如果粘貼網頁圖片,len=2, items[0].type = 'text/plain', items[1].type = 'image/*'
            //如果使用截圖工具粘貼圖片,len=1, items[0].type = 'image/png'
            //如果粘貼純文本+HTML,len=2, items[0].type = 'text/plain', items[1].type = 'text/html'
            // console.log('len:' + len);
            // console.log(items[0]);
            // console.log(items[1]);
            // console.log( 'items[0] kind:', items[0].kind );
            // console.log( 'items[0] MIME type:', items[0].type );
            // console.log( 'items[1] kind:', items[1].kind );
            // console.log( 'items[1] MIME type:', items[1].type );

            //阻止預設行為即不讓剪貼板內容在div中顯示出來
            event.preventDefault();

            //在items里找粘貼的image,據上面分析,需要迴圈
            for (var i = 0; i < len; i++) {
                if (items[i].type.indexOf("image") !== -1) {
                    // console.log(items[i]);
                    // console.log( typeof (items[i]));

                    //getAsFile()  此方法只是living standard  firefox ie11 並不支持
                    blob = items[i].getAsFile();
                }
            }
            if ( blob !== null ) {
                var reader = new FileReader();
                reader.onload = function (event) {
                    // event.target.result 即為圖片的Base64編碼字元串
                    var base64_str = event.target.result
                    //可以在這裡寫上傳邏輯 直接將base64編碼的字元串上傳(可以嘗試傳入blob對象,看看後臺程式能否解析)
                    uploadImgFromPaste(base64_str, 'paste', isChrome);
                }
                reader.readAsDataURL(blob);
            }
        } else {
            //for firefox
            setTimeout(function () {
                //設置setTimeout的原因是為了保證圖片先插入到div里,然後去獲取值
                var imgList = document.querySelectorAll('#tar_box img'),
                    len = imgList.length,
                    src_str = '',
                    i;
                for ( i = 0; i < len; i ++ ) {
                    if ( imgList[i].className !== 'my_img' ) {
                        //如果是截圖那麼src_str就是base64 如果是複製的其他網頁圖片那麼src_str就是此圖片在別人伺服器的地址
                        src_str = imgList[i].src;
                    }
                }
                uploadImgFromPaste(src_str, 'paste', isChrome);
            }, 1);
        }
    } else {
        //for ie11
        setTimeout(function () {
            var imgList = document.querySelectorAll('#tar_box img'),
                len = imgList.length,
                src_str = '',
                i;
            for ( i = 0; i < len; i ++ ) {
                if ( imgList[i].className !== 'my_img' ) {
                    src_str = imgList[i].src;
                }
            }
            uploadImgFromPaste(src_str, 'paste', isChrome);
        }, 1);
    }
})

function uploadImgFromPaste (file, type, isChrome) {
    var formData = new FormData();
    formData.append('image', file);
    formData.append('submission-type', type);

    var xhr = new XMLHttpRequest();
    xhr.open('POST', '/upload_image_by_paste');
    xhr.onload = function () {
        if ( xhr.readyState === 4 ) {
            if ( xhr.status === 200 ) {
                var data = JSON.parse( xhr.responseText ),
                    tarBox = document.getElementById('tar_box');
                if ( isChrome ) {
                    var img = document.createElement('img');
                    img.className = 'my_img';
                    img.src = data.store_path;
                    tarBox.appendChild(img);
                } else {
                    var imgList = document.querySelectorAll('#tar_box img'),
                        len = imgList.length,
                        i;
                    for ( i = 0; i < len; i ++) {
                        if ( imgList[i].className !== 'my_img' ) {
                            imgList[i].className = 'my_img';
                            imgList[i].src = data.store_path;
                        }
                    }
                }

            } else {
                console.log( xhr.statusText );
            }
        };
    };
    xhr.onerror = function (e) {
        console.log( xhr.statusText );
    }
    xhr.send(formData);
}
用express.js搭的簡易後臺的接收邏輯:
router.post('/', upload.array(), function (req, res, next) {
//1.獲取客戶端傳來的src_str字元串=>判斷是base64還是普通地址=>獲取圖片類型尾碼(jpg/png etc)
//=>如果是base64替換掉"首碼"("data:image\/png;base64," etc)
//2.base64 轉為 buffer對象  普通地址則先down下來
//3.寫入硬碟(後續可以將地址存入資料庫)
//4.返回picture地址
var src_str = req.body.image,
    timestamp = new Date().getTime();
if ( src_str.match(/^data:image\/png;base64,|^data:image\/jpg;base64,|^data:image\/jpg;base64,|^data:image\/bmp;base64,/) ) {
    //處理截圖 src_str為base64字元串
    var pic_suffix = src_str.split(';',1)[0].split('/',2)[1],
        base64 = src_str.replace(/^data:image\/png;base64,|^data:image\/jpg;base64,|^data:image\/jpg;base64,|^data:image\/bmp;base64,/, ''),
        buf = new Buffer(base64, 'base64'),
        store_path = 'public/images/test_' + timestamp + '.' + pic_suffix;

    fs.writeFile(store_path, buf, function (err) {
        if (err) {
            throw err;
        } else {
            res.json({'store_path': store_path});
        }
    });
} else {// 處理非chrome的網頁圖片 src_str為圖片地址
    var temp_array = src_str.split('.'),
        pic_suffix = temp_array[temp_array.length - 1],
        store_path = 'public/images/test_' + timestamp + '.' + pic_suffix,
        wstream = fs.createWriteStream(store_path);

    request(src_str).pipe(wstream);
    wstream.on('finish', function (err) {
        if( err ) {
            throw err;
        } else {
            res.json({"store_path": store_path});
        }
    });
}
});
完整demo,請訪問渣渣github下載..(跑起來需要node環境:安裝node=>npm intall=>node app.js)
第一篇文章終於拼湊完了....(╯﹏╰)b 歡迎大大們拍磚o(╯□╰)o
巨人們的肩膀:
https://dzone.com/articles/paste-wasteland-or-why-onpaste
http://strd6.com/2011/09/html5-javascript-pasting-image-data-in-chrome/http://stackoverflow.com/questions/6333814/how-does-the-paste-image-from-clipboard-functionality-work-in-gmail-and-google-c
http://stackoverflow.com/questions/18055422/how-to-receive-php-image-data-over-copy-n-paste-javascript-with-xmlhttpreques


