圖形變換。 一、畫一片星空 先畫一片canvas.width寬canvas.height高的黑色星空,再畫200個隨機位置,隨機大小,隨機旋轉角度的星星。 window.onload=function(){ var canvas=document.getElementById("canvas"); ...
圖形變換。
一、畫一片星空
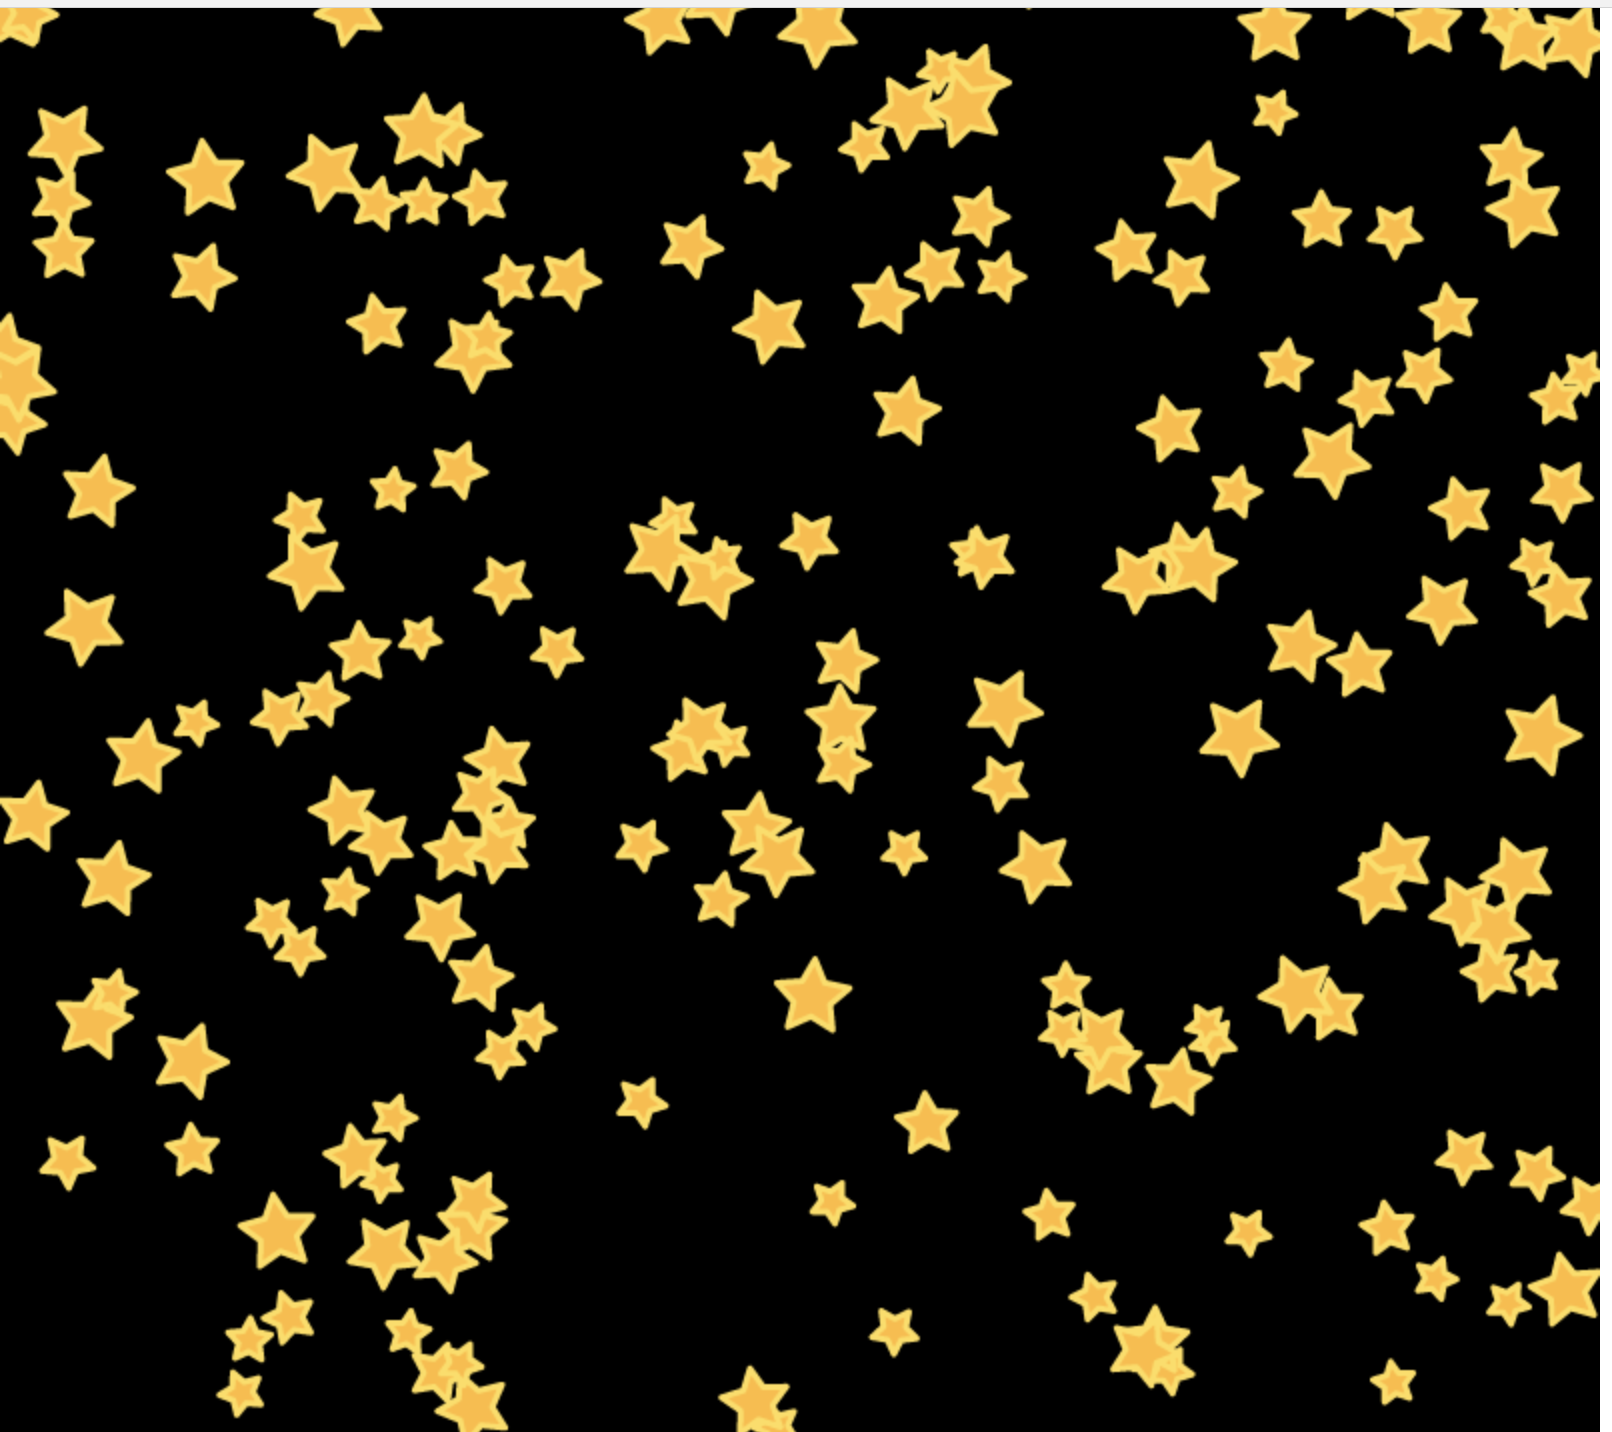
先畫一片canvas.width寬canvas.height高的黑色星空,再畫200個隨機位置,隨機大小,隨機旋轉角度的星星。

window.onload=function(){
    var canvas=document.getElementById("canvas");

    canvas.width=800;
    canvas.height=800;

    var context=canvas.getContext("2d");

    context.fillStyle="black";
    context.fillRect(0,0,canvas.width,canvas.height);

    for(var i=0;i<200;i++){
        var r=Math.random()*10+10;
        var x=Math.random()*canvas.width;
        var y=Math.random()*canvas.height;
        var a=Math.random()*360;
        drawStar(context,x,y,r,r/2.0,a);
    }

}


//rot順時針旋轉的角度
function drawStar(ctx,x,y,r,R,rot){
    ctx.beginPath();
    //角度轉弧度:除以180*PI
    for(var i=0;i<5;i++){
        ctx.lineTo(Math.cos((18+i*72-rot)/180*Math.PI)*R+x,
            -Math.sin((18+i*72-rot)/180*Math.PI)*R+y);
            ctx.lineTo(Math.cos((54+i*72-rot)/180*Math.PI)*r+x,
            -Math.sin((54+i*72-rot)/180*Math.PI)*r+y);
    }

    ctx.closePath();

    ctx.fillStyle="#fb3";
    ctx.strokeStyle="#fd5";
    ctx.lineWidth=3;
    ctx.lineJoin="round";

    ctx.fill();
    ctx.stroke();
}
View Code
產生一個扁平化設計中200個星星的效果。
二、圖像變換和狀態保存
1、用標準路徑+圖形變換思想重構
上面drawStar函數承載的功能太多來,整個繪製路徑的指定,同時把五角星的位移,大小,旋轉多少度全部揉合在一個函數里了。
假如需要變為畫一個四角形?六角形?代碼改起來就比較麻煩了。
標準做法:修改函數結構。
介面不變,省去了旋轉角度,畫一個標準星星。假設外圓半徑是內圓半徑的兩倍,所以只需要傳入一個小r。drawStar里調用一個startPath()函數來繪製一個標準五角星的路徑。
標準的五角星路徑:只傳入一個context,在(0,0)的位置繪製來一個大圓半徑為1,同時沒有任何偏移,任何旋轉的的五角星。
在drawStar里勾繪出標準五角星後再通過圖形變換使得標準五角星的位移變成在(x,y)的位置,大小變成R這麼大,同時旋轉rot角度。再進行具體的繪製。
這樣一個設計的結構可以避免之前的問題。比如需求變成要畫六角形,四角形,只需要把starPath()裡面路徑勾繪的代碼進行相應的更改即可。
更高級的復用:starPath()函數以參數的形式傳入drawStar()中。這樣drawStar可以叫drawSheap用戶可以繪製任意的圖形,只需要傳入繪製圖形的標準路徑,變更的位移量,大小量,旋轉量即可。
//rot順時針旋轉的角度
function drawStar(ctx,x,y,r,R,rot){
    starPath(ctx);
    //繪製在(x,y)大小為R,旋轉rot度的五角星
    //...
}

function starPath(ctx){
    ctx.beginPath();
    //角度轉弧度:除以180*PI
    for(var i=0;i<5;i++){
        ctx.lineTo(Math.cos((18+i*72)/180*Math.PI),
            -Math.sin((18+i*72)/180*Math.PI));
            ctx.lineTo(Math.cos((54+i*72)/180*Math.PI),
            -Math.sin((54+i*72)/180*Math.PI));
    }
    ctx.closePath();
}
總結:圖形學里繪製先繪製標準路徑,再通過圖形變換成需求大小。
2,圖形變換
三種基本操作:
- 位移translate(x,y)
- 旋轉rotate(deg)
- 縮放 scale(sx,sy)
translate會疊加
綠色正方形位置經過2次translate後到達了(200,200)。並不是代碼里看起來的(150,150)。

window.onload=function(){
    var canvas=document.getElementById("canvas");

    canvas.width=400;
    canvas.height=400;

    var context=canvas.getContext("2d");

    context.fillStyle="red";
    context.translate(50,50);
    context.fillRect(0,0,200,200);

    context.fillStyle="green";
    context.translate(150,150);
    context.fillRect(0,0,200,200);
}
View Code

為了避免上述問題,最佳實踐是使用圖形變換之後,再反向操作把圖形變換的結果逆轉過來。如下:

window.onload=function(){
    var canvas=document.getElementById("canvas");

    canvas.width=400;
    canvas.height=400;

    var context=canvas.getContext("2d");

    context.fillStyle="red";
    context.translate(50,50);
    context.fillRect(0,0,200,200);
    context.translate(-50,-50);//反向操作

    context.fillStyle="green";
    context.translate(150,150);
    context.fillRect(0,0,200,200);
    context.translate(-150,-150);//反向操作
}
View Code

3,canvas狀態的保存save()和恢復restore()
逆轉圖形變換太麻煩了,canvas提供了一個save()API,保存當前的圖形狀態,狀態包括所有我們設置的狀態,自然也包括圖形變換的狀態。
在完成圖形變換並且具體繪製以後,在最後再調用一次context.restore()。
restore()和save()是成對出現的,restore()返回在save()時候canvas的所有狀態, 這是一個非常好的保持canvas繪圖狀態的方法,在save()和restore()之間可以隨意的更改canvas的狀態而不影響後續的繪製效果。
window.onload=function(){
    var canvas=document.getElementById("canvas");

    canvas.width=400;
    canvas.height=400;

    var context=canvas.getContext("2d");

    context.save();
    context.fillStyle="red";
    context.translate(50,50);
    context.fillRect(0,0,200,200);
    //context.translate(-50,-50);//反向操作
    context.restore();

    context.save()
    context.fillStyle="green";
    context.translate(150,150);
    context.fillRect(0,0,200,200);
    // context.translate(-150,-150);//反向操作
    context.restore();
}
Note:繪製整體元素,特別是在其中使用圖形變換的時候,都應該先save()一下,最終結束繪製時再restore()一下以保證canvas圖形繪製的正確。
三、應用translate,rotate和scale
1、使用translate和rotate繪製固定大小星星的星空
沒有用scale.
ctx.translate(x,y); ctx.rotate(rot/180*Math.PI);
window.onload=function(){
    var canvas=document.getElementById("canvas");

    canvas.width=800;
    canvas.height=800;

    var context=canvas.getContext("2d");

    context.fillStyle="black";
    context.fillRect(0,0,canvas.width,canvas.height);

    for(var i=0;i<200;i++){
        var r=Math.random()*10+10;
        var x=Math.random()*canvas.width;
        var y=Math.random()*canvas.height;
        var a=Math.random()*360;
        drawStar(context,x,y,r,a);
    }

}


//rot順時針旋轉的角度
function drawStar(ctx,x,y,R,rot){

    ctx.save();

    ctx.translate(x,y);
    ctx.rotate(rot/180*Math.PI);
    starPath(ctx);
    //繪製在(x,y)大小為R,旋轉rot度的五角星

    ctx.fillStyle="#fb3";
    ctx.strokeStyle="#fd5";
    ctx.lineWidth=3;
    ctx.lineJoin="round";

    ctx.fill();
    ctx.stroke();

    ctx.restore();
}


function starPath(ctx){
    ctx.beginPath();
    //角度轉弧度:除以180*PI
    for(var i=0;i<5;i++){
        ctx.lineTo(Math.cos((18+i*72)/180*Math.PI)*20,
            -Math.sin((18+i*72)/180*Math.PI)*20);
            ctx.lineTo(Math.cos((54+i*72)/180*Math.PI)*0.5*20,
            -Math.sin((54+i*72)/180*Math.PI)*0.5*20);
    }
    ctx.closePath();
}
View Code
效果和上面圖片一樣。
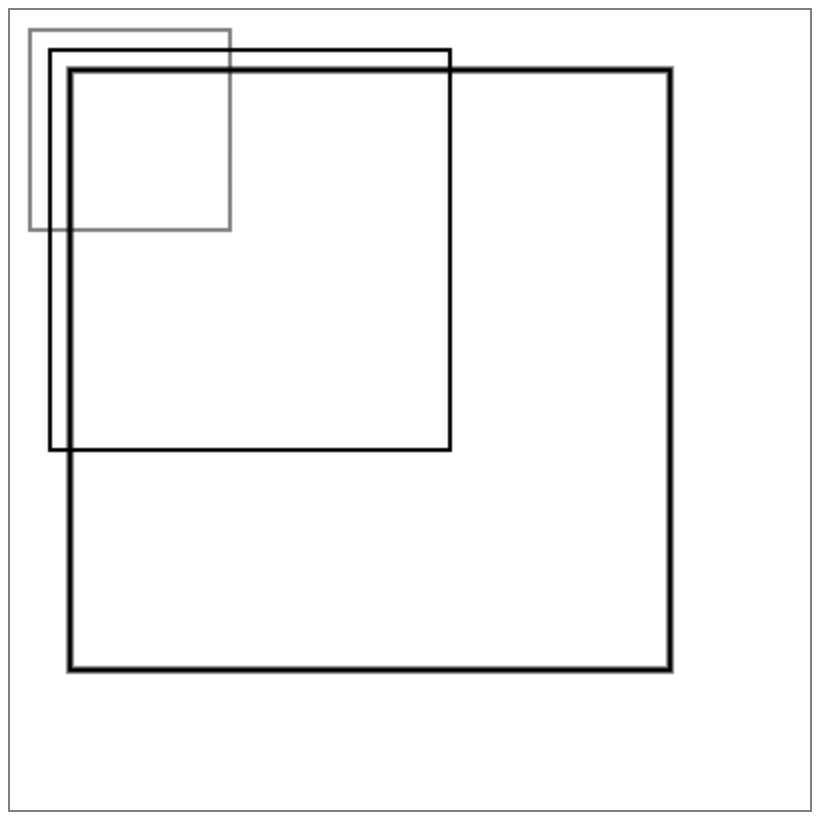
2、scale副作用
不僅放在大小,還會放大坐標,邊框等。
 var canvas=document.getElementById("canvas");

    canvas.width=400;
    canvas.height=400;

    var context=canvas.getContext("2d");

    context.save();
    context.scale(1,1);
    context.strokeRect(10,10,100,100);
    context.restore();

    context.save()
    context.scale(2,2,);
    context.strokeRect(10,10,100,100);
    context.restore();

    context.save()
    context.scale(3,3,);
    context.strokeRect(10,10,100,100);
    context.restore();
}
3, 應用scale繪製星空
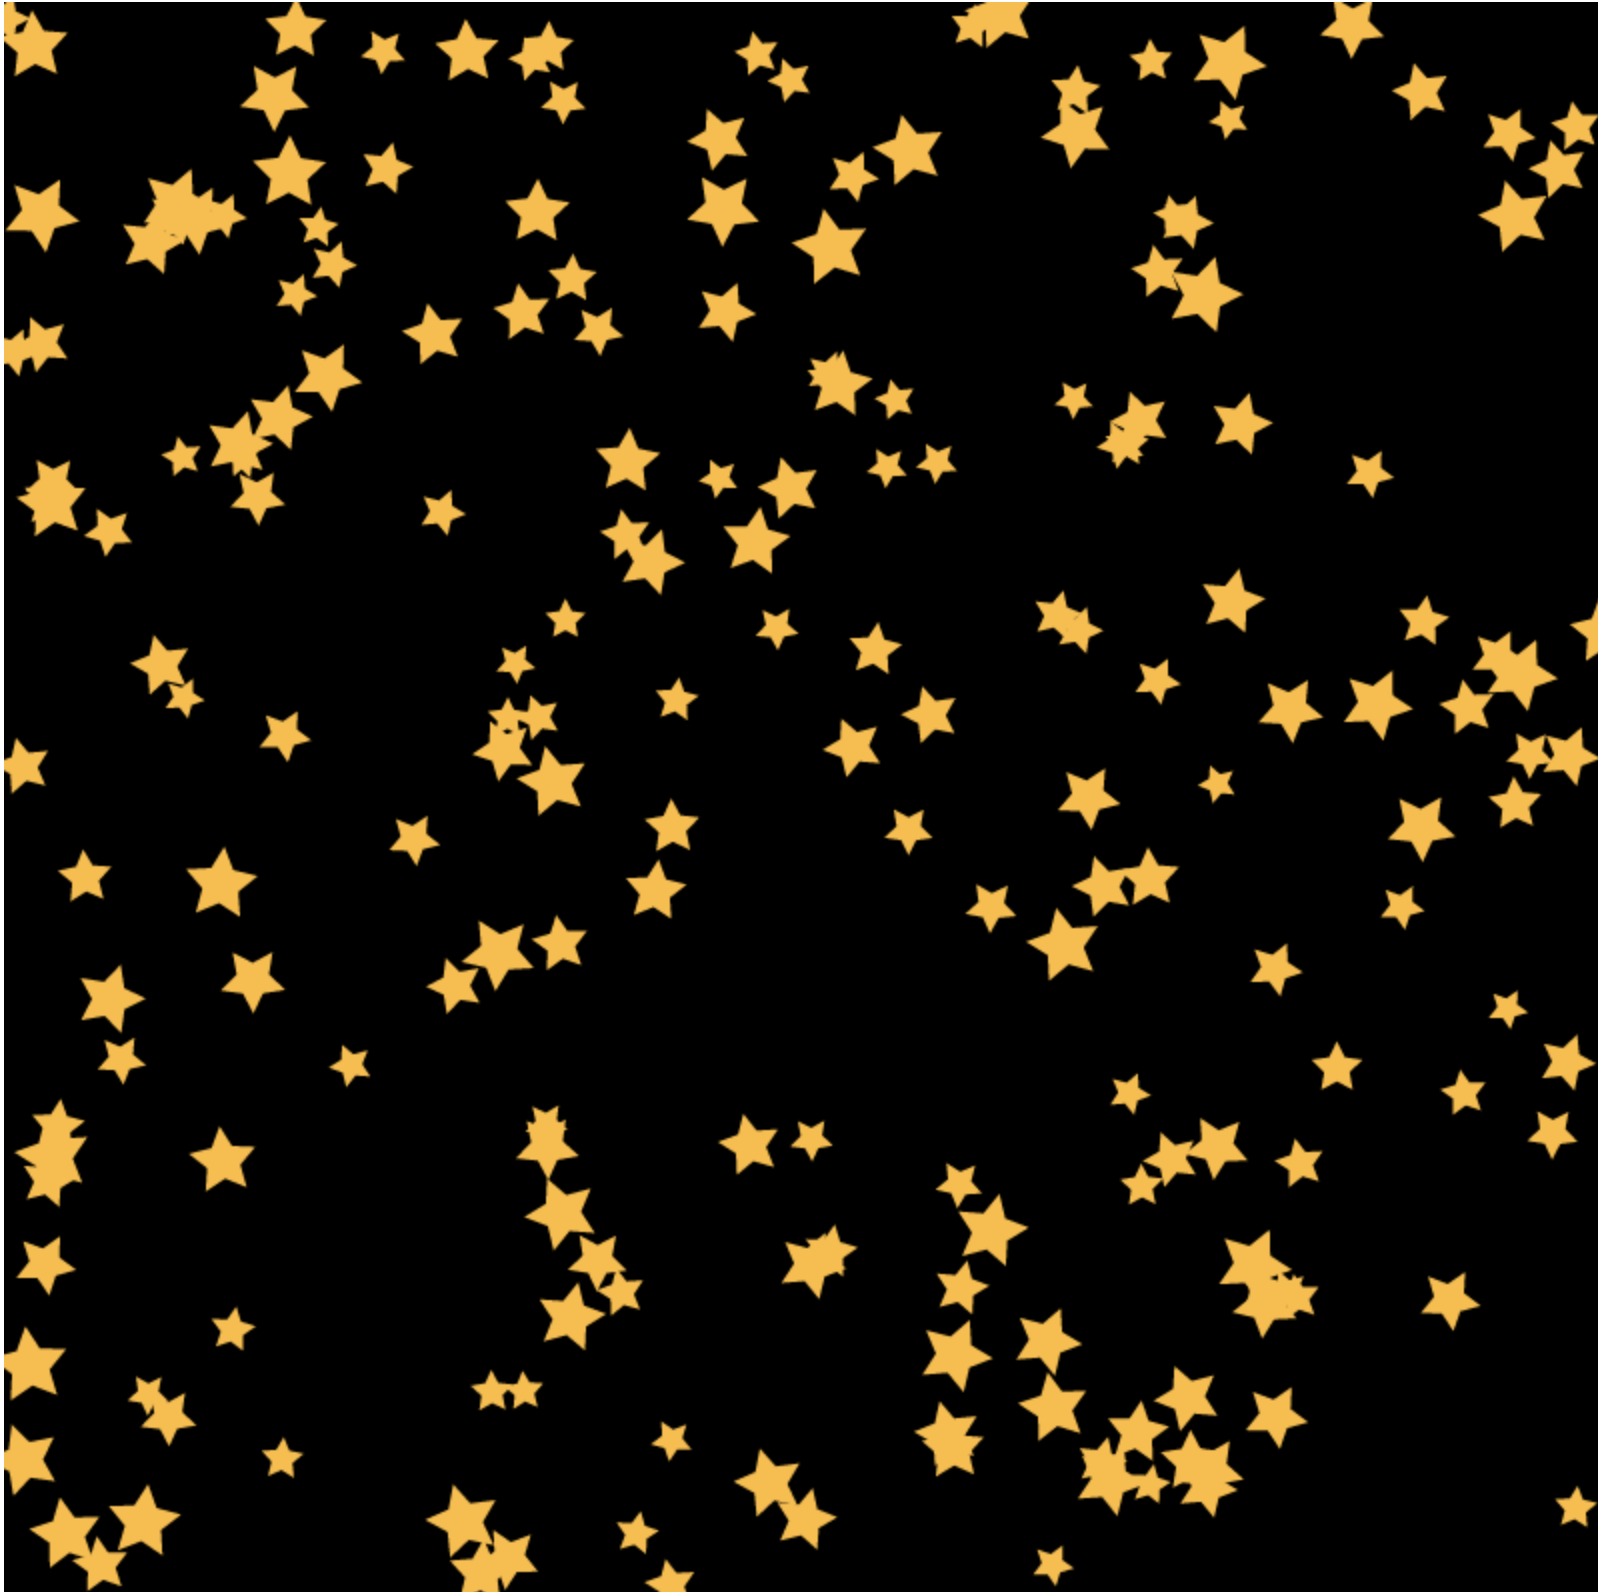
坐標是通過translate變換的,始終是(0,0)所以scale後還是(0,0)。
放棄外邊框的繪製。

window.onload=function(){
    var canvas=document.getElementById("canvas");

    canvas.width=800;
    canvas.height=800;

    var context=canvas.getContext("2d");

    context.fillStyle="black";
    context.fillRect(0,0,canvas.width,canvas.height);

    for(var i=0;i<200;i++){
        var r=Math.random()*10+10;
        var x=Math.random()*canvas.width;
        var y=Math.random()*canvas.height;
        var a=Math.random()*360;
        drawStar(context,x,y,r,a);
    }

}


//rot順時針旋轉的角度
function drawStar(ctx,x,y,R,rot){

    ctx.save();

    ctx.translate(x,y);
    ctx.rotate(rot/180*Math.PI);
    ctx.scale(R,R);

    starPath(ctx);
    //繪製在(x,y)大小為R,旋轉rot度的五角星

    ctx.fillStyle="#fb3";
    //放棄外邊框的繪製
    // ctx.strokeStyle="#fd5";
    // ctx.lineWidth=3;
    // ctx.lineJoin="round";

    ctx.fill();
    // ctx.stroke();

    ctx.restore();
}


function starPath(ctx){
    ctx.beginPath();
    //角度轉弧度:除以180*PI
    for(var i=0;i<5;i++){
        ctx.lineTo(Math.cos((18+i*72)/180*Math.PI),
            -Math.sin((18+i*72)/180*Math.PI));
            ctx.lineTo(Math.cos((54+i*72)/180*Math.PI)*0.5,
            -Math.sin((54+i*72)/180*Math.PI)*0.5);
    }
    ctx.closePath();
}
View Code
星星沒有外邊框。
四、深入理解圖形變換
圖形變換的實質是對圖形的頂點坐標的再計算。計算過程通過變換矩陣來完成。
二維的變換矩陣是3*3,三維的變換矩陣是4*4。
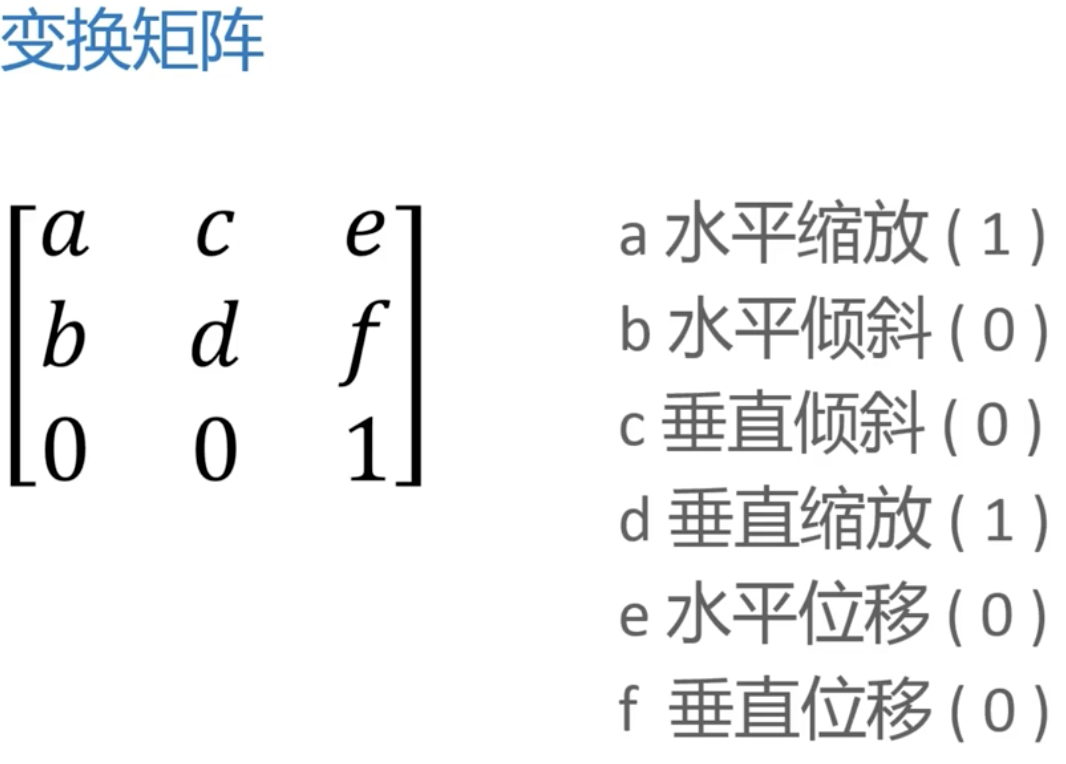
使用transform(a,b,c,d,e,f)設置變換矩陣每次設置是在之前的基礎上設置的。
可以用setTransform(a,b,c,d,e,f))忽略掉之前所有的變換矩陣。先設置為單位矩陣再變換。
window.onload=function(){
    var canvas=document.getElementById("canvas");

    canvas.width=400;
    canvas.height=400;

    var context=canvas.getContext("2d");

    context.fillStyle="red";
    context.strokeStyle="#058";
    context.lineWidth=5;
    /////////////////////////////
    // a c e
    // b d f
    // 0 0 1
    /////////////////////////////
    // a,d 水平,垂直縮放
    // b,c 水平,垂直傾斜
    // e,f 水平,垂直位移
    /////////////////////////////
    context.save();
    // context.transform(1,0,0,1,0,0);
    //transform級聯操作
    context.transform(1,0,0,1,50,100);
    context.transform(2,0,0,1.5,0,0);
    context.transform(1,-0.2,-0.2,1,0,0);
    //setTransform()只使用當前變換
    context.setTransform(1,0,0,1,100,100);
    context.fillRect(50,50,100,100);
    context.strokeRect(50,50,100,100);
    context.restore();
}
這部分內容和css3的動畫的內容本質都是一樣的,都是圖形學的內容。
css3動畫可以參考我之前的博客:
本文作者starof,因知識本身在變化,作者也在不斷學習成長,文章內容也不定時更新,為避免誤導讀者,方便追根溯源,請諸位轉載註明出處:http://www.cnblogs.com/starof/p/8626422.html 有問題歡迎與我討論,共同進步。


