代碼示例:https://github.com/johnlui/Swift-On-iOS/tree/master/ControlOrientation/ControlOrientation 環境要求:Xcode 7 / Swift2.0 前兩天遇到了一個 “使用指定的不同屏幕方向打開新頁面” 的需求
代碼示例:https://github.com/johnlui/Swift-On-iOS/tree/master/ControlOrientation/ControlOrientation
環境要求:Xcode 7 / Swift2.0
前兩天遇到了一個 “使用指定的不同屏幕方向打開新頁面” 的需求,需求很簡單:APP 一直保持豎屏,要求新打開的頁面能夠指定為橫屏或豎屏,並且不允許自動切換,新頁面退出後要恢復豎屏。
準備工作
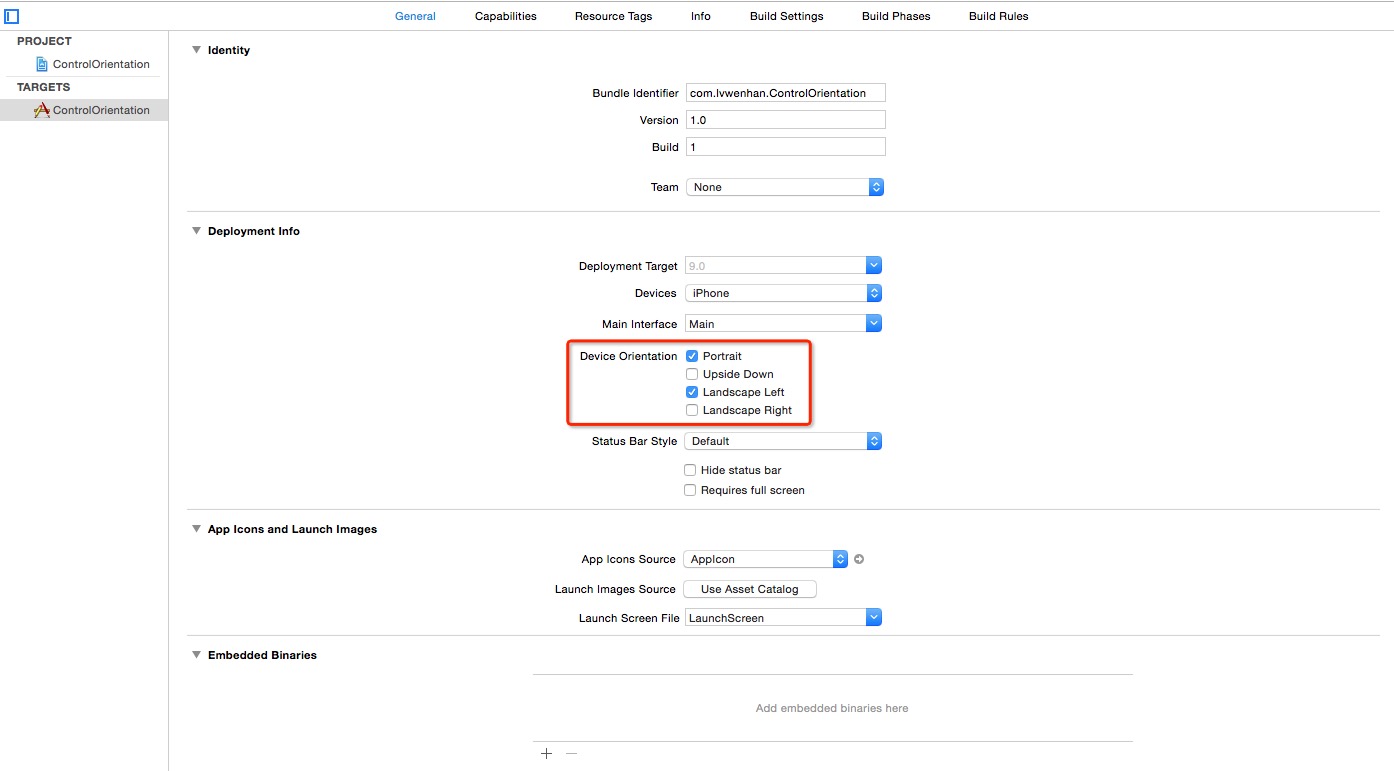
新建一個單頁面項目,命名為 ControlOrientation。接下來取消 Landscape Right 的勾選,我們的 APP 將只支持 豎屏(Portrait)和 Landscape Left:

以橫屏打開新頁面
給 Main.storyboard 拖入一個 View Controller,新建一個繼承自 UIViewController 的類,名為 SecondViewController,然後將兩者綁定。之後給新建的這個 View Controller 賦予 StoryBoard ID 值 “secondVC”:
簡單 Google 便可以得到代碼方式指定橫屏打來新頁面的方式:
在新頁面的 viewDidLoad 中執行:
UIDevice.currentDevice().setValue(UIInterfaceOrientation.LandscapeLeft.rawValue, forKey: "orientation")
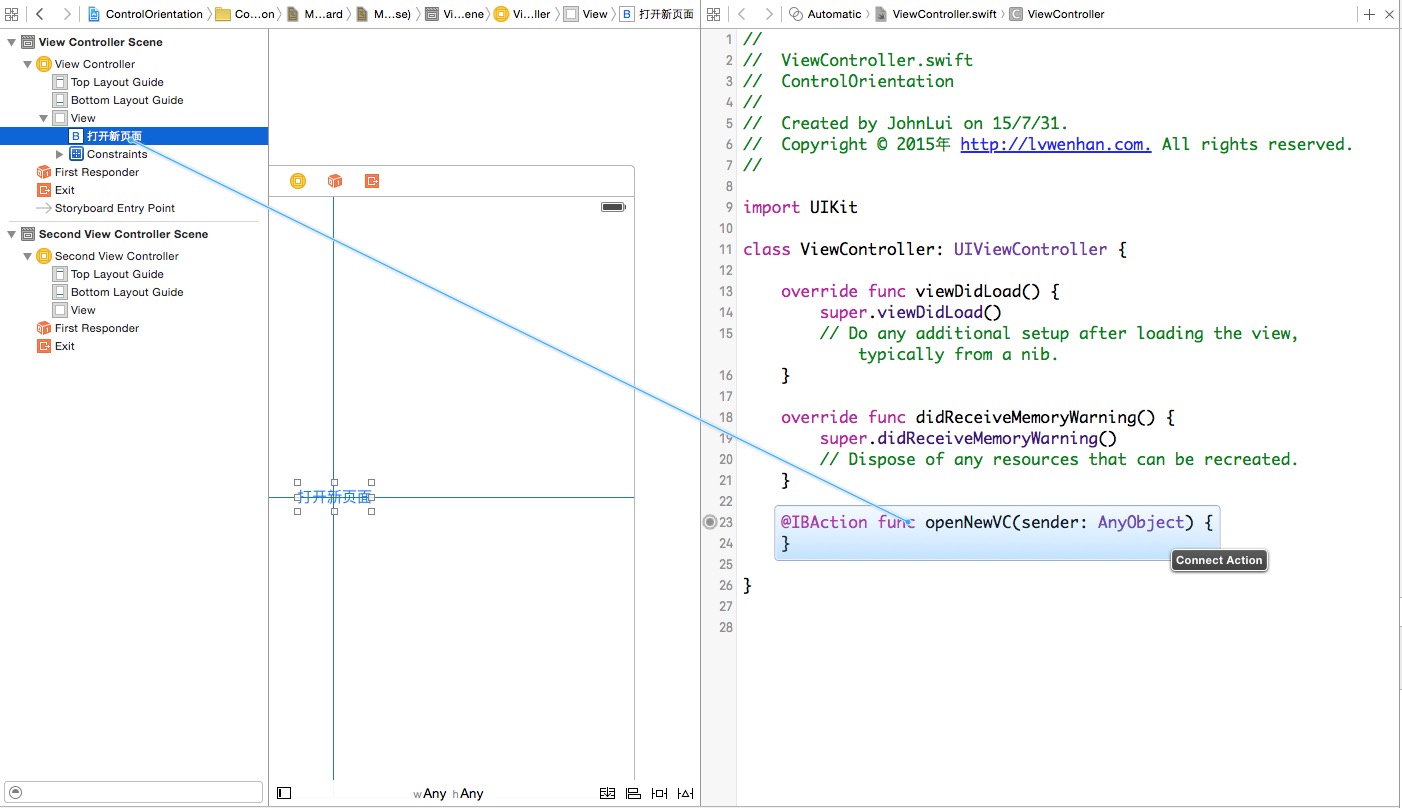
在啟動頁中間添加一個居中的按鈕,拖動綁定點擊事件,加入載入新頁面的代碼:

@IBAction func openNewVC(sender: AnyObject) {
    if let vc = UIStoryboard(name: "Main", bundle: nil).instantiateViewControllerWithIdentifier("secondVC") as? SecondViewController {
        self.presentViewController(vc, animated: true, completion: nil)
    }
}
運行!查看效果:
![]()
代碼控制橫屏成功!
還有一個收尾工作:給 SecondViewController 增加一個退出按鈕,這一步就不再描述啦。然後再次運行項目,查看效果:
![]()
出來之後也變橫屏了哎,這不是我們想要的。
屏幕方向鎖定
重讀文章開頭的需求,我們就會發現需求要求我們在任何一個界面都不能因為手機物理方向的變化而自動改變屏幕方向,稍微 Google 一下,我們就會得到鎖死屏幕方向的代碼:
給 ViewController 和 SecondViewController 都增加一個函數:
override func shouldAutorotate() -> Bool {
    return false
}
為了直觀的給大家展示,我們將通過手動改變模擬器的方向來模擬真機屏幕方向的變化(改變模擬器屏幕方向的快捷鍵是 Command 加左或者右),檢驗效果:
![]()
簡直完美呀!是不是覺得有點太簡單了?這麼容易就實現了?當然不是,這麼容易我還寫個毛的文章呀。
神級 BUG
既然新打開橫屏已經完美解決了,那麼新打開豎屏怎麼樣呢?讓我們把那一行切換屏幕方向的代碼註釋掉,運行查看結果:
![]()
BUG 了!!
解決 BUG
這個 bug 我搞了兩天,雖然不是一直在搞它,但是總時長也至少有八個小時。其實嚴格意義上來講,這並不是 bug,這隻是我們不知道怎麼才能搞定而已。最後我終於搞明白了這個 BUG 背後的運行原理,先說解決方案:
豎屏解決方案
在第一個頁面 ViewController 中增加以下兩個函數:
override func supportedInterfaceOrientations() -> UIInterfaceOrientationMask {
    return UIInterfaceOrientationMask.Portrait
}
override func preferredInterfaceOrientationForPresentation() -> UIInterfaceOrientation {
    return UIInterfaceOrientation.Portrait
}
在第二個頁面 SecondViewController 中增加兩個函數:
override func supportedInterfaceOrientations() -> UIInterfaceOrientationMask {
    return UIInterfaceOrientationMask.Portrait
}
override func preferredInterfaceOrientationForPresentation() -> UIInterfaceOrientation {
    return UIInterfaceOrientation.Portrait
}
查看效果:
![]()
豎屏搞定!
橫屏解決方案
將 SecondViewController 中的函數改為:
override func supportedInterfaceOrientations() -> UIInterfaceOrientationMask {
    return UIInterfaceOrientationMask.All
}
override func preferredInterfaceOrientationForPresentation() -> UIInterfaceOrientation {
    return UIInterfaceOrientation.LandscapeLeft
}
別忘了打開 viewDidLoad 函數中的橫屏控制代碼哦。查看效果:
![]()
橫屏搞定!
全搞定了嗎?並沒有
我們還是 Too Young Too Simple,在我們簡陋的例子中,似乎確實已經全搞定了,但是實際工程中大多數項目都不是普通 View Controller 作為根控制器哦~
我們測試一下 QQ、微信、微博 等 APP 採用的通用方案:根控制器為 TabBarController,之後嵌套 NavigationController,然後放入 ViewController 頁面進行展示,然後 present 出 SecondViewController。
搭 VIE TNV(TabbarController->NavigationController->ViewController) 架構
我們可不是跟風在國外上市的中國互聯網公司拆 VIE 架構哦~
-
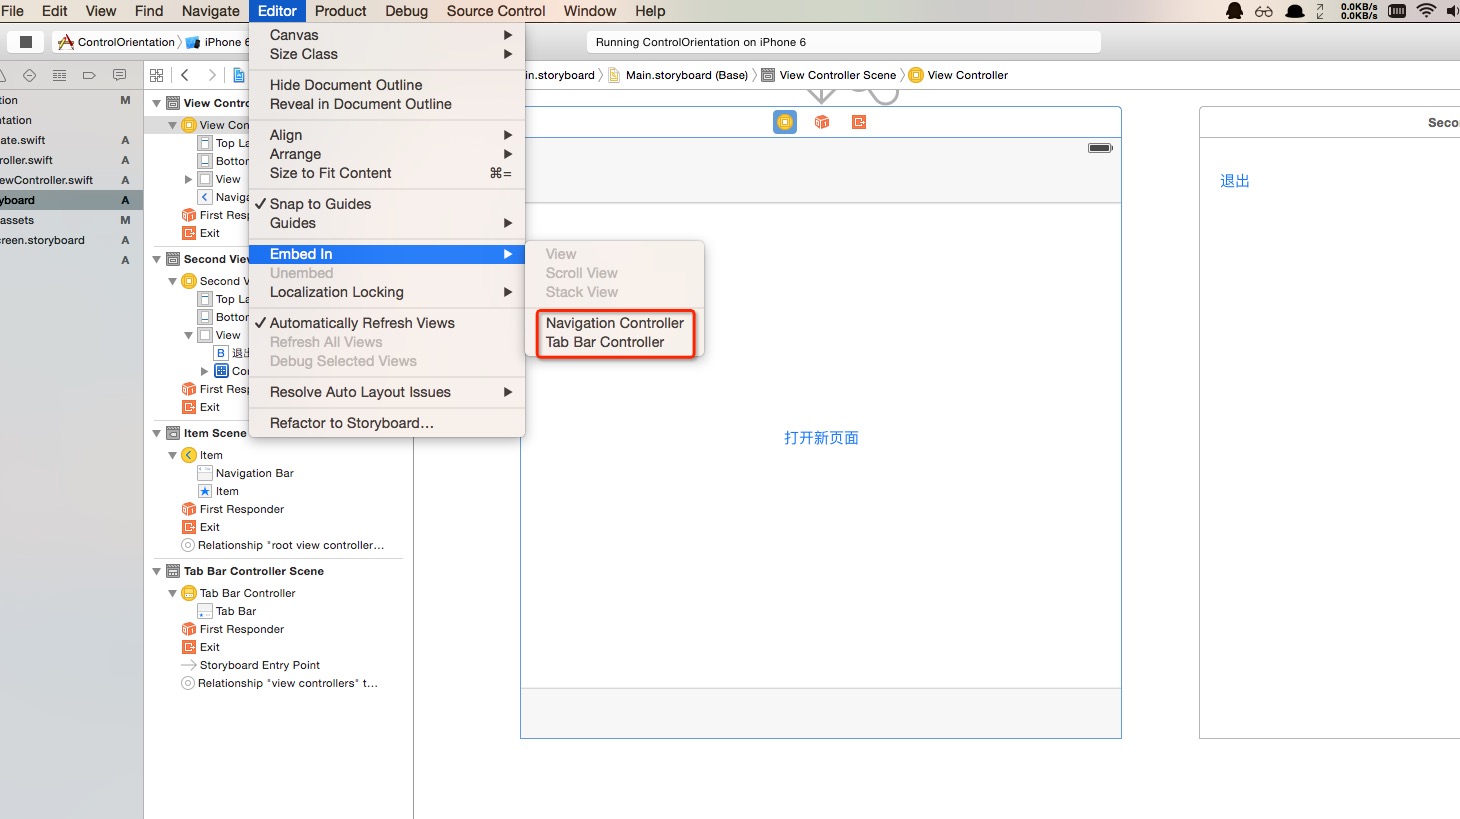
選中 ViewController,點擊菜單中的 Editor -> Embed In -> Navigation Controller,第一層嵌套完成。
-
選中 NavigationController,點擊菜單中的 Editor -> Embed In -> Tab Bar Controller,第二層嵌套完成。
如圖:

查看效果:
![]()
這他媽什麼玩意兒 o(╯□╰)o
終極解決方案
我埋坑的過程就不細說了,下麵直接給出特性分析及解決方案:
特性分析
跟 shouldAutorotate() 不同,判斷是否應該改變 APP 屏幕方向並不會檢測當前顯示的 View Controller 的屬性,而是去檢測根 View Controller 的屬性,所以我們要從 TabBarController 一路獲取到當前 View Controller。
解決方案
新建一個繼承於 UITabBarController 的類,名為 TabBarController,將其和 StoryBoard 中的 Tab Bar Controller 頁面綁定。該類完整代碼如下:
import UIKit

class TabBarController: UITabBarController, UITabBarControllerDelegate {

    override func viewDidLoad() {
        super.viewDidLoad()
        self.delegate = self
    }

    override func didReceiveMemoryWarning() {
        super.didReceiveMemoryWarning()
    }

    override func shouldAutorotate() -> Bool {
        return false
    }
    func tabBarControllerSupportedInterfaceOrientations(tabBarController: UITabBarController) -> UIInterfaceOrientationMask {
        return self.selectedViewController!.supportedInterfaceOrientations()
    }
    func tabBarControllerPreferredInterfaceOrientationForPresentation() -> UIInterfaceOrientation {
        return self.selectedViewController!.preferredInterfaceOrientationForPresentation()
    }
}
同樣,新建一個繼承於 UINavigationController 的類,名為 NavigationController,將其和 StoryBoard 中的 Navigation Controller 頁面綁定。向該類添加以下代碼:
override func supportedInterfaceOrientations() -> UIInterfaceOrientationMask {
    return self.visibleViewController!.supportedInterfaceOrientations()
}
override func preferredInterfaceOrientationForPresentation() -> UIInterfaceOrientation {
    return self.visibleViewController!.preferredInterfaceOrientationForPresentation()
}
檢查結果
![]()
寫在最後
通過本文我們可以總結出以下兩點:
-
是否自動轉換屏幕方向由當前顯示的 View Controller 決定。
-
是否支持橫屏和是否優先選擇橫屏由 rootViewController 決定,若有多層結構嵌套,則需要層層專遞,將控制權交給當前顯示的頁面。類似於 代理傳值 和 延遲靜態綁定。
另外,我利用 Swift 的 enum 給 SecondViewController 類加上了一個優雅的 橫屏/豎屏 控制開關,具體代碼可以在 Github 上查看。
問啊-定製化IT教育平臺,牛人一對一服務,有問必答,開發編程社交頭條 官方網站:www.wenaaa.com 下載問啊APP,參與官方懸賞,賺百元現金。
QQ群290551701 聚集很多互聯網精英,技術總監,架構師,項目經理!開源技術研究,歡迎業內人士,大牛及新手有志於從事IT行業人員進入!


