
怎麼在Android Studio中使用Kotlin? 1、使用Android Studio的插件 2、將Android Studio升級到3.0版本:目前不推薦,因為3.0的版本目前還是Dev Channel渠道,也就是開發渠道,還沒正式發佈 所以,今天我們就講講如何使用第1種方式來創建第一個Ko ...
怎麼在Android Studio中使用Kotlin?
1、使用Android Studio的插件
2、將Android Studio升級到3.0版本:目前不推薦,因為3.0的版本目前還是Dev Channel渠道,也就是開發渠道,還沒正式發佈
所以,今天我們就講講如何使用第1種方式來創建第一個Kotlin項目:
插件安裝:
1、進入Plugins\Install JetBrains plugins中,搜索Kotlin後安裝
2、正常創建一個Android 項目(平時怎麼創建的現在還是怎麼創建),截圖如下

在這邊,我把它上傳到我的Github上,這樣方便全程跟蹤每次的更改內容的記錄
3、通過轉換工具將java源文件轉換成Kotlin
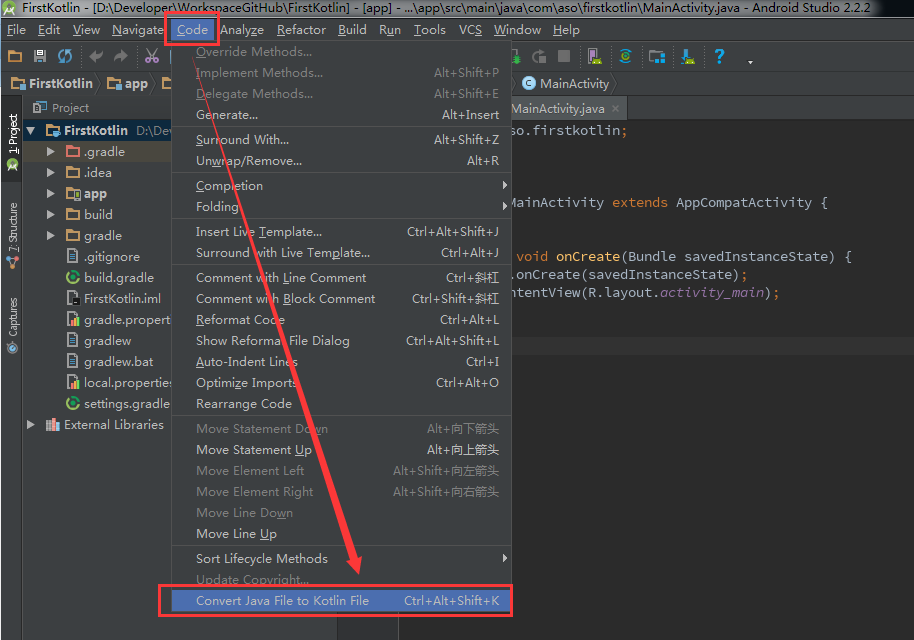
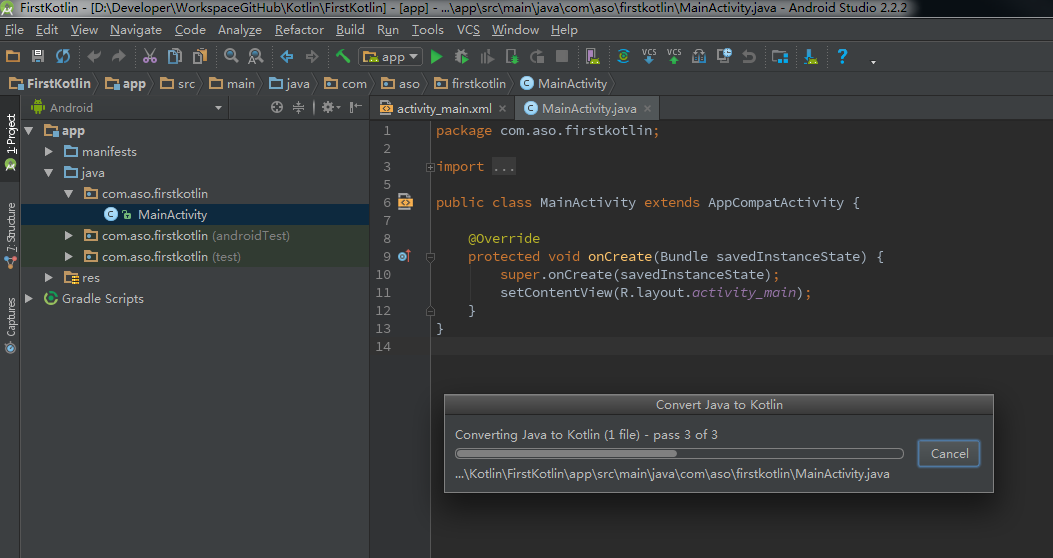
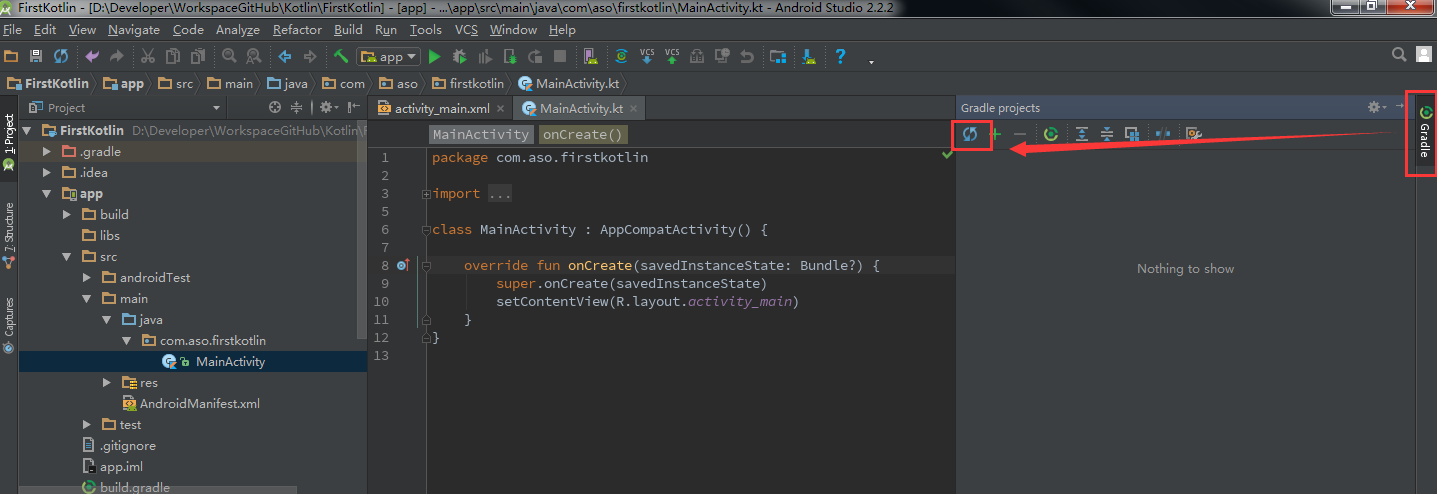
轉換之後的結果變化如下:java源文件的尾碼變成.kt,類的繼承方式變了

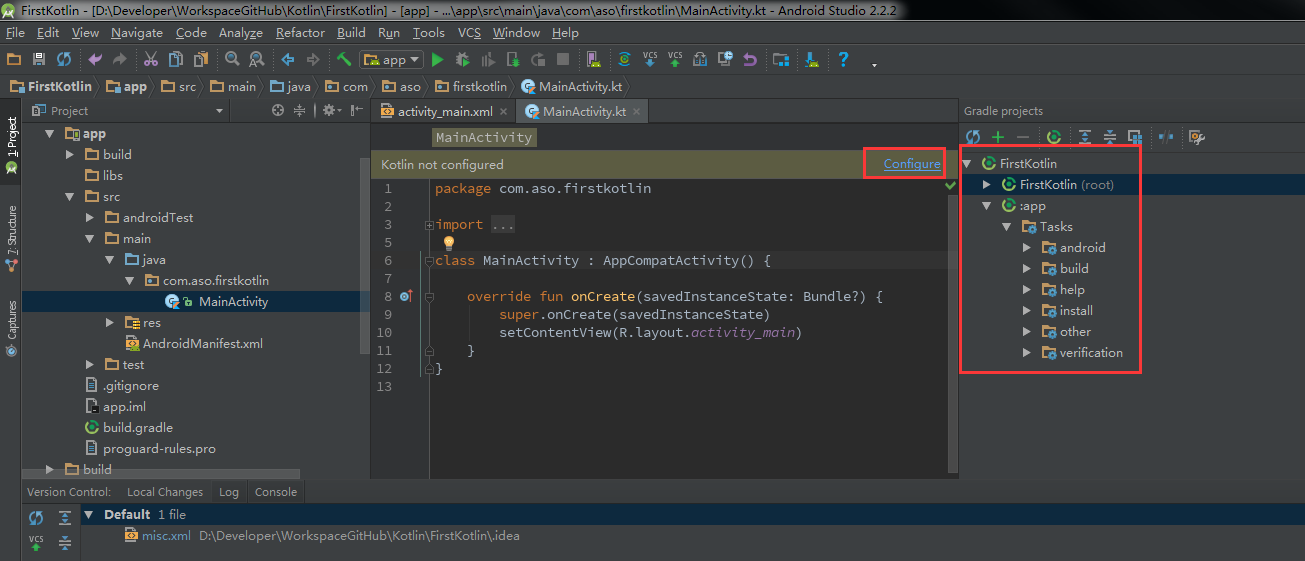
4、配置Kotlin的依賴

以上操作,會在Project的build.gradle文件中加入紅色標註內容
 1 // Top-level build file where you can add configuration options common to all sub-projects/modules.
 2
 3 buildscript {
 4     ext.kotlin_version = '1.1.2-3'//Kotlin擴展屬性
 5     repositories {
 6         jcenter()
 7     }
 8     dependencies {
 9         classpath 'com.android.tools.build:gradle:2.2.2'
10         classpath "org.jetbrains.kotlin:kotlin-gradle-plugin:$kotlin_version"//子模塊構建腳本時需要的classpath
11
12         // NOTE: Do not place your application dependencies here; they belong
13         // in the individual module build.gradle files
14     }
15 }
16
17 allprojects {
18     repositories {
19         jcenter()
20     }
21 }
22
23 task clean(type: Delete) {
24     delete rootProject.buildDir
25 }
同時在子模塊中(app module)的build.gradle中加入紅色標註內容
 1 apply plugin: 'com.android.application'
 2 apply plugin: 'kotlin-android'//引入Kotlin插件,如果是java 模塊,引入的是'kotlin'插件
 3
 4 android {
 5     compileSdkVersion 25
 6     buildToolsVersion "25.0.2"
 7     defaultConfig {
 8         applicationId "com.aso.firstkotlin"
 9         minSdkVersion 15
10         targetSdkVersion 25
11         versionCode 1
12         versionName "1.0"
13         testInstrumentationRunner "android.support.test.runner.AndroidJUnitRunner"
14     }
15     buildTypes {
16         release {
17             minifyEnabled false
18             proguardFiles getDefaultProguardFile('proguard-android.txt'), 'proguard-rules.pro'
19         }
20     }
21 }
22
23 dependencies {
24     compile fileTree(dir: 'libs', include: ['*.jar'])
25     androidTestCompile('com.android.support.test.espresso:espresso-core:2.2.2', {
26         exclude group: 'com.android.support', module: 'support-annotations'
27     })
28     compile 'com.android.support:appcompat-v7:25.3.1'
29     testCompile 'junit:junit:4.12'
30     compile "org.jetbrains.kotlin:kotlin-stdlib-jre7:$kotlin_version"//Kotlin依賴包
31 }
32 repositories {
33     mavenCentral()
34 }
5、到以上4個步驟操作完成之後,選擇同步Gradle(即Sync Now事件),結束後,恭喜,我們的第一個Kotlin工程就已經創建並且配置好了。
6、接下來,因為我們安裝了Kotlin插件,所以我們在創建新的文件時,會多出如圖紅色快的選項,然後根據需要創建即可


