
前言 自Weex發佈伊始, 其口號 "Write Once, Run Everywhere"就吸引了大批前端與客戶端程式猿紛紛入坑, 我也不能獨善其中. 就我目前所學習Weex的經驗在此記錄一下, 由於我是一名剛入行不久iOS開發者, 所以這篇博客含金量不高, 下麵就簡單闡述下如何將Weex初步集成 ...
前言
自Weex發佈伊始, 其口號 "Write Once, Run Everywhere"就吸引了大批前端與客戶端程式猿紛紛入坑, 我也不能獨善其中. 就我目前所學習Weex的經驗在此記錄一下, 由於我是一名剛入行不久iOS開發者, 所以這篇博客含金量不高, 下麵就簡單闡述下如何將Weex初步集成到iOS.
Weex簡介
2016年4月21日,北京 - 阿裡巴巴今天在Qcon大會上宣佈跨平臺移動開發工具Weex開放內測邀請。Weex能夠完美兼顧性能與動態性,讓移動開發者通過簡捷的前端語法寫出Native級別的性能體驗,並支持iOS、安卓、YunOS及Web等多端部署。
對於移動開發者來說,Weex主要解決了頻繁發版和多端研發兩大痛點,同時解決了前端語言性能差和顯示效果受限的問題。開發者可通過Weex官網申請內測。開發者只需要在自己的APP中嵌入Weex的SDK,就可以通過撰寫HTML/CSS/JavaScript來開發Native級別的Weex界面。Weex界面的生成碼其實就是一段很小的JS,可以像發佈網頁一樣輕鬆部署在服務端,然後在APP中請求執行。 Weex官網:https://weex-project.io/cn/. iOS 客戶端集成Weex 集成步驟一: 搭建開發環境 首先得有iOS開發環境: MacOS, 安裝有Xcode. 需要安裝node.js(6.0+), 直接到node.js 官網下載即可, 更過安裝方式 參考: node.js 官方信息. 點擊.dmg安裝包安裝完成後 在terminal輸入: 通常,安裝了 Node.js 環境,npm 包管理工具也隨之安裝了。npm 是一個 JavaScript 包管理工具,它可以讓開發者輕鬆共用和重用代碼。Weex 很多依賴來自社區,同樣,Weex 也將很多工具發佈到社區方便開發者使用。
集成步驟二:安裝cocoaPods
註: cocoaPods安裝,如果您此前已安裝,請跳過此步驟。
安裝cocoaPods前需要安裝ruby環境, 請參考:http://www.cnblogs.com/foxting/p/4520829.html
1. 移除現有的Ruby預設源
通常,安裝了 Node.js 環境,npm 包管理工具也隨之安裝了。npm 是一個 JavaScript 包管理工具,它可以讓開發者輕鬆共用和重用代碼。Weex 很多依賴來自社區,同樣,Weex 也將很多工具發佈到社區方便開發者使用。
集成步驟二:安裝cocoaPods
註: cocoaPods安裝,如果您此前已安裝,請跳過此步驟。
安裝cocoaPods前需要安裝ruby環境, 請參考:http://www.cnblogs.com/foxting/p/4520829.html
1. 移除現有的Ruby預設源1 gem sources --remove https://rubygems.org/ 2. 使用新源 2 gem sources -a https://ruby.taobao.org/ 3. 驗證新源替換是否成功 3 gem sources -l 4. 安裝cocoaPods 4 sudo gem install cocoapods 安裝完成後:
 由於我已經安裝過了cocoaPods, 所以再次安裝提示的內容非常少, 關於詳細的安裝cocoaPods 教程請參考: http://blog.csdn.net/aaron0619/article/details/51861127
至此, cocoaPods已安裝成功!
集成步驟三: 創建Podfile
由於做個簡單的iOS 集成 Weex的demo示範, 所以這裡我們新建一個項目, 來添加Podfile.
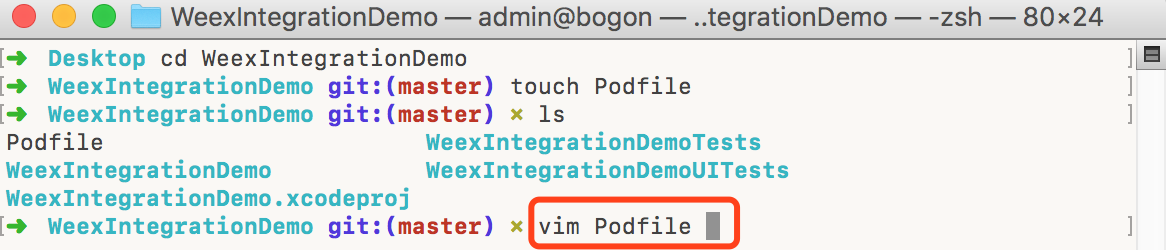
1. 創建新的項目, 併在terminal中進入該項目文件夾, 並創建Podfile:
由於我已經安裝過了cocoaPods, 所以再次安裝提示的內容非常少, 關於詳細的安裝cocoaPods 教程請參考: http://blog.csdn.net/aaron0619/article/details/51861127
至此, cocoaPods已安裝成功!
集成步驟三: 創建Podfile
由於做個簡單的iOS 集成 Weex的demo示範, 所以這裡我們新建一個項目, 來添加Podfile.
1. 創建新的項目, 併在terminal中進入該項目文件夾, 並創建Podfile:
 此時Podfile已經創建成功.
2. 編輯Podfile, 輸入 vim Podfile, 並打開的文件中按 "I"鍵進入編輯狀態, 接著輸入:
此時Podfile已經創建成功.
2. 編輯Podfile, 輸入 vim Podfile, 並打開的文件中按 "I"鍵進入編輯狀態, 接著輸入:
 實際操作時, 請將 下麵target中的名字改成與項目名字一致.
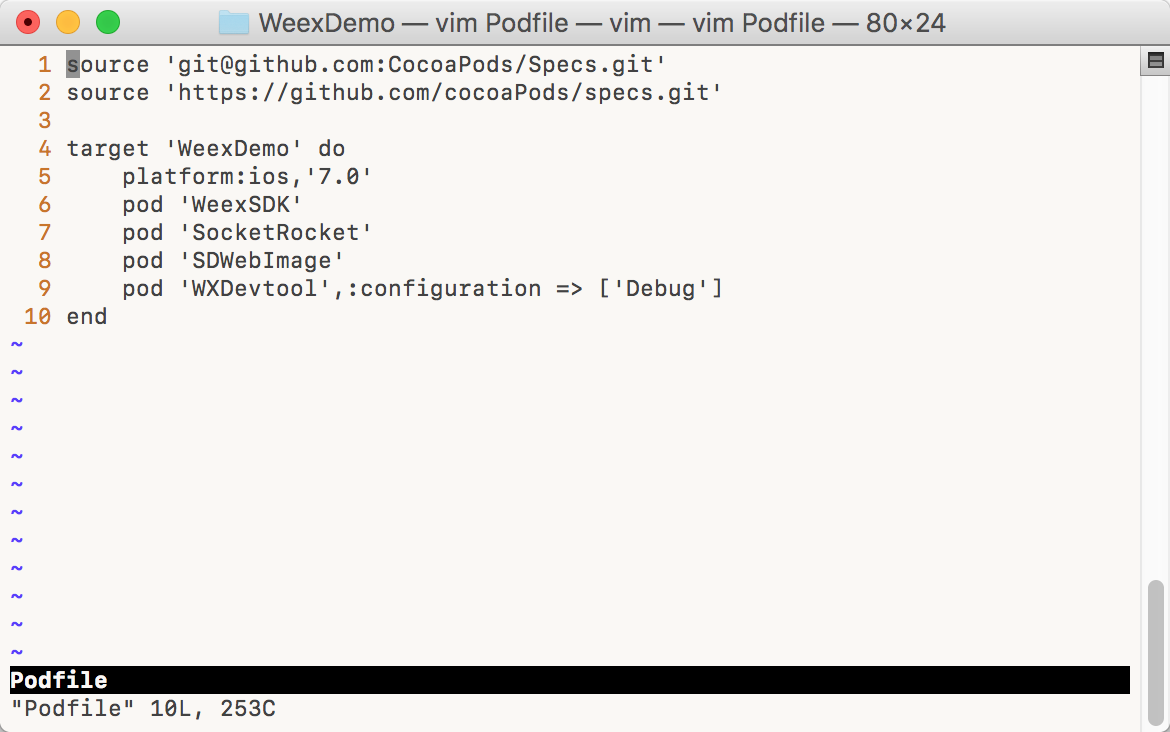 輸入完成之後按Esc然後:wq 保存退出.
註: 最好手動輸入, 避免出錯.
輸入完成之後按Esc然後:wq 保存退出.
註: 最好手動輸入, 避免出錯.
 1 source '[email protected]:CocoaPods/Specs.git'
 2 source 'https://github.com/cocoaPods/specs.git'
 3
 4 target 'WeexDemo' do
 5     platform:ios,'7.0'
 6     pod 'WeexSDK'
 7     pod 'SocketRocket'
 8     pod 'SDWebImage'
 9     pod 'WXDevtool',:configuration => ['Debug']
10 end
最新的weexSDK 不用拷貝weexSDK 到項目目錄中, WeexSDK 後面不指定版本即表示下載最新的版本.
3. 在terminal中 項目根目錄下執行 pod install 命令.
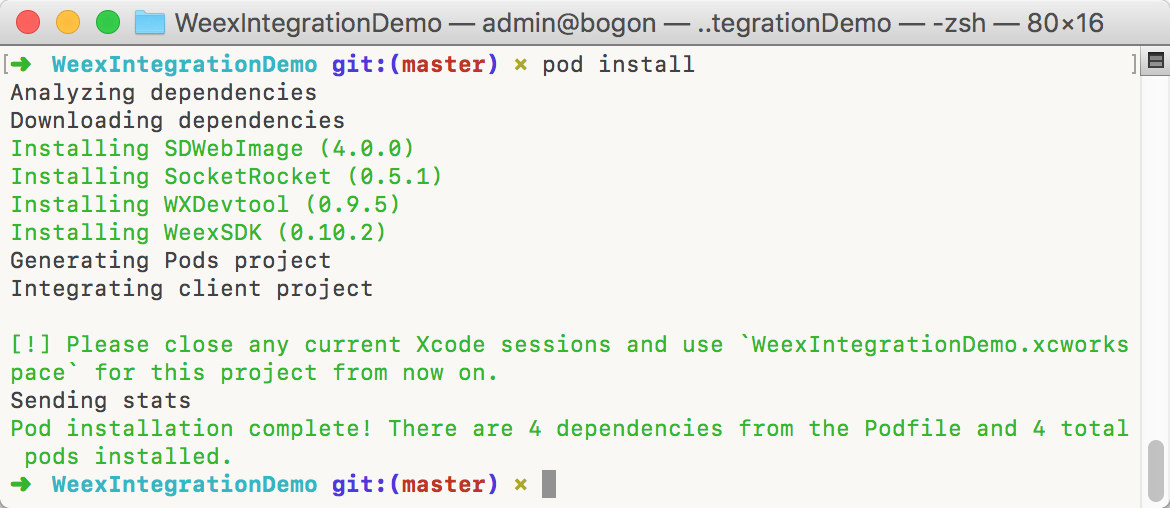
Podfile 就自動添加好了依賴, 並生在項目目錄中成一個WeexIntegrationDemo.xcworkspace, 打開它.
4. 導入系統庫的庫:
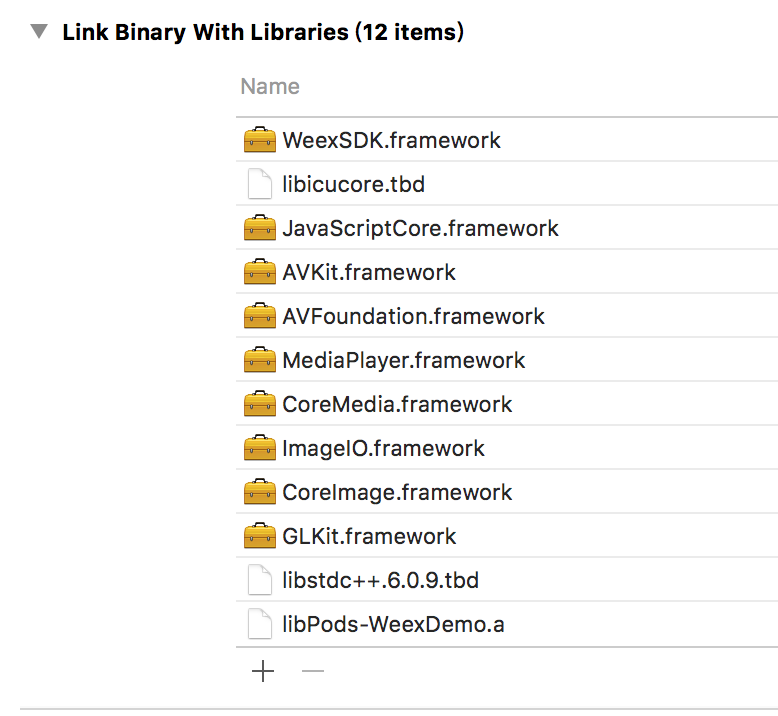
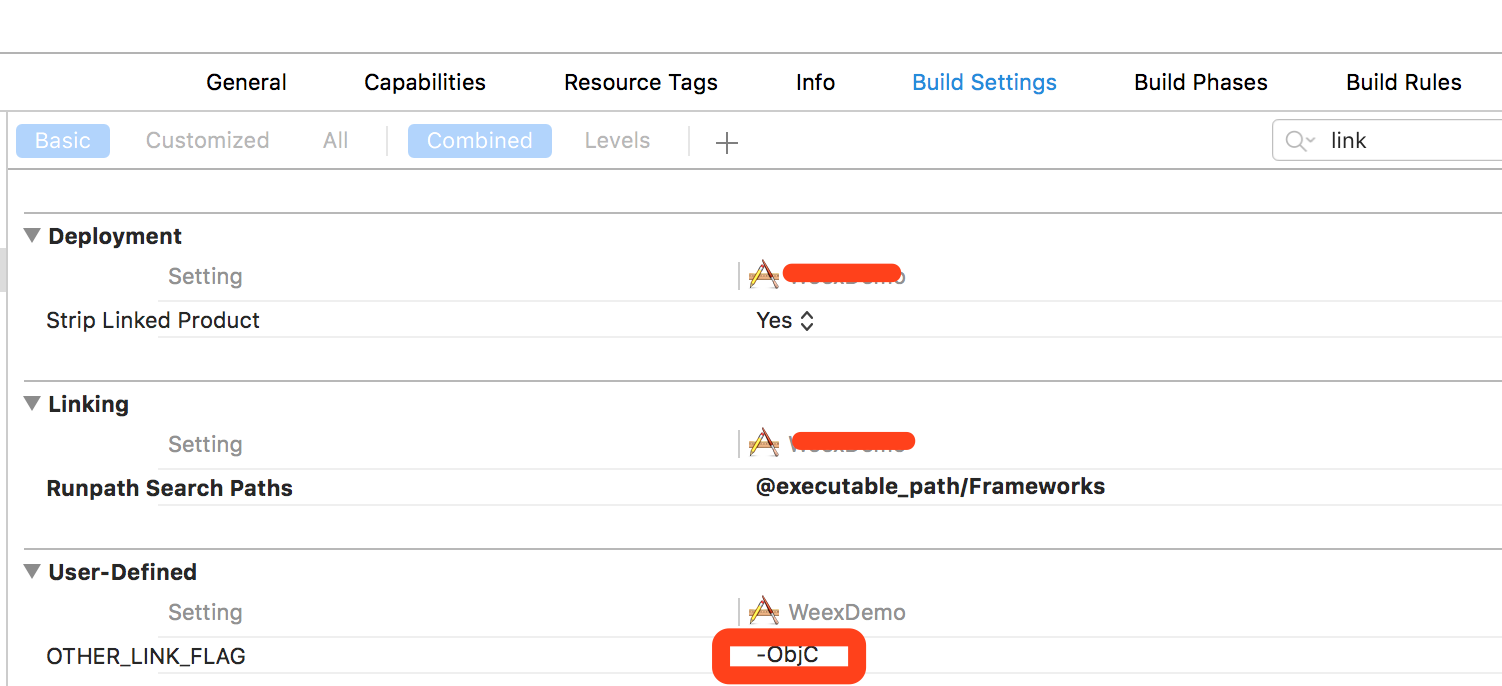
5. 添加 -ObjC 如下圖(註意大小寫)
#import "AppDelegate.h"
#import "ViewController.h"
#import <WeexSDK/WXSDKEngine.h>
#import <WeexSDK/WXLog.h>
#import <WeexSDK/WXDebugTool.h>
#import <WeexSDK/WXAppConfiguration.h>
#import "WXImgLoaderDefaultImpl.h"
幾個頭文件的介紹:
WXSDKEngine:SDK開放的絕大多數介面都在此有聲明。
WXLog: 控制Log輸出的級別,包括Verbose、Debug、Info、Warning、Error,開發者可以按需來設置輸出級別。
WXDebugTool: weex提供的對外調試工具。
WXAppConfiguration: 使用weex開發的業務性配置。
- (void)initWeexSDK {
//業務配置,非必需
[WXAppConfiguration setAppGroup:@"AliApp"];
[WXAppConfiguration setAppName:@"WeexIntegrationDemo"];
[WXAppConfiguration setAppVersion:@"1.0.0"];
//初始化SDK環境
[WXSDKEngine initSDKEnvironment];
//註冊自定義module和component,非必需
/*
[WXSDKEngine registerComponent:@"MyView" withClass:[MyViewComponent class]];
[WXSDKEngine registerModule:@"event" withClass:[WXEventModule class]];
*/
//註冊協議的實現類,非必需
[WXSDKEngine registerHandler:[WXImgLoaderDefaultImpl new] withProtocol:@protocol(WXImgLoaderProtocol)];
//設置Log輸出等級:調試環境預設為Debug,正式發佈會自動關閉。
[WXLog setLogLevel:WXLogLevelAll];
// 開啟debug模式
// [WXDebugTool setDebug:YES];
}
在appdelegate.m的didFinishLaunchingWithOptions回調中執行:
- (BOOL)application:(UIApplication *)application didFinishLaunchingWithOptions:(NSDictionary *)launchOptions {
// Override point for customization after application launch.
[self initWeexSDK];
UINavigationController *nac = [[UINavigationController alloc] initWithRootViewController:[ViewController new]];
self.window = [[UIWindow alloc] initWithFrame:[UIScreen mainScreen].bounds];
[self.window setRootViewController:nac];
[self.window makeKeyAndVisible];
return YES;
}
上面導入頭文件是可以看到有導入 "WXImgLoaderDefaultImpl.h" 這個頭文件, 這是因為weex本身沒有網路下載的能力, 所以需要我們自己寫個協議去實現網路下載.
自定義一個類叫: WXImgLoaderDefaultImpl, 要遵循二個協議: WXImgLoaderProtocol, WXModuleProtocol
#import <Foundation/Foundation.h>
#import "WXImgLoaderProtocol.h"
@interface WXImgLoaderDefaultImpl : NSObject<WXImgLoaderProtocol, WXModuleProtocol>
@end
實現:
#import "WXImgLoaderDefaultImpl.h"
#import <SDWebImage/UIImageView+WebCache.h>
@interface WXImgLoaderDefaultImpl()
@end
@implementation WXImgLoaderDefaultImpl
#pragma mark WXImgLoaderProtocol
- (id<WXImageOperationProtocol>)downloadImageWithURL:(NSString *)url imageFrame:(CGRect)imageFrame userInfo:(NSDictionary *)userInfo completed:(void(^)(UIImage *image, NSError *error, BOOL finished))completedBlock
{
if ([url hasPrefix:@"//"]) {
url = [@"http:" stringByAppendingString:url];
}
return (id<WXImageOperationProtocol>)[[SDWebImageManager sharedManager] downloadImageWithURL:[NSURL URLWithString:url] options:0 progress:^(NSInteger receivedSize, NSInteger expectedSize) {
} completed:^(UIImage *image, NSError *error, SDImageCacheType cacheType, BOOL finished, NSURL *imageURL) {
if (completedBlock) {
completedBlock(image, error, finished);
}
}];
}
這樣, weex就具有網路下載圖片的能力了.
經過以上簡單的配置,WeexSDK的環境初始化已完成,下麵就進入Weex動態化頁面渲染環節。
Weex動態化頁面渲染
weex支持全頁面以及頁面局部兩種不同的渲染模式。在iOS中使用方法很簡單,只需要將weex渲染所得的view添加到父容器中即可。下麵會介紹如何在iOS最常用的容器viewController中渲染weex頁面。
1.在要使用Weex渲染的viewController中包含頭文件
現在來介紹下WXSDKInstance究竟是什麼,如何來使用它。WXSDKInstance,簡單來說,就是weex渲染的實例對象。它提供給開發者諸多跟頁面渲染相關的介面,包括renderWithURL、refreshInstance以及destroyInstance等,提供了幾個比較重要的回調介面,方便開發者根據不同的業務場景去處理他們的邏輯,如onfailed,還提供了性能監控相關的介面。
2. 頁面渲染
#import "ViewController.h"
#import <WeexSDK/WXSDKInstance.h>
@interface ViewController ()
//WXSDKInstance 屬性
@property(nonatomic, strong) WXSDKInstance *instance;
// weex 視圖
@property(nonatomic, strong)UIView *weexView;
// URL屬性(用於指定載入js的URL, 一般申明在介面中)
@property (nonatomic, strong) NSURL *url;
@end
@implementation ViewController
- (void)viewDidLoad {
[super viewDidLoad];
self.title = @"Hello Weex";
self.instance = [[WXSDKInstance alloc] init];
// 設置weexInstance所在的控制器
self.instance.viewController = self;
// 設置weexInstance的frame
self.instance.frame = self.view.frame;
// 設置weexInstance用於渲染JS的url路徑
[self.instance renderWithURL:self.url options:@{@"bundleUrl":[self.url absoluteString]} data:nil];
// 為避免迴圈引用 聲明一個弱指針 self
__weak typeof(self) weakSelf = self;
// 設置weexInstance創建完的回調
self.instance.onCreate = ^(UIView *view) {
[weakSelf.weexView removeFromSuperview];
weakSelf.weexView = view;
weakSelf.weexView.backgroundColor = [UIColor whiteColor];
[weakSelf.view addSubview:weakSelf.weexView];
};
// 設置weexInstance出錯時的回調
self.instance.onFailed = ^( NSError *error) {
NSLog(@"處理失敗%@", error);
};
// 設置weexInstance渲染完成時的回調
self.instance.renderFinish = ^(UIView *view) {
NSLog(@"渲染完成");
};
}
- (void)dealloc {
[_instance destroyInstance];
}
#pragma mark - 懶載入
- (NSURL *)url {
if (!_url) {
_url = [NSURL URLWithString:@"http://ygz001.oicp.net/app.weex.js"];
}
return _url;
}
- (void)didReceiveMemoryWarning {
[super didReceiveMemoryWarning];
// Dispose of any resources that can be recreated.
}
@end
以上是通過weex實例來渲染頁面的簡單例子。其中有幾點需要著重說明下:
instance.viewController: 一般情況下,iOS的運行環境都是基於不同viewController的,很多底層操作需要知曉當前所處的viewController對象,因此需要向instance知會當前的viewController。
instance.frame: 根據weex對instance的設計規範,需要渲染中知道最外層body的位置和尺寸。這個frame值的設置,跟最終在回調中獲取的view.frame一致。
當然,在很多場景下,僅需要在一個native頁面的局部渲染weex區塊。很簡單,您只需要將instance.frame設置為目標區塊的位置尺寸即可。
renderWithURL:常用的渲染方式:其一,直接輸入URL(可以是file://或 http(s)://);其二,sourceCode,即JavaScript源碼。options參數,表示開發者可以通過WeexSDK向前端透傳的參數,如bundleURL。data參數,表示向weex的模板註入的頁面數據,它一般來源於native的數據請求,當然也可以在前端邏輯中完成請求後將數據註入。
url參數: 是從weex 編譯運行後出來的app.js或app.weex.js 文件, 可以放在遠程伺服器上, 也可以直接拖進項目工程里.
_instance.onCreate:weex頁面最外層body渲染完成後的回調。在此回調中,weex渲染所得的rootView已確定,可以輸出並添加到父容器中。
_instance.renderFinish:和onCreate不同,renderFinish表示所有weex的頁面元素都已渲染完畢,整個渲染過程至此結束。
其他跟instance緊密相關的介面,請參見WXSDKInstance.h的詳細說明。
3. 頁面銷毀
切記在viewController的銷毀的同時,將weex實例一併銷毀,否則會出現記憶體泄露。
- (void)dealloc {
[_instance destroyInstance];
}
其他
在頁面渲染這個部分,本文已向您詳細介紹了成功接入WeexSDK後,如何通過載入URL的方式渲染得到視圖。此外,您也可以通過github下載最新的playground代碼並編譯,它可以提供二維碼掃描預覽以及線上debug等功能。
點擊下載 WeexSample
南心芭比: 熱愛分享, 收穫快樂~

