最近在做項目的時候經常自定義一些輸入框,今天在這裡分享給大家。我的思路就是繼承於系統的控制項然後利用drawRect重畫裡面的控制項。那麼drawRect是怎麼工作的呢?drawRect的工作原理:首先蘋果是不推薦我們直接使用drawRect進行工作的,直接調用他也是沒有任何效果的。蘋果要求我們調用UI...
最近在做項目的時候經常自定義一些輸入框,今天在這裡分享給大家。
我的思路就是繼承於系統的控制項然後利用drawRect重畫裡面的控制項。
那麼drawRect是怎麼工作的呢?
drawRect的工作原理:
首先蘋果是不推薦我們直接使用drawRect進行工作的,直接調用他也是沒有任何效果的。蘋果要求我們調用UIView類中的setNeedsDisplay方法,則程式會自動調用drawRect方法進行重繪。(調用setNeedsDisplay會自動調用drawRect)。
在UIView中,重寫drawRect: (CGRect) aRect方法,可以自己定義想要畫的圖案.且此方法一般情況下只會畫一次.也就是說這個drawRect方法一般情況下只會被調用一次。
當某些情況下想要手動重畫這個View,只需要掉用[self setNeedsDisplay]方法即可.
drawRect調用是在Controller->loadView, Controller->viewDidLoad 兩方法被調用之後調用的.所以不用擔心在控制器中,這些View的drawRect就開始畫了.這樣可以在控制器中設置一些值給View(如果這些View draw的時候需要用到某些變數值).
1.如果在UIView初始化時沒有設置rect大小,將直接導致drawRect不被自動調用。
2.該方法在調用sizeThatFits後被調用,所以可以先調用sizeToFit計算出size。然後系統自動調用drawRect:方法。
3.通過設置contentMode屬性值為UIViewContentModeRedraw。那麼將在每次設置或更改frame的時候自動調用drawRect:。
4.直接調用setNeedsDisplay,或者setNeedsDisplayInRect:觸發drawRect:,但是有個前提條件是rect不能為0.
以上1,2推薦;而3,4不提倡
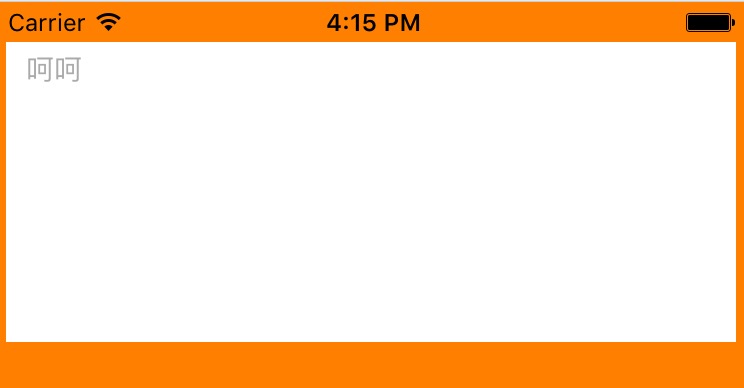
1.首先是可以多行輸入的輸入框(繼承於UITextView,效果如下)

#pragma mark -- 初始化時調用 --
- (instancetype)initWithFrame:(CGRect)frame {
    if (self = [super initWithFrame:frame]) {
        /**
         *  初始化的時候為屬性設置預設值
         */
        self.placeholder      = @"請輸入文字";
        self.placeholderColor = [UIColor lightGrayColor];
        self.placeholderFont  = [UIFont systemFontOfSize:14];

        /**
         *  用textVeiw添加通知,當textView發生變化的時候會調用textChanged方法
         */
        [[NSNotificationCenter defaultCenter] addObserver:self selector:@selector(textChanged:) name:UITextViewTextDidChangeNotification object:nil];
    }
    return self;
}

#pragma mark -- 重繪(為textVeiw加上placeholder) --
- (void)drawRect:(CGRect)rect {
    //如果文字消失了就會繪製placeholder
    if (self.text.length == 0) {
        CGRect placeholderRect = CGRectZero;
        placeholderRect.origin.x = 10;
        placeholderRect.origin.y = 5;
        placeholderRect.size.width = self.frame.size.width-10;
        placeholderRect.size.height = self.frame.size.height-5;
        [self.placeholder drawInRect:placeholderRect withAttributes:@{
                                                            NSFontAttributeName:_placeholderFont,
                                                            NSForegroundColorAttributeName:_placeholderColor
                                                            }];
    }
    [super drawRect:rect];
}

#pragma mark -- 文字改變的時候會調用該方法
- (void)textChanged:(NSNotification *)notification {
    /**
     *  在文字改變的時候就重繪
     */
    [self setNeedsDisplay];
}

#pragma mark -- 移除通知
- (void)dealloc {
    [[NSNotificationCenter defaultCenter] removeObserver:self];
}
如果想自定義更多樣式,可以給attribute多加一些屬性就可以了!!!
2.自定義符合要求的輸入框(繼承於UITextField,效果如下)

上面左視圖只有兩個圓角而且離上下左都有1px的間距,並且placeholder是在右邊的。
- (instancetype)initWithFrame:(CGRect)frame {
    if (self = [super initWithFrame:frame]) {
        /**
         *  初始化屬性,設置預設值
         */
        _placeholderFont = [UIFont systemFontOfSize:16];
        _placeholderColor = [UIColor lightGrayColor];

        CGFloat height = frame.size.height;
        UIView *leftView = [[UIView alloc] initWithFrame:CGRectMake(0, 1, height-1, height-2)];
        leftView.backgroundColor = [UIColor redColor];

        UIImageView *imageView = [[UIImageView alloc] initWithImage:[UIImage imageNamed:@"Icon"]];
        imageView.frame = CGRectMake(0, 0, height-1, height-2);
        [leftView addSubview:imageView];

        //利用這個方法可以使左視圖只有兩個圓角
        UIBezierPath *maskPath = [UIBezierPath bezierPathWithRoundedRect:leftView.bounds byRoundingCorners:UIRectCornerBottomLeft|UIRectCornerTopLeft cornerRadii:CGSizeMake(5, 5)];
        CAShapeLayer *maskLayer = [[CAShapeLayer alloc] init];
        maskLayer.frame = leftView.bounds;
        maskLayer.path = maskPath.CGPath;
        leftView.layer.mask = maskLayer;
        self.leftView = leftView;
        self.leftViewMode = UITextFieldViewModeAlways;


        NSLog(@"%s",__func__);
    }
    return self;
}
//這兩個方法我也不知道有什麼用,如果有知道的可以聯繫我告訴我一下
/*
#pragma mark -- 重置邊界區域
- (CGRect)borderRectForBounds:(CGRect)bounds {
    CGRect borderRect = [super borderRectForBounds:bounds];

    return borderRect;
}

#pragma mark -- 重置文字區域
- (CGRect)textRectForBounds:(CGRect)bounds {
    CGRect textRect = [super textRectForBounds:bounds];

    return textRect;
}
*/

#pragma mark -- 重置placeholder
- (CGRect)placeholderRectForBounds:(CGRect)bounds {
    CGRect placeholderRect = [super placeholderRectForBounds:bounds];
    /**
     *  使placeholder居右
     */
    CGFloat placeholderWidth = [self.placeholder boundingRectWithSize:CGSizeMake(MAXFLOAT, MAXFLOAT) options:NSStringDrawingUsesLineFragmentOrigin attributes:@{NSFontAttributeName:_placeholderFont} context:nil].size.width;
    placeholderRect.origin.x += placeholderRect.size.width-placeholderWidth-5;
    return placeholderRect;
}

#pragma mark -- 重置編輯區域
- (CGRect)editingRectForBounds:(CGRect)bounds {
    CGRect editingRect = [super editingRectForBounds:bounds];
    return editingRect;
}

#pragma mark -- 重置刪除按鈕區域
- (CGRect)clearButtonRectForBounds:(CGRect)bounds {
    CGRect clearButtonRect = [super clearButtonRectForBounds:bounds];

    return clearButtonRect;
}

#pragma mark -- 重置左視圖區域
- (CGRect)leftViewRectForBounds:(CGRect)bounds {
    CGRect leftViewRect = [super leftViewRectForBounds:bounds];
    leftViewRect.origin.x += 1;
    return leftViewRect;
}

#pragma mark -- 重置右視圖區域
- (CGRect)rightViewRectForBounds:(CGRect)bounds {
    CGRect rightViewRect = [super rightViewRectForBounds:bounds];

    return rightViewRect;
}

#pragma mark -- 重繪文字(這個方法他成為第一響應者之後才調用的)
- (void)drawTextInRect:(CGRect)rect {
    [super drawTextInRect:rect];
    self.textColor = [UIColor purpleColor];
}

#pragma mark -- 重繪placeholder

//在第一次顯示的時候是先調用了placeholderRectForBounds:這個方法,然後再調用該方法

//之後顯示的時候都是在調用了placeholderRectForBounds:方法之後,調用該方法,之後再調用placeholderRectForBounds:方法,這就會使placeholder的位置發生偏移(當他成為第一響應者的時候就不會居中對齊了,如果有知道怎麼解決的,請聯繫我一下,謝謝!!!)
- (void)drawPlaceholderInRect:(CGRect)rect {
    [super drawPlaceholderInRect:rect];
    /**
     *  調用kvo修改系統的_placeholderLabel的屬性
     */
    [self setValue:_placeholderColor forKeyPath:@"_placeholderLabel.textColor"];
    [self setValue:_placeholderFont  forKeyPath:@"_placeholderLabel.font"];
}
如果有需要這個demo的,可以去我的空間下載,也可以加我qq:357898849,一起交流一下哦!!!


