
我的博客園博文地址:http://www.cnblogs.com/tenglongwentian/ Lucene,最新版是Lucene6.2.1,匹配的jdk版本是1.8正式版。這裡用jdk7最後一版,所以用Lucene5.3.3。 新建一個maven項目,如果不會可以參考前面的博文,前面的博文有專 ...
我的博客園博文地址:http://www.cnblogs.com/tenglongwentian/
Lucene,最新版是Lucene6.2.1,匹配的jdk版本是1.8正式版。
這裡用jdk7最後一版,所以用Lucene5.3.3。
新建一個maven項目,如果不會可以參考前面的博文,前面的博文有專門提到如何新建maven項目。
新建的maven項目:<packaging>jar</packaging>,
 1 <dependencies>
 2         <!-- https://mvnrepository.com/artifact/org.apache.lucene/lucene-core -->
 3         <dependency>
 4             <groupId>org.apache.lucene</groupId>
 5             <artifactId>lucene-core</artifactId>
 6             <version>5.5.3</version>
 7         </dependency>
 8         <!-- https://mvnrepository.com/artifact/org.apache.lucene/lucene-queryparser -->
 9         <dependency>
10             <groupId>org.apache.lucene</groupId>
11             <artifactId>lucene-queryparser</artifactId>
12             <version>5.5.3</version>
13         </dependency>
14         <!-- https://mvnrepository.com/artifact/org.apache.lucene/lucene-analyzers-common -->
15         <dependency>
16             <groupId>org.apache.lucene</groupId>
17             <artifactId>lucene-analyzers-common</artifactId>
18             <version>5.5.3</version>
19         </dependency>
20     </dependencies>
因為我用jdk7,不喜歡每次更新maven倉庫都要手動調整項目的jdk版本,所以
 1 <!-- 源碼目錄,插件管理等配置 -->
 2     <build>
 3         <finalName>Lucene</finalName>
 4         <plugins>
 5             <plugin>
 6                 <groupId>org.apache.maven.plugins</groupId>
 7                 <artifactId>maven-compiler-plugin</artifactId>
 8                 <version>3.3</version>
 9                 <configuration>
10                     <!-- 指定source和target的版本 -->
11                     <!-- source 指定用哪個版本的編譯器對java源碼進行編譯 -->
12                     <source>1.7</source>
13                     <!-- target 指定生成的class文件將保證和哪個版本的虛擬機進行相容 -->
14                     <target>1.7</target>
15                 </configuration>
16             </plugin>
17         </plugins>
18     </build>
可以這樣。
新建兩個類:
Indexer
import java.io.File;
import java.io.FileReader;
import java.nio.file.Paths;

import org.apache.lucene.analysis.Analyzer;
import org.apache.lucene.analysis.standard.StandardAnalyzer;
import org.apache.lucene.document.Document;
import org.apache.lucene.document.Field;
import org.apache.lucene.document.TextField;
import org.apache.lucene.index.IndexWriter;
import org.apache.lucene.index.IndexWriterConfig;
import org.apache.lucene.store.Directory;
import org.apache.lucene.store.FSDirectory;

public class Indexer {
    private IndexWriter writer;// 寫索引實例

    /**
     * 構造方法實例化IndexWriter
     *
     * @param indexDir
     * @throws Exception
     */
    public Indexer(String indexDir) throws Exception {
        Directory dir = FSDirectory.open(Paths.get(indexDir));
        Analyzer analyzer = new StandardAnalyzer();// 標準分詞器
        IndexWriterConfig iwc = new IndexWriterConfig(analyzer);
        writer = new IndexWriter(dir, iwc);
    }

    /**
     * 關閉寫索引
     *
     * @throws Exception
     */
    public void close() throws Exception {
        writer.close();
    }

    /**
     * 索引指定目錄的所有文件
     *
     * @param dataDir
     * @throws Exception
     */
    public int index(String dataDir) throws Exception {
        File[] files = new File(dataDir).listFiles();
        for (File f : files) {
            indexFile(f);
        }
        return writer.numDocs();
    }

    /**
     * 索引指定文件
     *
     * @param f
     */
    private void indexFile(File f) throws Exception {
        // TODO Auto-generated method stub
        System.out.println("索引文件:" + f.getCanonicalFile());
        Document doc = getDocument(f);
        writer.addDocument(doc);
    }

    /**
     * 獲取文檔,文檔里在設置每個欄位
     *
     * @param f
     * @return
     * @throws Exception
     */
    private Document getDocument(File f) throws Exception {
        // TODO Auto-generated method stub
        Document doc = new Document();
        doc.add(new TextField("contents", new FileReader(f)));
        doc.add(new TextField("fileName", f.getName(), Field.Store.YES));
        doc.add(new TextField("fullPath", f.getCanonicalPath(), Field.Store.YES));
        return doc;
    }
    public static void main(String[] args){
        String indexDir="E:\\lucene";
        String dataDir="E:\\lucene\\data";
        Indexer indexer = null;
        int numIndexed=0;
        long start=System.currentTimeMillis();
        try {
            indexer = new Indexer(indexDir);
            numIndexed=indexer.index(dataDir);
        } catch (Exception e) {
            // TODO Auto-generated catch block
            e.printStackTrace();
        }finally {
            try {
                indexer.close();
            } catch (Exception e) {
                // TODO Auto-generated catch block
                e.printStackTrace();
            }
        }
        long end=System.currentTimeMillis();
        System.out.println("索引:"+numIndexed+"個文件,花費了"+(end-start)+"毫秒");
    }
}
String indexDir="E:\\lucene";
String dataDir="E:\\lucene\\data";
看到這裡不要好奇,盤符隨意,在任意盤符根目錄下新建文件夾,最好英文無空格,中文未測試,然後拷貝幾個txt文件到data文件夾下麵,一會測試用的到。
然後運行這個類,可以看到
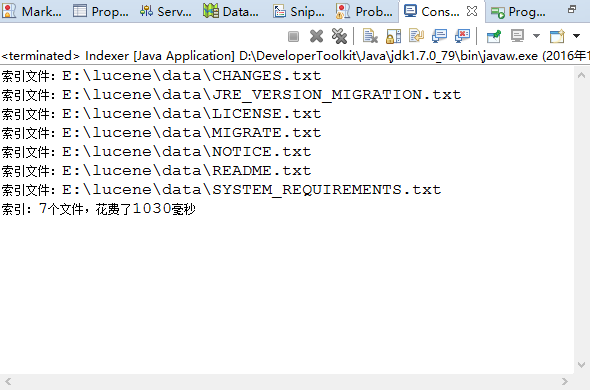
然後可以在lucene文件夾下看到這幾個奇怪的文件,是什麼後面會提到,稍安勿躁。
新建另一個類:
Searcher
 1 import java.nio.file.Paths;
 2
 3 import org.apache.lucene.analysis.Analyzer;
 4 import org.apache.lucene.analysis.standard.StandardAnalyzer;
 5 import org.apache.lucene.document.Document;
 6 import org.apache.lucene.index.DirectoryReader;
 7 import org.apache.lucene.index.IndexReader;
 8 import org.apache.lucene.queryparser.classic.QueryParser;
 9 import org.apache.lucene.search.IndexSearcher;
10 import org.apache.lucene.search.Query;
11 import org.apache.lucene.search.ScoreDoc;
12 import org.apache.lucene.search.TopDocs;
13 import org.apache.lucene.store.Directory;
14 import org.apache.lucene.store.FSDirectory;
15
16 public class Searcher {
17     public static void search(String indexDir, String q) throws Exception {
18         Directory dir = FSDirectory.open(Paths.get(indexDir));
19         IndexReader reader = DirectoryReader.open(dir);
20         IndexSearcher is = new IndexSearcher(reader);
21         Analyzer analyzer = new StandardAnalyzer();
22         QueryParser parse = new QueryParser("contents", analyzer);
23         Query query = parse.parse(q);
24         long start = System.currentTimeMillis();
25         TopDocs hits = is.search(query, 10);
26         long end = System.currentTimeMillis();
27         System.out.println("匹配" + q + ",總共花費" + (end - start) + "毫秒," + "查詢到" + hits.totalHits + "個記錄");
28         for (ScoreDoc scoreDoc : hits.scoreDocs) {
29             Document doc = is.doc(scoreDoc.doc);
30             System.out.println(doc.get("fullPath"));
31         }
32         reader.close();
33     }
34
35     public static void main(String[] args) {
36         String indexDir = "E:\\lucene";
37         //String q = "LICENSE-2.0";
38         String q = "Zygmunt Saloni";
39         try {
40             search(indexDir, q);
41         } catch (Exception e) {
42             // TODO Auto-generated catch block
43             e.printStackTrace();
44         }
45     }
46 }
運行這個類,

不要把第一個類生成的幾個特殊的文件刪除,任性的話,試試看,會報錯,如果刪除運行第一個類生成的幾個特殊的奇怪文件後再運行第二個類的時候會報錯。
還是任性的試試看吧。
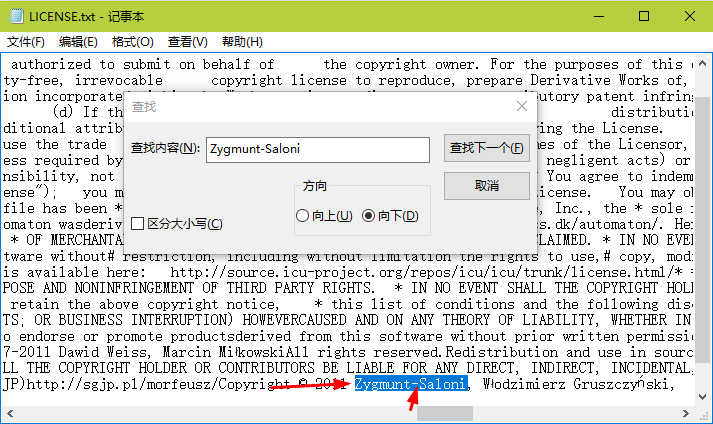
對比String q = "Zygmunt Saloni";事實證明沒什麼影響,因為分詞了,整體切割。
加上-運行第二個類的話,結果一樣,自己試試看。
轉載請註明出處,謝謝。

