理解I2C設備驅動框架,主要圍繞四個結構體去分析就容易了。 struct i2c_algorithm:提供I2C協議的實現的操作,如:master_xfer實現數據收發的最基本方法。 struct i2c_adapter:每一個i2c_adapter都代表一個I2C物理介面,一個cpu可以有多個I2 ...
理解I2C設備驅動框架,主要圍繞四個結構體去分析就容易了。
struct i2c_algorithm:提供I2C協議的實現的操作,如:master_xfer實現數據收發的最基本方法。
struct i2c_adapter:每一個i2c_adapter都代表一個I2C物理介面,一個cpu可以有多個I2C介面(i2c_adapter),i2c_algorithm就是為i2c_adapter提供I2C協議的實現。每增加一個i2c介面,即是向i2c_core.c註冊一個i2c_adapter
struct i2c_driver:代表著一類I2C從機設備的驅動,比如:at24cxx的驅動,不同類型的I2C從機需要註冊不同的i2c_driver,如:ssd1306的驅動不同於at24cxx的驅動。每增加一個類型的I2C從機設備,都要向i2c_core.c註冊一個i2c_driver
struct i2c_client:代表具體的某一個I2C從機設備,如:at24cxx系列的設備,有at24c01,at24c02等,每增加一個at24cxx設備,都要註冊一個i2c_client。只有I2C從機設備被探測到,i2c_client才會被註冊。
這四者的關係可以分為:i2c_algorithm和i2c_adapter一起驅動I2C匯流排,i2c_driver和i2c_client一起實現設備驅動。
註:linux目前只支持I2C主機模式。本文引用內核源碼中i2c-algo-bit.c和i2c-gpio.c文件來講解, i2c_driver由驅動開發者根據特定的設備提供,這裡引用作者提供的ssd1306.c。i2c-algo-bit.c和i2c-gpio.c共同實現IO模擬I2C。
i2c-algo-bit.c提供了一個i2c_algorithm,i2c-gpio.c提供了一個i2c_adapter。
i2c-algo-bit.c通過以下代碼綁定到i2c-gpio.c
i2c-algo-bit.c
 1 static const struct i2c_algorithm i2c_bit_algo = {
 2     .master_xfer    = bit_xfer,
 3     .functionality  = bit_func,
 4 };
 5
 6 static int i2c_bit_prepare_bus(struct i2c_adapter *adap)
 7 {
 8     ... ...
 9     adap->algo = &i2c_bit_algo;
10     ... ...
11     return 0;
12 }
13
14 int i2c_bit_add_bus(struct i2c_adapter *adap)
15 {
16     ... ...
17     err = i2c_bit_prepare_bus(adap);
18     ... ...
19     return i2c_add_adapter(adap);
20 }
i2c-gpio.c
 1 static int __init i2c_gpio_probe(struct platform_device *pdev)
 2 {
 3     struct i2c_gpio_platform_data *pdata;
 4     struct i2c_algo_bit_data *bit_data;
 5     struct i2c_adapter *adap;
 6     ... ...
 7     pdata = pdev->dev.platform_data;
 8     ... ...
 9     i2c_bit_add_bus(adap);
10     ... ...
11 }
這裡就註冊了一個i2c_adapter。
要驅動ssd1306,因此對應地要提供一個i2c_driver,與i2c_adapter建立關係。
ssd1306.c
 1 static struct i2c_driver ssd1306_driver = {
 2     .driver = {
 3             .name   = "ssd1306",
 4         },
 5         .id     = I2C_DRIVERID_I2CDEV,
 6         .attach_adapter = ssd1306_attach_adapter,
 7         .detach_client  = ssd1306_detach_client,
 8 };
 9
10 static int ssd1306_module_init(void)
11 {
12     i2c_add_driver(&ssd1306_driver);
13     return 0;
14 }
i2c_driver和i2c_adapter是怎樣建立關係的呢?
I2c_core.c負責橋接i2c_driver和i2c_adapter建立關係,在i2c_driver和i2c_adapter註冊的時候,兩者都會調用driver->attach_adapter(adapter)
 1 int i2c_register_driver(struct module *owner, struct i2c_driver *driver)
 2 {
 3     ... ...
 4     driver->attach_adapter(adapter);
 5     ... ...
 6     return 0;
 7 }
 8
 9 static int i2c_register_adapter(struct i2c_adapter *adap)
10 {
11     ... ...
12     driver->attach_adapter(adap);
13     ... ...
14 }
driver->attach_adapter(adapter)實際上調用
1 static int ssd1306_attach_adapter(struct i2c_adapter *adapter)
2 {
3     return i2c_probe(adapter, &addr_data, ssd1306_detect);
4 }
I2c_probe()函數的作用就是,探測是否存在ssd1306這個設備,是怎樣探測的呢?就是通過發送從機地址到ssd1306,如果ssd1306返回應答信號,就認為探測到了。
 1 int i2c_probe(struct i2c_adapter *adapter,
 2           struct i2c_client_address_data *address_data,
 3           int (*found_proc) (struct i2c_adapter *, int, int))
 4 {
 5     ... ...
 6     i2c_probe_address(adapter,
 7                     address_data->probe[i + 1],
 8                     -1, found_proc);
 9     ... ...
10 }
代碼太多,簡化函數調用關係如下:
1 i2c_probe_address()
2     i2c_smbus_xfer()
3         i2c_smbus_xfer_emulated();
4             i2c_transfer();
5                 adap->algo->master_xfer(adap,msgs,num);
adap->algo->master_xfer(adap,msgs,num);實際調用的是bit_xfer()
探測到ssd1306後,其實也就說明瞭探測到的I2C地址有效, 還需要註冊一個描述SSD1306的i2c_client。
 1 static int ssd1306_detect(struct i2c_adapter *adapter, int address, int kind)
 2 {
 3     printk("ssd1306_detect\n");
 4
 5     ssd1306_client = kzalloc(sizeof(struct i2c_client), GFP_KERNEL);
 6     ssd1306_client->addr    = address;
 7     ssd1306_client->adapter = adapter;
 8     ssd1306_client->driver  = &ssd1306_driver;
 9     strcpy(ssd1306_client->name, "ssd1306");
10
11     i2c_attach_client(ssd1306_client);
12
13     ... ...
14 }
先轉下話題。
在i2c-gpio.c中,
1 static int __init i2c_gpio_init(void)
2 {
3     ... ...
4     ret = platform_driver_probe(&i2c_gpio_driver, i2c_gpio_probe);
5     ... ...
6 }
這裡實際上是註冊了一個platform_driver,我們還要對應的為他註冊一個platform_device,
這個platform_device提供了硬體相關的設置,如指定那兩個io口為SCL和SDA。
I2c_gpio_dev.c中
 1 static struct i2c_gpio_platform_data i2c_dev = {
 2     .sda_pin = S3C2410_GPG6,
 3     .scl_pin = S3C2410_GPG5,
 4     .udelay = 0,
 5     .timeout = 0,
 6     .sda_is_open_drain = 1,
 7     .scl_is_open_drain = 1,
 8     .scl_is_output_only = 1
 9 };
10
11 static struct platform_device i2c_platform_dev = {
12     .name         = "i2c-gpio",
13     .id           = -1,
14     .dev = {
15         .release = i2c_dev_release,
16         .platform_data = (void *)&i2c_dev,
17     },
18 };
19
20 static int i2c_dev_init(void)
21 {
22     platform_device_register(&i2c_platform_dev);
23     return 0;
24 }
如果platform_device和platform_driver匹配,就會調用i2c_gpio_probe()
 1 static int __init i2c_gpio_probe(struct platform_device *pdev)
 2 {
 3     struct i2c_gpio_platform_data *pdata;
 4     struct i2c_algo_bit_data *bit_data;
 5     struct i2c_adapter *adap;
 6     ... ...
 7     pdata = pdev->dev.platform_data;
 8     ... ...
 9     i2c_bit_add_bus(adap);
10     ... ...
11 }
只有platform_device和platform_driver匹配才能註冊i2c_adapter。
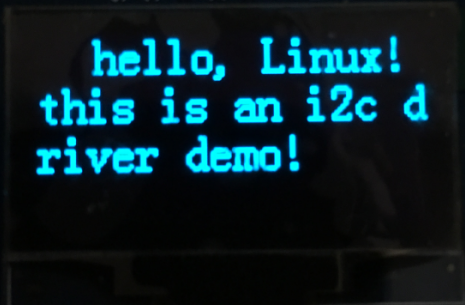
到這裡,就可以操作ssd1306了。ssd1306寫一個位元組的操作:
 1 static void ssd1306_write_byte(uint8_t chData, uint8_t chCmd)
 2 {
 3     uint8_t cmd = 0x00;
 4
 5     if (chCmd) {
 6         cmd = 0x40;
 7     } else {
 8         cmd = 0x00;
 9     }
10
11     i2c_smbus_write_byte_data(ssd1306_client, cmd, chData);
12 }
實際上調用了i2c_smbus_write_byte_data()
I2c_core.c提供了幾個I2C的讀寫函數:
1 s32 i2c_smbus_write_byte_data(struct i2c_client *client, u8 command, u8 value);
2 s32 i2c_smbus_read_word_data(struct i2c_client *client, u8 command);
3 ... ...
4 s32 i2c_smbus_read_i2c_block_data(struct i2c_client *client, u8 command, u8 *values);
5 s32 i2c_smbus_write_i2c_block_data(struct i2c_client *client, u8 command,
6                    u8 length, const u8 *values)
運行代碼
註:由於源碼的i2c-gpio-bit.c只支持具有開漏輸入輸出功能的IO模擬I2C, 而我的開發板已經沒有具有開漏輸入輸出功能的IO了,只能使用普通的上啦輸入輸出IO,對SDA的讀寫操作,需要切換輸入輸出方向。因此我把i2c-gpio-bit.c改成普通IO操作SDA,命名為my-i2c-gpio-bit.c,同時i2c-gpio-bit.h和i2c-gpio.c也要做相應改動,分別改為my-i2c-gpio-bit.h和my-i2c-gpio.c。如果使用具有開漏輸入輸出功能的IO,可以直接使用i2c-gpio-bit.c,i2c-gpio-bit.h,i2c-gpio.c。


代碼
i2c_gpio_dev.c
 1 #include <linux/module.h>
 2 #include <linux/version.h>
 3
 4 #include <linux/init.h>
 5
 6 #include <linux/kernel.h>
 7 #include <linux/types.h>
 8 #include <linux/interrupt.h>
 9 #include <linux/list.h>
10 #include <linux/timer.h>
11 #include <linux/init.h>
12 #include <linux/serial_core.h>
13 #include <linux/platform_device.h>
14 #include <linux/gpio_keys.h>
15 #include <linux/input.h>
16 #include <linux/irq.h>
17 #include <linux/i2c-gpio.h>
18
19 #include <asm/gpio.h>
20 #include <asm/io.h>
21 #include <asm/arch/regs-gpio.h>
22
23
24 /* [cgw]:  */
25
26 static struct i2c_gpio_platform_data i2c_dev = {
27     .sda_pin = S3C2410_GPG6,
28     .scl_pin = S3C2410_GPG5,
29     .udelay = 0,
30     .timeout = 0,
31     .sda_is_open_drain = 1,
32     .scl_is_open_drain = 1,
33     .scl_is_output_only = 1
34 };
35
36 static void i2c_dev_release(struct device * dev)
37 {
38     printk("i2c_dev_release! \n");
39 }
40
41 /* [cgw]: 分配一個平臺設備 */
42 static struct platform_device i2c_platform_dev = {
43     .name         = "i2c-gpio",
44     .id           = -1,
45     .dev = {
46         .release = i2c_dev_release,
47         .platform_data = (void *)&i2c_dev,
48     },
49 };
50
51
52 static int i2c_dev_init(void)
53 {
54     /* [cgw]: 註冊i2c_platform_dev平臺設備 */
55     platform_device_register(&i2c_platform_dev);
56     return 0;
57 }
58
59 static void i2c_dev_exit(void)
60 {
61     /* [cgw]: 註銷i2c_platform_dev平臺設備 */
62     platform_device_unregister(&i2c_platform_dev);
63 }
64
65 module_init(i2c_dev_init);
66 module_exit(i2c_dev_exit);
67
68 MODULE_LICENSE("GPL");
ssd1306.c
  1 #include <linux/kernel.h>
  2 #include <linux/init.h>
  3 #include <linux/module.h>
  4 #include <linux/slab.h>
  5 #include <linux/jiffies.h>
  6 #include <linux/i2c.h>
  7 #include <linux/mutex.h>
  8 #include <linux/fs.h>
  9 #include <asm/uaccess.h>
 10
 11
 12 #define SSD1306_CMD    0
 13 #define SSD1306_DAT    1
 14
 15 #define SSD1306_WIDTH    128
 16 #define SSD1306_HEIGHT   64
 17
 18 static uint8_t s_chDispalyBuffer[128][8];
 19
 20 const uint8_t c_chFont1608[95][16] = {
 21 {0x00,0x00,0x00,0x00,0x00,0x00,0x00,0x00,0x00,0x00,0x00,0x00,0x00,0x00,0x00,0x00},/*" ",0*/
 22 {0x00,0x00,0x00,0x00,0x00,0x00,0x1F,0xCC,0x00,0x0C,0x00,0x00,0x00,0x00,0x00,0x00},/*"!",1*/
 23 {0x00,0x00,0x08,0x00,0x30,0x00,0x60,0x00,0x08,0x00,0x30,0x00,0x60,0x00,0x00,0x00},/*""",2*/
 24 {0x02,0x20,0x03,0xFC,0x1E,0x20,0x02,0x20,0x03,0xFC,0x1E,0x20,0x02,0x20,0x00,0x00},/*"#",3*/
 25 {0x00,0x00,0x0E,0x18,0x11,0x04,0x3F,0xFF,0x10,0x84,0x0C,0x78,0x00,0x00,0x00,0x00},/*"$",4*/
 26 {0x0F,0x00,0x10,0x84,0x0F,0x38,0x00,0xC0,0x07,0x78,0x18,0x84,0x00,0x78,0x00,0x00},/*"%",5*/
 27 {0x00,0x78,0x0F,0x84,0x10,0xC4,0x11,0x24,0x0E,0x98,0x00,0xE4,0x00,0x84,0x00,0x08},/*"&",6*/
 28 {0x08,0x00,0x68,0x00,0x70,0x00,0x00,0x00,0x00,0x00,0x00,0x00,0x00,0x00,0x00,0x00},/*"'",7*/
 29 {0x00,0x00,0x00,0x00,0x00,0x00,0x07,0xE0,0x18,0x18,0x20,0x04,0x40,0x02,0x00,0x00},/*"(",8*/
 30 {0x00,0x00,0x40,0x02,0x20,0x04,0x18,0x18,0x07,0xE0,0x00,0x00,0x00,0x00,0x00,0x00},/*")",9*/
 31 {0x02,0x40,0x02,0x40,0x01,0x80,0x0F,0xF0,0x01,0x80,0x02,0x40,0x02,0x40,0x00,0x00},/*"*",10*/
 32 {0x00,0x80,0x00,0x80,0x00,0x80,0x0F,0xF8,0x00,0x80,0x00,0x80,0x00,0x80,0x00,0x00},/*"+",11*/
 33 {0x00,0x01,0x00,0x0D,0x00,0x0E,0x00,0x00,0x00,0x00,0x00,0x00,0x00,0x00,0x00,0x00},/*",",12*/
 34 {0x00,0x00,0x00,0x80,0x00,0x80,0x00,0x80,0x00,0x80,0x00,0x80,0x00,0x80,0x00,0x80},/*"-",13*/
 35 {0x00,0x00,0x00,0x0C,0x00,0x0C,0x00,0x00,0x00,0x00,0x00,0x00,0x00,0x00,0x00,0x00},/*".",14*/
 36 {0x00,0x00,0x00,0x06,0x00,0x18,0x00,0x60,0x01,0x80,0x06,0x00,0x18,0x00,0x20,0x00},/*"/",15*/
 37 {0x00,0x00,0x07,0xF0,0x08,0x08,0x10,0x04,0x10,0x04,0x08,0x08,0x07,0xF0,0x00,0x00},/*"0",16*/
 38 {0x00,0x00,0x08,0x04,0x08,0x04,0x1F,0xFC,0x00,0x04,0x00,0x04,0x00,0x00,0x00,0x00},/*"1",17*/
 39 {0x00,0x00,0x0E,0x0C,0x10,0x14,0x10,0x24,0x10,0x44,0x11,0x84,0x0E,0x0C,0x00,0x00},/*"2",18*/
 40 {0x00,0x00,0x0C,0x18,0x10,0x04,0x11,0x04,0x11,0x04,0x12,0x88,0x0C,0x70,0x00,0x00},/*"3",19*/
 41 {0x00,0x00,0x00,0xE0,0x03,0x20,0x04,0x24,0x08,0x24,0x1F,0xFC,0x00,0x24,0x00,0x00},/*"4",20*/
 42 {0x00,0x00,0x1F,0x98,0x10,0x84,0x11,0x04,0x11,0x04,0x10,0x88,0x10,0x70,0x00,0x00},/*"5",21*/
 43 {0x00,0x00,0x07,0xF0,0x08,0x88,0x11,0x04,0x11,0x04,0x18,0x88,0x00,0x70,0x00,0x00},/*"6",22*/
 44 {0x00,0x00,0x1C,0x00,0x10,0x00,0x10,0xFC,0x13,0x00,0x1C,0x00,0x10,0x00,0x00,0x00},/*"7",23*/
 45 {0x00,0x00,0x0E,0x38,0x11,0x44,0x10,0x84,0x10,0x84,0x11,0x44,0x0E,0x38,0x00,0x00},/*"8",24*/
 46 {0x00,0x00,0x07,0x00,0x08,0x8C,0x10,0x44,0x10,0x44,0x08,0x88,0x07,0xF0,0x00,0x00},/*"9",25*/
 47 {0x00,0x00,0x00,0x00,0x00,0x00,0x03,0x0C,0x03,0x0C,0x00,0x00,0x00,0x00,0x00,0x00},/*":",26*/
 48 {0x00,0x00,0x00,0x00,0x00,0x01,0x01,0x06,0x00,0x00,0x00,0x00,0x00,0x00,0x00,0x00},/*";",27*/
 49 {0x00,0x00,0x00,0x80,0x01,0x40,0x02,0x20,0x04,0x10,0x08,0x08,0x10,0x04,0x00,0x00},/*"<",28*/
 50 {0x02,0x20,0x02,0x20,0x02,0x20,0x02,0x20,0x02,0x20,0x02,0x20,0x02,0x20,0x00,0x00},/*"=",29*/
 51 {0x00,0x00,0x10,0x04,0x08,0x08,0x04,0x10,0x02,0x20,0x01,0x40,0x00,0x80,0x00,0x00},/*">",30*/
 52 {0x00,0x00,0x0E,0x00,0x12,0x00,0x10,0x0C,0x10,0x6C,0x10,0x80,0x0F,0x00,0x00,0x00},/*"?",31*/
 53 {0x03,0xE0,0x0C,0x18,0x13,0xE4,0x14,0x24,0x17,0xC4,0x08,0x28,0x07,0xD0,0x00,0x00},/*"@",32*/
 54 {0x00,0x04,0x00,0x3C,0x03,0xC4,0x1C,0x40,0x07,0x40,0x00,0xE4,0x00,0x1C,0x00,0x04},/*"A",33*/
 55 {0x10,0x04,0x1F,0xFC,0x11,0x04,0x11,0x04,0x11,0x04,0x0E,0x88,0x00,0x70,0x00,0x00},/*"B",34*/
 56 {0x03,0xE0,0x0C,0x18,0x10,0x04,0x10,0x04,0x10,0x04,0x10,0x08,0x1C,0x10,0x00,0x00},/*"C",35*/
 57 {0x10,0x04,0x1F,0xFC,0x10,0x04,0x10,0x04,0x10,0x04,0x08,0x08,0x07,0xF0,0x00,0x00},/*"D",36*/
 58 {0x10,0x04,0x1F,0xFC,0x11,0x04,0x11,0x04,0x17,0xC4,0x10,0x04,0x08,0x18,0x00,0x00},/*"E",37*/
 59 {0x10,0x04,0x1F,0xFC,0x11,0x04,0x11,0x00,0x17,0xC0,0x10,0x00,0x08,0x00,0x00,0x00},/*"F",38*/
 60 {0x03,0xE0,0x0C,0x18,0x10,0x04,0x10,0x04,0x10,0x44,0x1C,0x78,0x00,0x40,0x00,0x00},/*"G",39*/
 61 {0x10,0x04,0x1F,0xFC,0x10,0x84,0x00,0x80,0x00,0x80,0x10,0x84,0x1F,0xFC,0x10,0x04},/*"H",40*/
 62


