寫在前面 在之前的文章中我們有介紹過SpringAI這個項目。SpringAI 是Spring 官方社區項目,旨在簡化 Java AI 應用程式開發, 讓 Java 開發者想使用 Spring 開發普通應用一樣開發 AI 應用。 而SpringAI 主要面向的是國外的各種大模型接入,對於國內開發者可 ...
寫在前面
在之前的文章中我們有介紹過SpringAI這個項目。SpringAI 是Spring 官方社區項目,旨在簡化 Java AI 應用程式開發,
讓 Java 開發者想使用 Spring 開發普通應用一樣開發 AI 應用。
而SpringAI 主要面向的是國外的各種大模型接入,對於國內開發者可能不太友好。
於是乎,Spring Cloud Alibaba AI 便問世了,Spring Cloud Alibaba AI 以 Spring AI 為基礎,併在此基礎上提供阿裡雲同義系列大模型全面適配,
讓用戶在 5 分鐘內開發基於同義大模型的 Java AI 應用。
一、Spring AI 簡介
可能有些小伙伴已經忘記了SpringAI 是啥?我們這兒再來簡單回顧一下。
Spring AI是一個面向AI工程的應用框架。其目標是將可移植性和模塊化設計等設計原則應用於AI領域的Spring生態系統,
並將POJO作為應用程式的構建塊推廣到AI領域。
轉換為人話來說就是:Spring出了一個AI框架,幫助我們快速調用AI,從而實現各種功能場景。
二、Spring Cloud Alibaba AI 簡介
Spring Cloud Alibaba AI 以 Spring AI 為基礎,併在此基礎上,基於 Spring AI 0.8.1 版本 API 完成同義系列大模型的接入
實現阿裡雲同義系列大模型全面適配。
在當前最新版本中,Spring Cloud Alibaba AI 主要完成了幾種常見生成式模型的適配,包括對話、文生圖、文生語音等,
開發者可以使用 Spring Cloud Alibaba AI 開發基於同義的聊天、圖片或語音生成 AI 應用,
框架還提供 OutParser、Prompt Template、Stuff 等實用能力。
三、第一個Spring AI應用開發
① 新建maven 項目
註: 在創建項目的時候,jdk版本必須選擇17+

② 添加依賴
<dependency>
    <groupId>com.alibaba.cloud</groupId>
    <artifactId>spring-cloud-alibaba-dependencies</artifactId>
    <version>2023.0.1.0</version>
    <type>pom</type>
    <scope>import</scope>
</dependency>

<dependency>
    <groupId>com.alibaba.cloud</groupId>
    <artifactId>spring-cloud-starter-alibaba-ai</artifactId>
    <version>2023.0.1.0</version>
</dependency>
註: 這裡我們需要配置鏡像源,否則是沒法下載依賴的。會報如下錯誤
spring-ai: 0.8.1 dependency not found
<repositories>
    <repository>
        <id>spring-milestones</id>
        <name>Spring Milestones</name>
        <url>https://repo.spring.io/milestone</url>
        <snapshots>
            <enabled>false</enabled>
        </snapshots>
    </repository>
</repositories>
③ 在 application.yml 配置文件中添加api-key
spring:
  cloud:
    ai:
      tongyi:
        api-key: 你自己申請的api-key
小伙伴如果不知道在哪申請,我把申請鏈接也放這兒了
https://dashscope.console.aliyun.com/apiKey
操作步驟:https://help.aliyun.com/zh/dashscope/developer-reference/activate-dashscope-and-create-an-api-key
④ 新建TongYiController 類,代碼如下
@RestController
@RequestMapping("/ai")
@CrossOrigin
@Slf4j
public class TongYiController {

    @Autowired
    @Qualifier("tongYiSimpleServiceImpl")
    private TongYiService tongYiSimpleService;

    @GetMapping("/example")
    public String completion(@RequestParam(value = "message", defaultValue = "Tell me a joke") String message) {

        return tongYiSimpleService.completion(message);
    }

}
⑤ 新建TongYiService 介面,代碼如下
public interface TongYiService {
    String completion(String message);

}
⑥ 新建TongYiSimpleServiceImpl 實現類,代碼如下
@Service
@Slf4j
public  class TongYiSimpleServiceImpl  implements TongYiService {

    private final ChatClient chatClient;

    @Autowired
    public TongYiSimpleServiceImpl(ChatClient chatClient, StreamingChatClient streamingChatClient) {
        this.chatClient = chatClient;
    }

    @Override
    public String completion(String message) {
        Prompt prompt = new Prompt(new UserMessage(message));

        return chatClient.call(prompt).getResult().getOutput().getContent();
    }


}
到這兒我們一個簡單的AI應用已經開發完成了,最終項目結構如下

四、運行AI應用
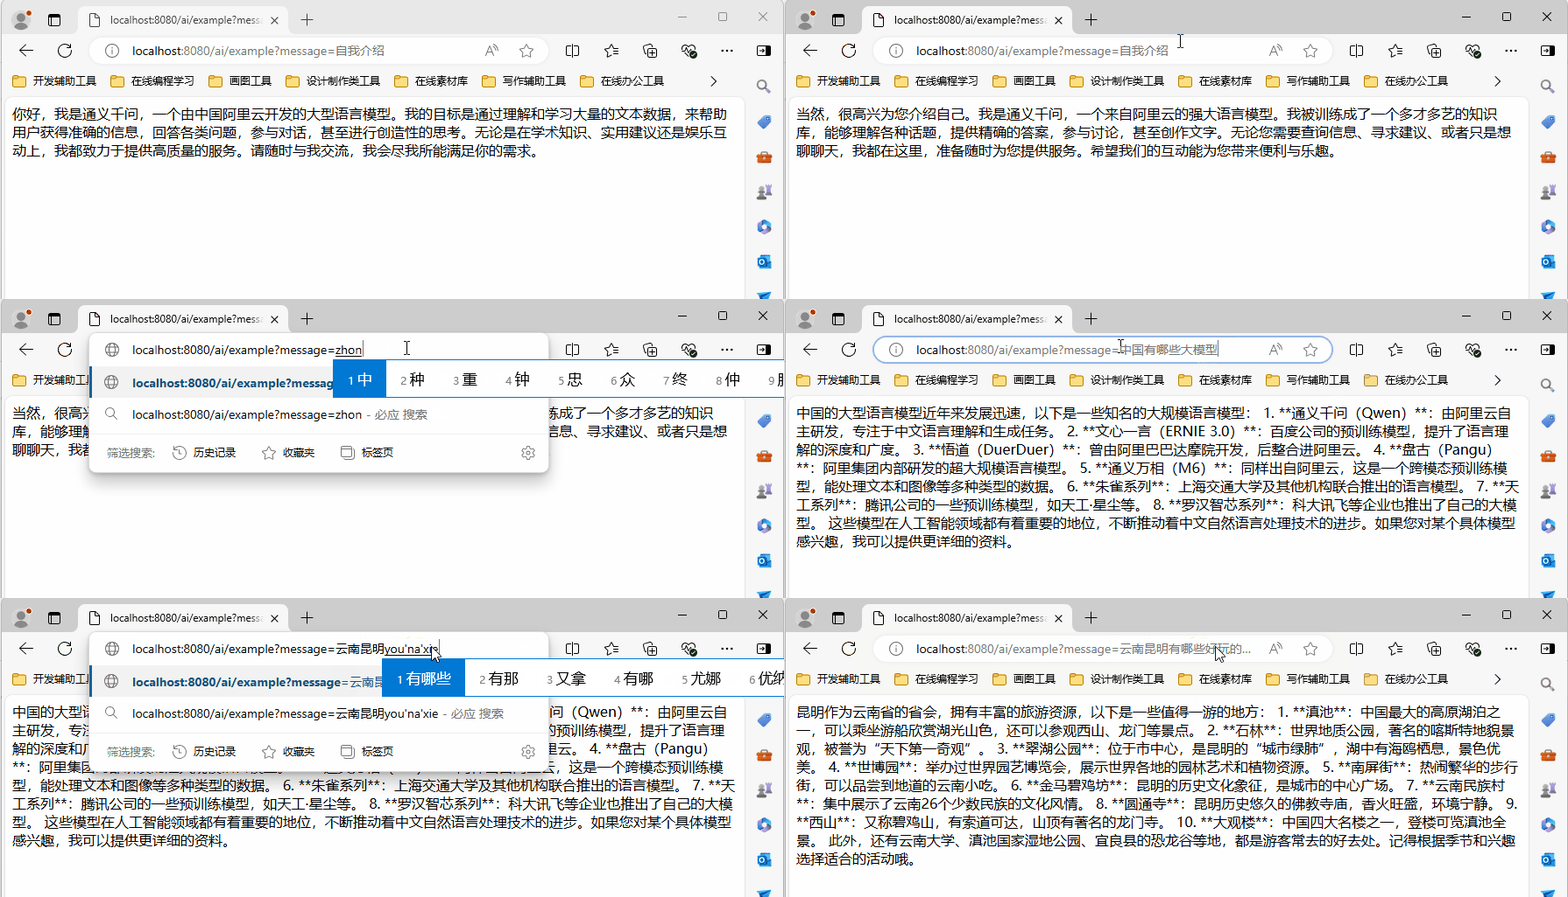
啟動服務,我們只需要在瀏覽器中輸入:http://localhost:8080/ai/example 即可與AI交互。
① 不帶message參數,則message=Tell me a joke,應用隨機返回一個笑話

② 我們在瀏覽器中輸入:http://localhost:8080/ai/example?message=對話內容

五、前端頁面對話模式
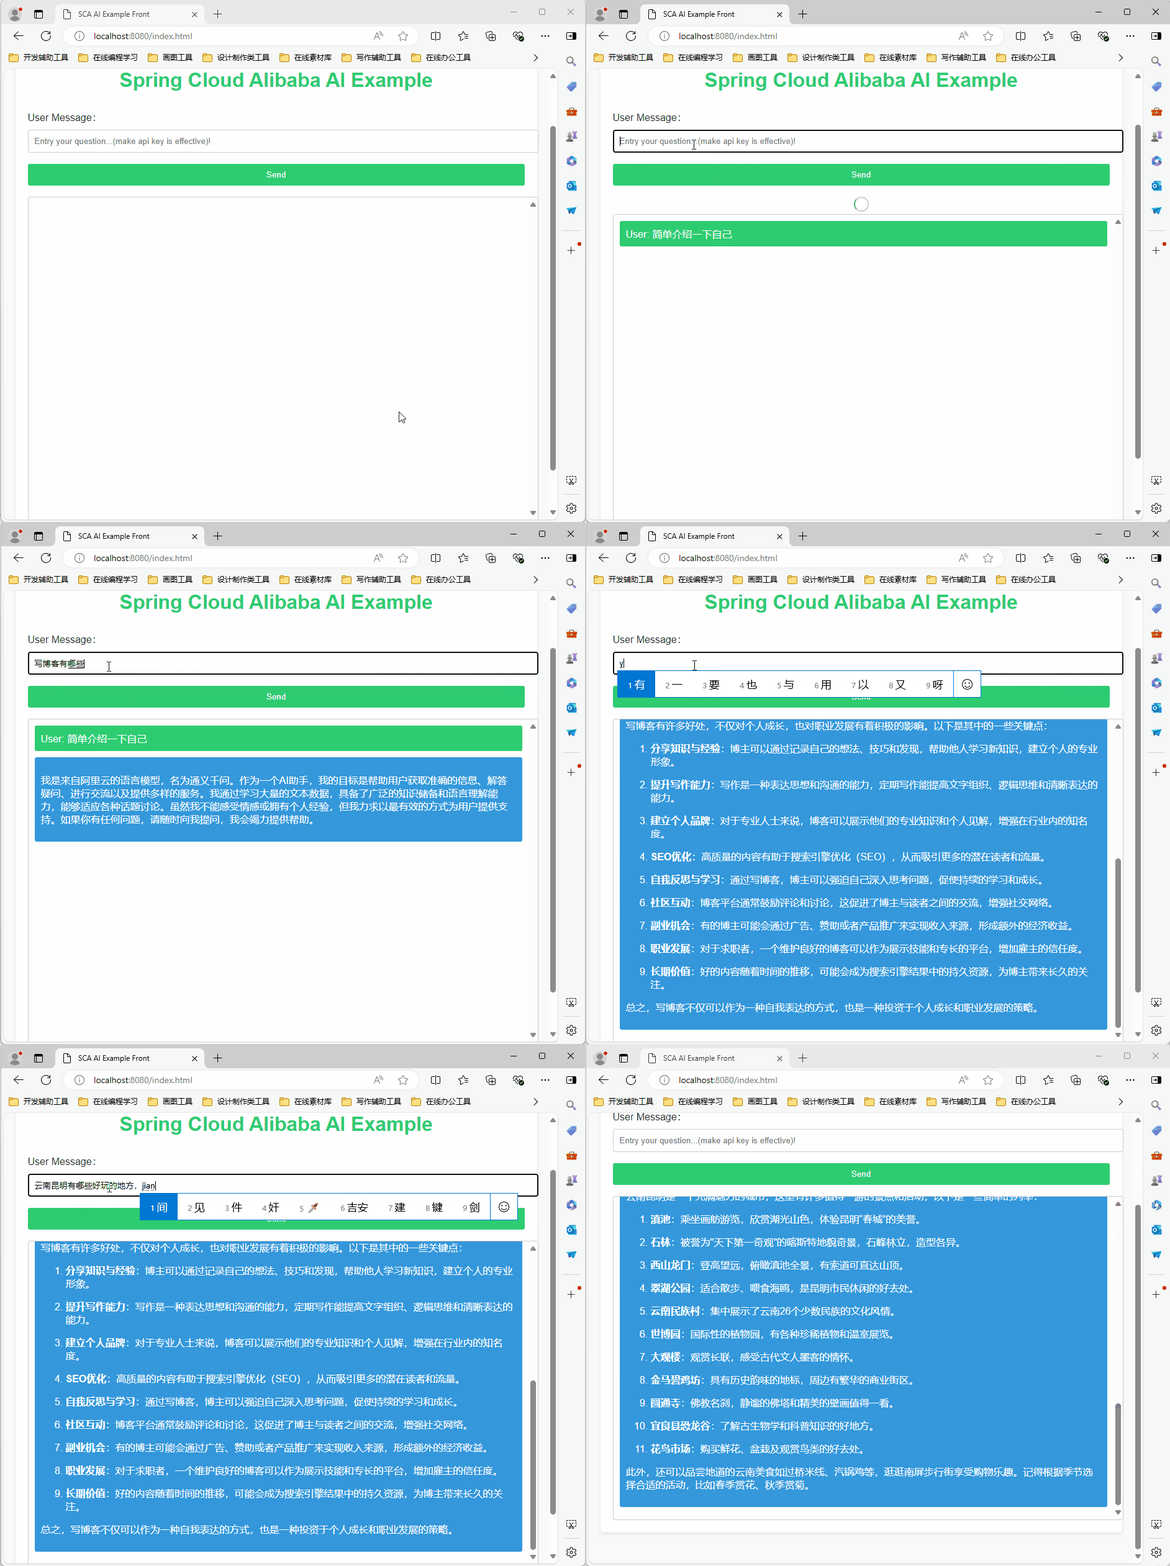
我們只更加在resources/static 路徑下添加一個index.html前端頁面,即可擁有根據美觀的交互體驗。
index.html代碼官方github倉庫中已給出樣例,由於代碼比較長,這裡就不貼代碼了
添加完靜態頁面之後,我們瀏覽器中輸入:http://localhost:8080/index.html 就可以得到一個美觀的交互界面

接下來,我們來實際體驗一下

六、其他模型
上面章節中我們只簡單體驗了對話模型,阿裡還有很多其他模型。由於篇幅原因這裡就不一一帶大家一起體驗了。
應用場景:

各個模型概述:

七、怎麼樣快速接入大模型
各種應用場景阿裡官方GitHub都給出了接入例子

感興趣的小伙伴可以自己到上面github 倉庫看代碼研究
本期內容到這兒就結束了,★,°:.☆( ̄▽ ̄)/$:.°★ 。 希望對您有所幫助
我們下期再見 ヾ(•ω•`)o (●'◡'●)
本文來自博客園,作者:xiezhr,轉載請註明原文鏈接:https://www.cnblogs.com/xiezhr/p/18251683


