Vue3簡單項目流程分享——工作室主頁 零、寫在最前 以下是項目相關的一些鏈接: 源代碼GitHub倉庫(需要魔法上網):倉庫 網頁示例(需要魔法上網):網頁示例 UI圖(來源@設計師楊賀):MasterGo主頁 補充:由於時間關係,該網頁沒有適配手機端,最佳展示效果為網頁端1440p寬度。 如果你 ...
Vue3簡單項目流程分享——工作室主頁
零、寫在最前
以下是項目相關的一些鏈接:
- 源代碼GitHub倉庫(需要魔法上網):倉庫
- 網頁示例(需要魔法上網):網頁示例
- UI圖(來源@設計師楊賀):MasterGo主頁
補充:由於時間關係,該網頁沒有適配手機端,最佳展示效果為網頁端1440p寬度。
如果你想要運行源代碼:
- 首先需要保證你本地擁有Vue.js環境(具體方法和版本號下文有提到)
- 將源代碼克隆到本地(得保證本地有Git環境)
cd your_path
git clone https://github.com/YellowSeaa/studio_page.git
- 安裝依賴
npm install
- 運行項目
npm run dev
一、想法
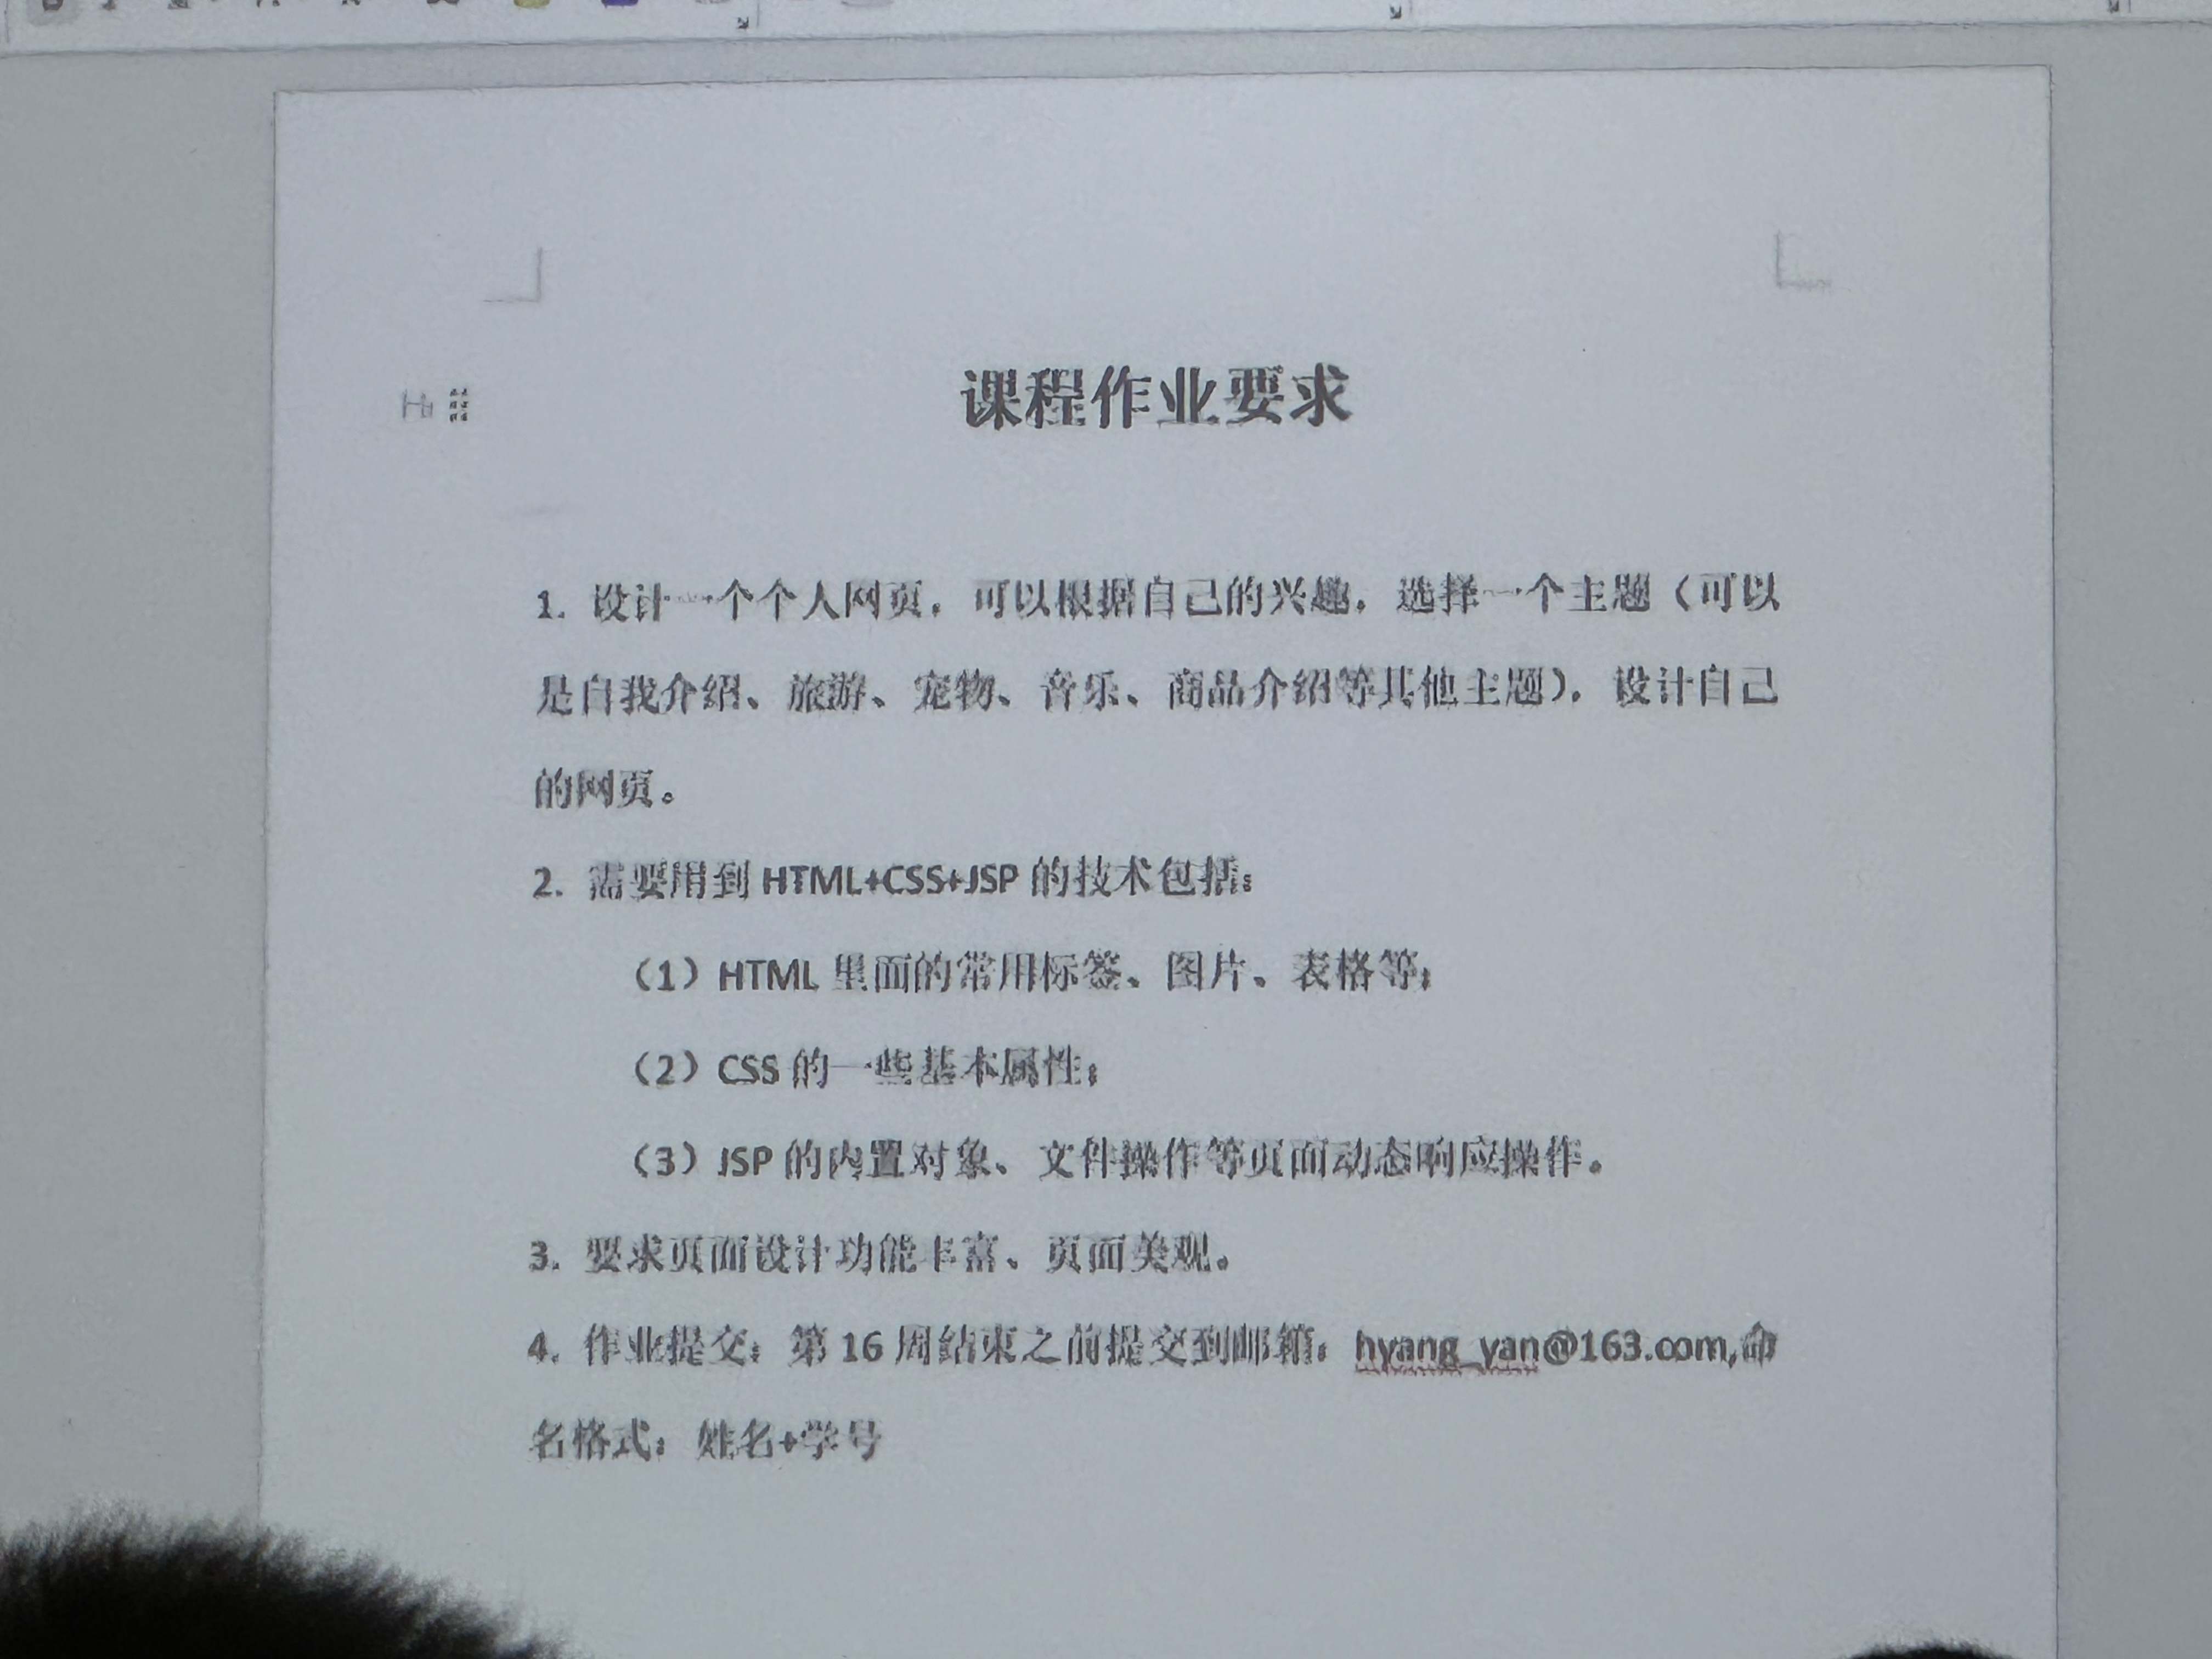
- 作業要求
- 想做一個簡單的工作室主頁設計(在MasterGo上找到個模板)
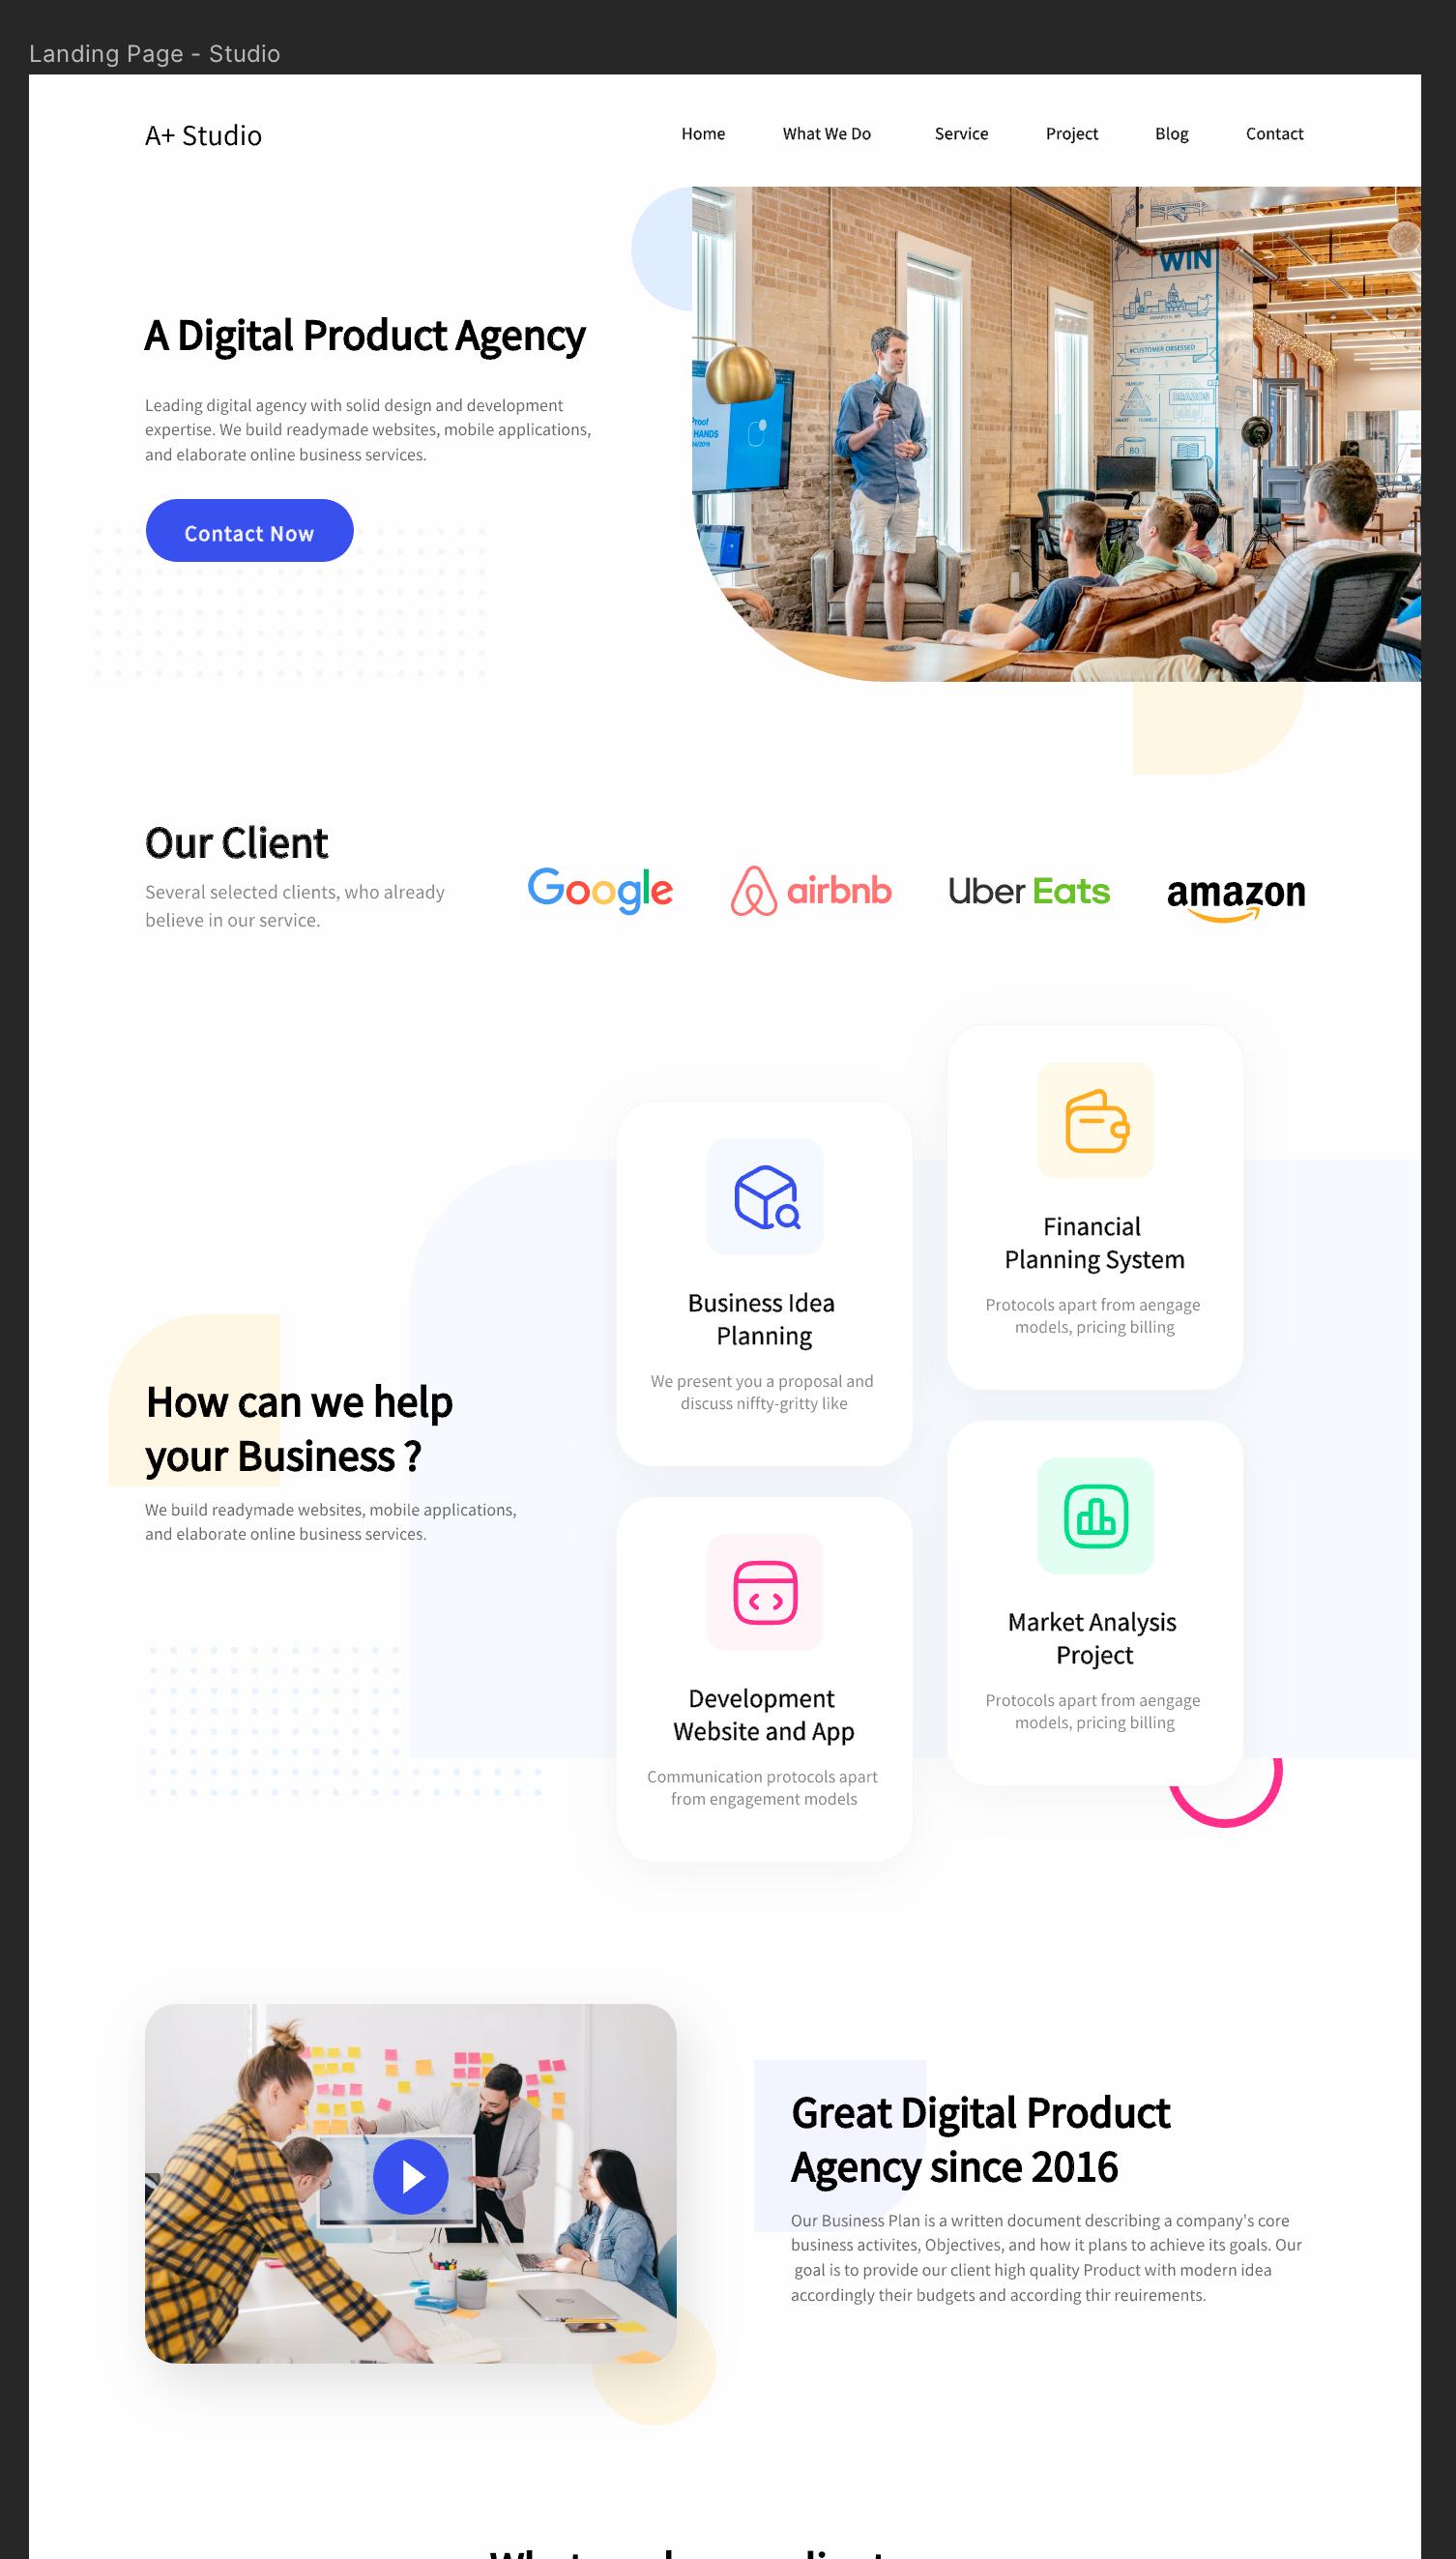
- https://mastergo.com/goto/AvNhjBqG?page_id=:27558&file=128583730325968 邀請您進入《工作室主頁設計》,點擊鏈接開始協作
二、技術棧選用
課程作業要求要使用HTML+CSS+JSP技術,在網上瞭解到JSP內可以套用Vue(相當於用Vue寫模板,然後外面套一層JSP模板即可)。
最終決定使用Vue來實現前端,並且使用element Plus腳手架,後端部分嘗試使用JSP(沒學過,不知道能不能弄的下來),如果實在不行就用Django做前後端分離開發。
資料庫方面的話,就用Mysql或者sqlite3。
三、項目初始化
1. 安裝Vue.js和JSP和Tomcat
由於之前已經安裝過Vue,所以不記錄了。
JSP和Tomcat參考的是下麵幾篇文章,直接使用homebrew安裝的:
值得註意的是以下啟動 Tomcat方法
brew services start tomcat
如果終端提示 Successfully started 'tomcat' (label: homebrew.mxcl.tomcat) 則說明啟動成功,瀏覽器訪問 http://localhost:8080 即可看到 Tomcat 的頁面。
2. 環境版本記錄
- Vue.js: @vue/cli 5.0.8
- npm: 10.5.0
- Java: openjdk 22.0.1 2024-04-16/ OpenJDK Runtime Environment Temurin-22.0.1+8 (build 22.0.1+8)/ OpenJDK 64-Bit Server VM Temurin-22.0.1+8 (build 22.0.1+8, mixed mode)
3. Vue項目創建
使用終端,進入想創建的文件夾位置,然後運行以下命令
npm create vue@latest
然後會讓我輸入項目名稱和進行一些選項,在此我只選擇了引入 Vue Router 進行單頁面應用開發,其他選項均選擇了否。
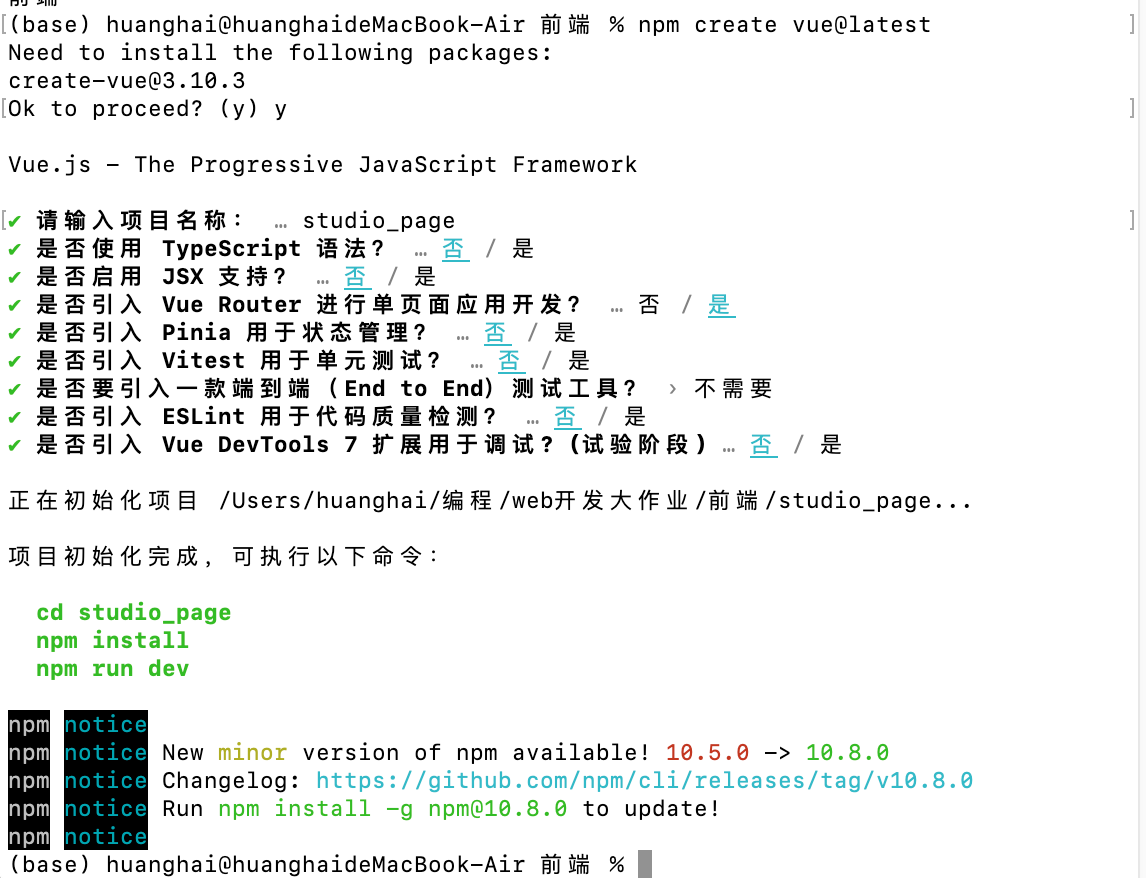
最後根據提示進入項目文件夾內,安裝依賴並運行即可。
cd <your-project-name>
npm install #安裝依賴
npm run dev #運行項目
在瀏覽器中打開對應網址即可
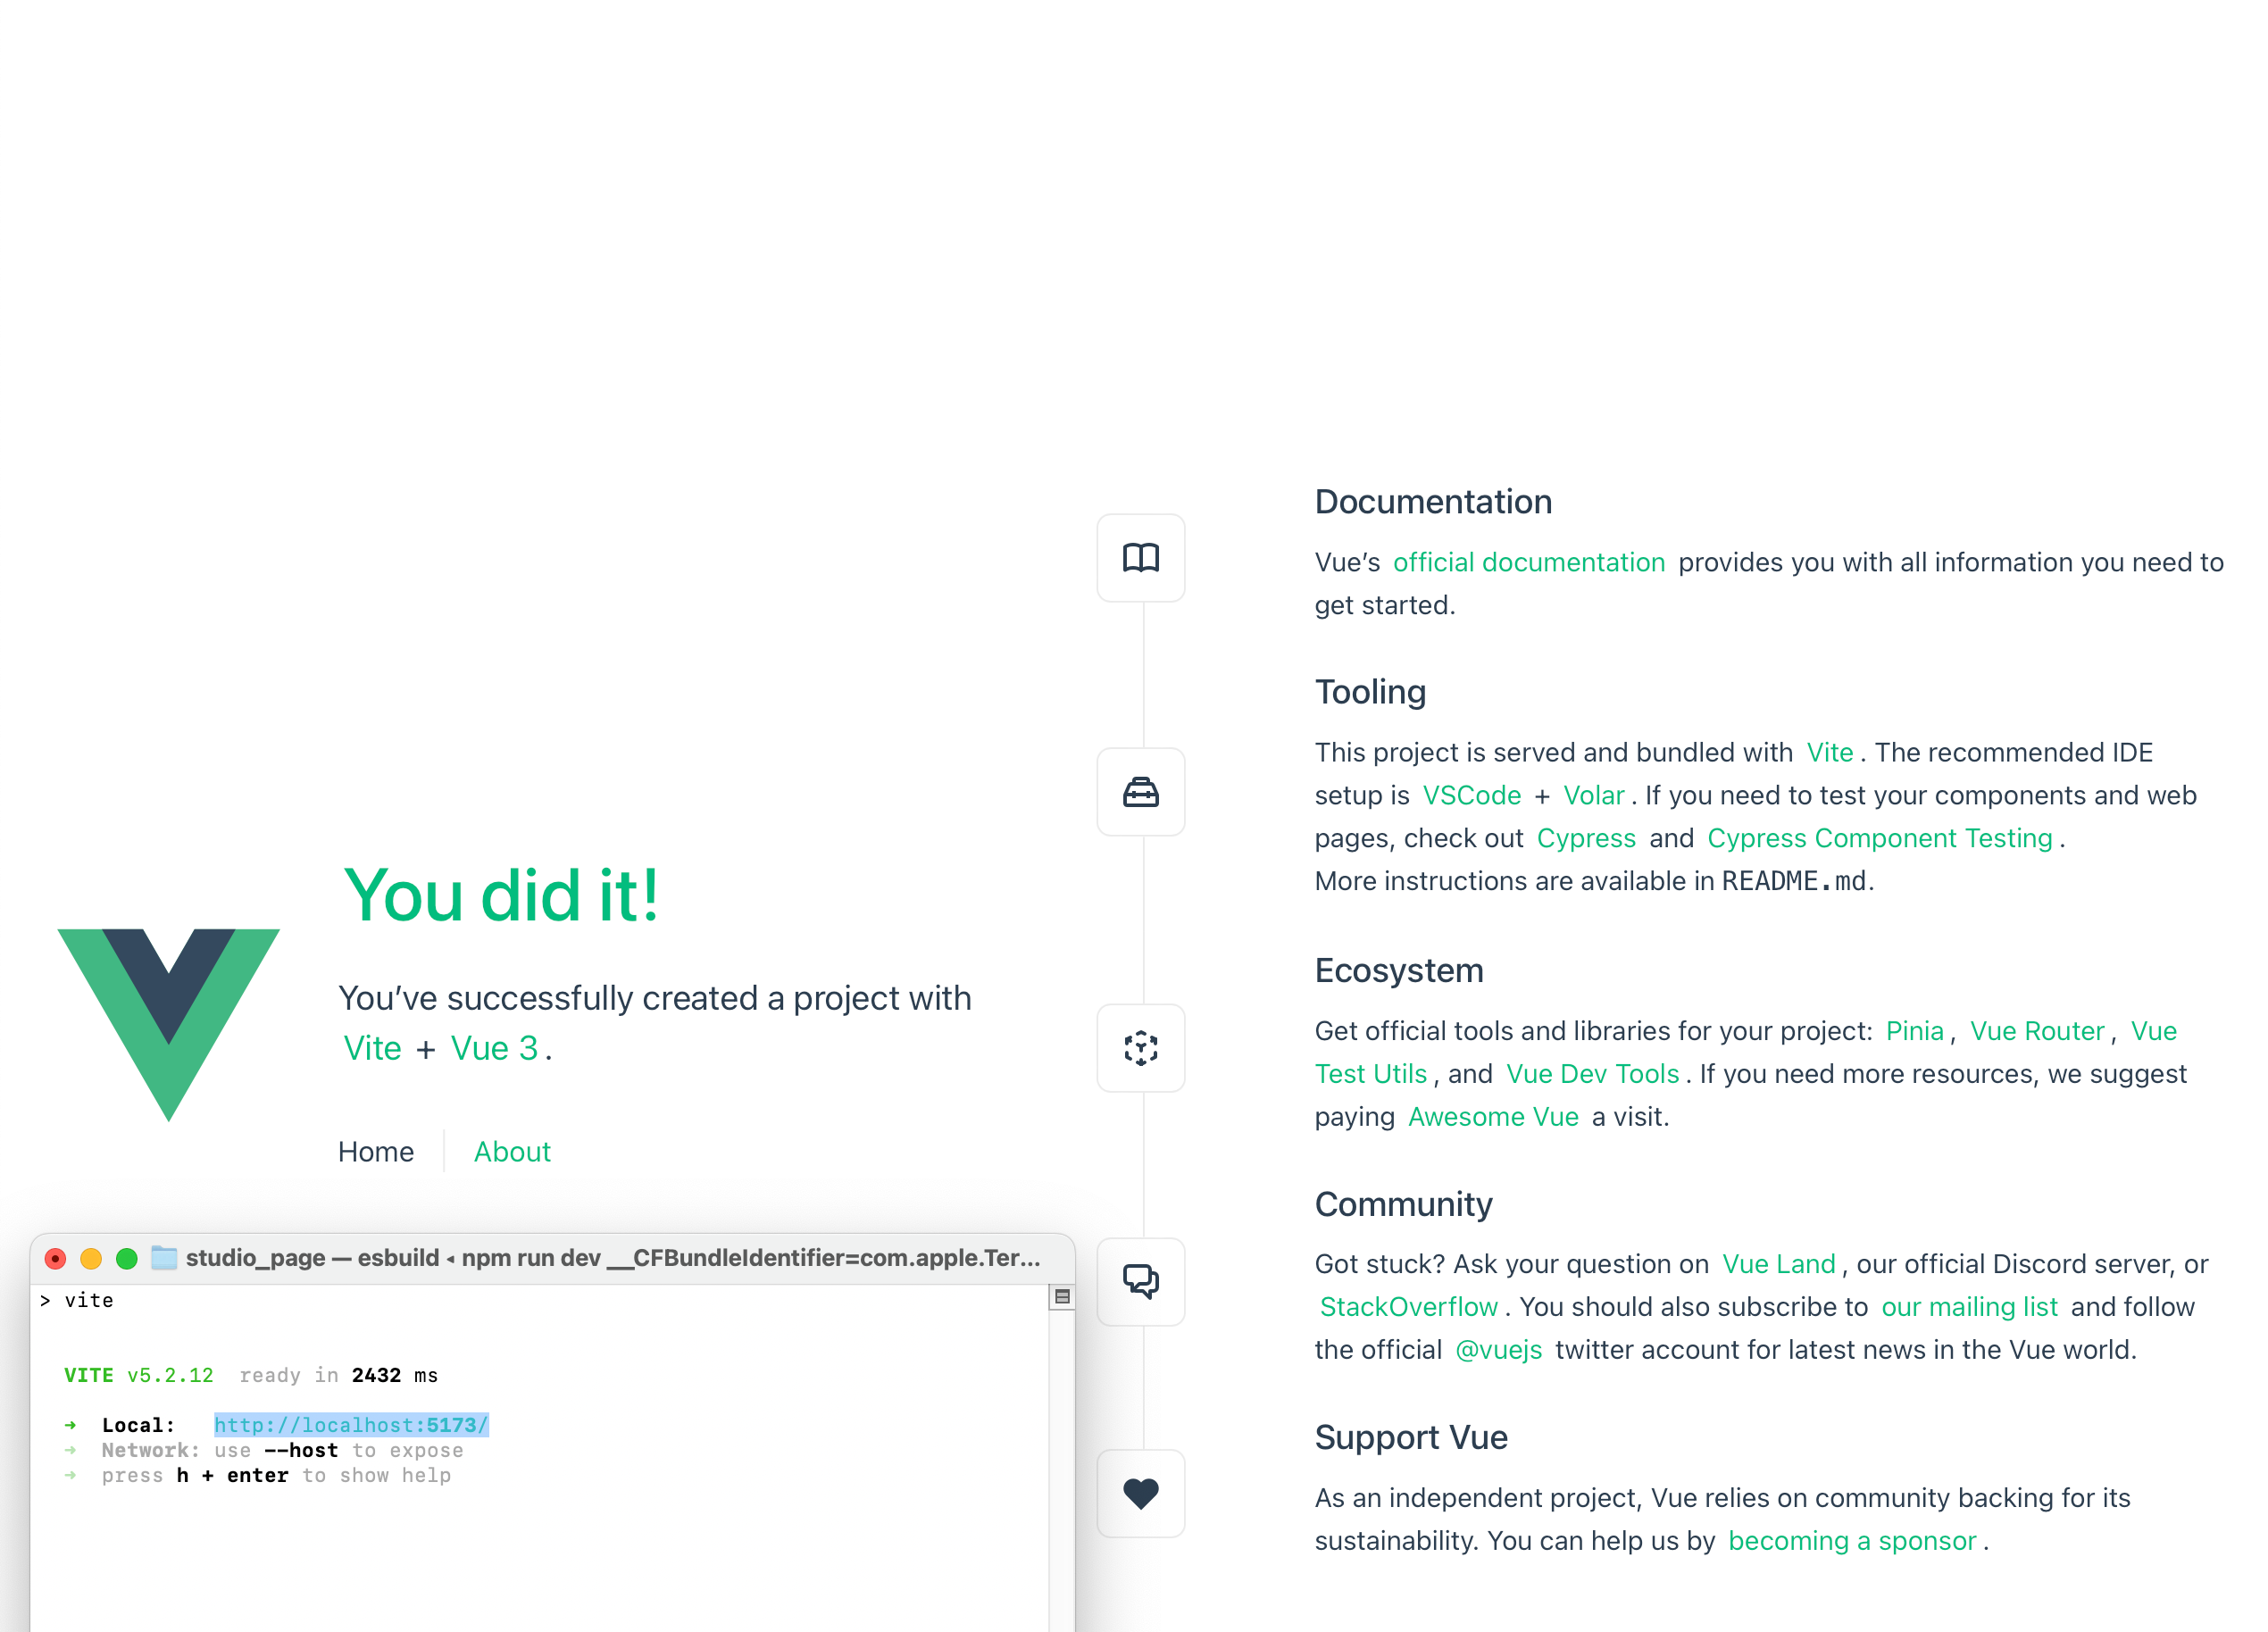
四、前端靜態部分
1. 路由設置
本項目是簡單的項目,只有一個主頁面,頁面內由上到下排布多個塊。
我們只需要修改src/App.vue和src/router/index.js中的內容,將一開始的頁面指向自定義的文件src/components/home.vue即可,以下是具體內容:
<!-- App.vue -->
<script setup>
import { RouterLink, RouterView } from 'vue-router'
</script>

<template>
  <RouterView />
</template>
// index.js
import { createRouter, createWebHistory } from 'vue-router'
import home from '../components/home.vue'

const router = createRouter({
  history: createWebHistory(import.meta.env.BASE_URL),
  routes: [
    {
      path: '/',
      name: 'home',
      component: home
    },
  ]
})

export default router
<!-- home.vue -->
<template>
    <div>
        <h1>This is home</h1>
    </div>
  </template>
2. 主頁的排版
根據UI圖可以看出,主頁是由多個部分組成,由上到下排布。
本項目中將每個部分分別寫成一個組件文件,然後在home.vue中集成。
home.vue只需要關註組件部分間的排版即可。
先分別創建好各個組件對應的文件:
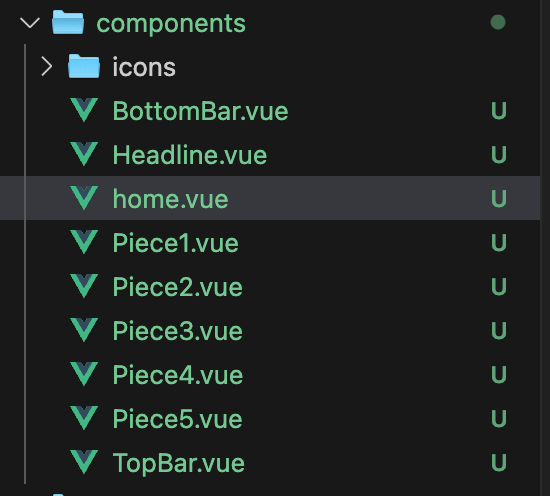
然後修改home.vue
<template>
    <div class="main-page">
        <TopBar />
        <Headline />
        <Piece1 />
        <Piece2 />
        <Piece3 />
        <Piece4 />
        <Piece5 />
        <BottomBar />
    </div>
</template>

<script>
import TopBar from './TopBar.vue';
import Headline from './Headline.vue';
import Piece1 from './Piece1.vue';
import Piece2 from './Piece2.vue';
import Piece3 from './Piece3.vue';
import Piece4 from './Piece4.vue';
import Piece5 from './Piece5.vue';
import BottomBar from './BottomBar.vue';

export default {
    name: 'MainPage',
    components: {
        TopBar,
        Headline,
        Piece1,
        Piece2,
        Piece3,
        Piece4,
        Piece5,
        BottomBar
    }
};
</script>

<style scoped>
.main-page {
    display: flex;
    flex-direction: column;
    align-items: stretch;
    width: 100%;
    position: absolute;
    left: 0;
    right: 0;
    top: 0;
    bottom: 0;
    background-color: #ffffff;
}
</style>
最終得到效果如下:
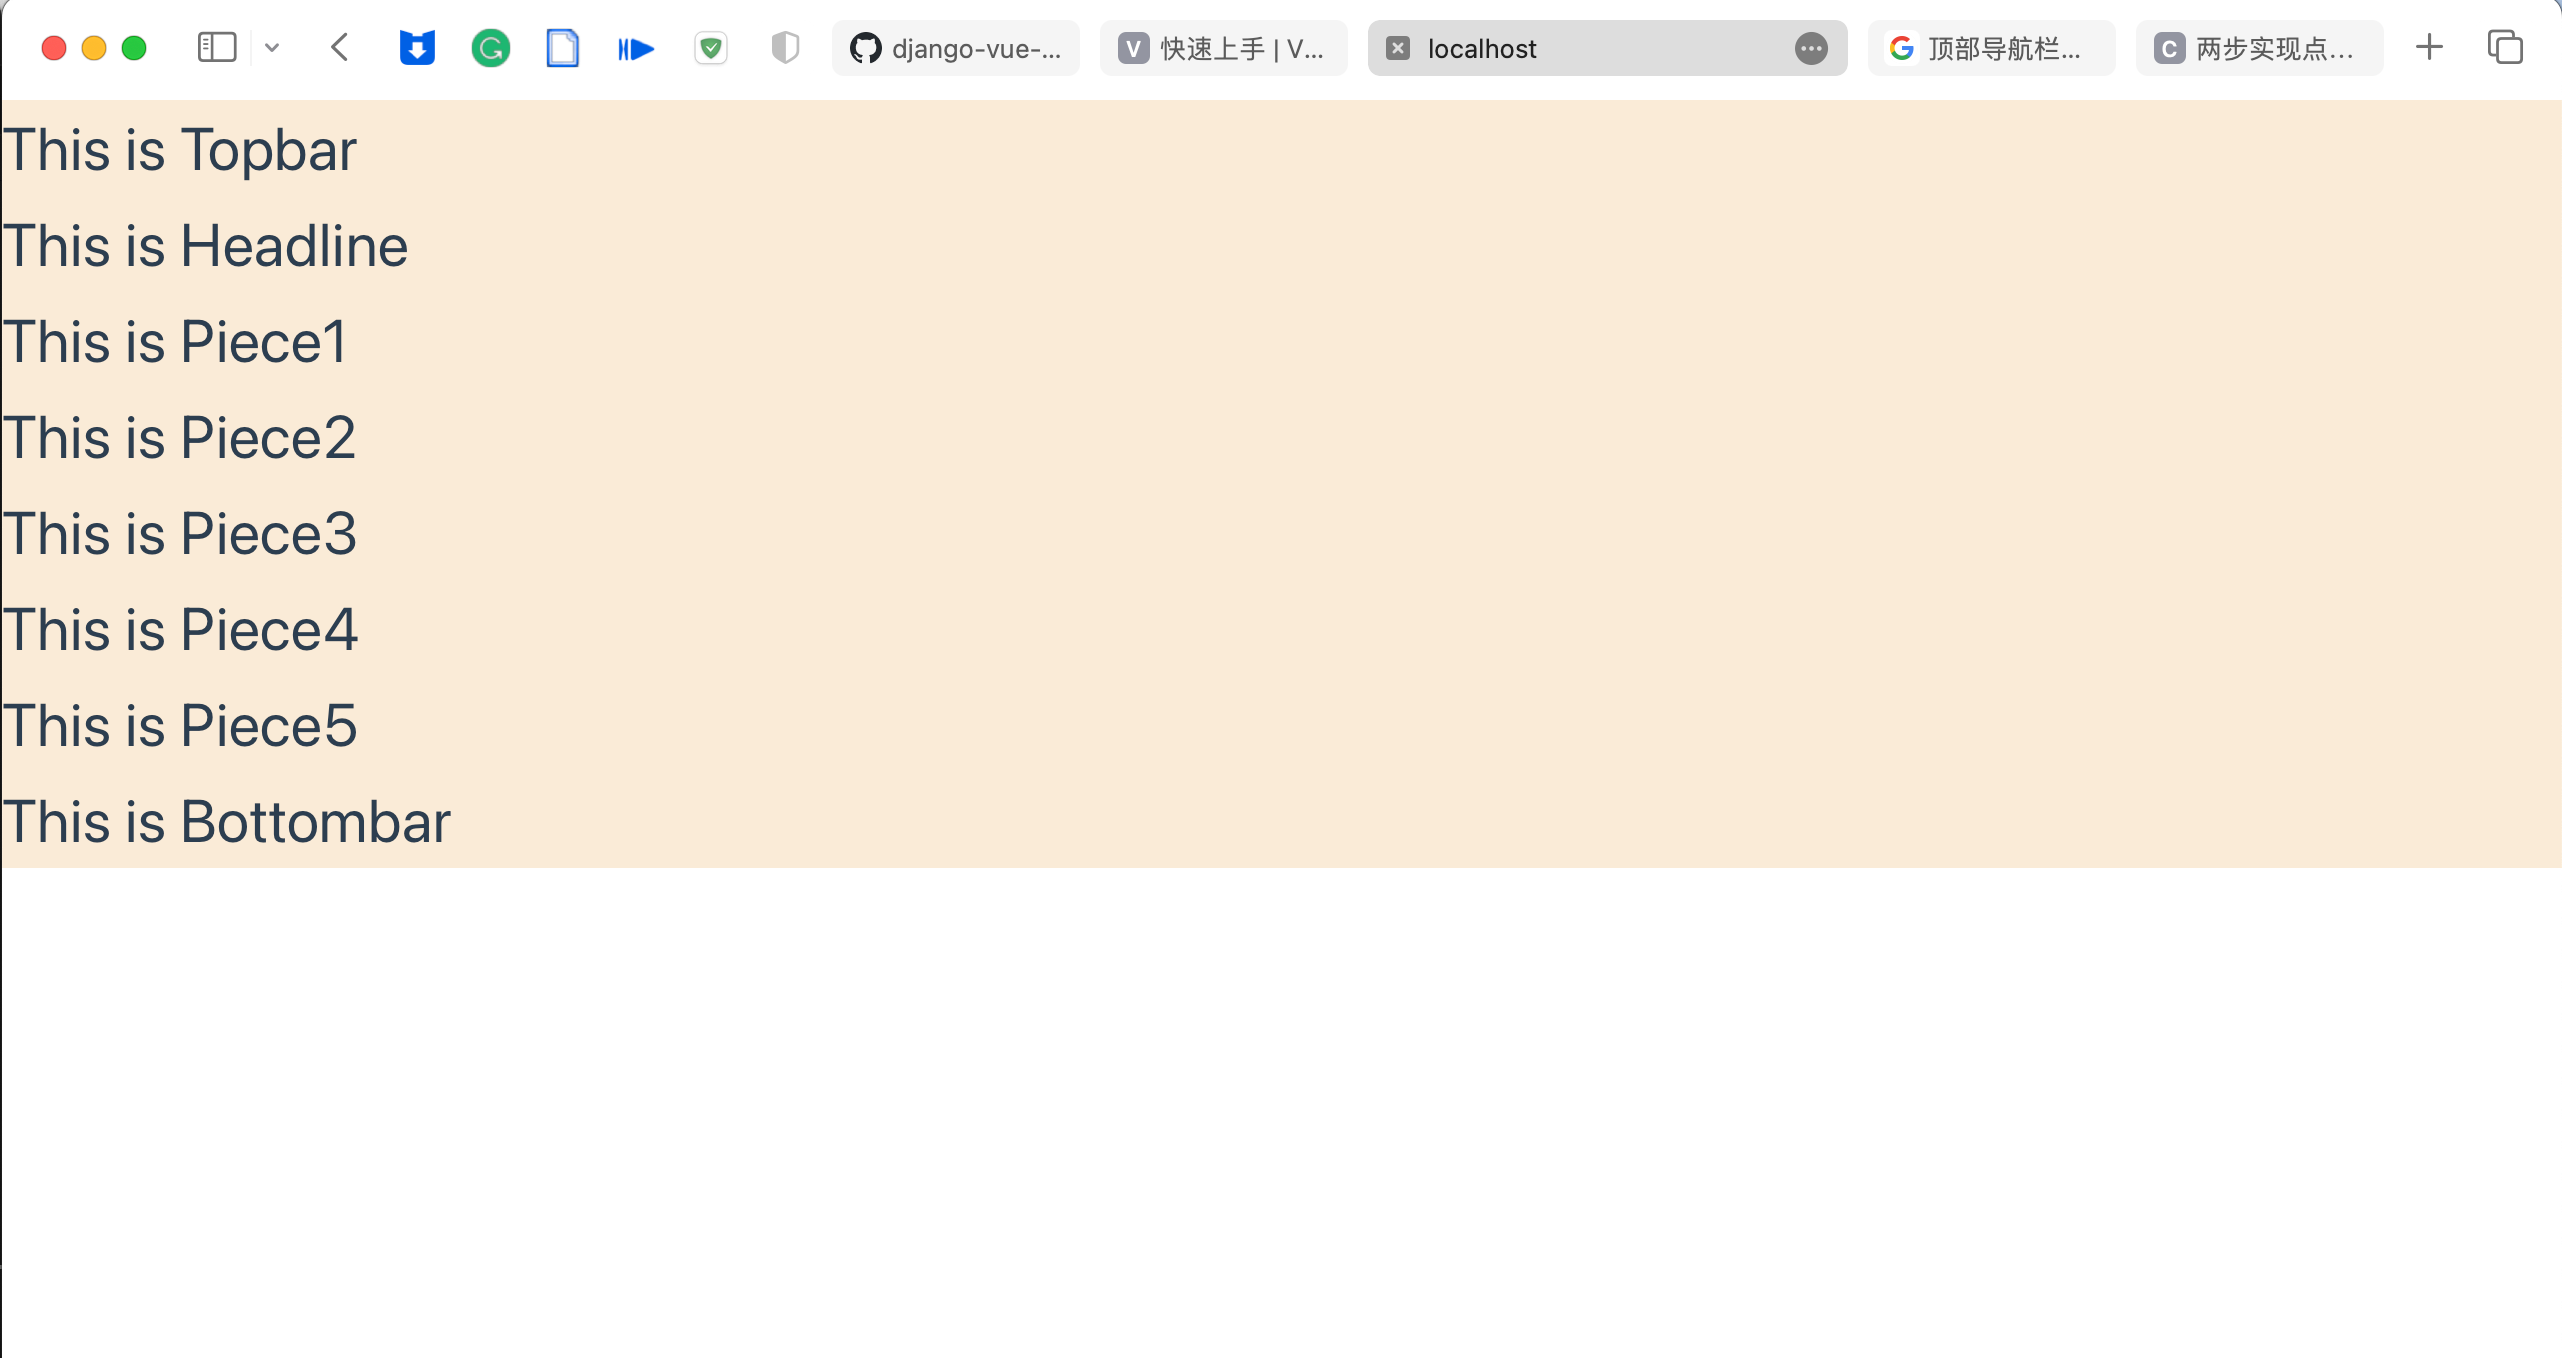
接下來只需要在對應的組件文件中,完成前端的繪製即可。
3. 頂部菜單欄
首先看一下UI圖,佈局如下:

使用flex佈局,紅色部分使用space-between:兩端對齊,項目之間的間隔都相等;藍色部分使用space-around:每個項目兩側的間隔相等。
代碼如下:
<template>
    <div class="bar">
        <div class="name">A Studio</div>
        <div class="label">
            <div>Home</div>
            <div>What We Do</div>
            <div>Service</div>
            <div>Project</div>
            <div>Blog</div>
            <div>Contact</div>
        </div>
    </div>
</template>

<style scoped>
.bar {
    display: flex;
    justify-content: space-between;
    margin-top: 42px;
    margin-left: 120px;
    margin-right: 120px;
}

.name {
    font-family: ProximaNova;
    font-size: 27.15px;
    font-weight: normal;
    line-height: 38px;
    letter-spacing: 0px;
    color: #000000;
}

.label{
    display: flex;
    justify-content: space-around;
    width: 645px;
    height: 20px;
    font-family: AvertaDemoPECuttedDemo;
    font-size: 16px;
    align-items: center;
    height: 100%;
}
</style>
最終效果:
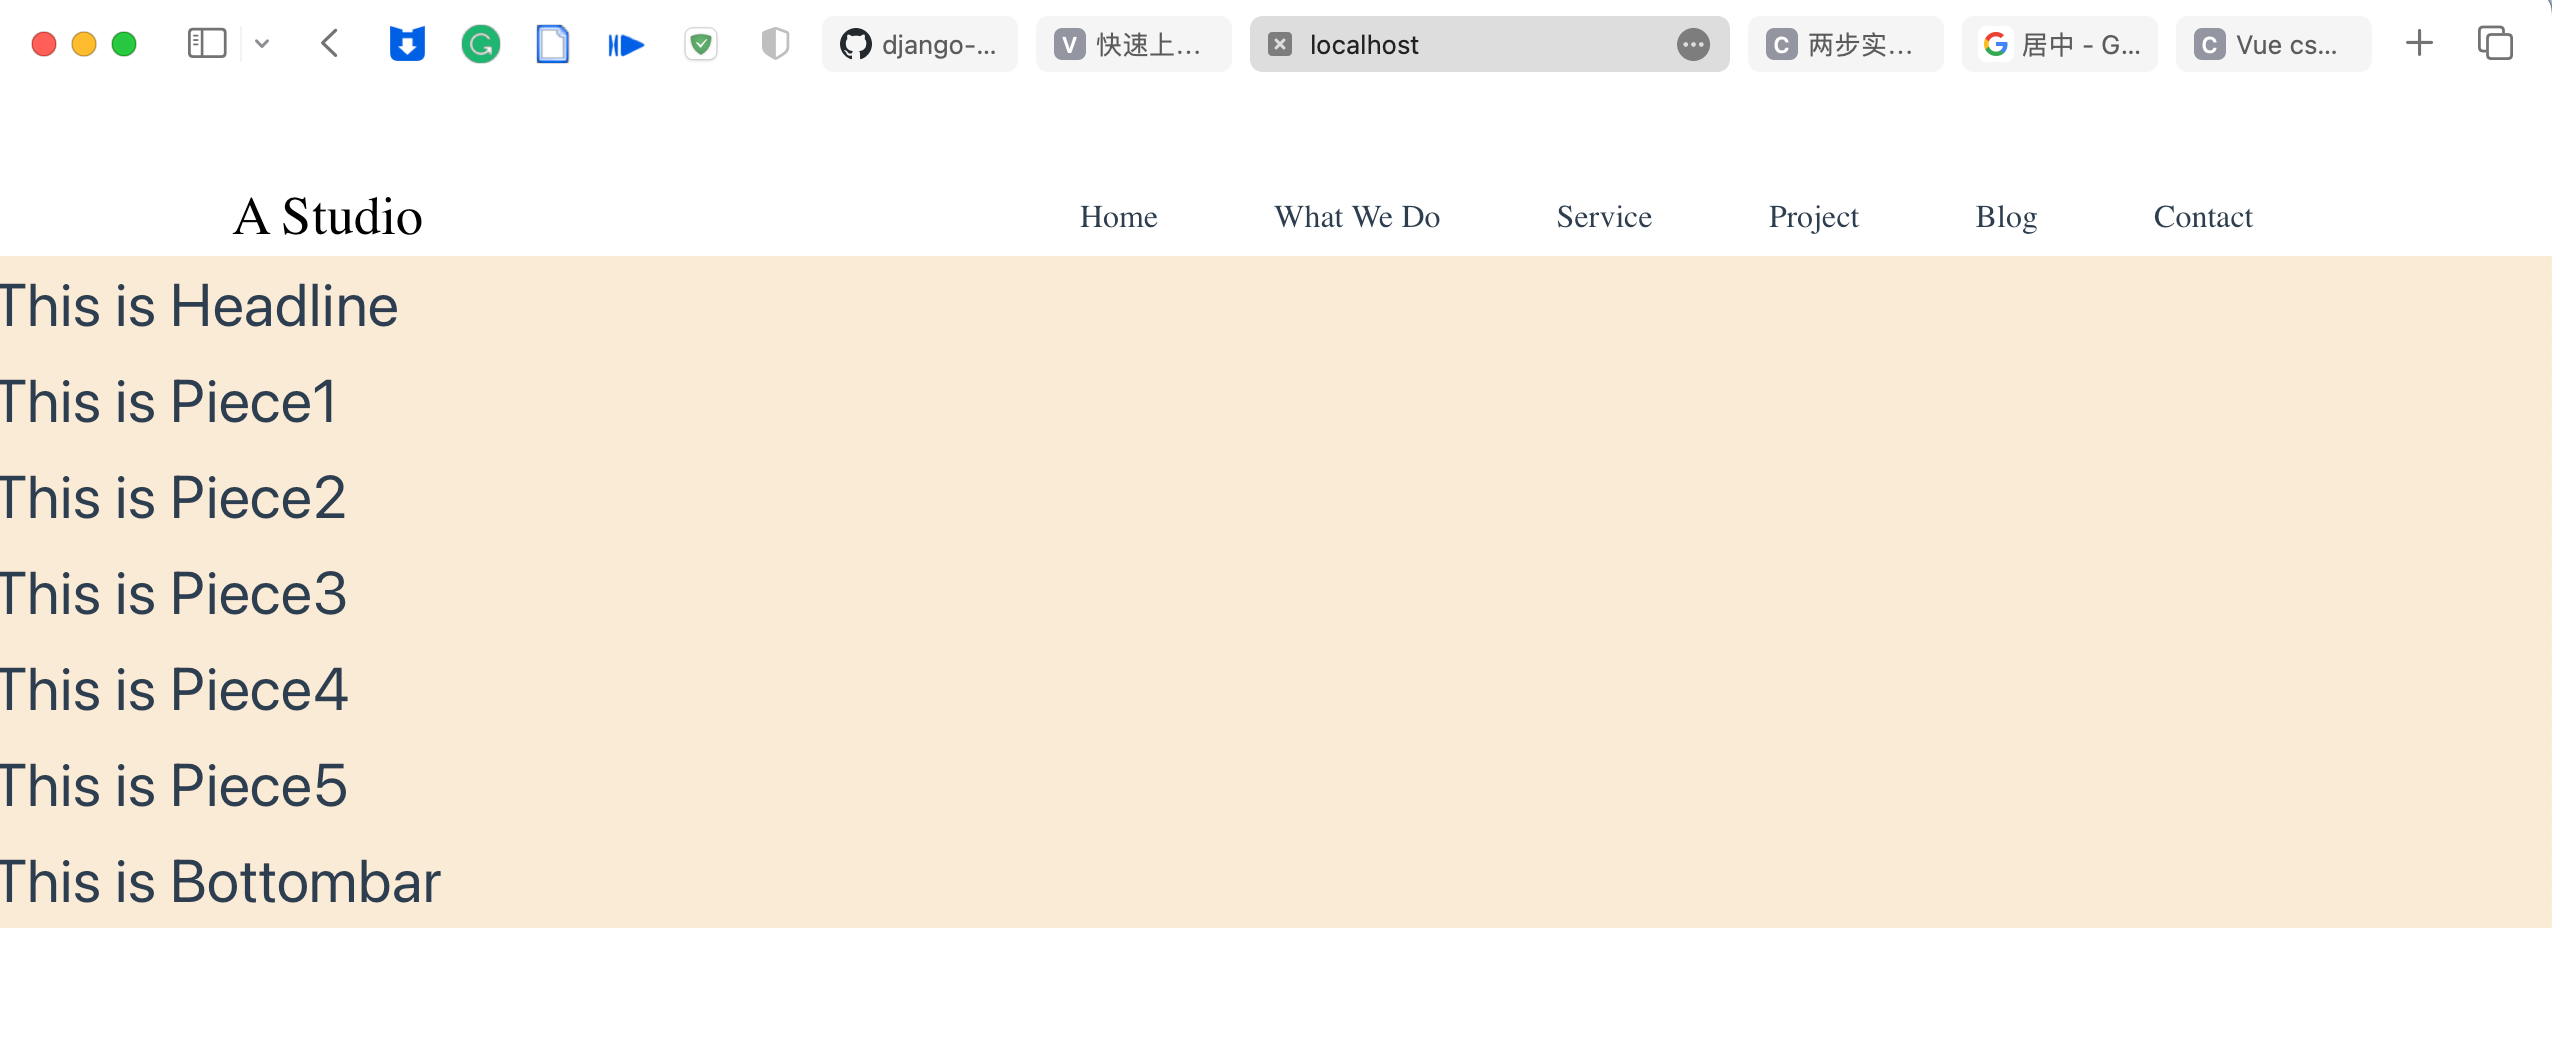
後續還需要做:
點擊標簽滾動到對應位置:參考文章
4. 頭條部分
UI圖:
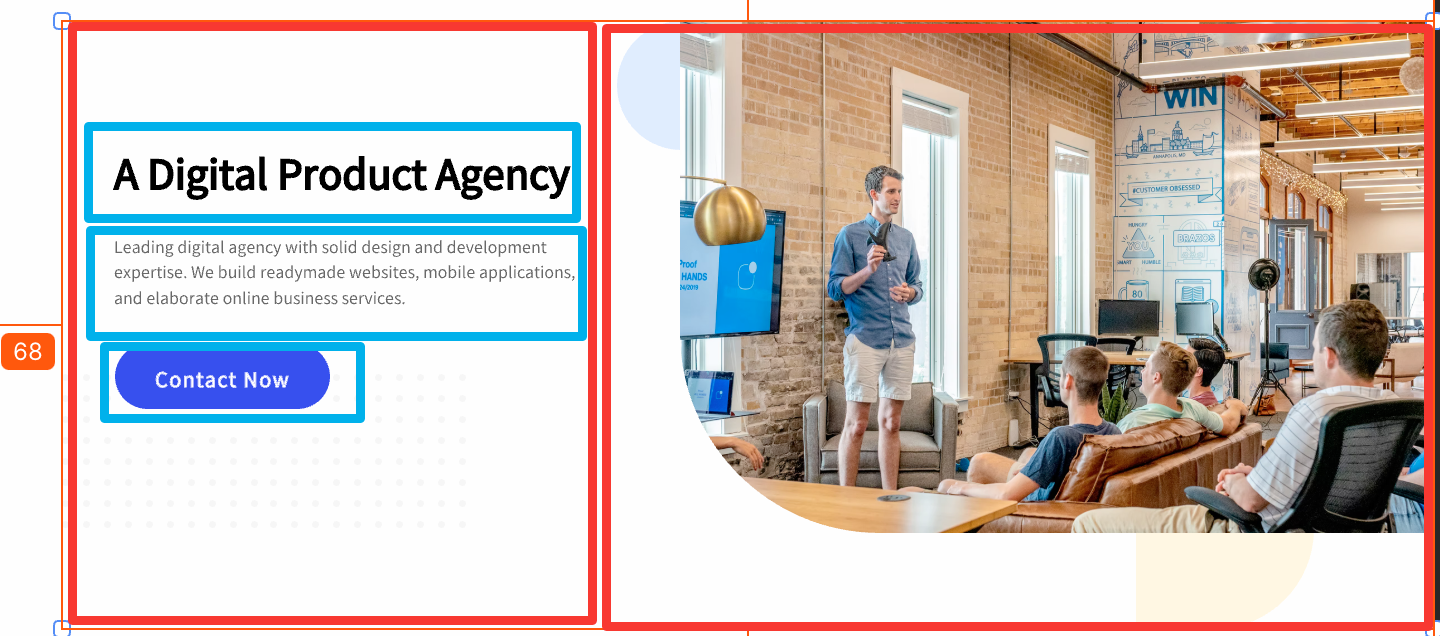
其中紅色部分使用flex分為左右兩部分,左邊使用flex分為上下三部分,右邊則是一張圖。
代碼如下:
<template>
    <div class="headline">
        <div class="left_part">
            <div class="text1">A Digital Product Agency</div>
            <div class="text2">Leading digital agency with solid design and development expertise. We build readymade
                websites, mobile applications, and elaborate online business services.</div>
            <button>Contact Now</button>
        </div>
        <div class="right_part">
            <img src="../assets/headimg.png" alt="">
        </div>
    </div>
</template>

<style scoped>
.headline {
    /* background-color: antiquewhite; */
    margin-top: 40px;
    margin-left: 68px;
    height: 608px;
    display: flex;
    justify-content: space-between;
}

.left_part {
    max-width: 40%;
    margin-left: 52px;
    margin-right: 32px;
    margin-top: 123px;
    display: flex;
    flex-direction: column;
    /* background-color: blue; */
}

.text1 {
    font-family: AvertaDemoPECuttedDemo;
    font-size: 40px;
}

.text2 {
    font-family: AvertaDemoPECuttedDemo;
    font-size: 16px;
    font-weight: normal;
    line-height: 25.6px;
    letter-spacing: 0px;
    margin-top: 40px;
}

.left_part button {
    display: flex;
    flex-direction: row;
    justify-content: center;
    align-items: center;
    margin-top: 33px;
    border-radius: 60px;
    background: #2639ED;
    font-size: 20px;
    font-family: AvertaDemoPECuttedDemo;
    color: white;
    width: 215px;
    height: 65px;
}

.right_part {
    max-width: 60%;
    overflow: hidden;
    /* background-color: red; */
}

.right_part img {
    height: 512px;
    max-width: 100%;
    border-radius: 0px 0px 0px 200px;
    /* margin-left: 64.5px;
    margin-bottom: 89px; */
}
</style>
最終效果:
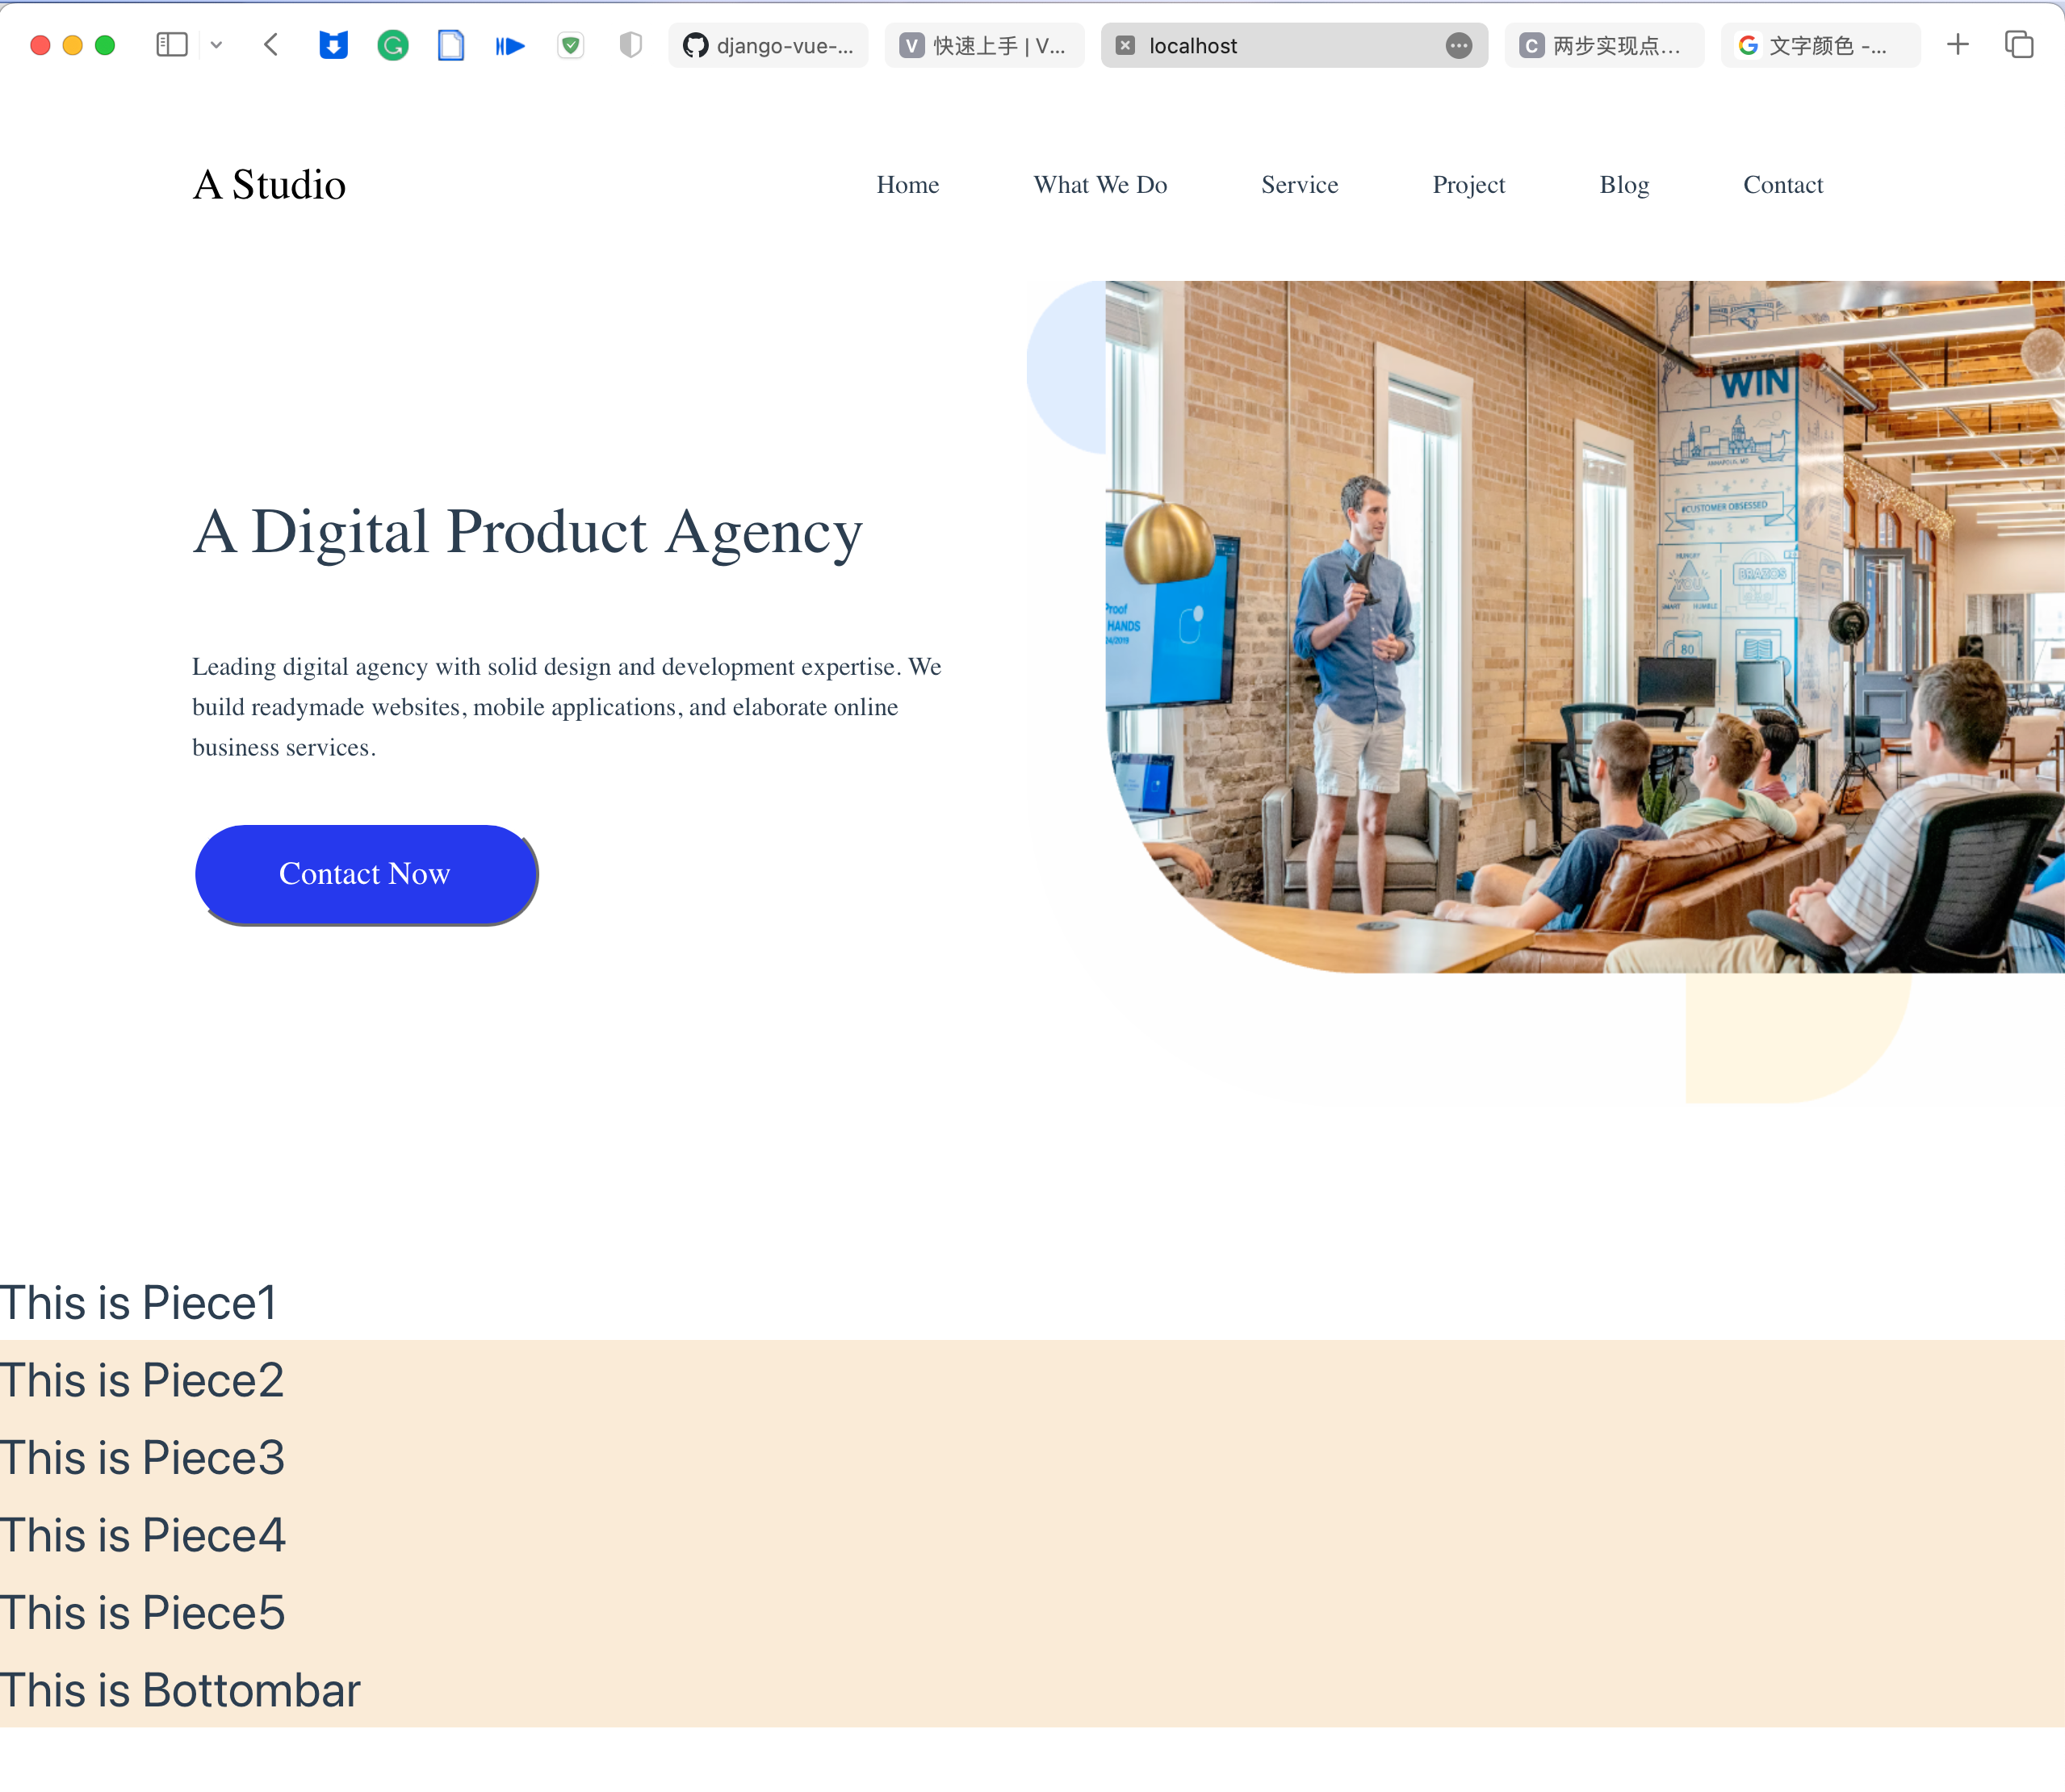
5. 塊1
接下來是下麵的五個塊中的第一個。UI圖如下:

佈局如圖所示。
代碼如下:
<template>
    <div class="piece">
        <div class="left_part">
            <div class="text1">Our Client</div>
            <div class="text2">Several selected clients, who already believe in our service.</div>
        </div>
        <div class="right_part">
            <img src="../assets/piece1_1.png" alt="">
            <img src="../assets/piece1_2.png" alt="">
            <img src="../assets/piece1_3.png" alt="">
            <img src="../assets/piece1_4.png" alt="">
        </div>
    </div>
</template>

<style scoped>
.piece {
    /* background-color: aqua; */
    display: flex;
    justify-content: space-between;
    margin-top: 40px;
    margin-right: 120px;
    margin-left: 120px;
    height: 124px;
}

.left_part {
    display: flex;
    flex-direction: column;
}

.text1 {
    font-family: AvertaDemoPECuttedDemo;
    font-size: 40px;
    font-weight: normal;
    line-height: 56px;
    letter-spacing: 0px;
}

.text2 {
    font-family: AvertaDemoPECuttedDemo;
    font-size: 18px;
    font-weight: normal;
    line-height: 28.8px;
    letter-spacing: 0px;
    color: #757575;
}

.right_part{
    display: flex;
    justify-content: space-between;
    margin-left: 40px;
    align-items: center;
}

.right_part img{
    height: 50px;
    margin-right: 59px;
}
</style>
效果如下:
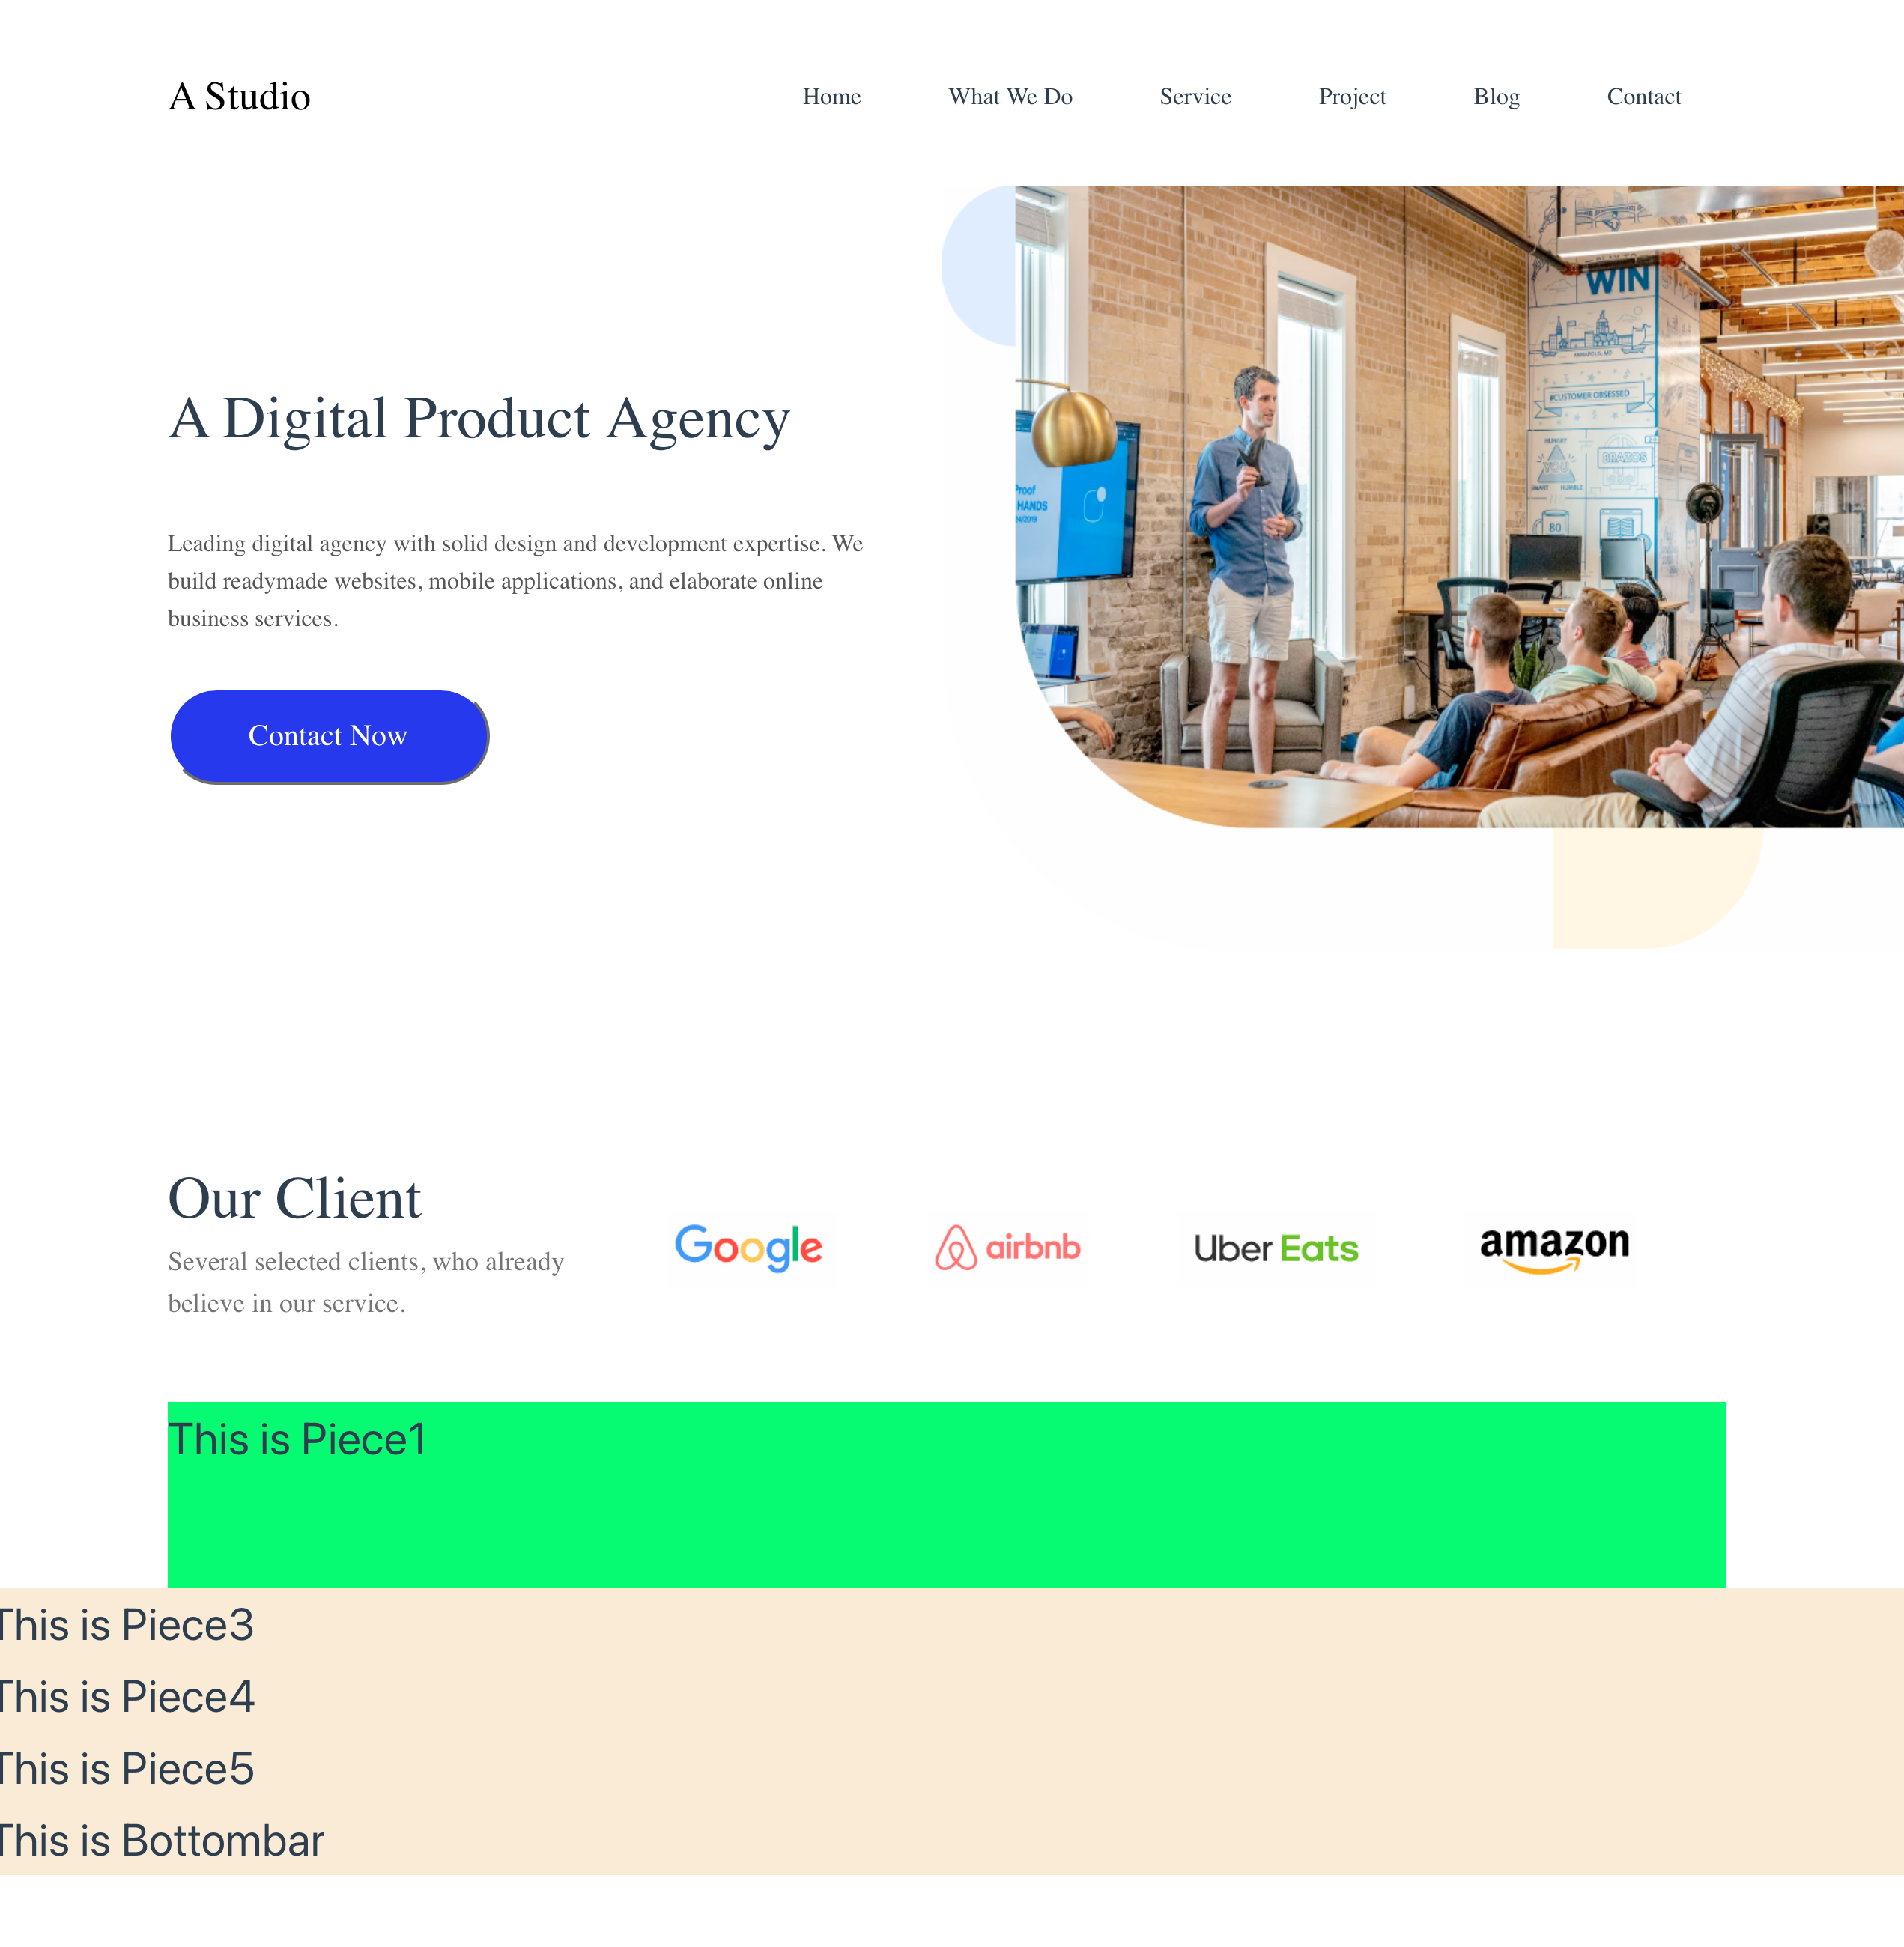
- 遇到一個問題:佈局的高度不是固定的(我在css里寫了固定的數值),會隨著瀏覽器的縮放而改變。暫未解決。
6. 塊2
UI圖如下:
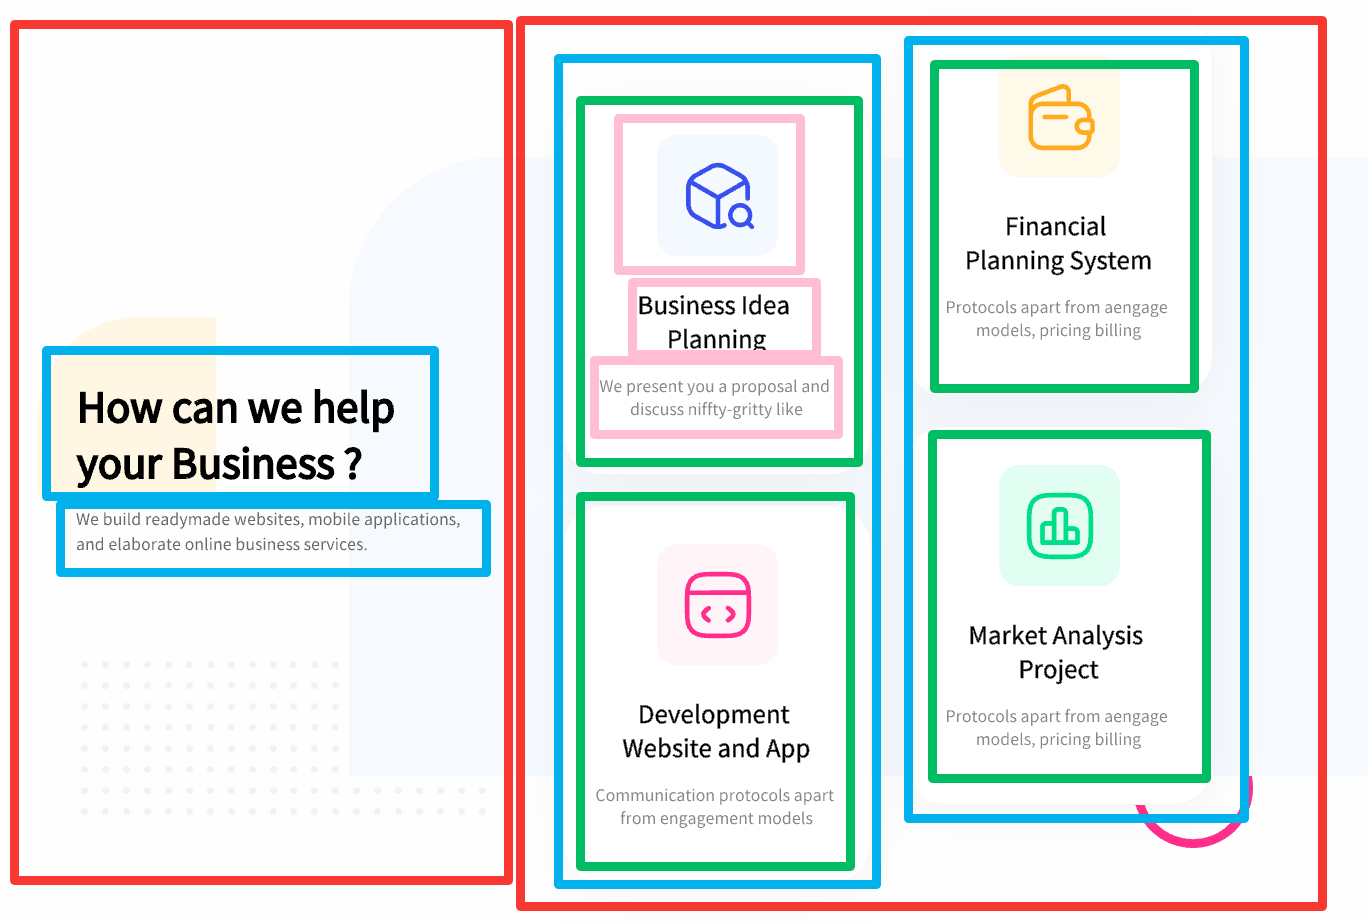
佈局有點複雜,其中兩個藍色部分通過調整不同的margin-top來實現錯位的效果。
背景的幾個矩形不太好直接通過代碼繪製,直接導出一張圖片放在容器背景中。
代碼如下:
<template>
    <div class="piece">
        <div class="left_part">
            <div class="text1">How can we help your Business ?</div>
            <div class="text2">We build readymade websites, mobile applications, and elaborate online business services.
            </div>
        </div>
        <div class="right_part">
            <div class="block_row" style="margin-top: 79px;">
                <div class="block">
                    <img src="../assets/piece2_1.png" alt="">
                    <div class="block_text1">Business Idea Planning</div>
                    <div class="block_text2">We present you a proposal and discuss niffty-gritty like</div>
                </div>
                <div class="block">
                    <img src="../assets/piece2_2.png" alt="">
                    <div class="block_text1">Financial Planning System</div>
                    <div class="block_text2">Protocols apart from aengage models, pricing billing</div>
                </div>
            </div>
            <div class="block_row">
                <div class="block">
                    <img src="../assets/piece2_3.png" alt="">
                    <div class="block_text1">Development Website and App</div>
                    <div class="block_text2">Communication protocols apart from engagement models</div>
                </div>
                <div class="block">
                    <img src="../assets/piece2_4.png" alt="">
                    <div class="block_text1">Market Analysis Project</div>
                    <div class="block_text2">Protocols apart from aengage models, pricing billing</div>
                </div>
            </div>
        </div>
    </div>
</template>

<style scoped>
.piece {
    /* background-color:rgb(0, 255, 115); */
    display: flex;
    justify-content: space-between;
    margin-top: 94px;
    margin-left: 82px;
    height: 867px;
    background-image: url('../assets/piece2_background.png');
    background-size: 100% 100%;
            background-repeat: no-repeat;
}

.left_part {
    /* background-color: aquamarine; */
    display: flex;
    flex-direction: column;
    max-width: 358px;
    margin-left: 38px;
    margin-right: 91px;
    margin-top: 220px;
}

.right_part {
    /* background-color: rebeccapurple; */
    display: flex;
    justify-content: space-around;
    margin-right: 183px;
}

.text1 {
    font-family: AvertaDemoPECuttedDemo;
    font-size: 40px;
    font-weight: normal;
    line-height: 56px;
    letter-spacing: 0px;

    color: #000000;
}

.text2 {
    font-family: AvertaDemoPECuttedDemo;
    font-size: 16px;
    font-weight: normal;
    line-height: 25.6px;
    letter-spacing: 0px;

    color: #565656;
}

.block_row {
    /* background-color: bisque; */
    display: flex;
    flex-direction: column;
    margin-left: 34px;
}

.block {
    /* background-color: #000000; */
    display: flex;
    height: 379px;
    width: 308px;
    margin-bottom: 30px;
    flex-direction: column;
    align-items: center;

    box-sizing: border-box;
    border: 1px solid #F2F2F2;
    border-radius: 40px;
    box-shadow: 0px 10px 50px 0px rgba(0, 0, 0, 0.05);
}

.block img {
    margin-top: 63px;
}

.block_text1 {
    font-family: AvertaDemoPECuttedDemo;
    font-size: 24px;
    font-weight: normal;
    line-height: 34px;
    text-align: center;
    letter-spacing: 0px;

    margin-top: 54px;
    margin-left: 38px;
    margin-right: 38px;
}

.block_text2 {
    font-family: AvertaDemoPECuttedDemo;
    font-size: 16px;
    font-weight: normal;
    line-height: 22.4px;
    text-align: center;
    letter-spacing: 0px;

    color: #757575;

    margin-top: 27px;
    margin-left: 31px;
    margin-right: 31px;
}
</style>
效果如下:
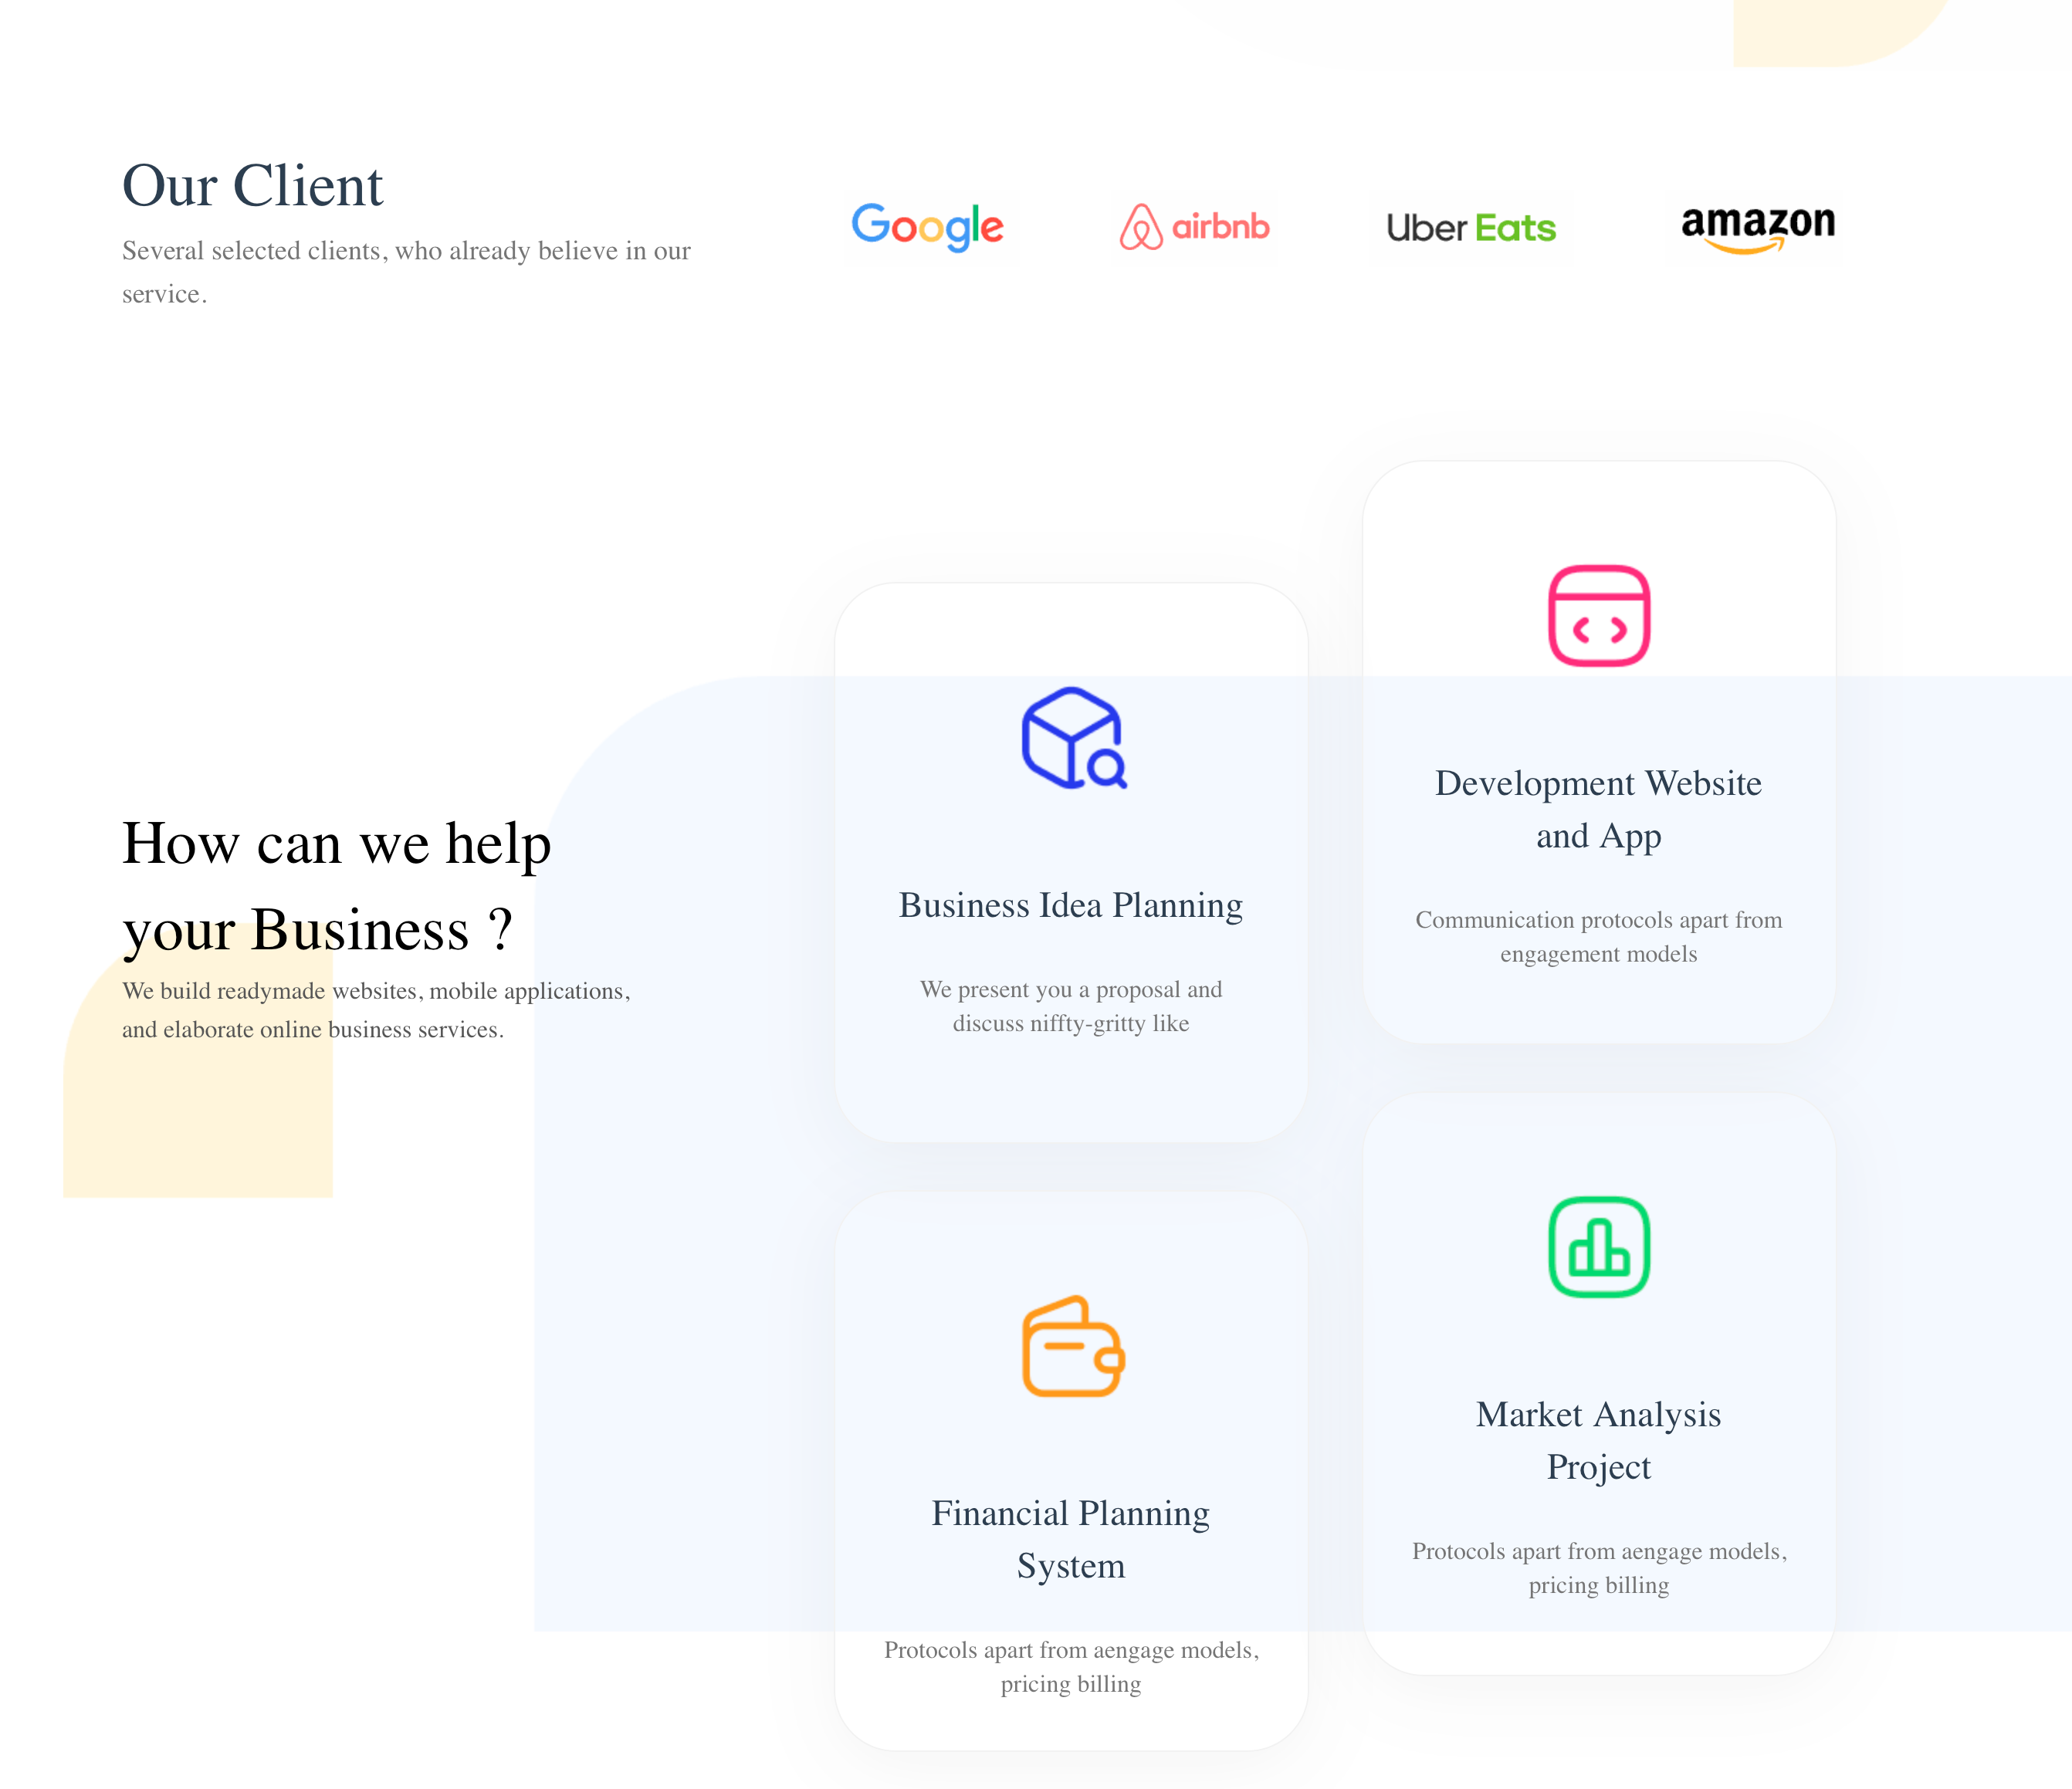
實踐中發現,使用背景圖片來實現那些矩形,有點難以控制,效果不佳。最終我簡化了一些元素,勉強能看。
如果要達到最好的效果,還是得通過代碼實現矩形的繪製。
7. 塊3
UI圖:
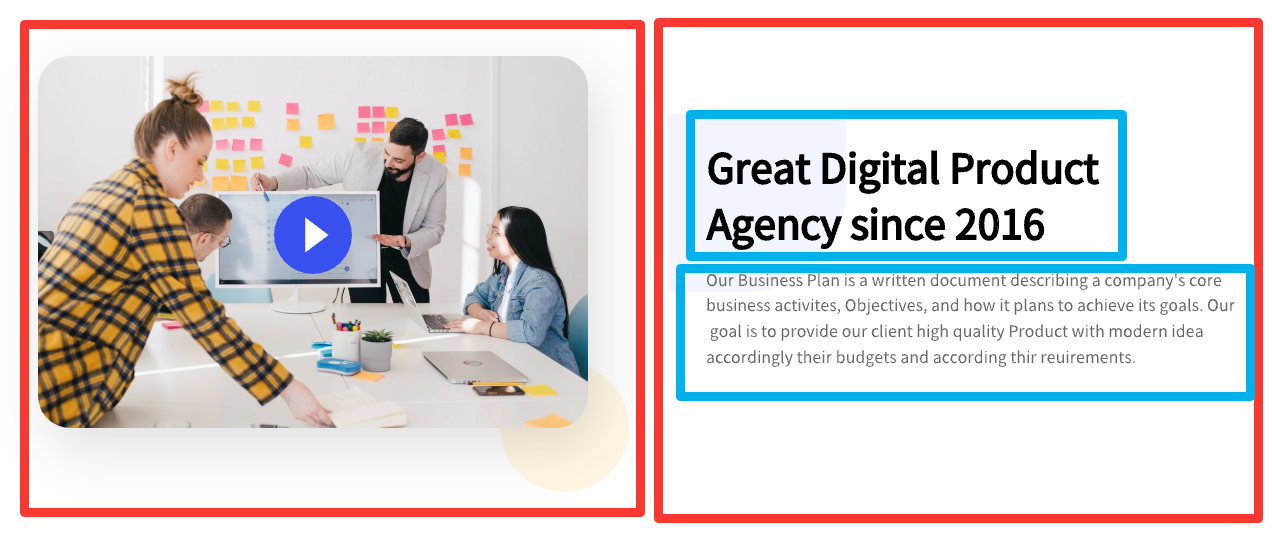
這裡的佈局比較簡單,就不過多贅述了。
7.1 視頻播放器
比較特別的是此處使用了一個視頻播放器,但是目前暫時沒有實現,出現了一些bug:第三方的播放器插件安裝後import顯示找不到,傳統的video播放不了……
先使用img代替,後續再修這個bug。
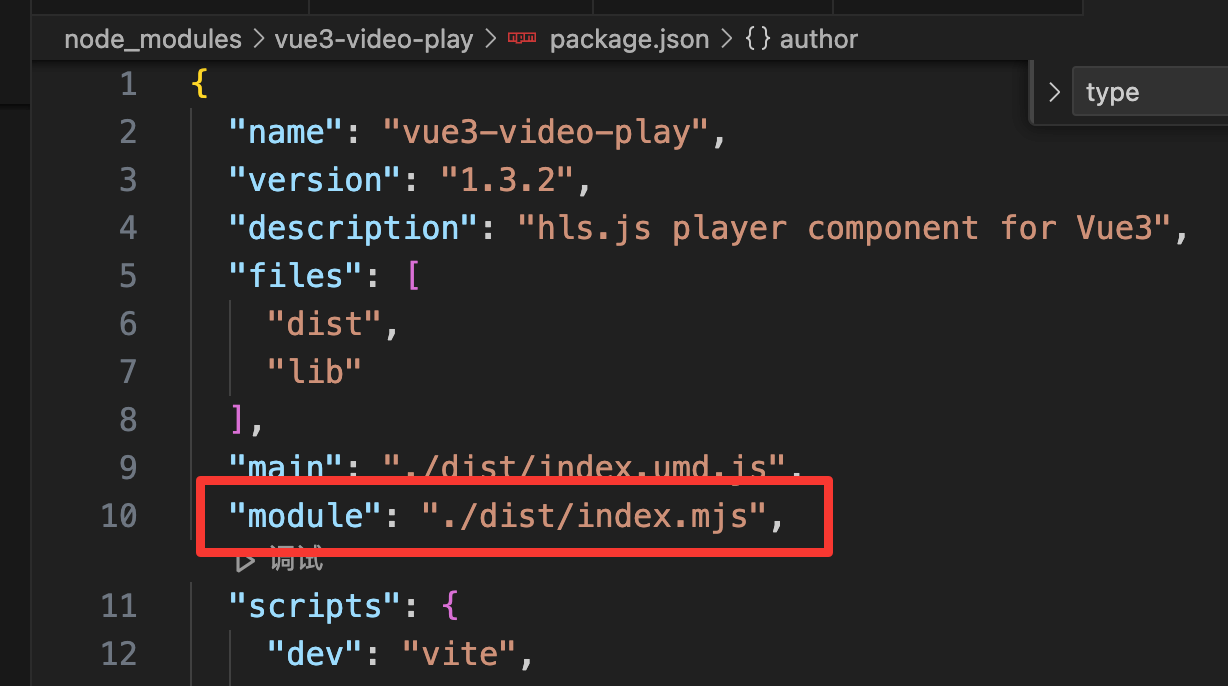
選用vue3VideoPlay這個插件,值得註意的是,這個插件有一個問題,其預設package.json中有一個路徑是錯的,要改寫成下麵這個:
另外,該插件官方的文檔也有點問題,mp4文件不知道為什麼播放不了,本地文件也播放不了……
經過測試,網路m3u8文件可以播放,所以下麵使用此格式進行播放。(如何獲得m3u8鏈接,寫在了補充部分)
代碼:
- template部分:
<div class="left_part">
    <!-- <img src="../assets/piece3.png" alt=""> -->
    <vue3VideoPlay width="100%" height="100%"
        poster="https://cdn.jsdelivr.net/gh/xdlumia/files/video-play/ironMan.jpg" :src="options.src"
        :type="options.type" :autoPlay="false" />
</div>
此處值得註意的部分是,播放器的長和寬得像代碼的寫法才有效,寫成css無效,另外,圓角也只能通過設置父容器overflow: hidden;實現。
poster部分是封面。
- script部分:
<script setup lang="ts">
import { reactive } from "vue";
const options = reactive({
    src: "https://test-streams.mux.dev/x36xhzz/x36xhzz.m3u8", //視頻源
    type: "m3u8", //視頻類型
});
</script>
7.2 佈局代碼
代碼:
<template>
    <div class="piece">
        <div class="left_part">
                <img src="../assets/piece3.png" alt="">
                <!-- <VideoPlayer videoSrc="../assets/cockatoo.mp4" coverSrc="../assets/piece1_1.png" /> -->
        </div>
        <div class="right_part">
            <div class="text1">Great Digital Product Agency since 2016 </div>
            <div class="text2">Our Business Plan is a written document describing a company's core business activites,
                Objectives, and how it plans to achieve its goals. Our goal is to provide our client high quality
                Product with modern idea accordingly their budgets and according thir reuirements.</div>
        </div>
    </div>
</template>

<script>
import VideoPlayer from './videoplayer.vue';

export default {
    name: 'App',
    components: {
        VideoPlayer
    }
};
</script>

<style scoped>
.piece {
    /* background-color: aqua; */
    display: flex;
    justify-content: space-between;
    margin-top: 146px;
    margin-left: 120px;
    margin-right: 120px;
    height: 436px;
}

.left_part {
    width: 550px;
    height: 372px;
    /* background-color: bisque; */
    box-shadow: 10px 20px 50px 0px rgba(0, 0, 0, 0.15);
    border-radius: 32px;
}

.left_part img {
    /* width: 100%;
    height: 100%; */
    width: 550px;
    height: 372px;
    object-fit: cover;
    /* 使圖片覆蓋整個容器 */
    object-position: center;
    /* 居中顯示圖片 */
}

.right_part {
    display: flex;
    flex-direction: column;
    width: 532px;
    max-width: 550px;
    margin-left: 119px;
}

.text1 {
    margin-top: 82px;
    font-family: AvertaDemoPECuttedDemo;
    font-size: 40px;
    font-weight: normal;
    line-height: 56px;
    letter-spacing: 0px;

    color: #000000;
}

.text2 {
    margin-top: 30px;
    margin-bottom: 122px;
    font-family: AvertaDemoPECuttedDemo;
    font-size: 16px;
    font-weight: normal;
    line-height: 25.6px;
    letter-spacing: 0px;

    color: #565656;
}
</style>
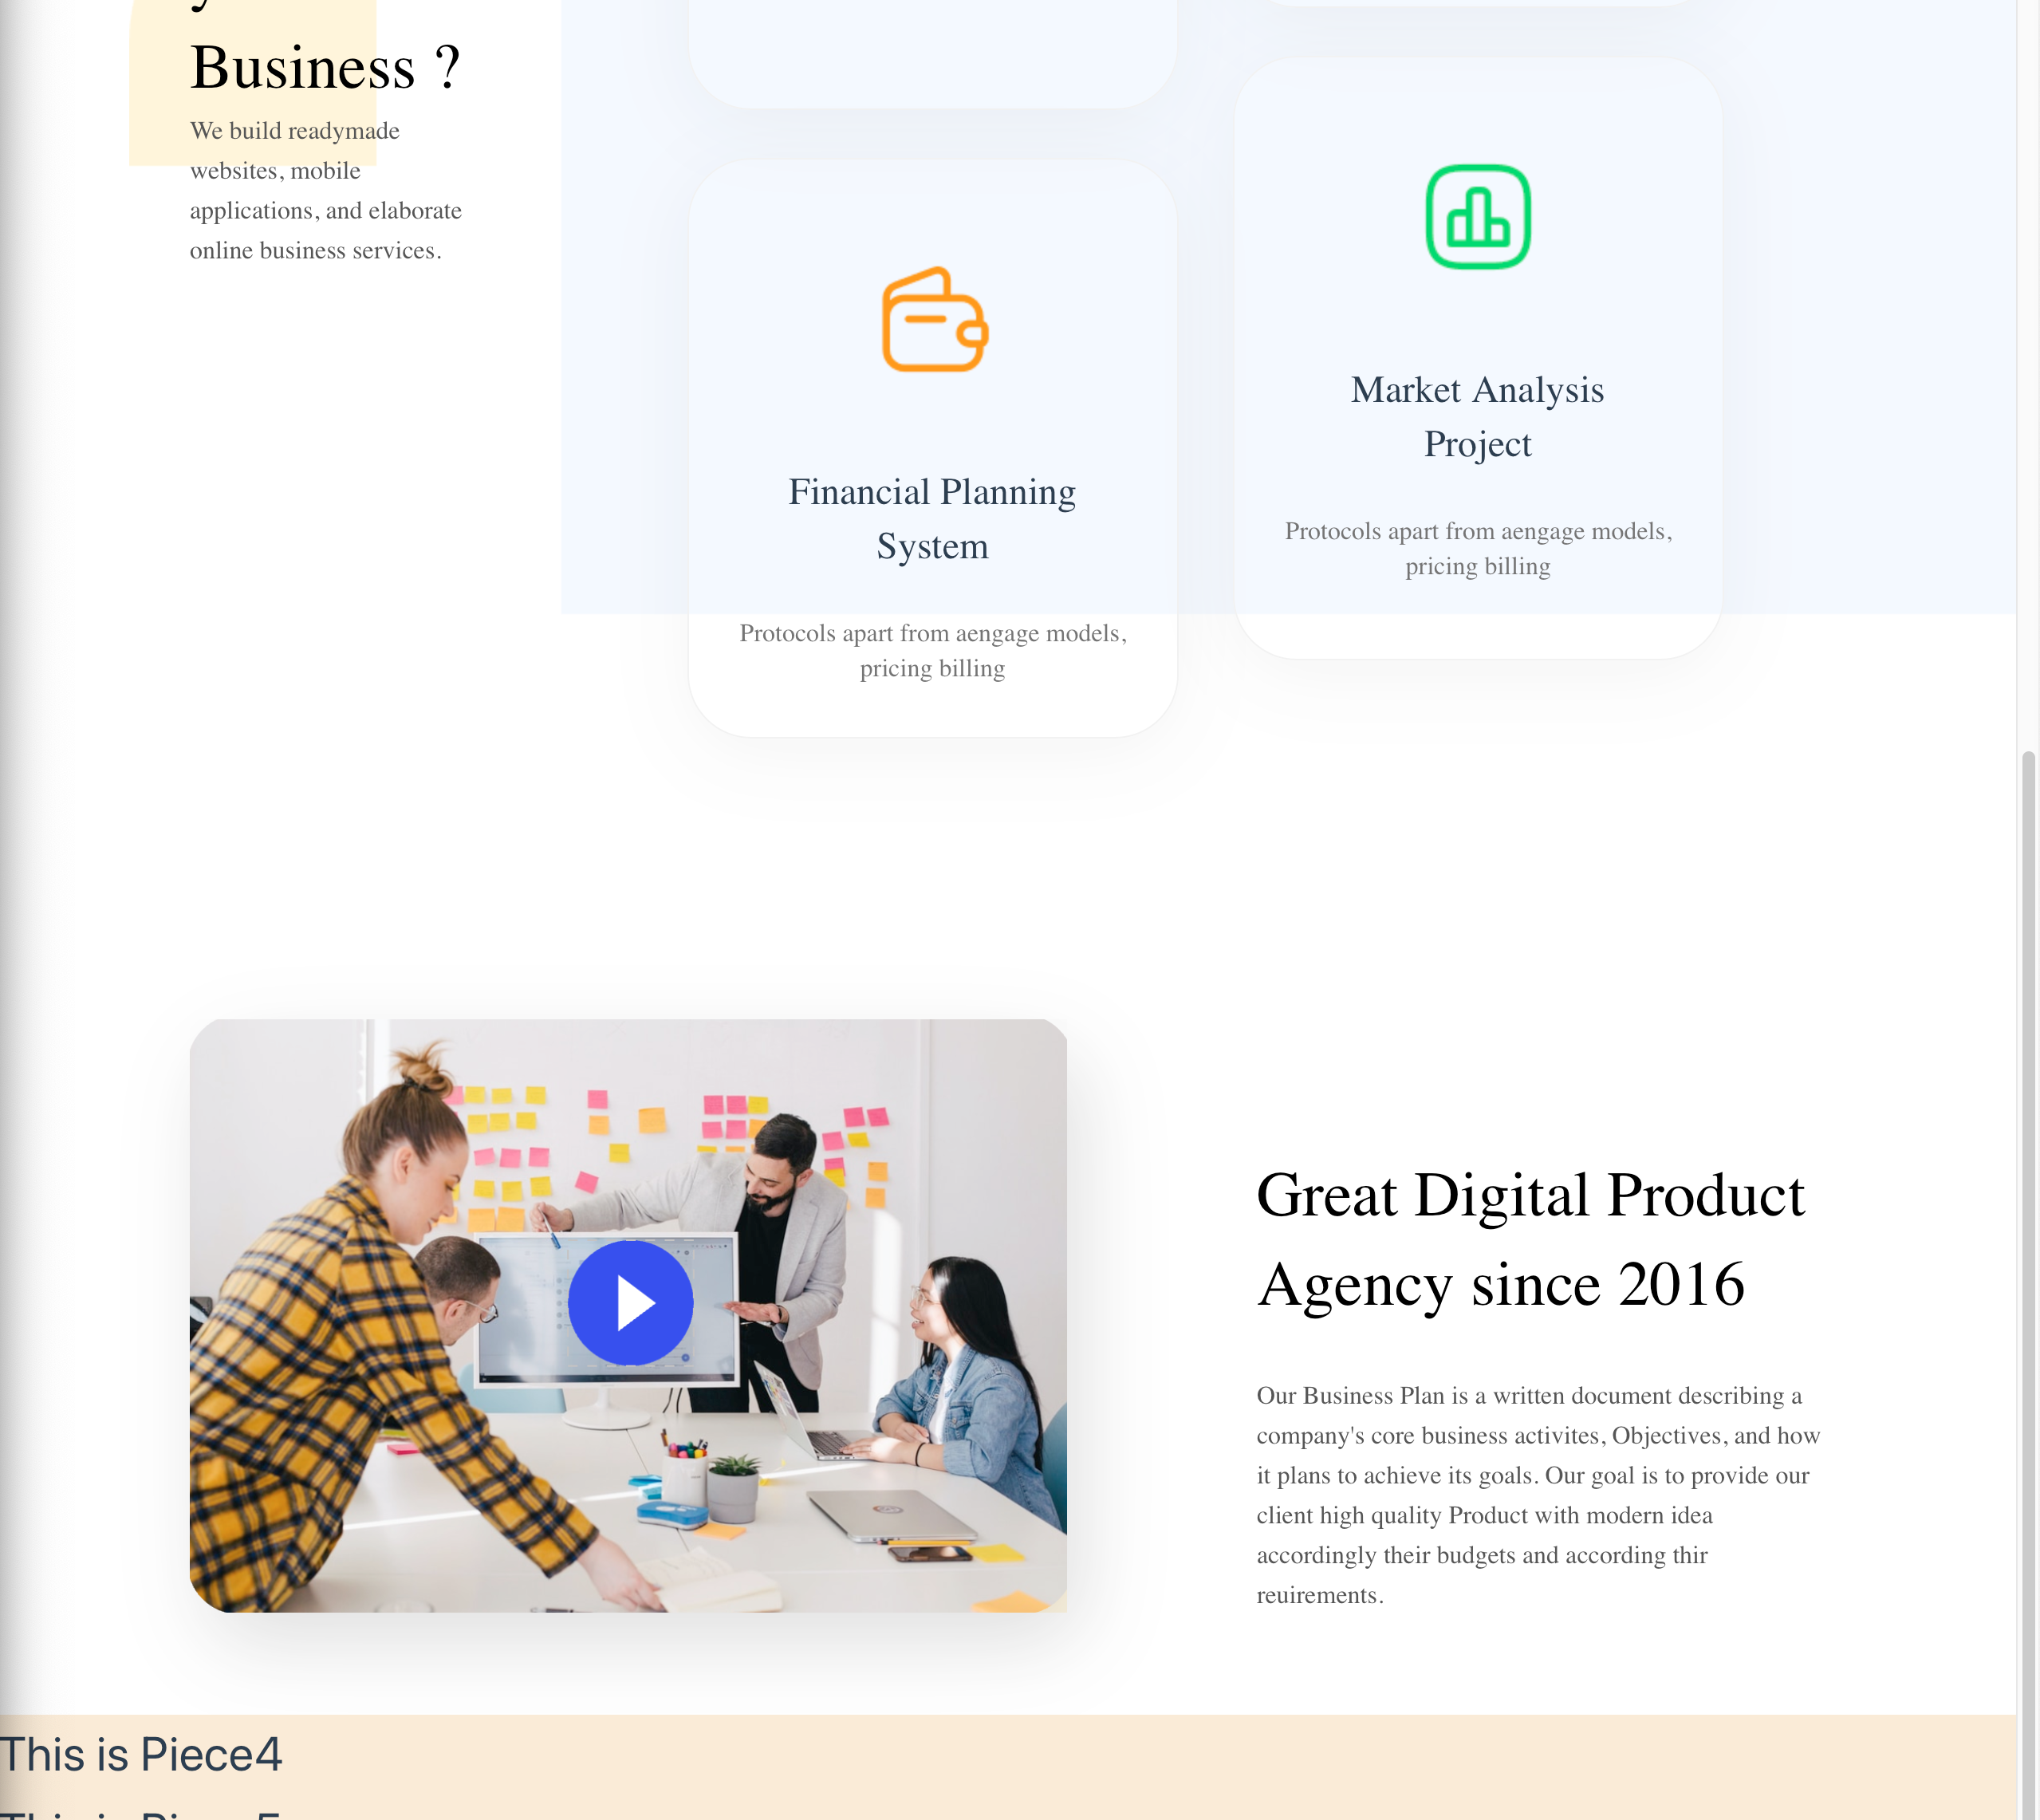
效果:
8. 塊4
UI圖: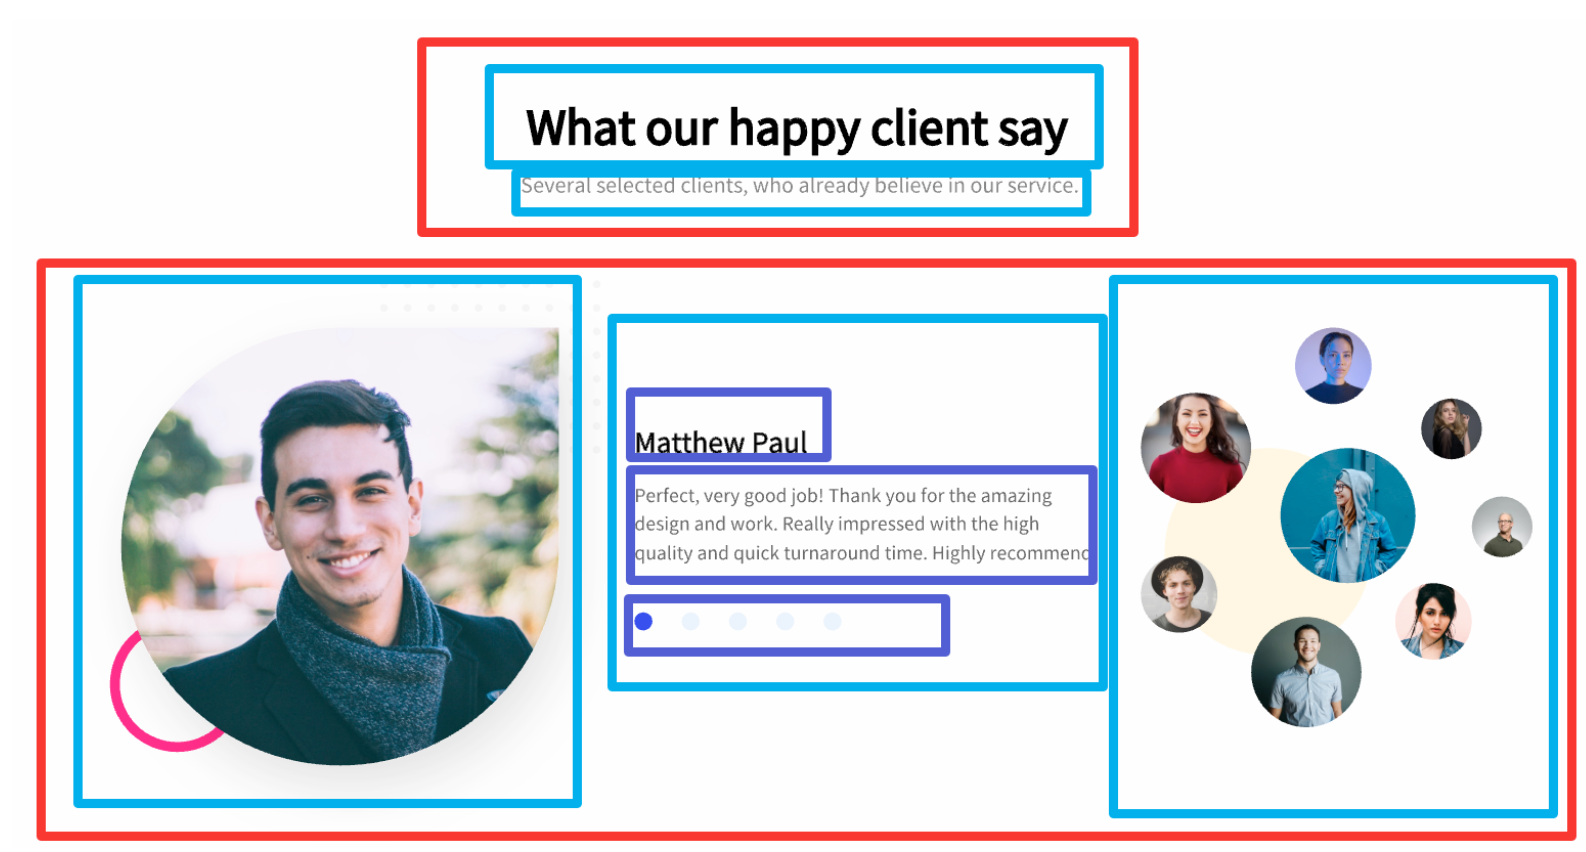
這張圖是有動效的,中間的藍色圓圈可以選擇不同的人物介紹。
在此先做好靜態的外觀,動效後面再補全。
8.1 靜態佈局
代碼如下:
<template>
    <div class="piece">
        <div class="top_part">
            <div class="top_text1">What our happy client say</div>
            <div class="top_2text2">Several selected clients, who already believe in our service.</div>
        </div>
        <div class="bottom_part">
            <div class="bottom_1">
                <img src="../assets/piece4.png" alt="">
            </div>
            <div class="bottom_2">
                <div class="bottom_text1">Matthew Paul</div>
                <div class="bottom_text2">Perfect, very good job! Thank you for the amazing design and work. Really
                    impressed with the high quality and quick turnaround time. Highly recommend.</div>
                <div class="select">
                    <div class="option" style="background: #2639ED;"></div>
                    <div class="option"></div>
                    <div class="option"></div>
                    <div class="option"></div>
                    <div class="option"></div>
                    <div class="option"></div>
                </div>
            </div>
            <div class="bottom_3">
                <img src="../assets/piece4.png" alt="" class="img120">
                <img src="../assets/piece4.png" alt="" class="img98" style="left: 0px;top: 58px;">
                <img src="../assets/piece4.png" alt="" class="img98" style="left: 98px;top: 257px;">
                <img src="../assets/piece4.png" alt="" class="img68" style="left: 0px;top: 203px;">
                <img src="../assets/piece4.png" alt="" class="img68" style="left: 240px;top: 227px;">
                <img src="../assets/piece4.png" alt="" class="img54">
            </div>
        </div>
    </div>
</template>

<style scoped>
.piece {
    /* background-color: aqua; */
    display: flex;
    flex-direction: column;
    align-items: center;
    height: 597px;
    margin-top: 117px;
    margin-left: 107px;
    margin-right: 69px;
}

.top_part {
    display: flex;
    flex-direction: column;
    align-items: center;
}

.top_text1 {
    font-family: AvertaDemoPECuttedDemo;
    font-size: 40px;
    font-weight: normal;
    line-height: 56px;
    text-align: center;
    letter-spacing: 0px;

    color: #000000;
}

.top_text2 {
    margin-top: 17px;
    font-family: AvertaDemoPECuttedDemo;
    font-size: 18px;
    font-weight: normal;
    line-height: 28.8px;
    text-align: center;
    letter-spacing: 0px;

    color: #757575;
}

.bottom_part {
    margin-top: 113px;
    display: flex;
    justify-content: space-between;
    height: 389px;
    align-items: center;
    width: 100%;
}

.bottom_1 {
    box-shadow: 10px 20px 50px 0px rgba(0, 0, 0, 0.15);
    border-radius: 500px 0px 500px 500px;
    width: 389px;
    height: 389px;
}

.bottom_1 img {
    width: 100%;
    height: 100%;
    box-shadow: 10px 20px 50px 0px rgba(0, 0, 0, 0.15);
    border-radius: 500px 0px 500px 500px;
}

.bottom_2 {
    display: flex;
    flex-direction: column;
    margin-left: 67px;
    margin-top: 84px;
    width: 412px;
    max-width: 600px;
}

.bottom_text1 {
    font-family: AvertaDemoPECuttedDemo;
    font-size: 24px;
    font-weight: normal;
    line-height: 34px;
    text-align: left;
    letter-spacing: 0px;

    color: #000000;
}

.bottom_text2 {
    font-family: AvertaDemoPECuttedDemo;
    font-size: 16px;
    font-weight: normal;
    line-height: 25.6px;
    letter-spacing: 0px;
    margin-top: 21px;
    color: #565656;
}

.bottom_3 {
    position: relative;
    width: 348px;
    height: 355px;
    margin-left: 38px;
}

.img120 {
    border-radius: 500px 500px 500px 500px;
    position: absolute;
    left: 124px;
    top: 107px;
    width: 120px;
    height: 120px;
    opacity: 1;
}

.img98 {
    border-radius: 500px 500px 500px 500px;
    position: absolute;
    width: 98px;
    height: 98px;
    opacity: 1;
}

.img68 {
    border-radius: 500px 500px 500px 500px;
    position: absolute;
    width: 68px;
    height: 68px;
    opacity: 1;

}

.img54 {
    border-radius: 500px 500px 500px 500px;
    position: absolute;
    left: 200px;
    top: 30px;
    width: 54px;
    height: 54px;
    opacity: 1;
}

.select{
    display: flex;
    justify-content: space-between;
    margin-top: 40px;
    width: 180px;
}

.option{
    border-radius: 500px 500px 500px 500px;
    width: 16px;
    height: 16px;
    background: #E7F0FC;
}
</style>
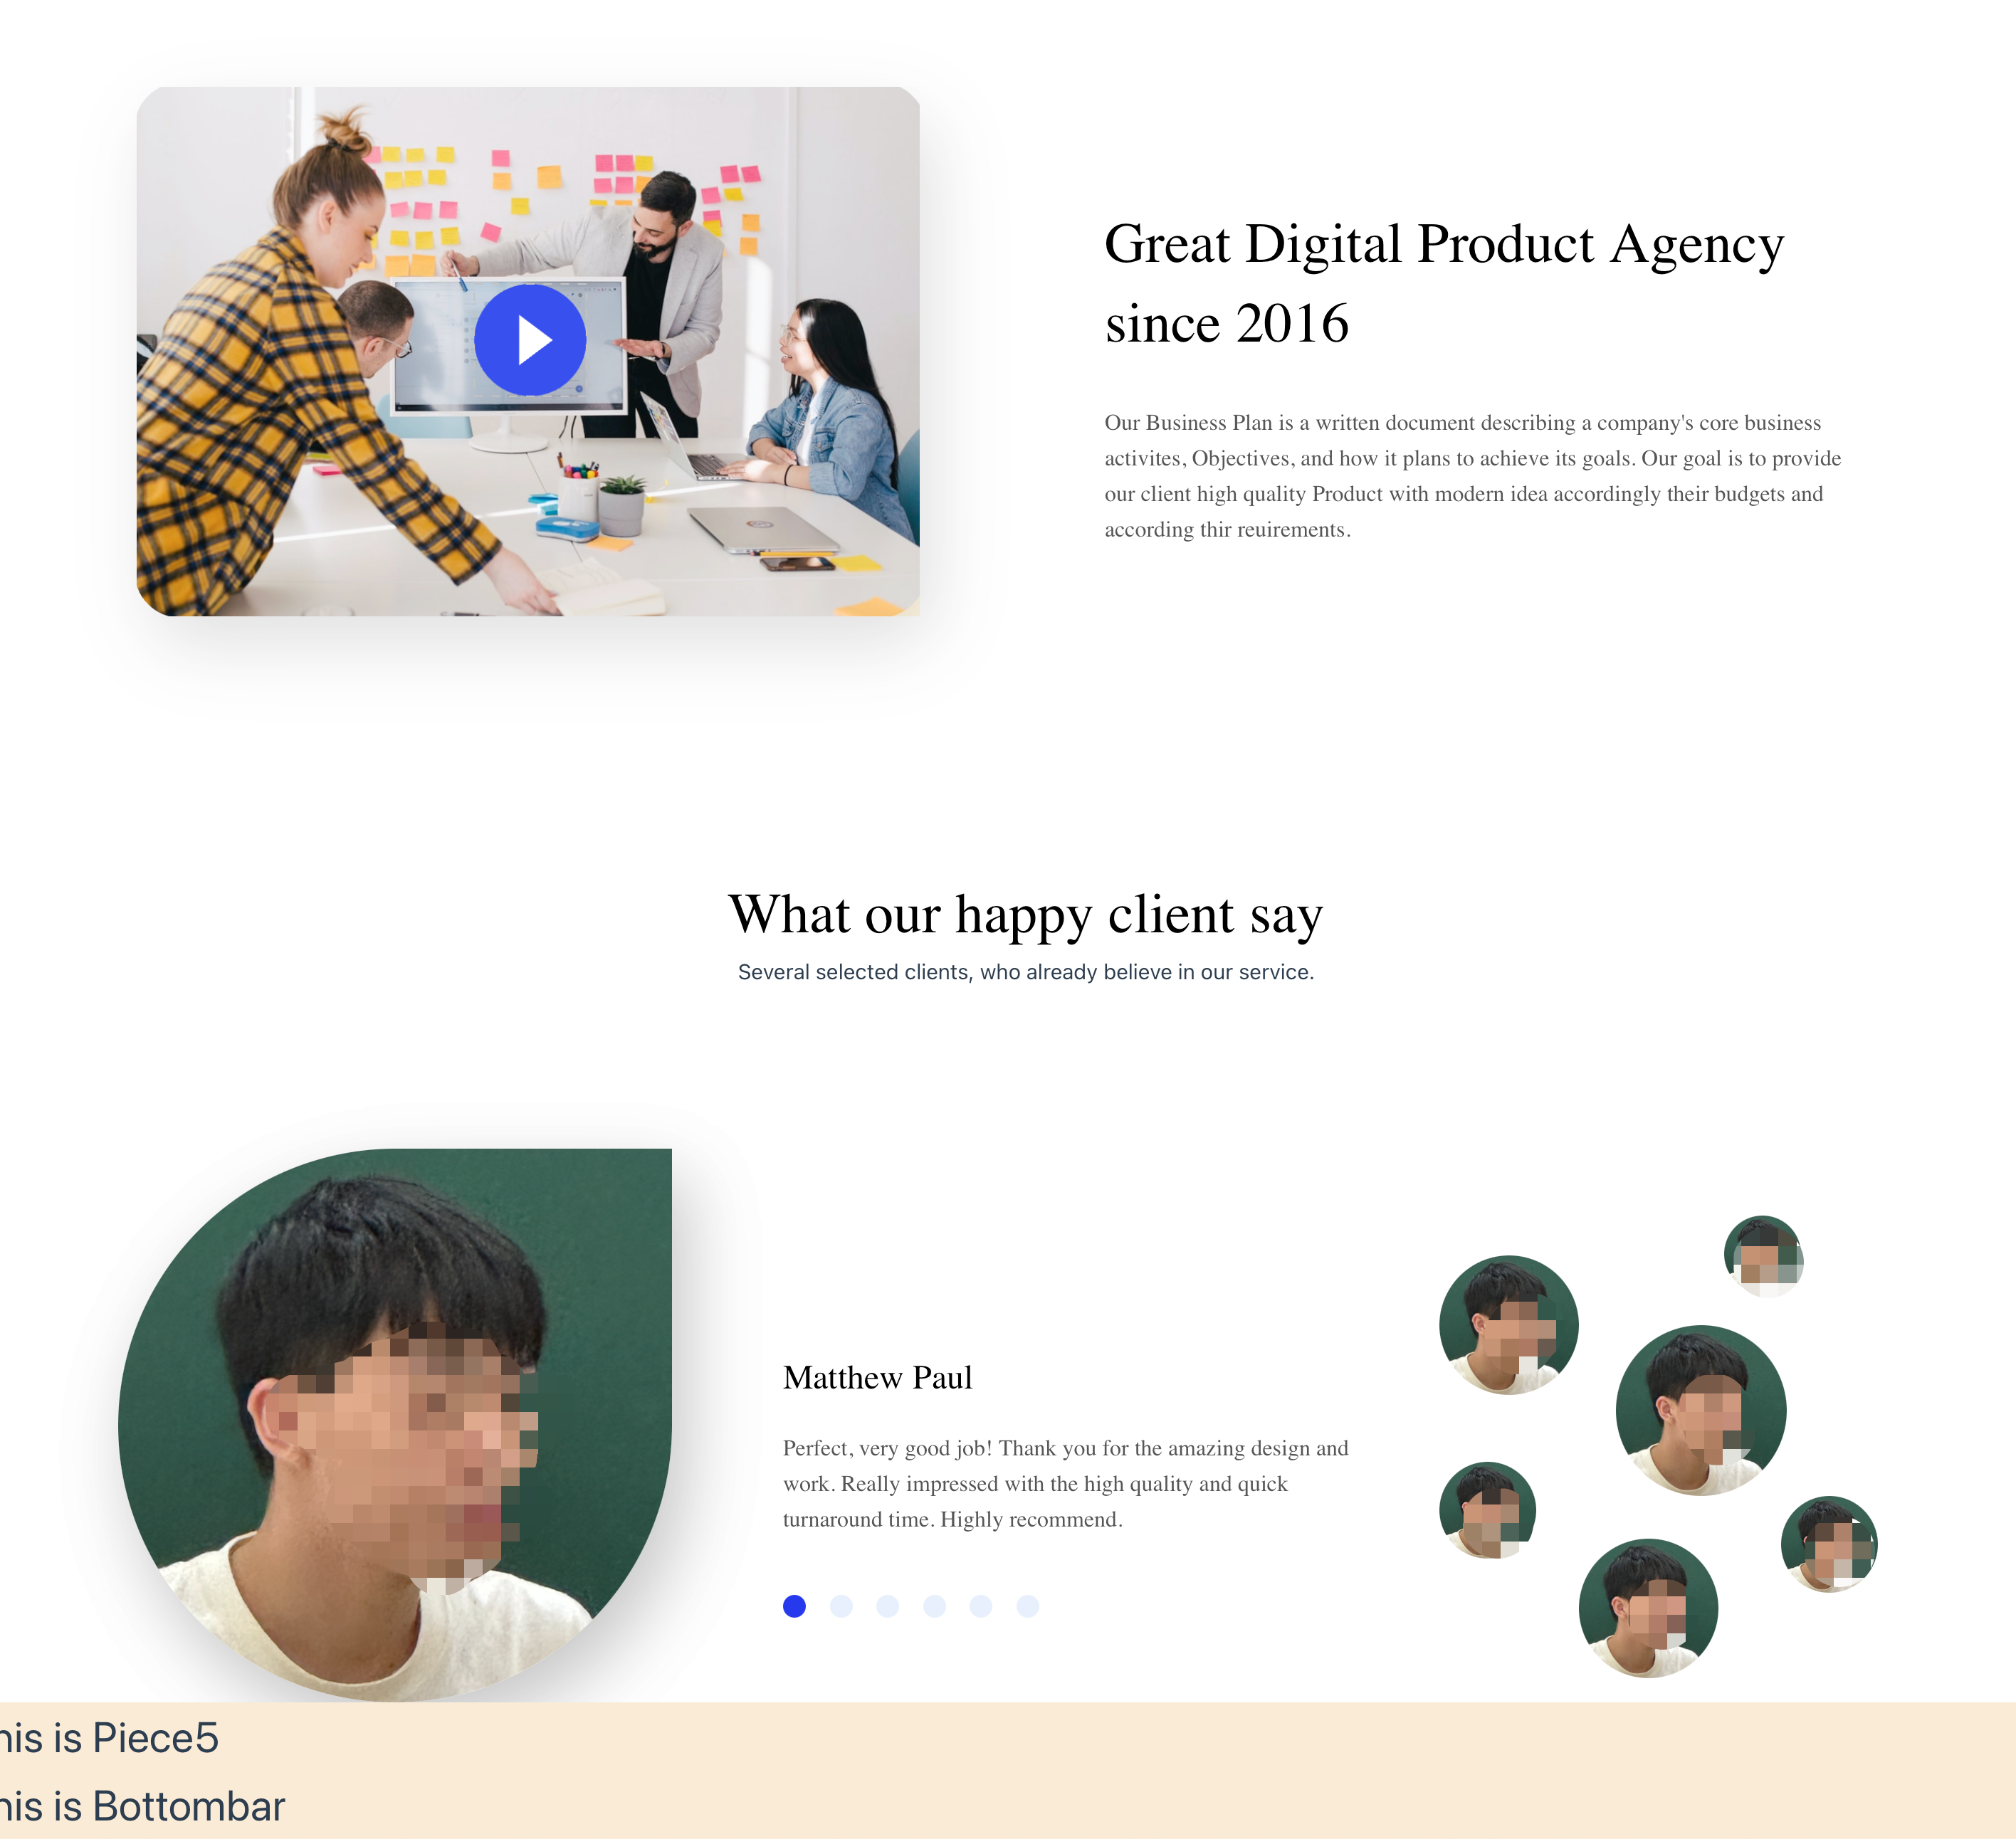
事實上,這裡的圖片和選項都寫法,復用性很差,而且不好做動效。後面會使用v-for等方法進行修改。
效果如下(因為沒有找到合適的圖片,就隨便拿了一張圖片):
9. 塊5
UI如下圖:
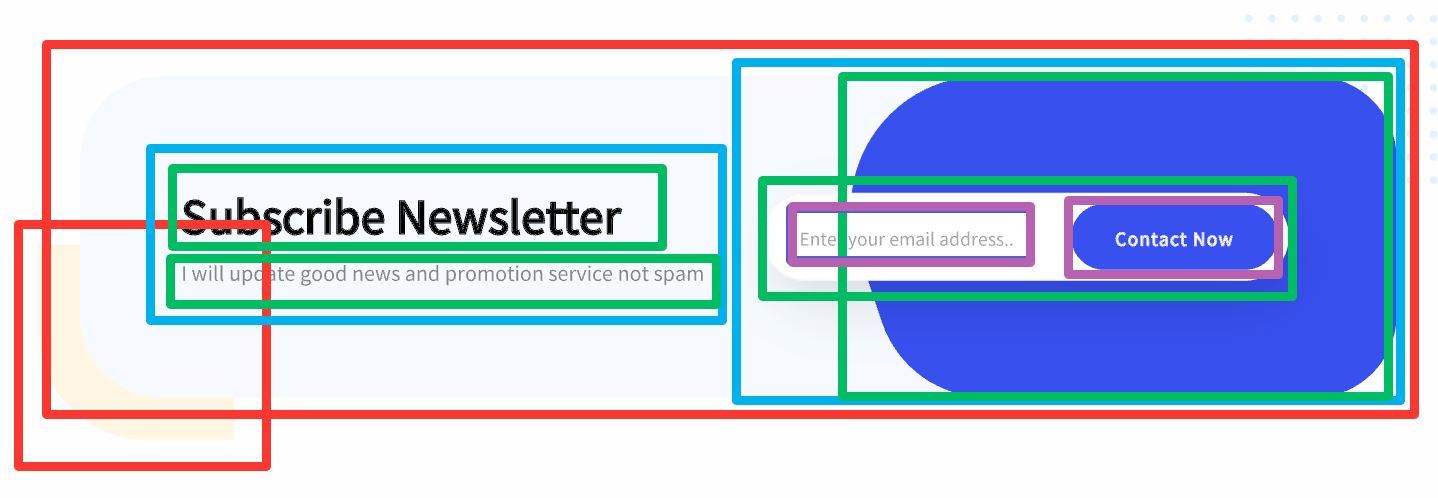
這一部分的佈局和上面的有許多不同,有一部分的佈局不能使用flex實現,得用相對和絕對位置relative、absolute來實現重疊,如圖中的紅色、右邊的綠色部分。
具體代碼如下:
<template>
    <div class="a">
        <div class="piece">
            <div class="rectangle"></div>
            <div class="main">
                <div class="left_part">
                    <div class="text1">Subscribe Newsletter</div>
                    <div class="text2">I will update good news and promotion service not spam</div>
                </div>
                <div class="right_part">
                    <div class="back"></div>
                    <div class="input">
                        <input type="text" placeholder="Enter your email address..">
                        <button>Contact Now</button>
                    </div>
                </div>
            </div>
        </div>
    </div>
</template>

<style scoped>
.piece {
    /* background-color: aqua; */
    position: relative;
    margin-top: 92px;
    margin-left: 82px;
    margin-right: 86px;
    height: 387px;
}

.main {
    position: absolute;
    display: flex;
    justify-content: space-between;
    left: 38px;
    top: 0px;
    border-radius: 75px;
    opacity: 1;
    width: 97%;
    /* max-width: 100%; */
    height: 292px;
    background-color: #F4F9FF;
}

.rectangle {
    position: absolute;
    left: 0px;
    top: 153px;
    width: 178px;
    height: 178px;
    transform: rotate(90deg);
    border-radius: 0px 0px 100px 0px;
    opacity: 1;

    background: #FFF5DB;
}

.left_part {
    display: flex;
    flex-direction: column;
    margin-left: 92px;
    margin-top: 98px;
    width: 40%;
}

.text1 {
    font-family: AvertaDemoPECuttedDemo;
    font-size: 40px;
    font-weight: normal;
    line-height: 56px;
    letter-spacing: 0px;

    color: #000000;
}

.text2 {
    font-family: AvertaDemoPECuttedDemo;
    font-size: 18px;
    font-weight: normal;
    line-height: 28.8px;
    letter-spacing: 0px;

    color: #757575;
}

.right_part {
    position: relative;
    width: 60%;
    margin-left: 10px;
}

.back {
    position: absolute;
    right: 0px;
    top: 0px;
    width: 80%;
    height: 292px;
    opacity: 1;
    border-radius: 380px 250px 250px 500px;
    background: #2639ED;
}

.input {
    position: absolute;
    right: 98px;
    top: 106px;
    width: 80%;
    height: 80px;
    border-radius: 60px;
    opacity: 1;

    box-sizing: border-box;
    border: 1px solid #F1F1F1;
    box-shadow: 10px 20px 50px 0px rgba(0, 0, 0, 0.15);
    background-color: white;

    display: flex;
    justify-content: space-between;
}

.input button {
    border-radius: 60px;
    margin-top: 10px;
    margin-bottom: 10px;
    margin-right: 10px;
    width: 39.2%;
    background: #2639ED;

    font-family: AvertaDemoPECuttedDemo;
    font-size: 16px;
    font-weight: normal;
    line-height: 22px;
    letter-spacing: 1.04px;

    color: #FFFFFF;
}

.input input {
    border: none;
    /* 移除邊框 */
    outline: none;
    /* 移除聚焦時的外邊框 */
    width: 55%;
    border-radius: 60px;
    margin-left: 30px;
    font-size: 16px;
}
</style>
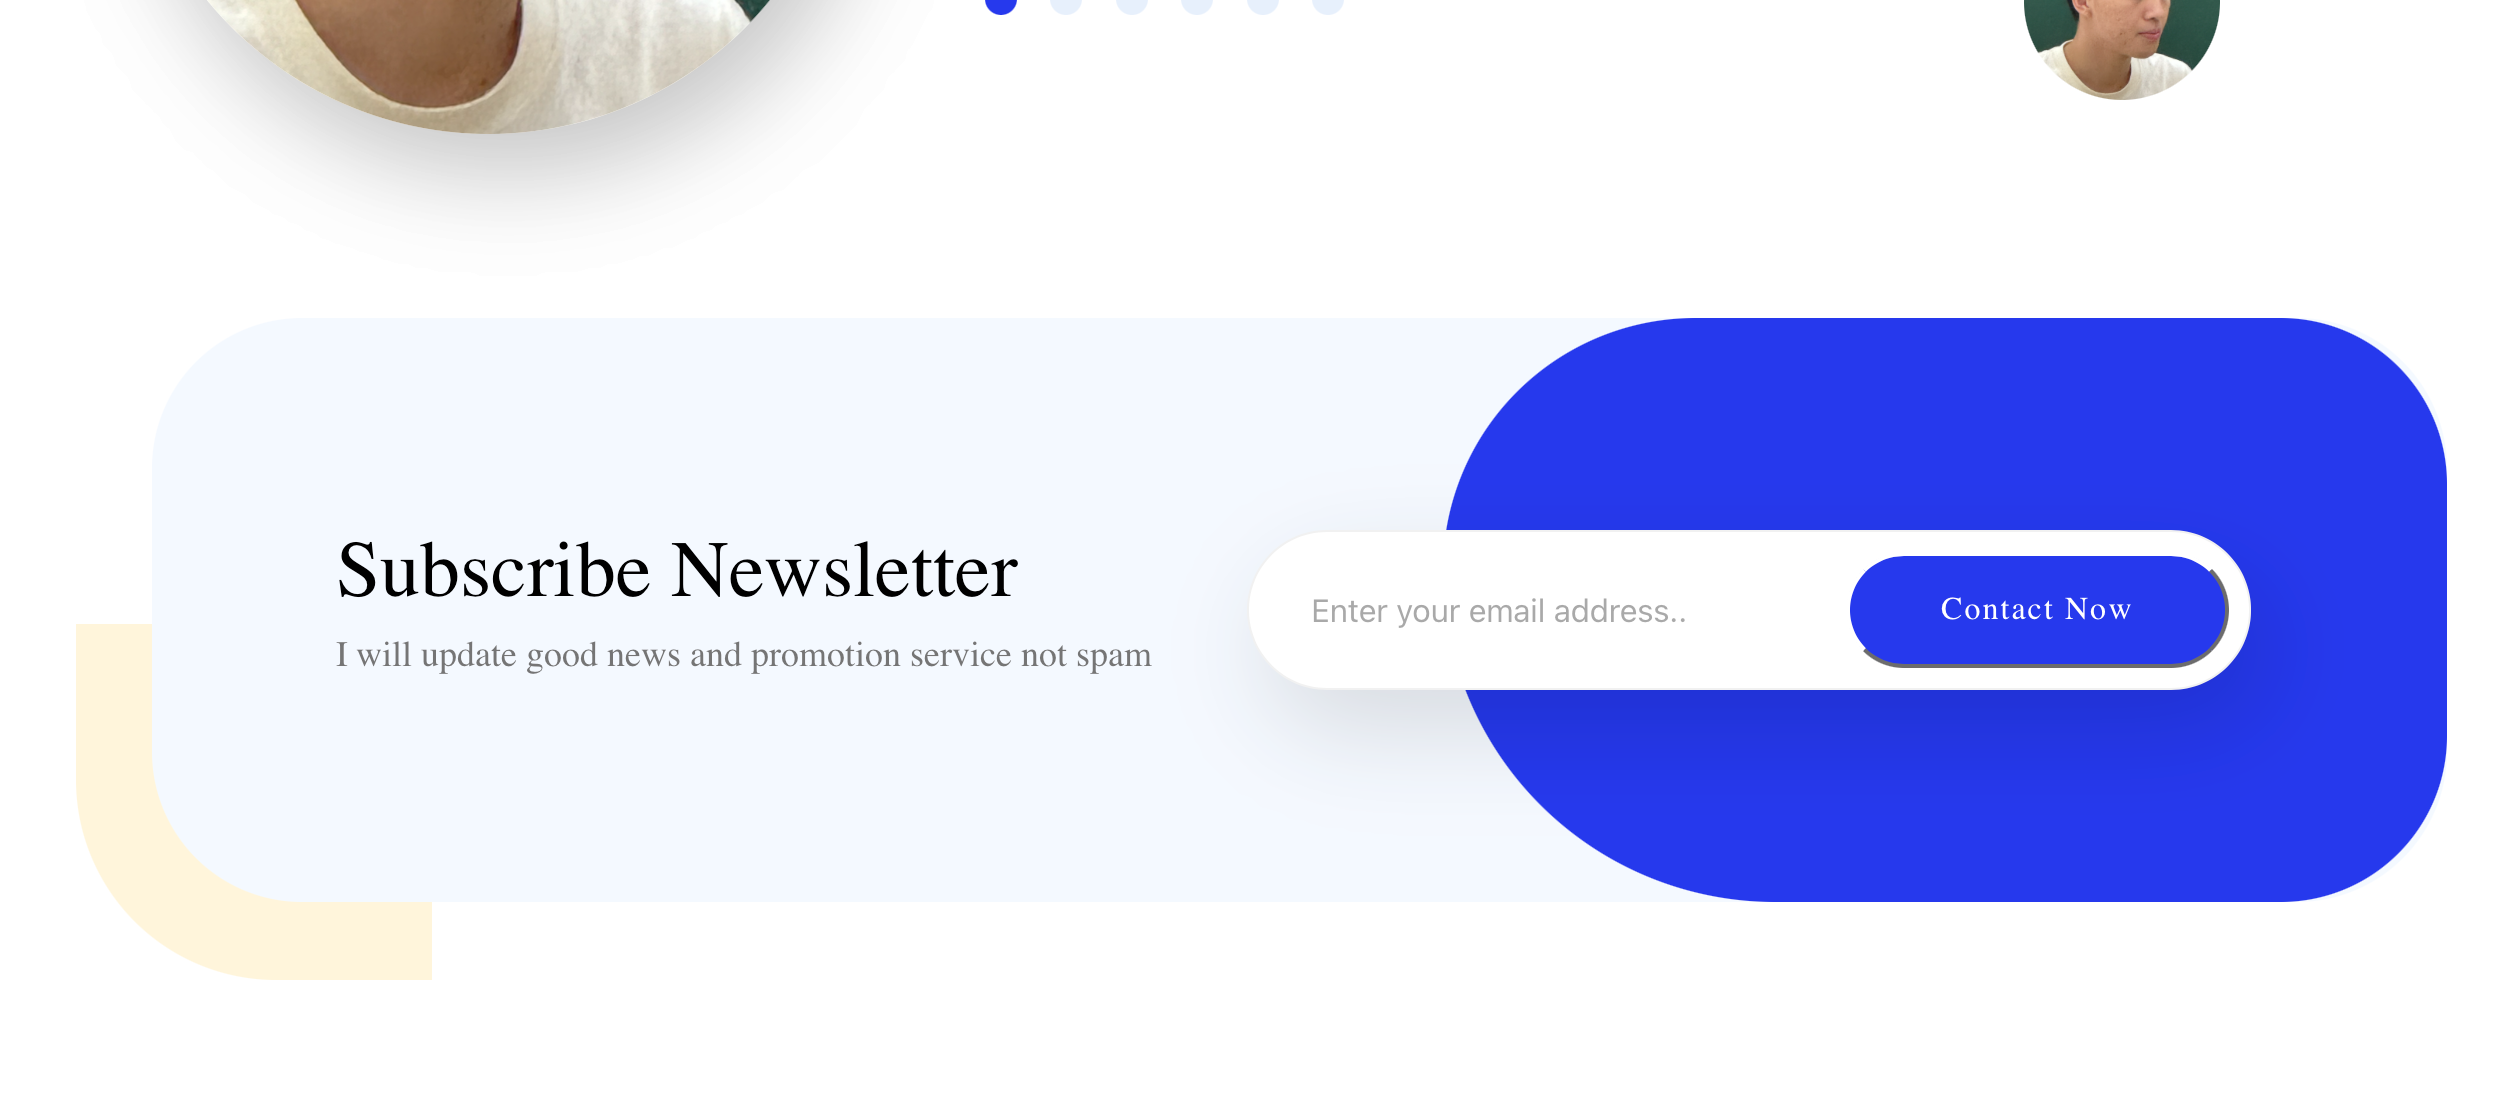
效果如下:
10. 底部
UI如下:

佈局比較簡單,就不過多贅述。
代碼如下:
<template>
    <div class="bottombar">
        <div class="left_part">
            <div class="left_text1">A+ Studio</div>
            <div class="left_text2">Leading digital agency with solid design and development expertise. We build
                readymade websites, mobile applications, and elaborate online business services.</div>
            <div class="left_bottom">
                <img src="../assets/piece4.png" alt="">
                <img src="../assets/piece4.png" alt="">
                <img src="../assets/piece4.png" alt="">
            </div>
        </div>
        <div class="right_part">
            <div class="block">
                <div class="block_title">What We Do</div>
                <div class="block_items">
                    <div class="itme_text">Web Design
                        <br>App Design
                        <br>Social Media Manage
                        <br>Market Analysis Project</div>
                </div>
            </div>
            <div class="block">
                <div class="block_title">Company</div>
                <div class="block_items">
                    <div class="itme_text">About Us
                        <br>Career
                        <br>Become Investor</div>
                </div>
            </div>
            <div class="block">
                <div class="block_title">Support</div>
                <div class="block_items">
                    <div class="itme_text">FAQ
                        <br>Policy
                        <br>Business</div>
                </div>
            </div>
            <div class="block">
                <div class="block_title">Contact</div>
                <div class="block_items">
                    <div class="itme_text">WhatsApp
                        <br>Support 24</div>
                </div>
            </div>
        </div>
    </div>
</template>

<style scoped>
.bottombar {
    margin-top: 107px;
    margin-left: 120px;
    margin-right: 120px;
    margin-bottom: 100px;
    display: flex;
    justify-content: space-between;
}

.left_part {
    display: flex;
    flex-direction: column;
    margin-top: 60px;
    max-width: 30%;
}

.left_text1 {
    font-family: ProximaNova;
    font-size: 24px;
    font-weight: normal;
    line-height: 34px;
    letter-spacing: 0px;

    color: #000000;

}

.left_text2 {
    margin-top: 26px;
    font-family: AvertaDemoPECuttedDemo;
    font-size: 14px;
    font-weight: normal;
    line-height: 22.4px;
    letter-spacing: 0px;

    color: #565656;
}

.left_bottom {
    display: flex;
    justify-content: space-between;
    max-width: 150px;
    margin-top: 20px;
    margin-bottom: 80px;
}

.left_part img {
    width: 36px;
    height: 36px;
    border-radius: 500px 500px 500px 500px;
}

.right_part {
    display: flex;
    justify-content: space-between;
    margin-left: 71px;
    margin-top: 60px;
}

.block {
    margin-left: 80px;
    max-width: 150px;
}

.block_title {
    font-family: AvertaDemoPECuttedDemo;
    font-size: 20px;
    font-weight: bold;
    line-height: 28px;
    letter-spacing: 0px;

    color: #000000;
}

.itme_text {
    font-family: AvertaDemoPECuttedDemo;
    font-size: 14px;
    font-weight: normal;
    line-height: 28px;
    letter-spacing: 0px;

    color: #000000;
}

.block_items{
    margin-top: 24px;
}
</style>
效果:

11. 補充
11.1 矩形繪製
前面寫靜態頁的時候,有一部分背景圖形是直接使用圖片,但是拉伸效果不好,所以補充使用div來畫矩形,以適應不同寬度的瀏覽器。
首先是headline的這兩個矩形:
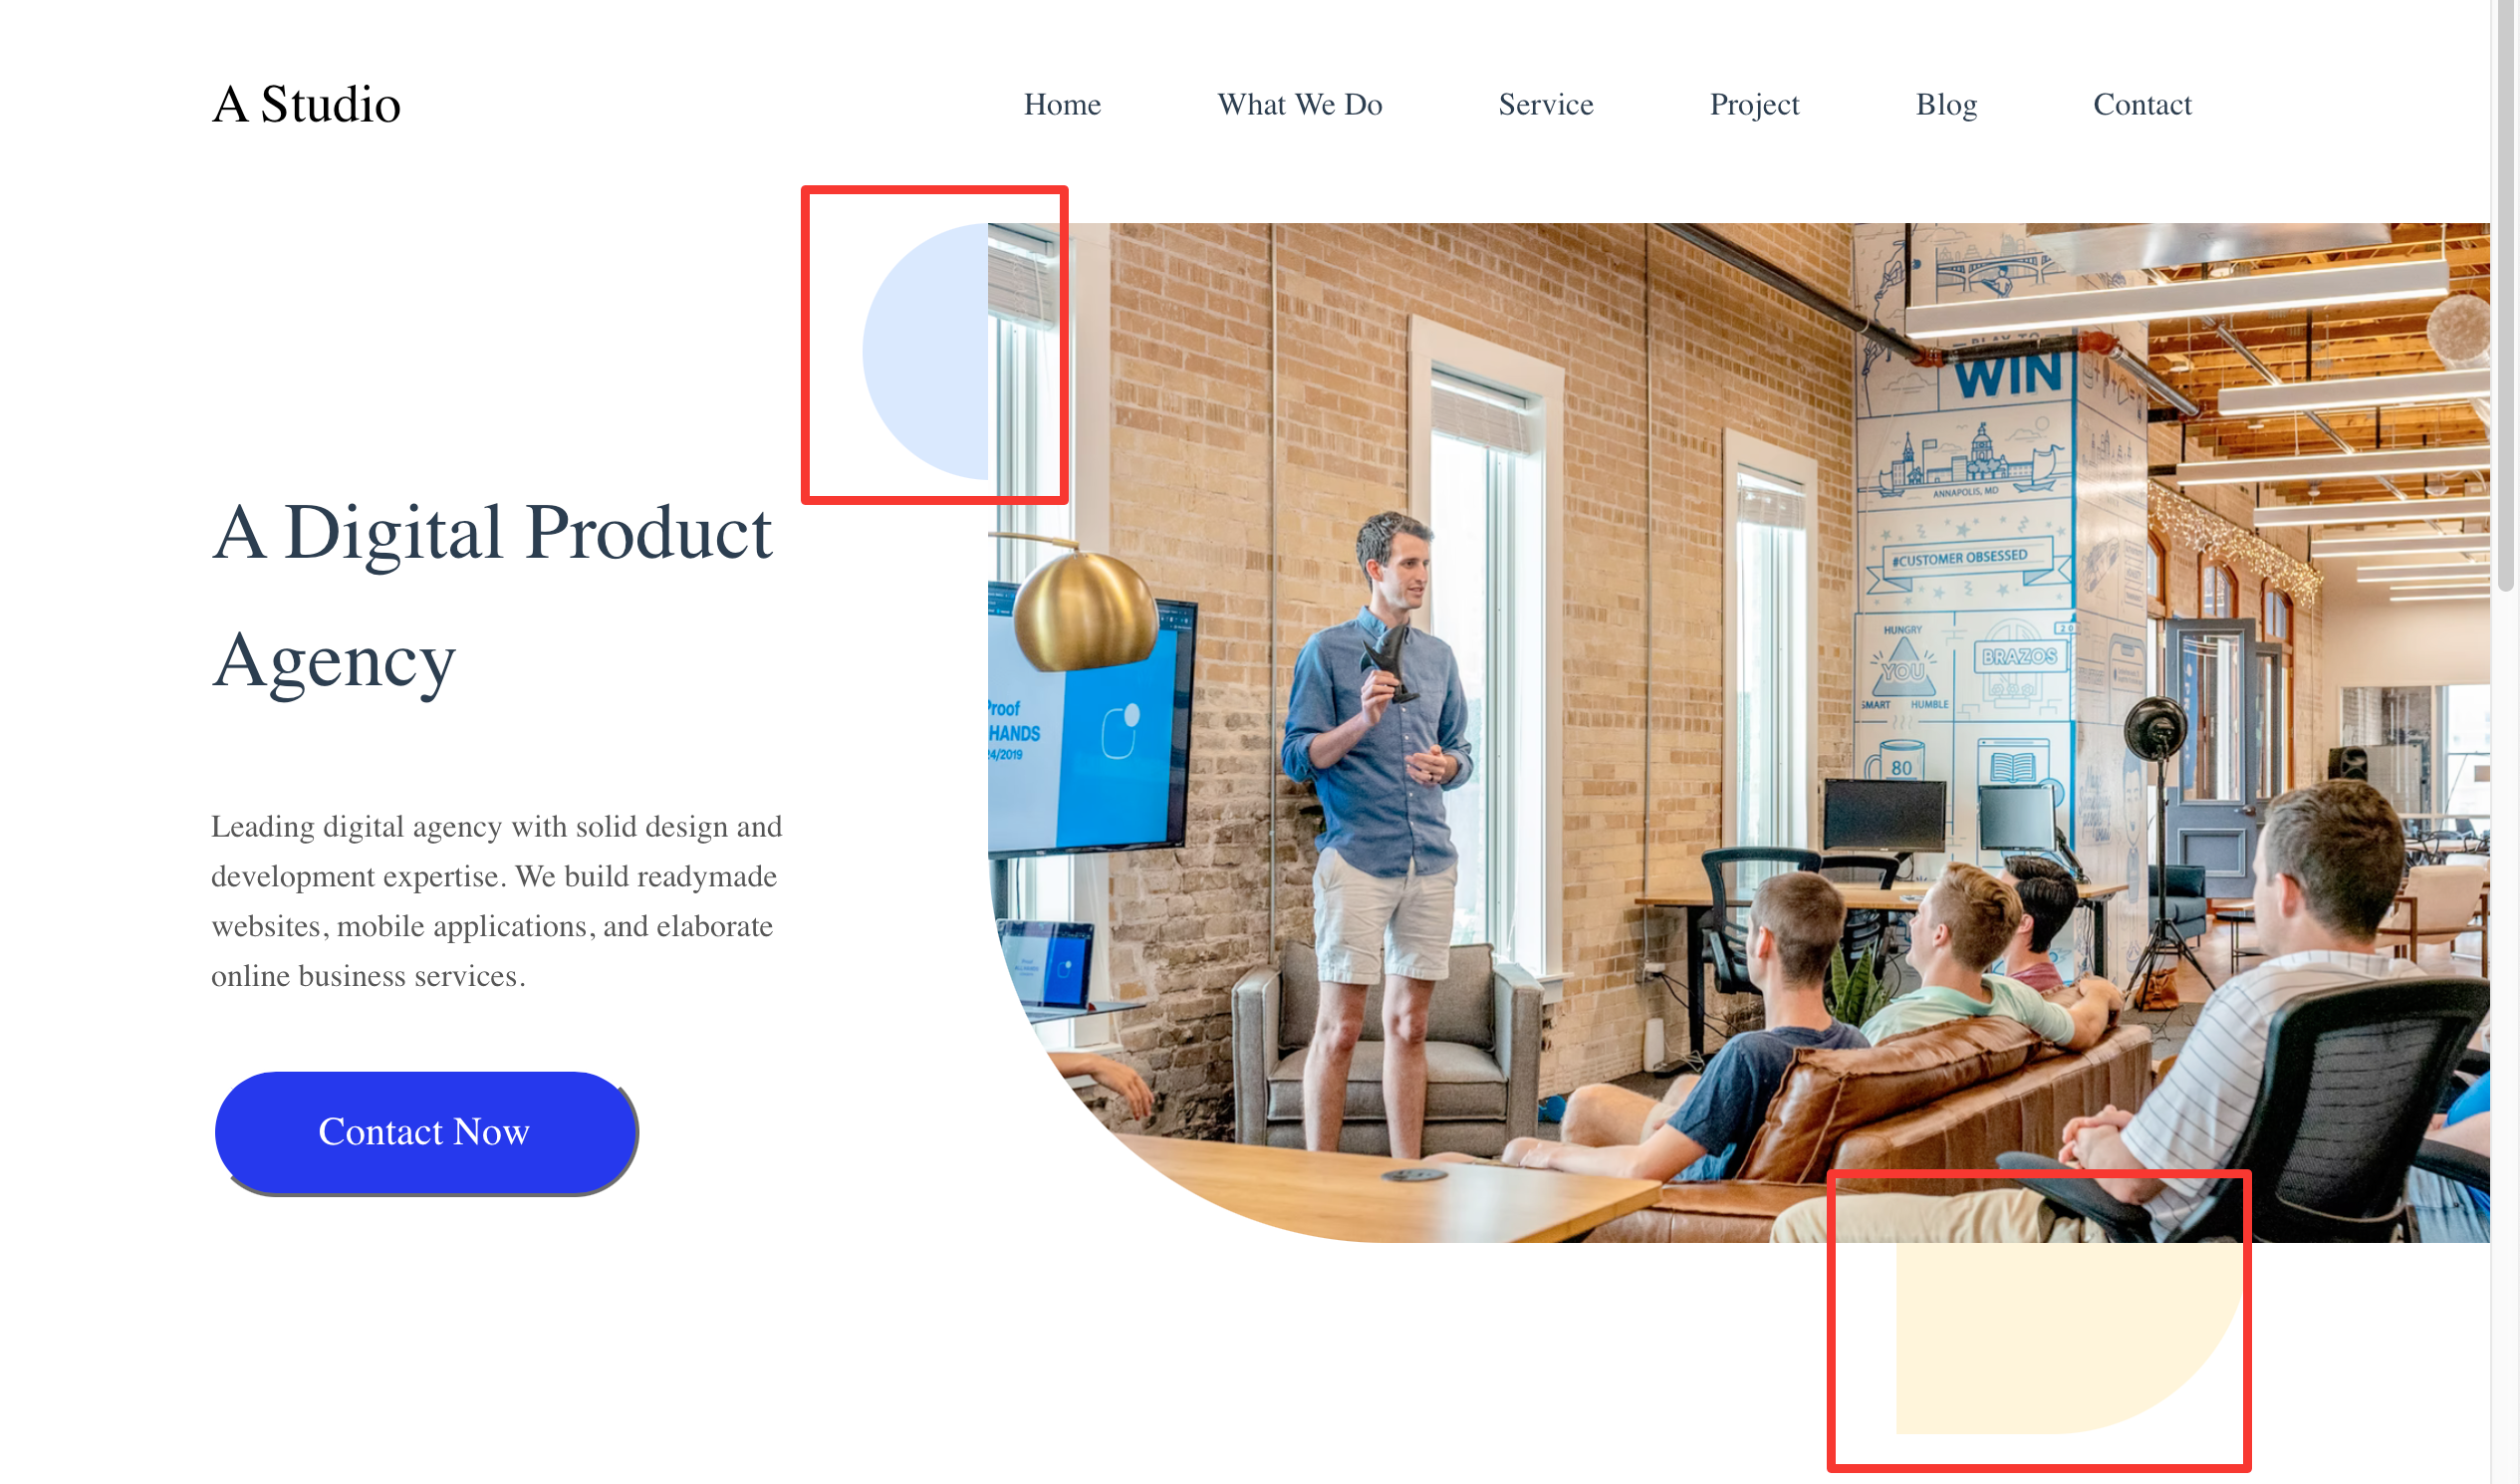
在right_part中加上兩個div,並用相對位置和絕對位置固定。
// template
<div class="right_part">
    <div class="rectangle1"></div>
    <div class="rectangle2"></div>
    <img src="../assets/headimg.png" alt="">
</div>

//style
.right_part {
    min-width: 817px;
    height: 100%;
    overflow: auto;
    position: relative;
    /* background-color: red; */
}

.right_part img {
    height: 512px;
    width: 754px;
    /* min-width: 754px; */
    border-radius: 0px 0px 0px 200px;
    position: absolute;
    top: 0px;
    right: 0px;
    /* margin-left: 64.5px;
    margin-bottom: 89px; */
}

.rectangle1{
    position: absolute;
    top: 0px;
    left: 0px;
    width: 129px;
    height: 129px;
    background: #DAE9FF;
    border-radius: 500px 500px 500px 500px;
}

.rectangle2{
    position: absolute;
    bottom: 0px;
    right: 120px;
    width: 178px;
    height: 178px;
    background: #FFF5DB;
    border-radius: 0px 0px 100px 0px;
}
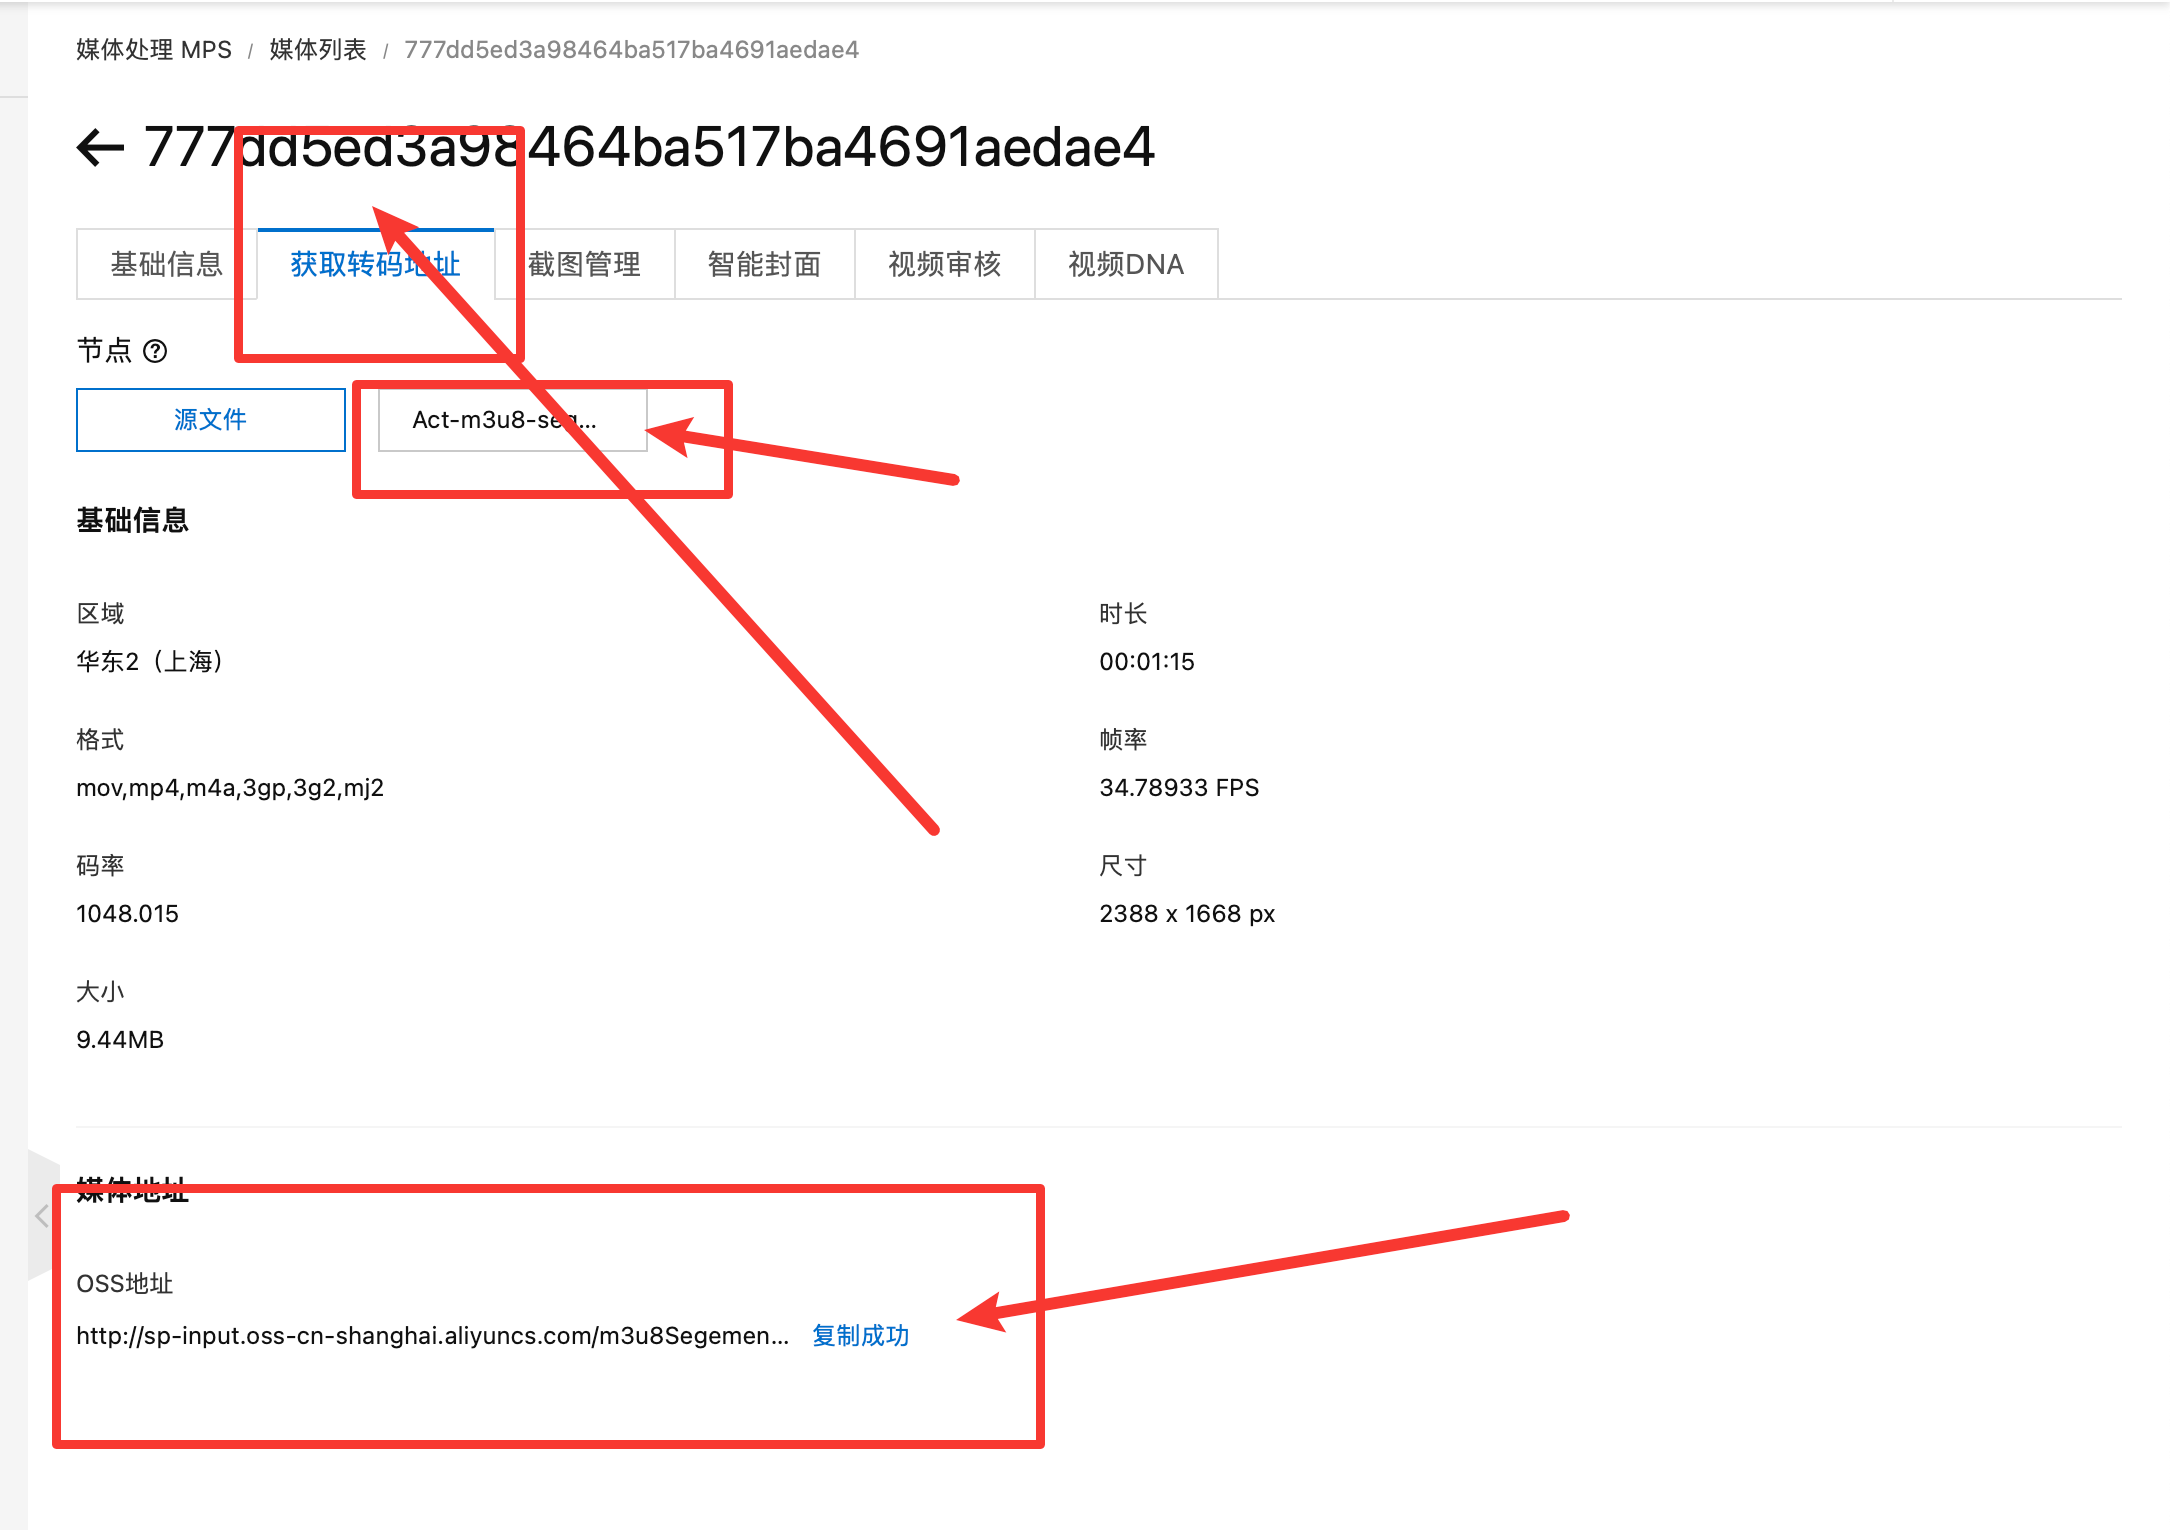
11.2 獲得m3u8鏈接
上面提到過,那個視頻播放插件無法播放本地視頻,所以需要將視頻上傳到網路上,通過網路鏈接獲取。
在此使用阿裡雲的媒體處理MPS和對象存儲OSS實現。
- 新建媒體Bucket

- 新建工作流
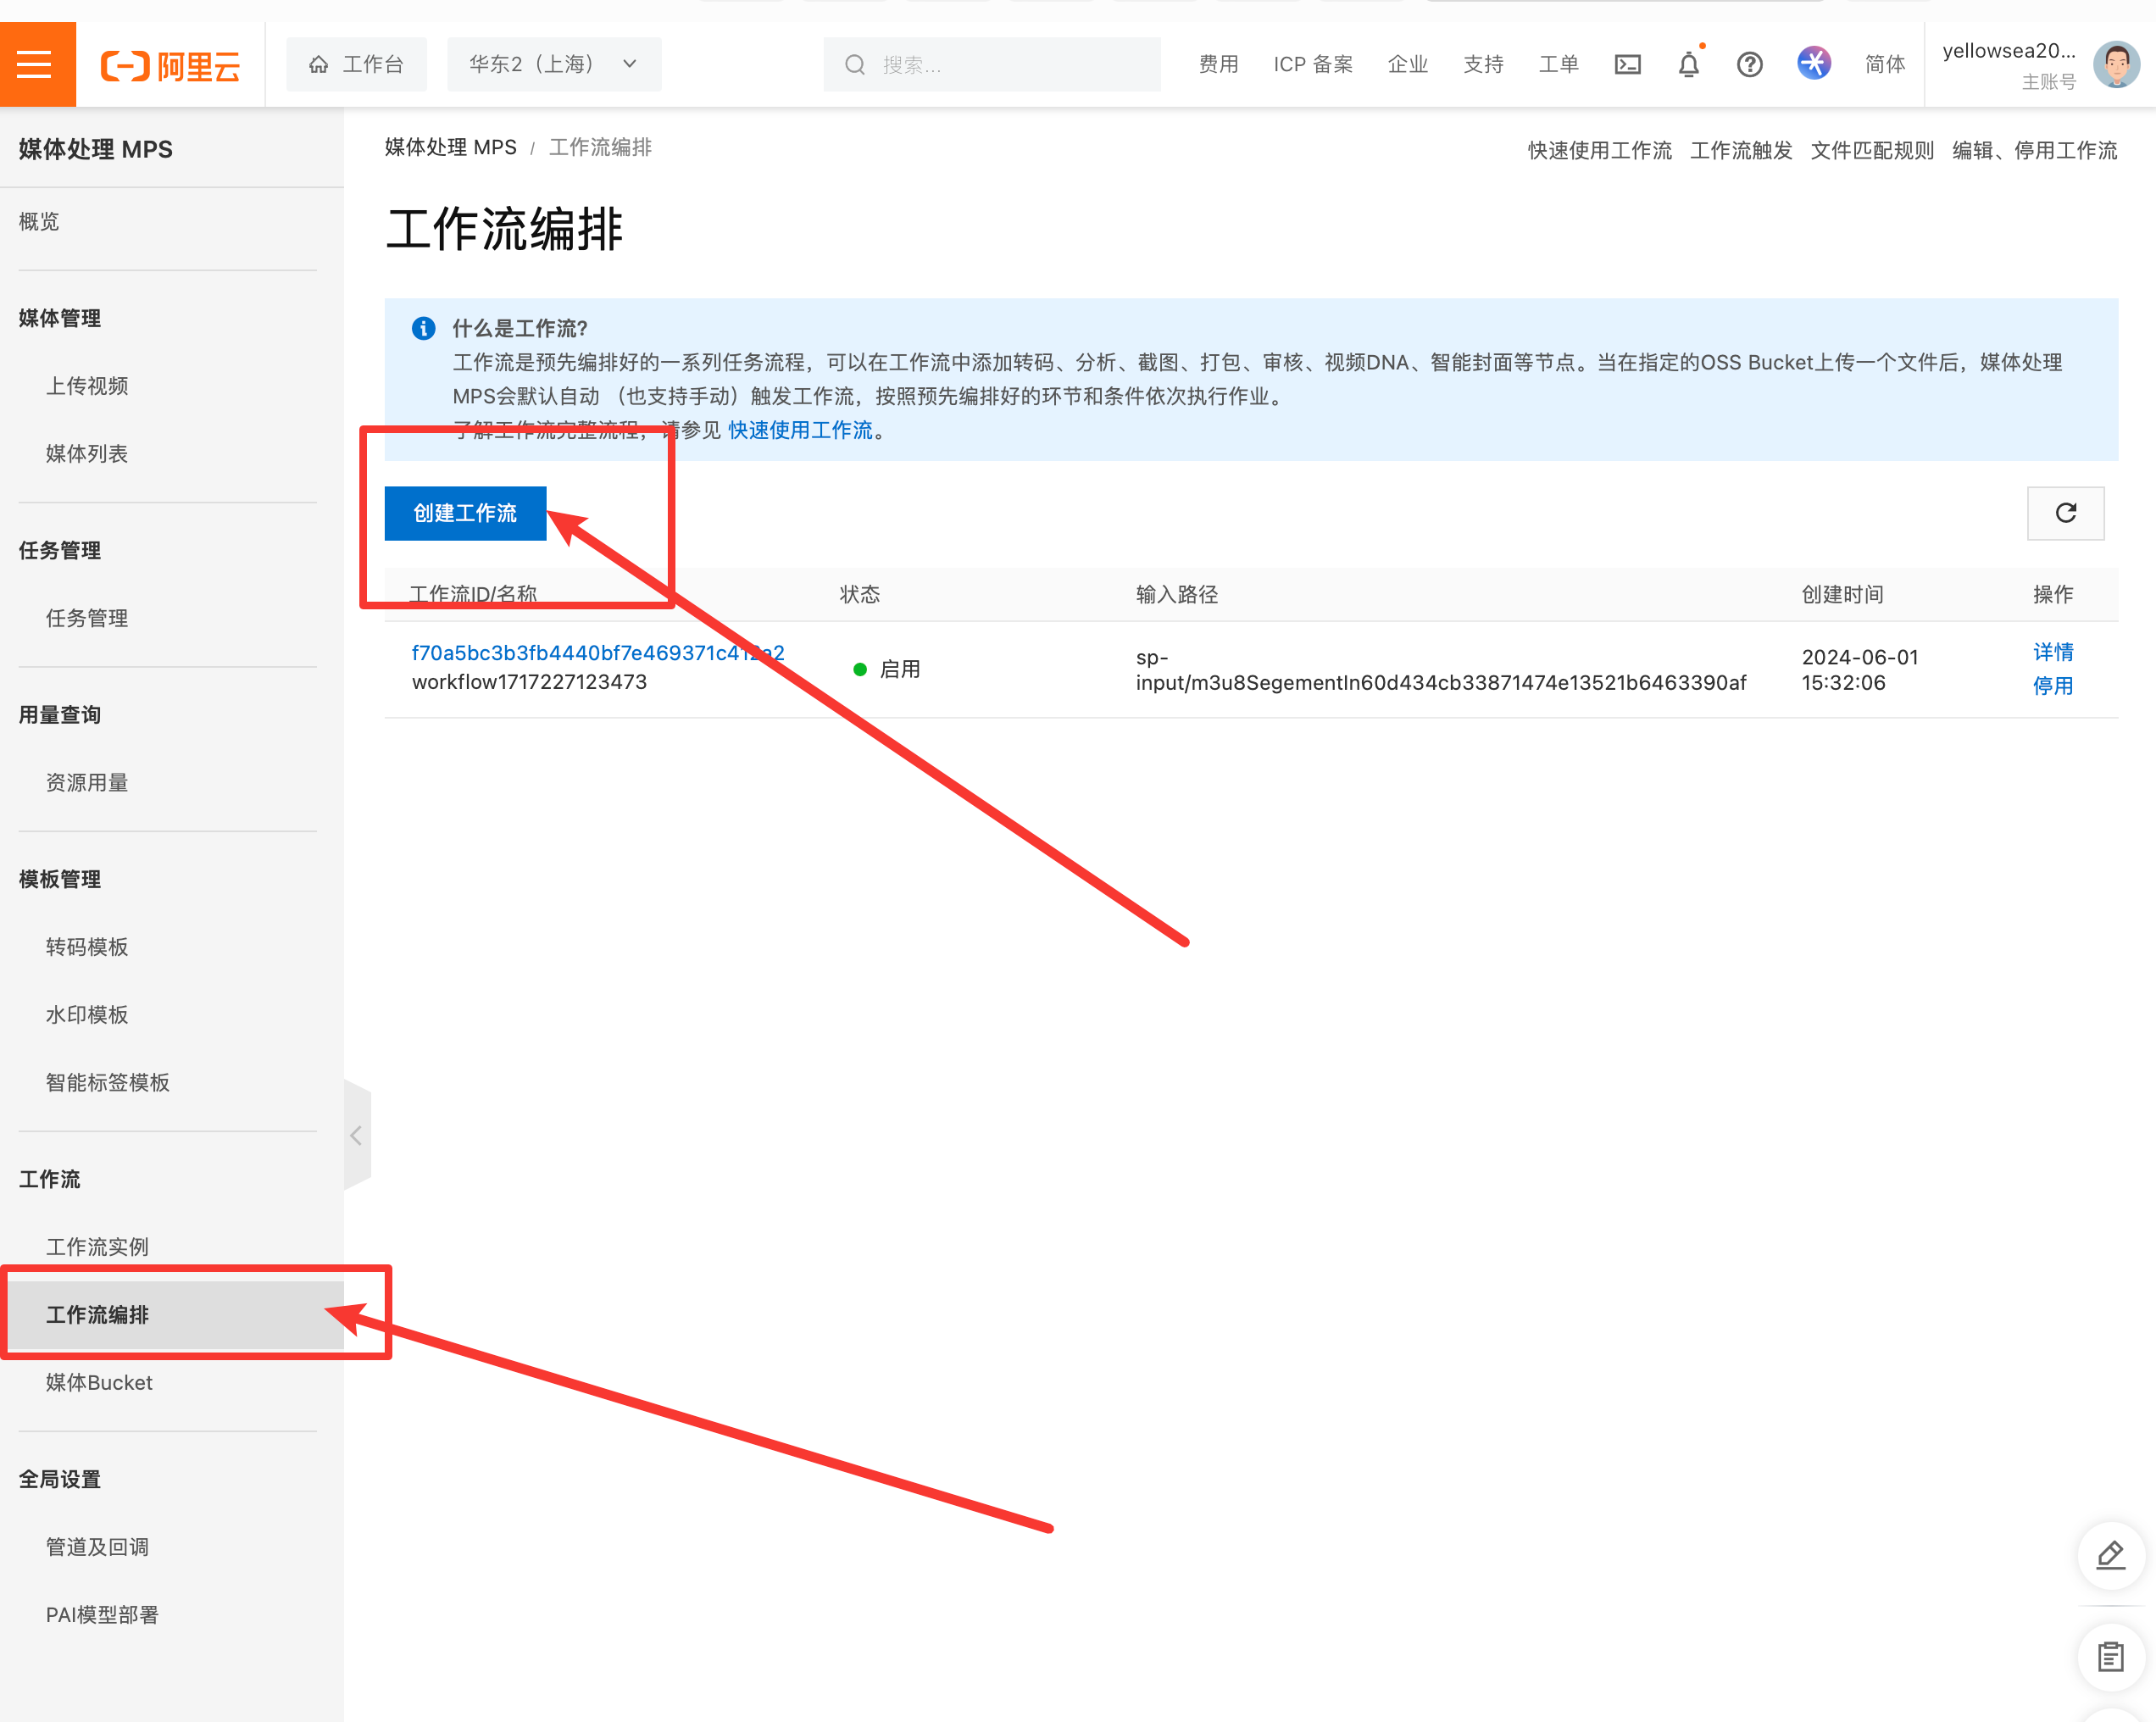
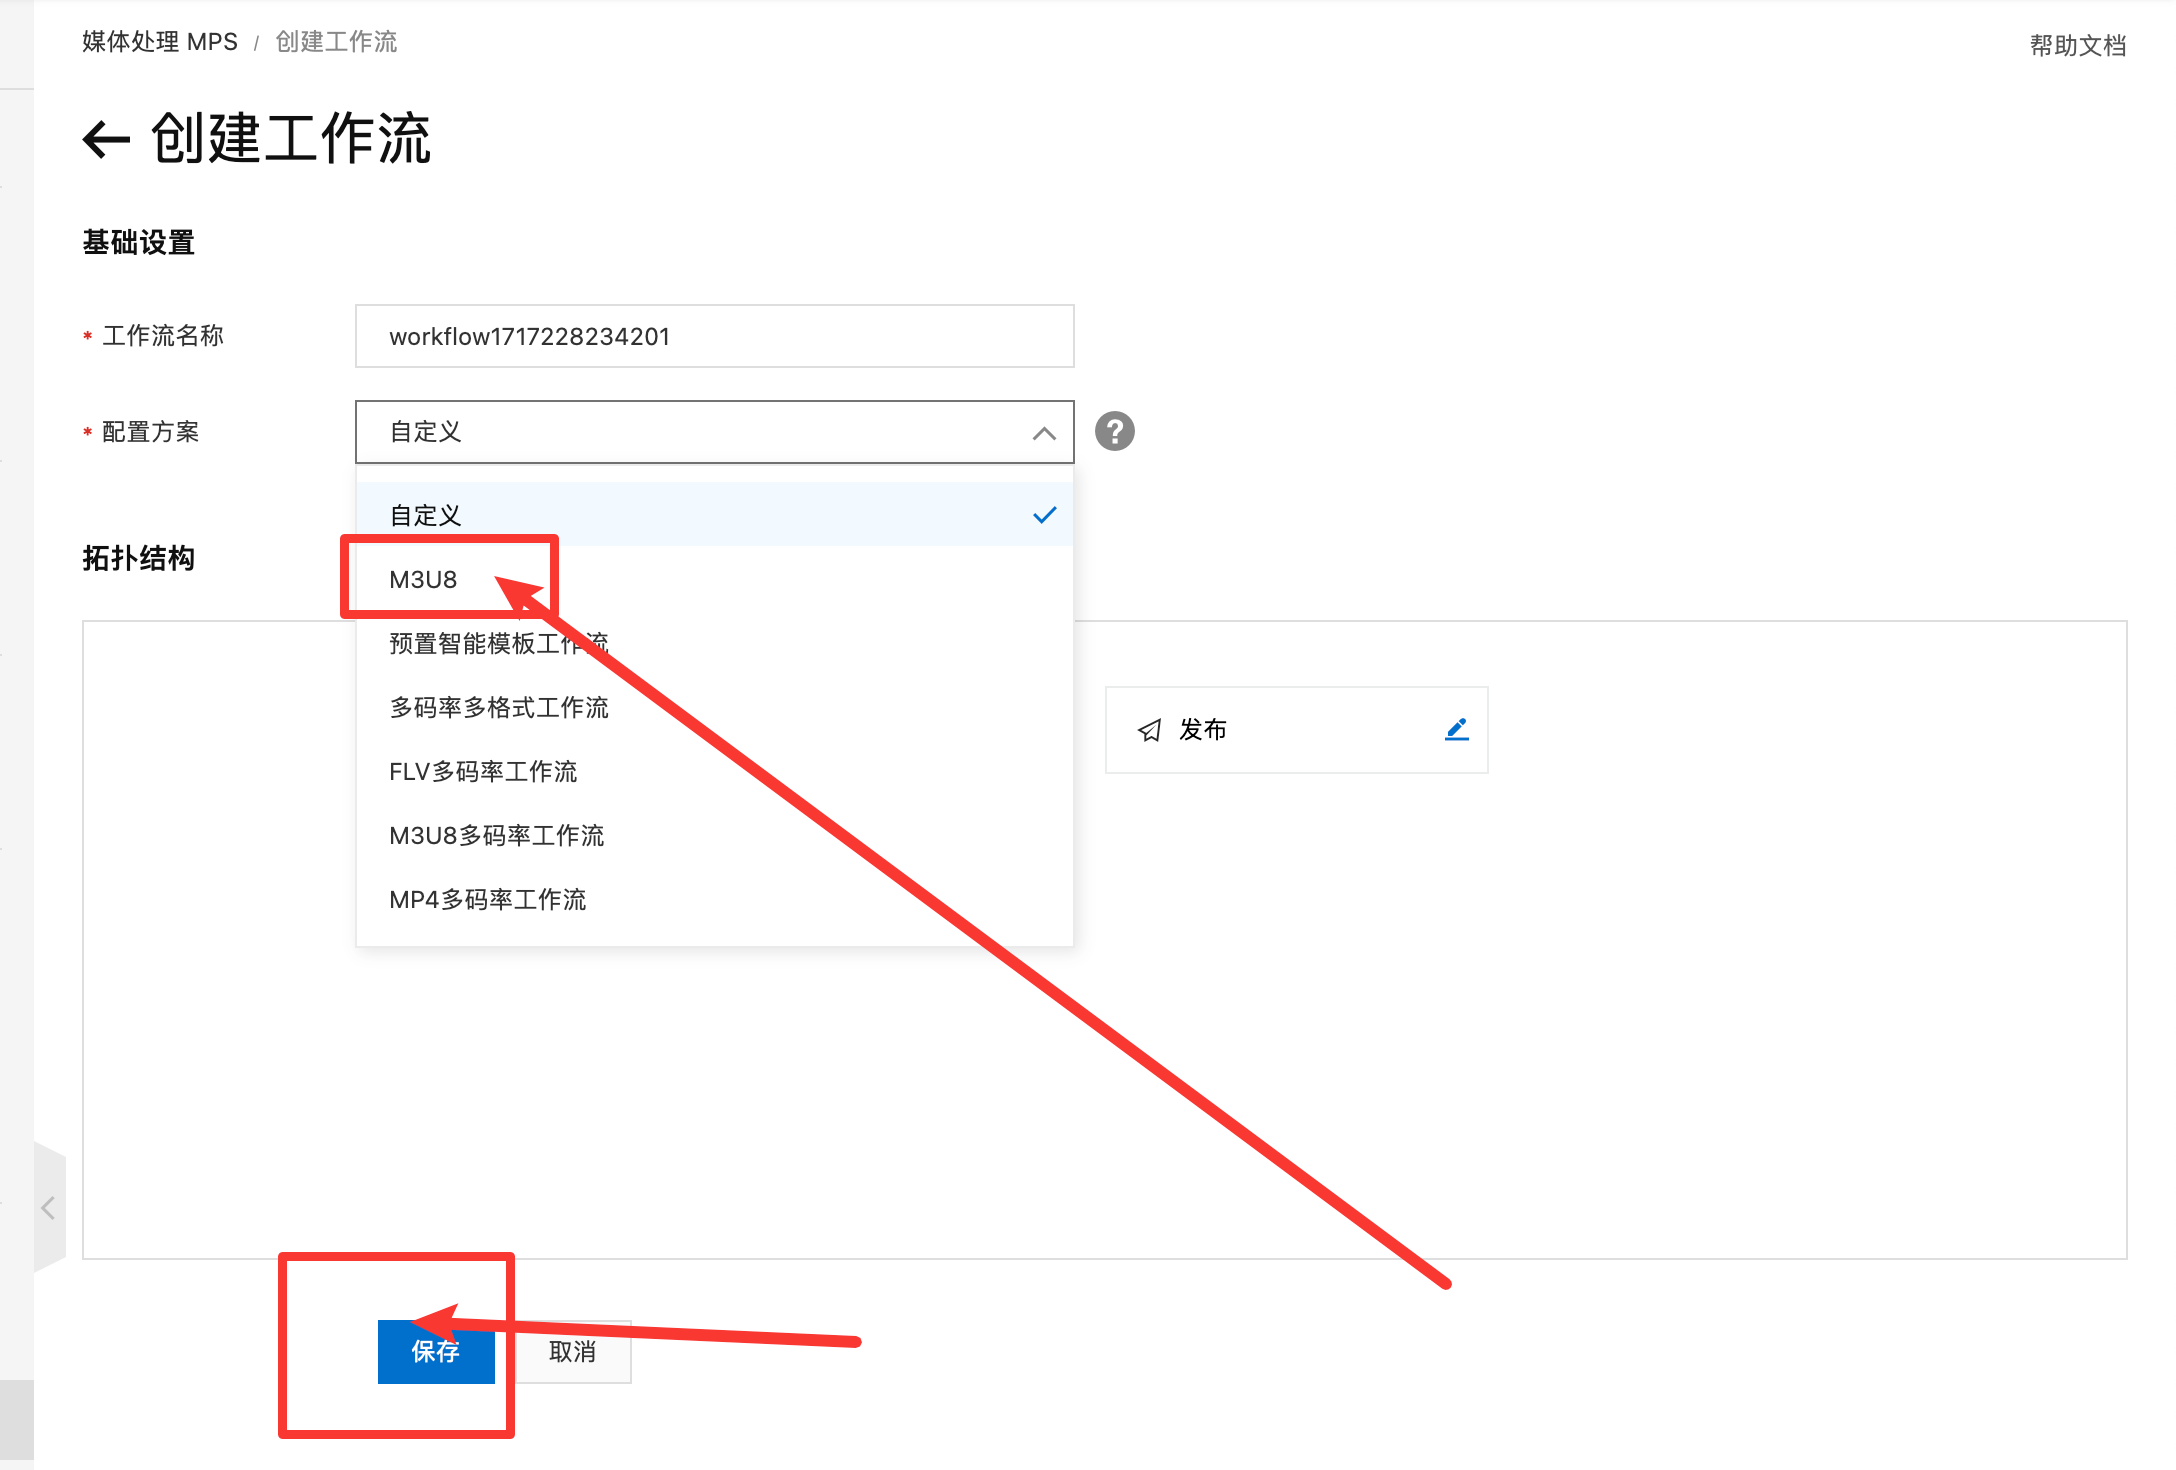
- 上傳視頻併發布
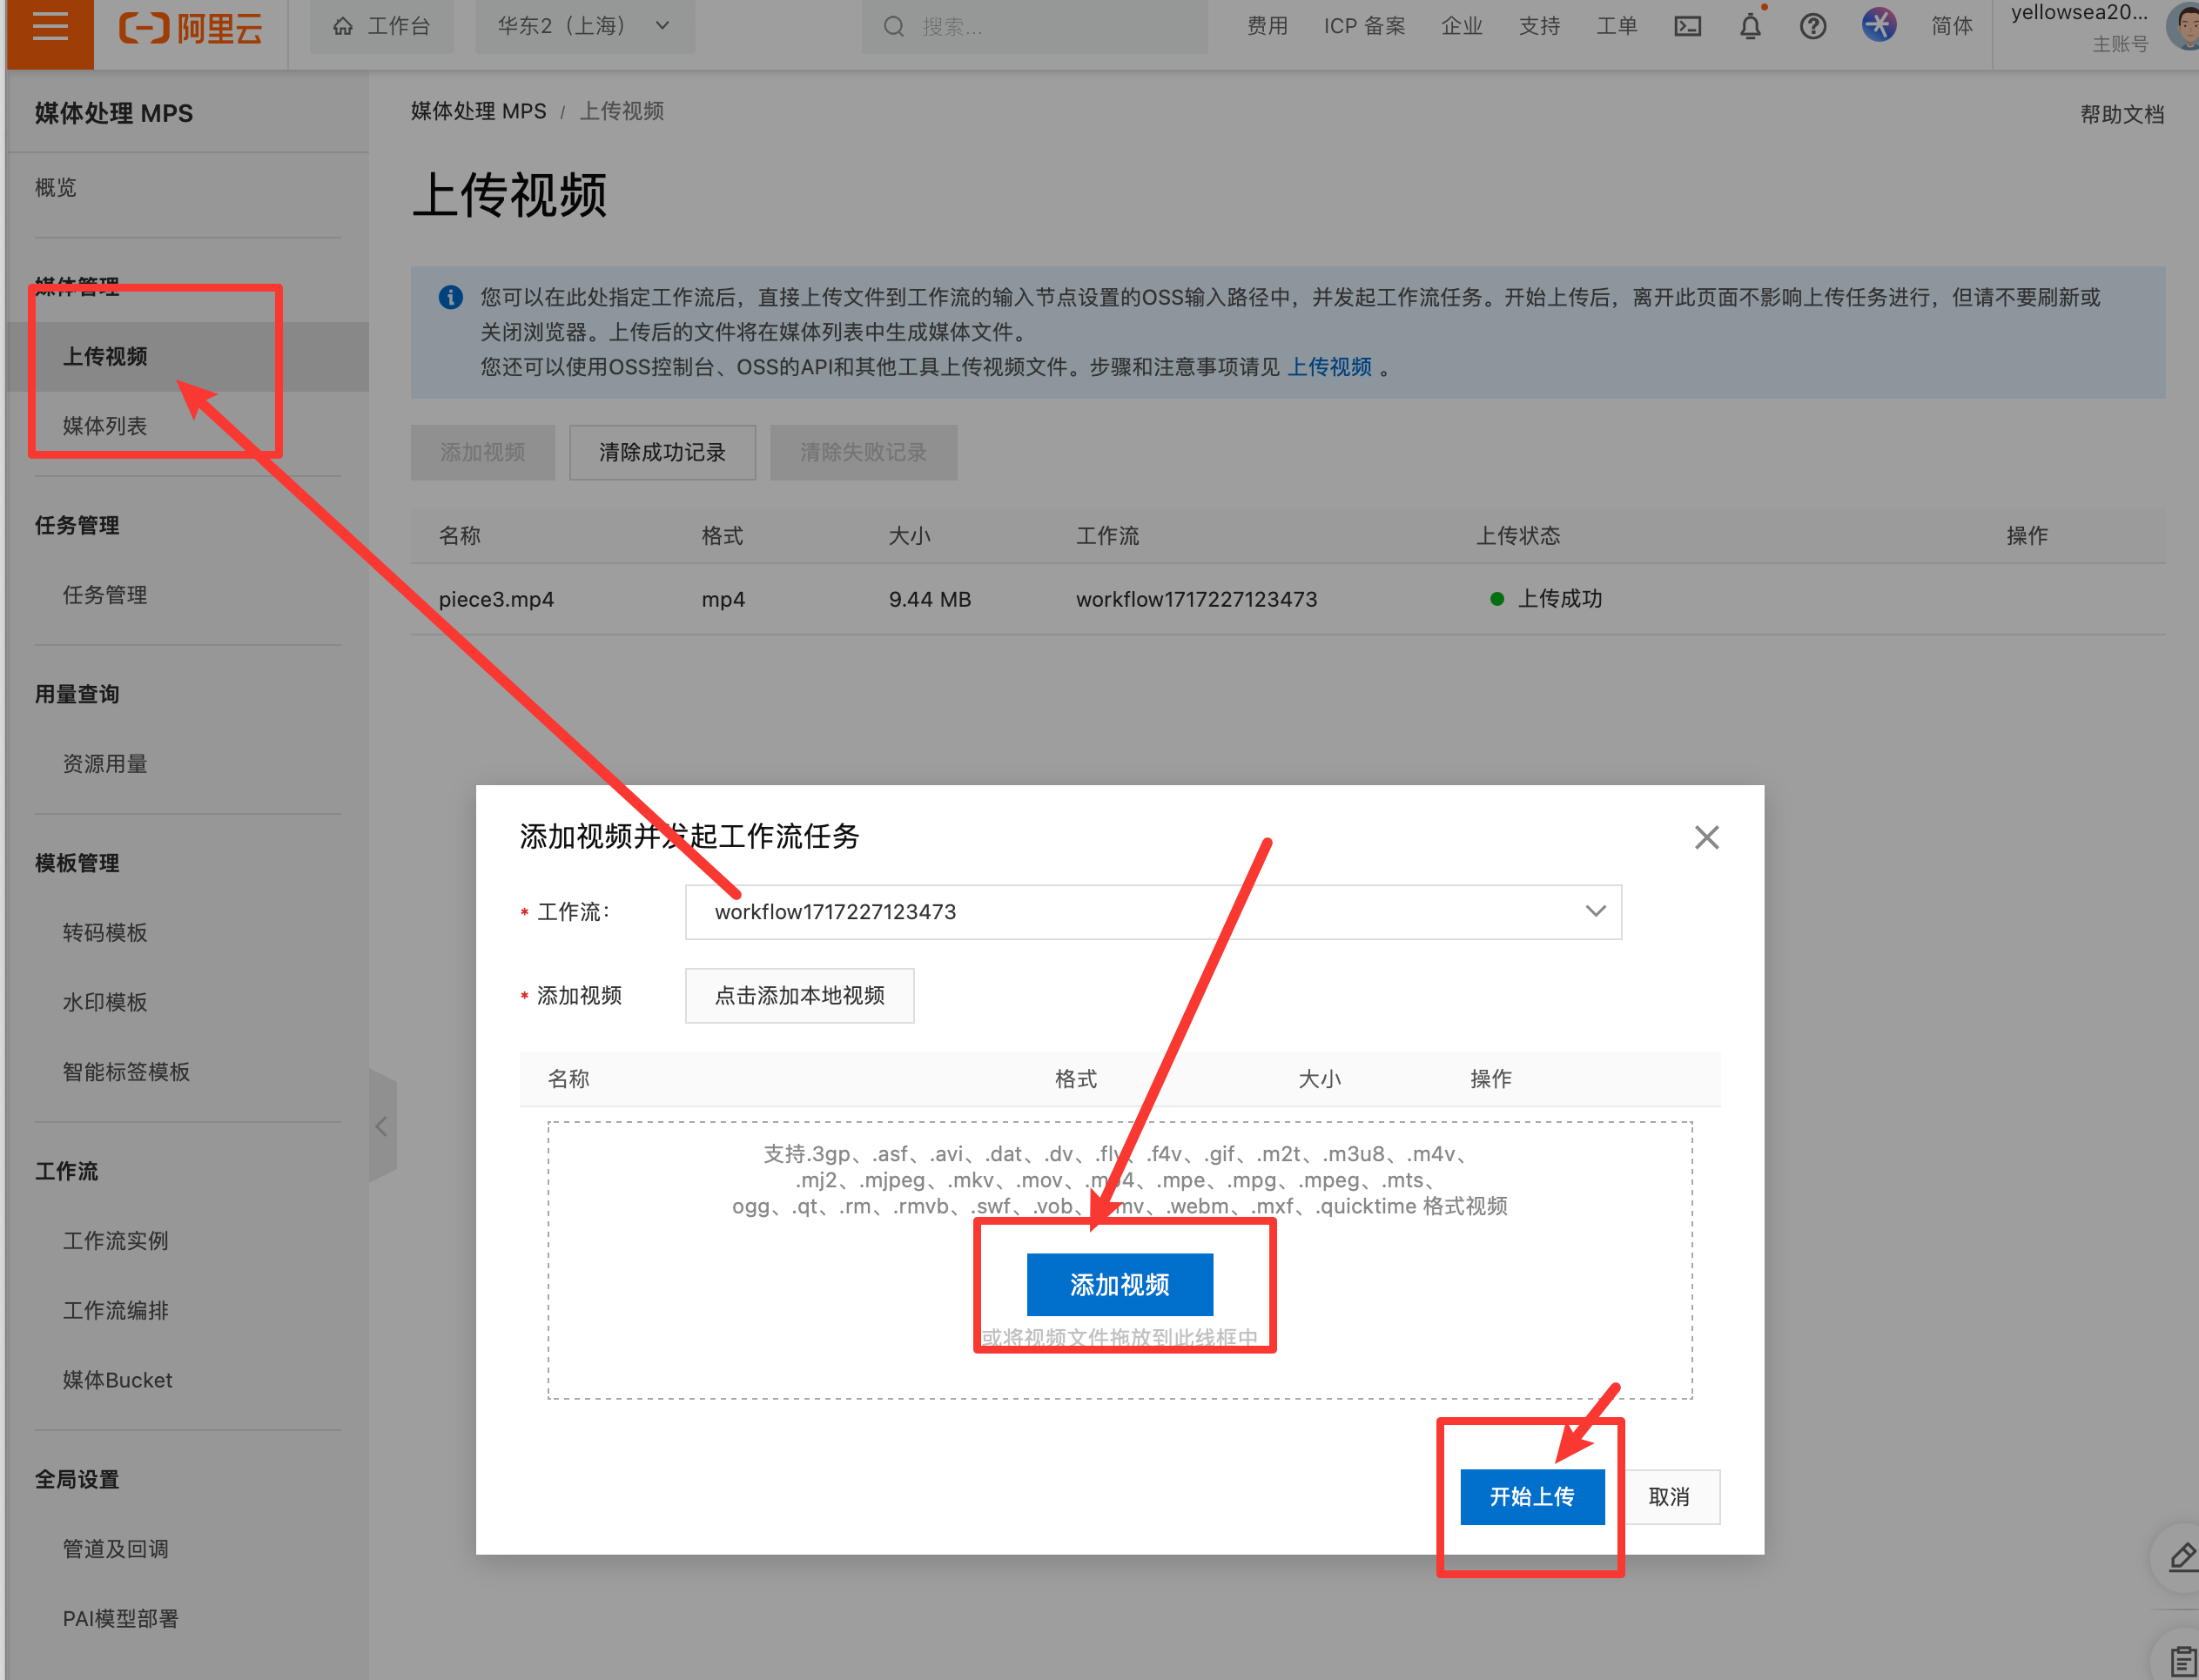
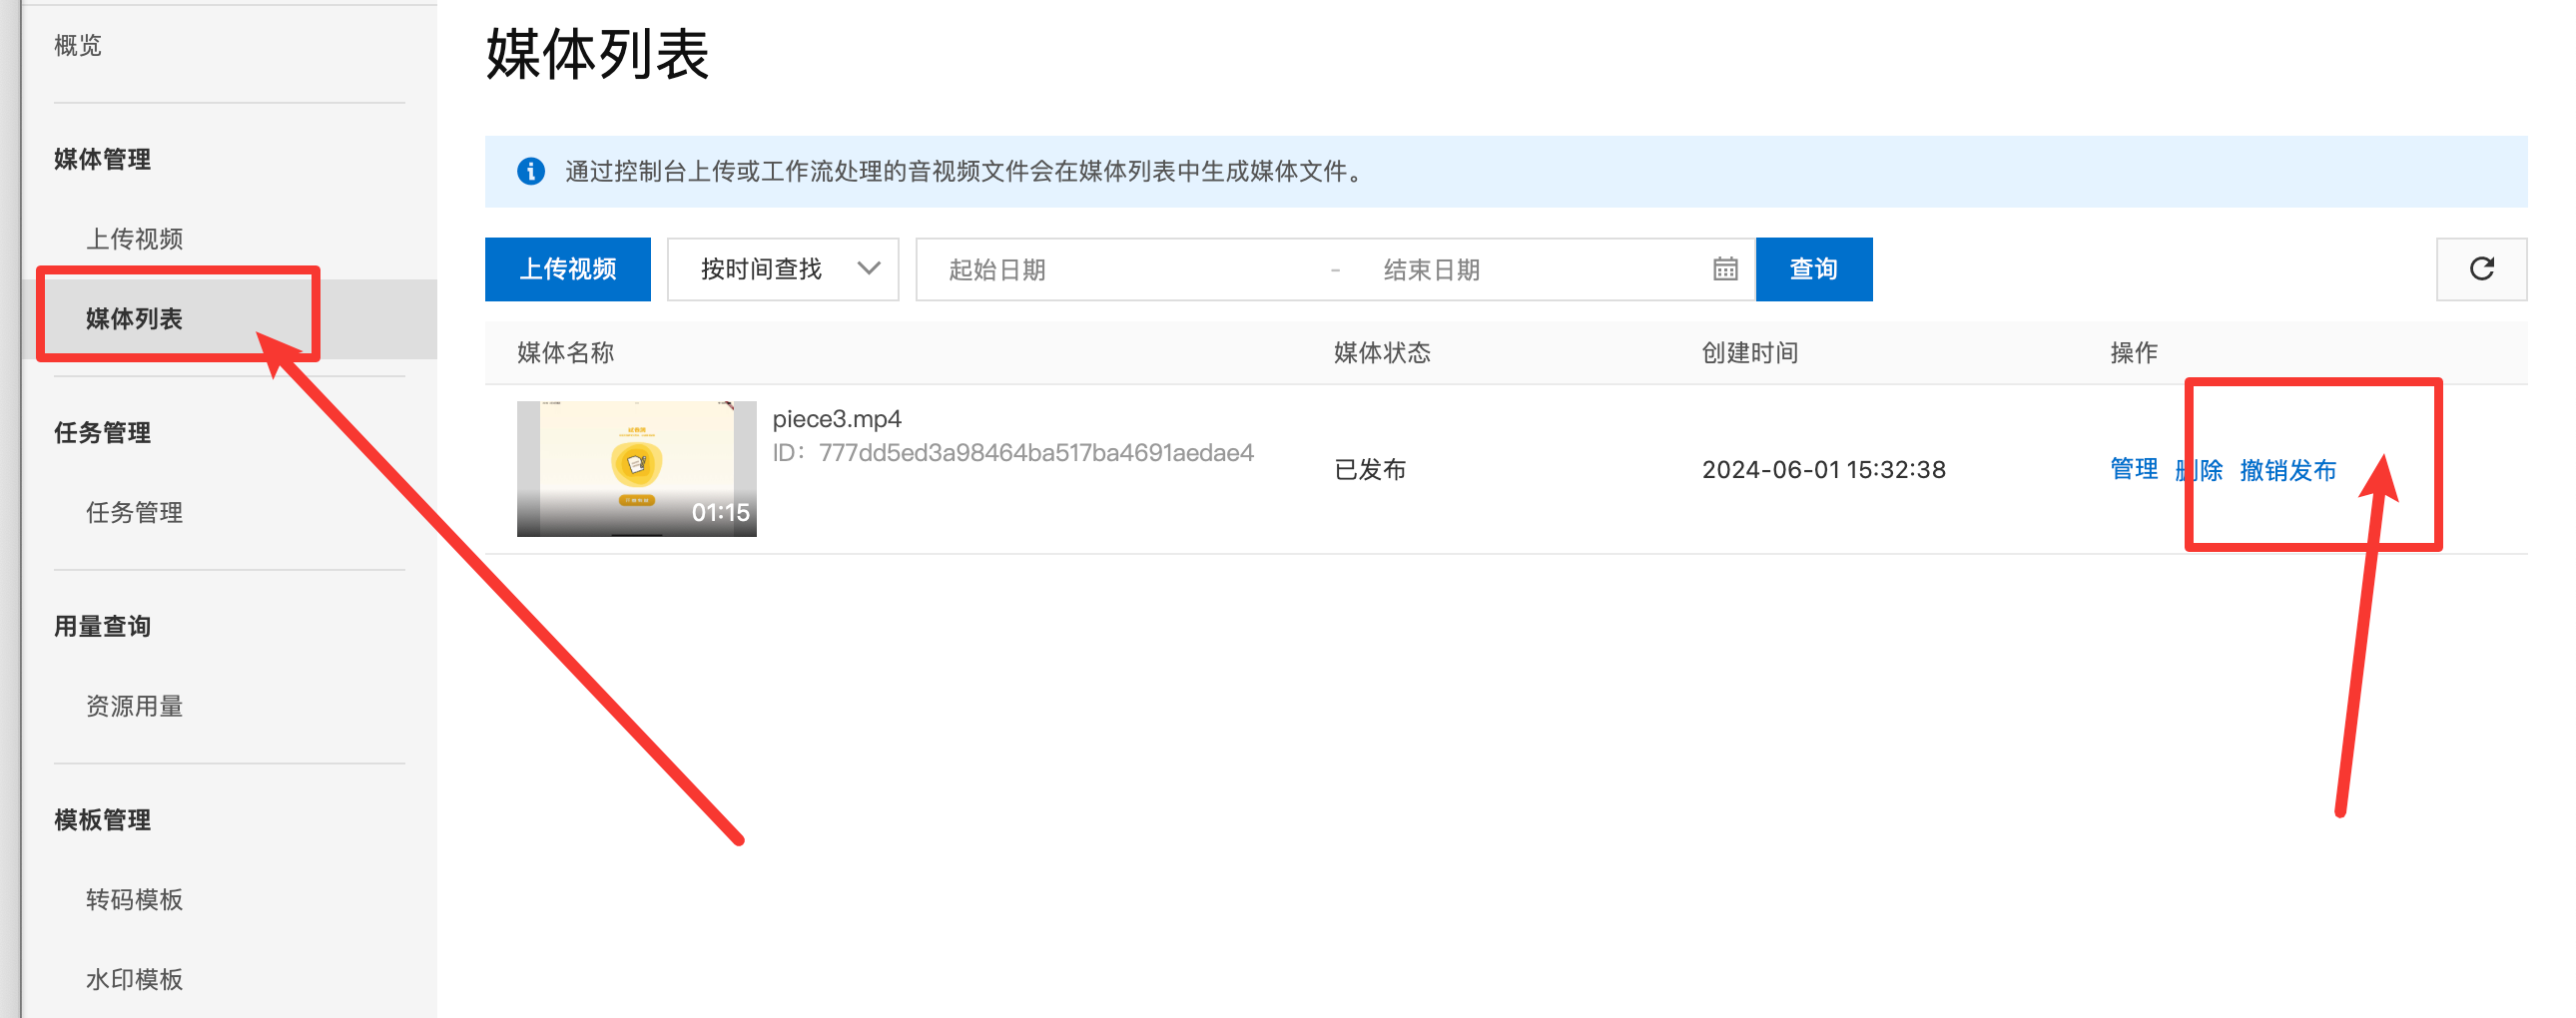
- 獲取鏈接
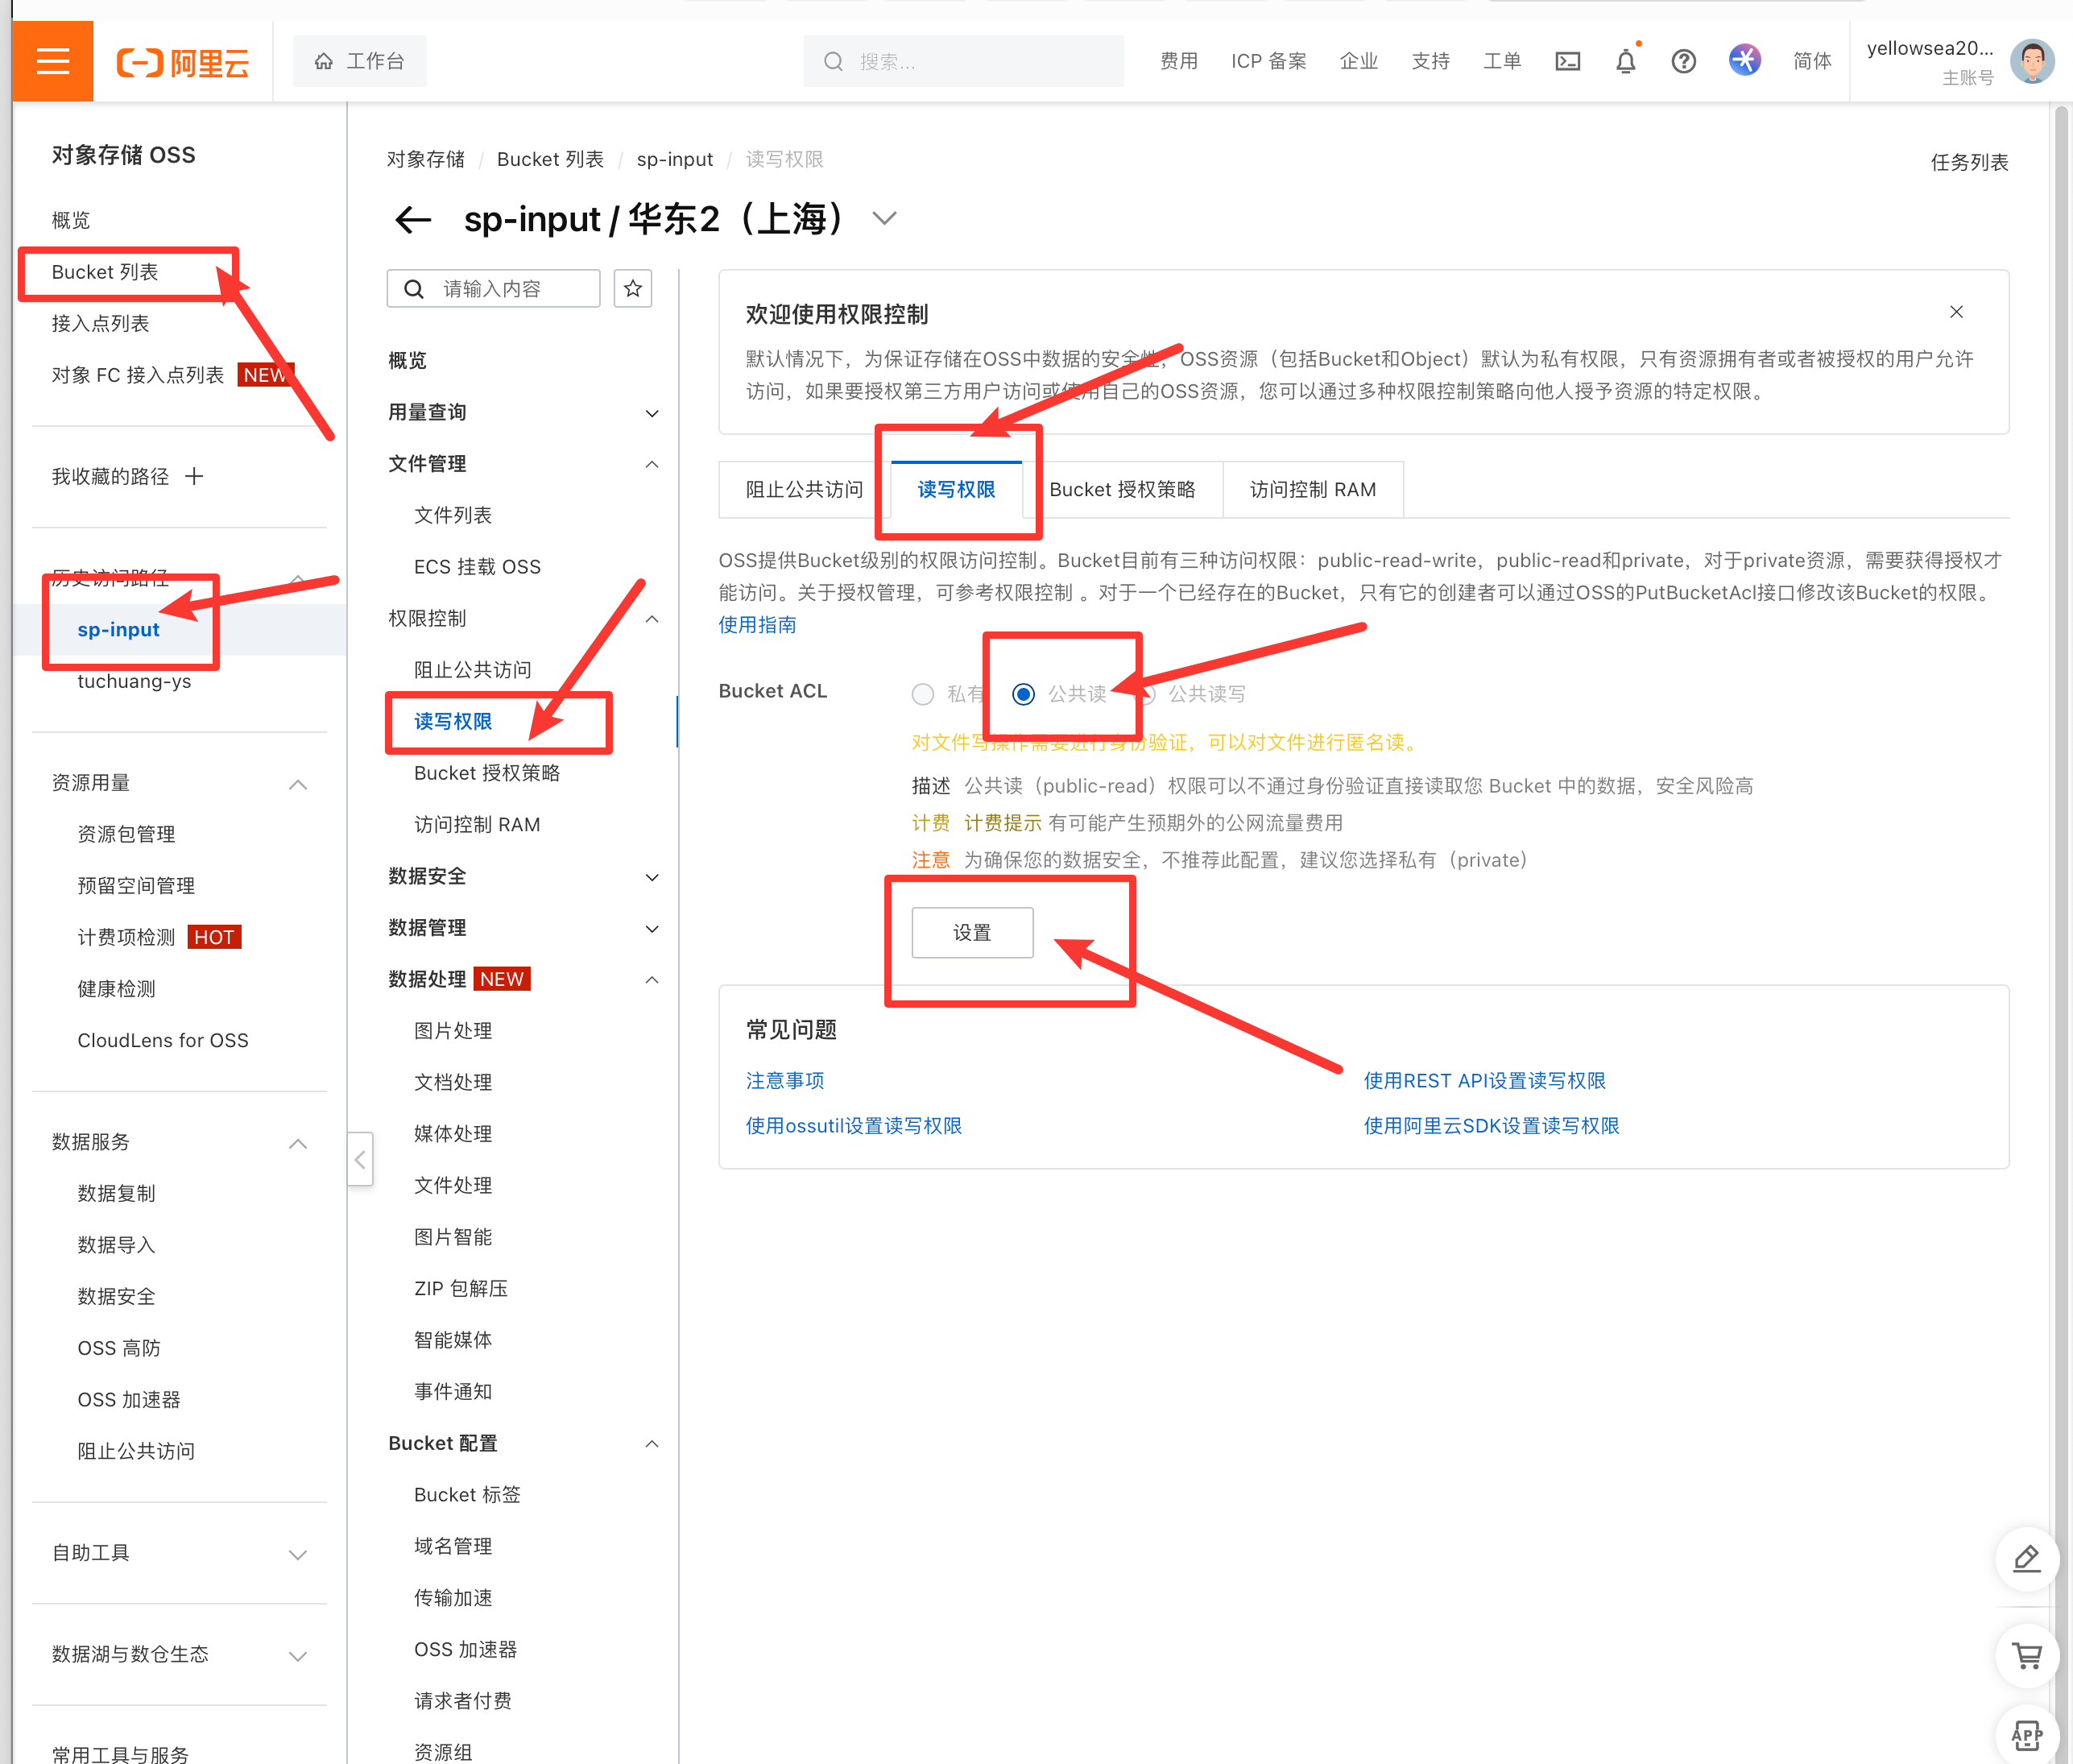
- OSS授權(不操作的話,鏈接會提示沒許可權)
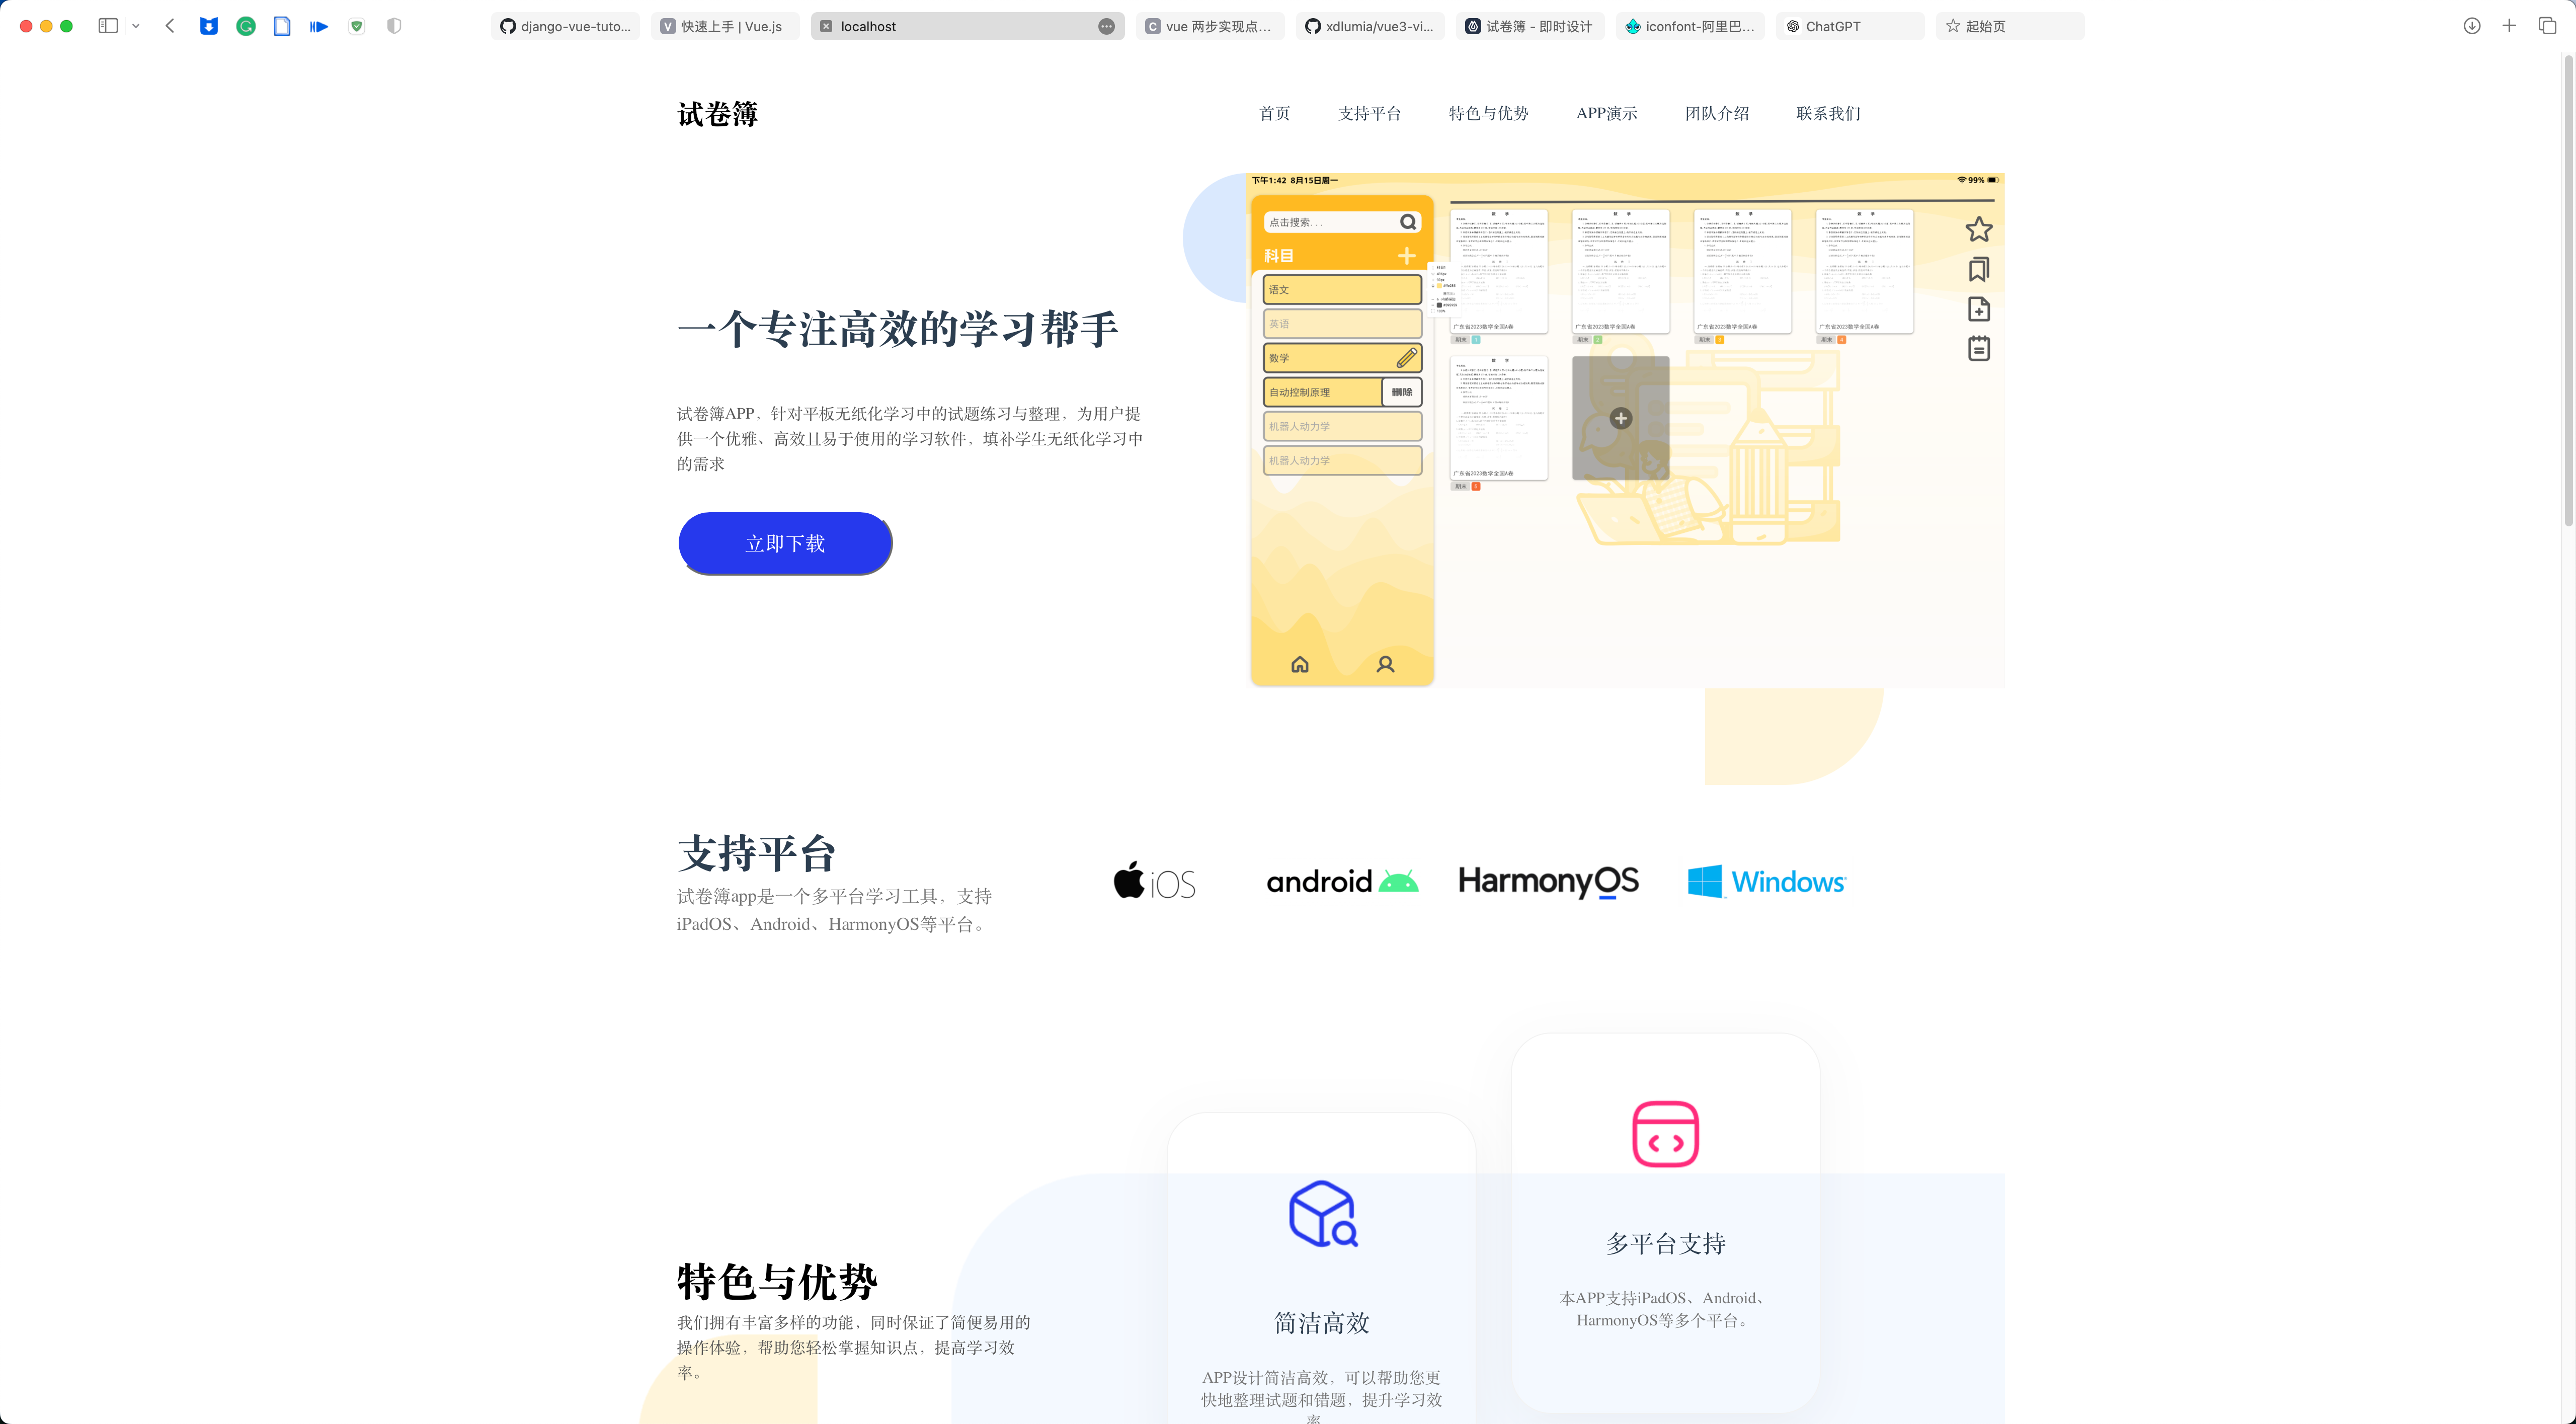
11.3 限制最大寬度
之前在佈局時,多使用flex佈局,可以根據瀏覽器寬度自適應佈局,在一定的寬度限制內效果還不錯,但是如果寬度太大,會導致左右兩邊的組件之間有一個巨大的空白,很難看,所以需要限制一個最大的寬度,當超出這個寬度時,在兩邊使用空白填充。
只需要在home.vue的style部分添加下麵代碼。
max-width: 1440px;
/* 設置最大寬度 */
margin-left: auto;
/* 左側自動填充 */
margin-right: auto;
/* 右側自動填充 */
效果如下:
11.4 打開頁面預設在頂部
視頻播放器有一個bug:在一開始打開頁面的時候,會開始緩衝,緩衝時預設把頁面滾動到播放器所在的位置。
但是我們想要打開時預設在頂部。
試過使用mounted鉤子函數強制滾動到頂部,但是緩衝在後,結果是不生效。
認真查看了視頻播放器的文檔後,發現通過綁定事件,在緩衝開始時滾動到頂部,可以曲線救國。
const onloadstart = (ev) => {
  console.log("開始緩衝");
  window.scroll(0, 0);
};

五、修改內容
1. 網頁內的內容
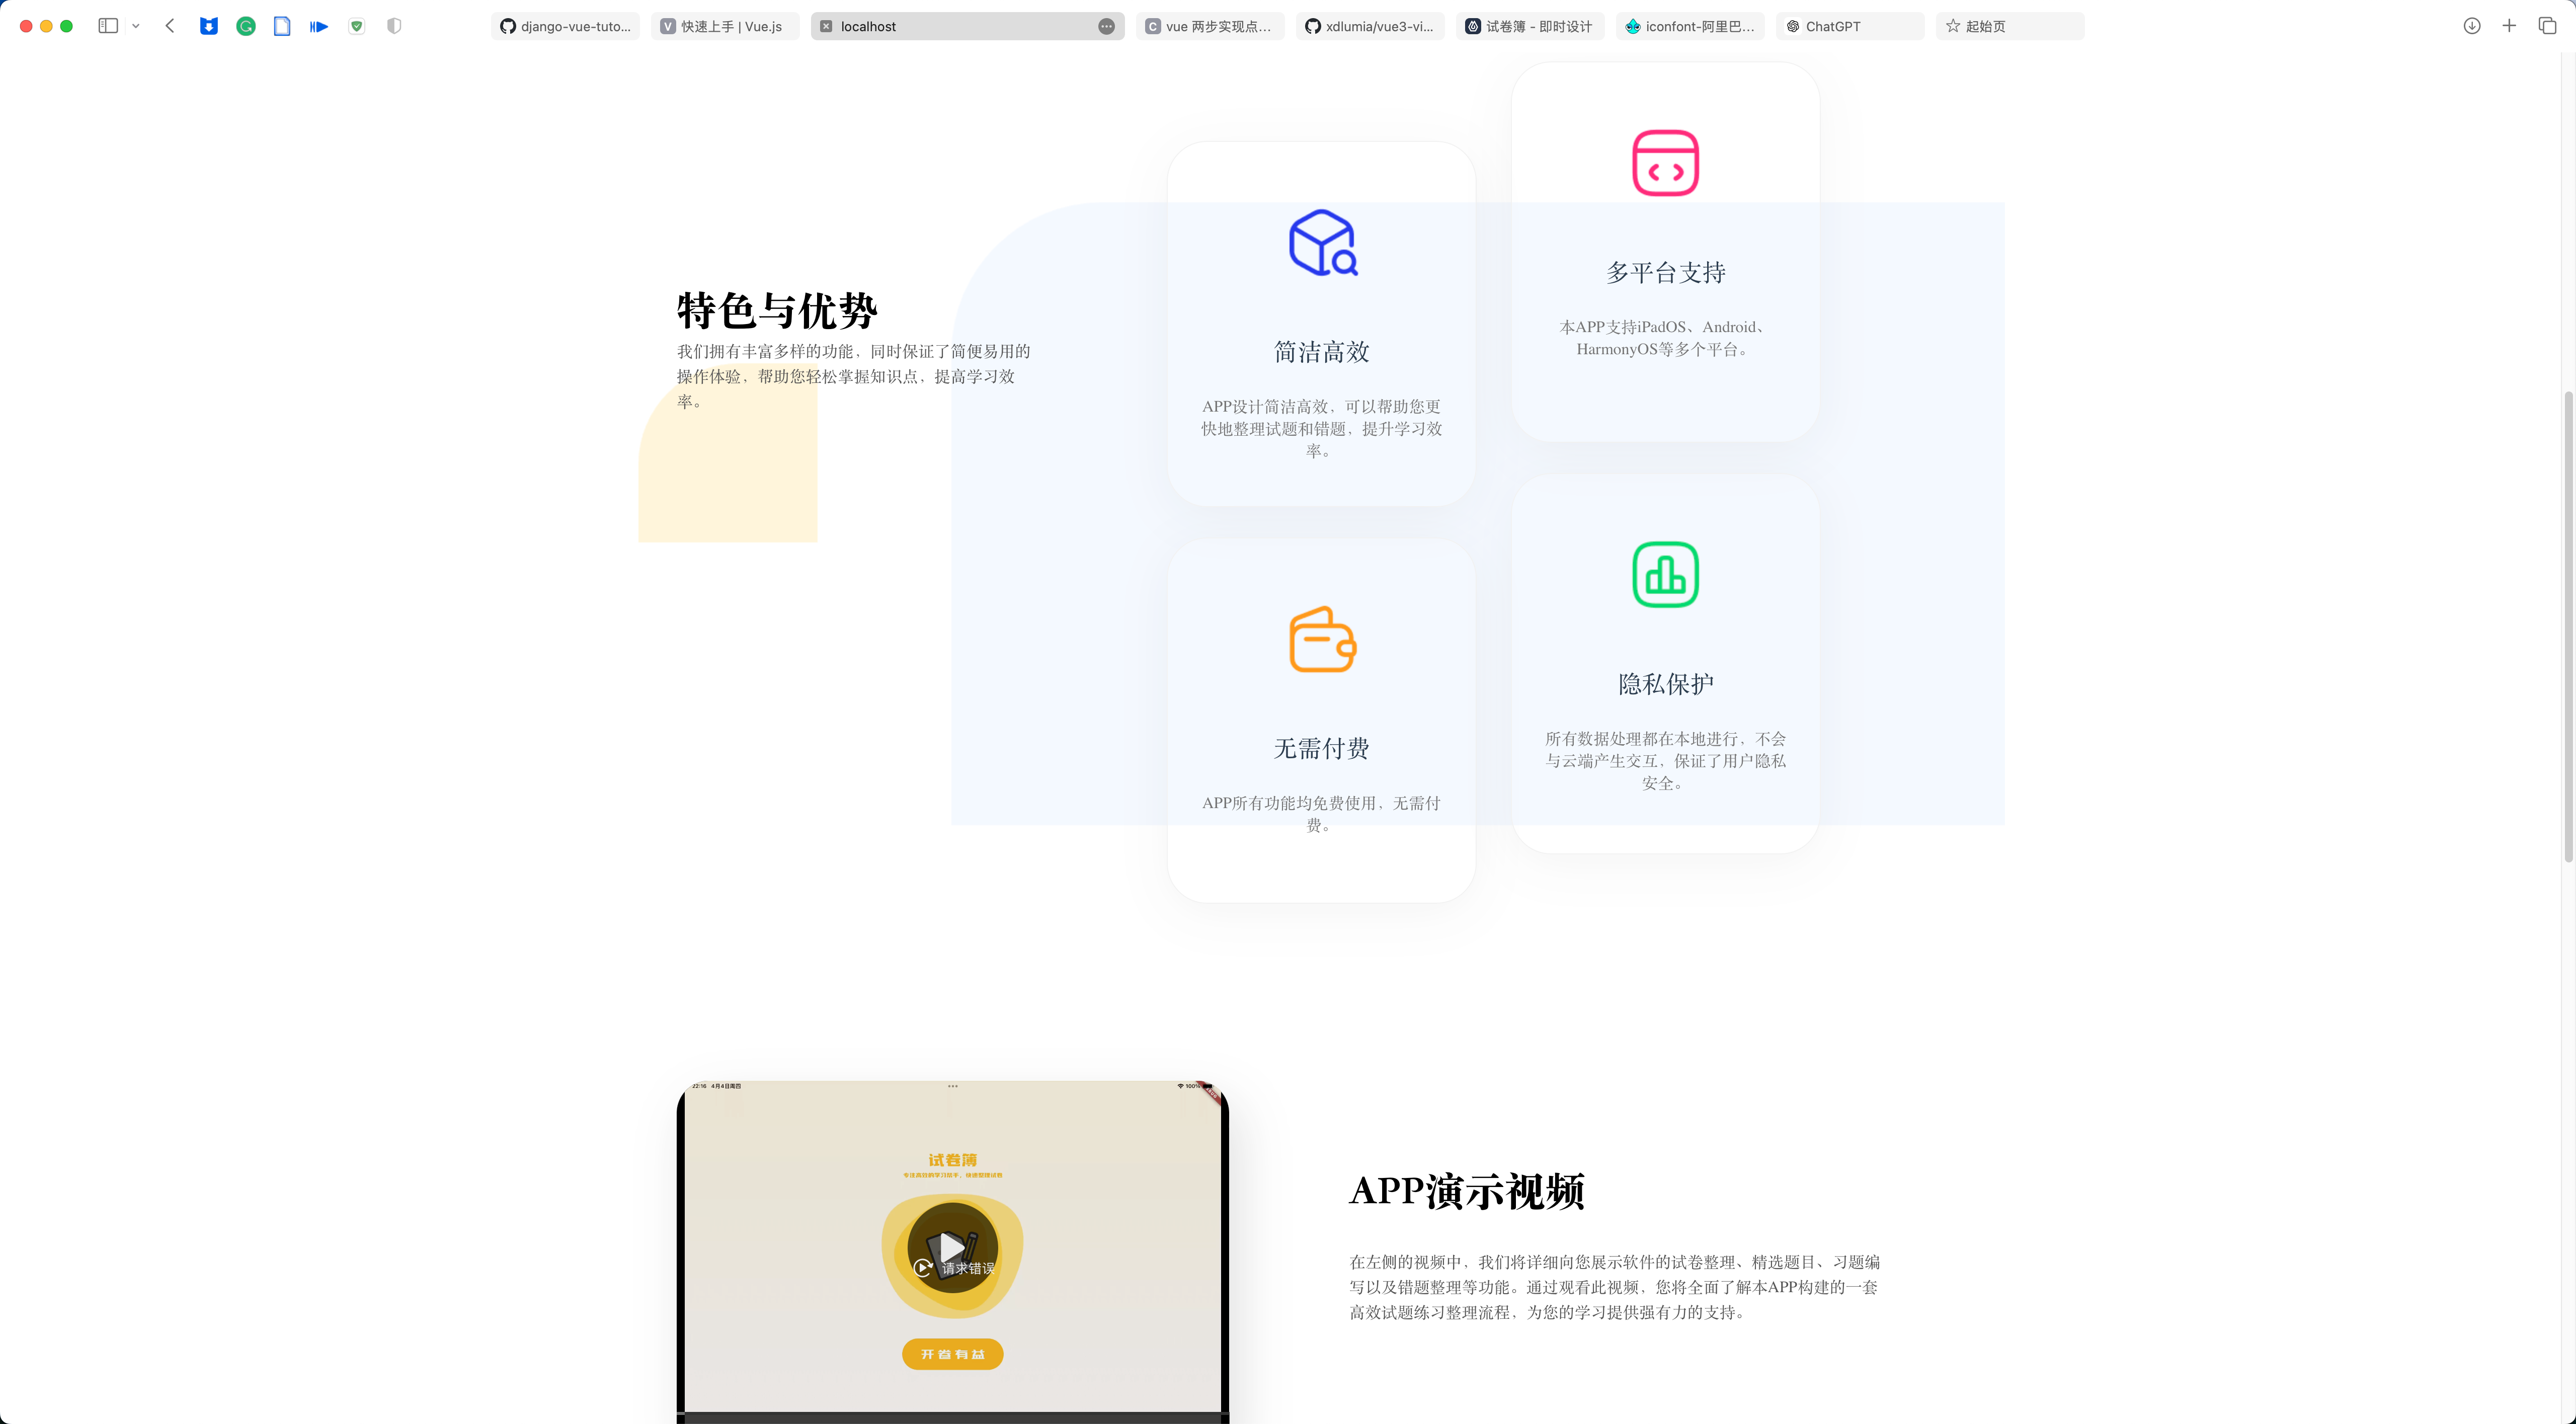
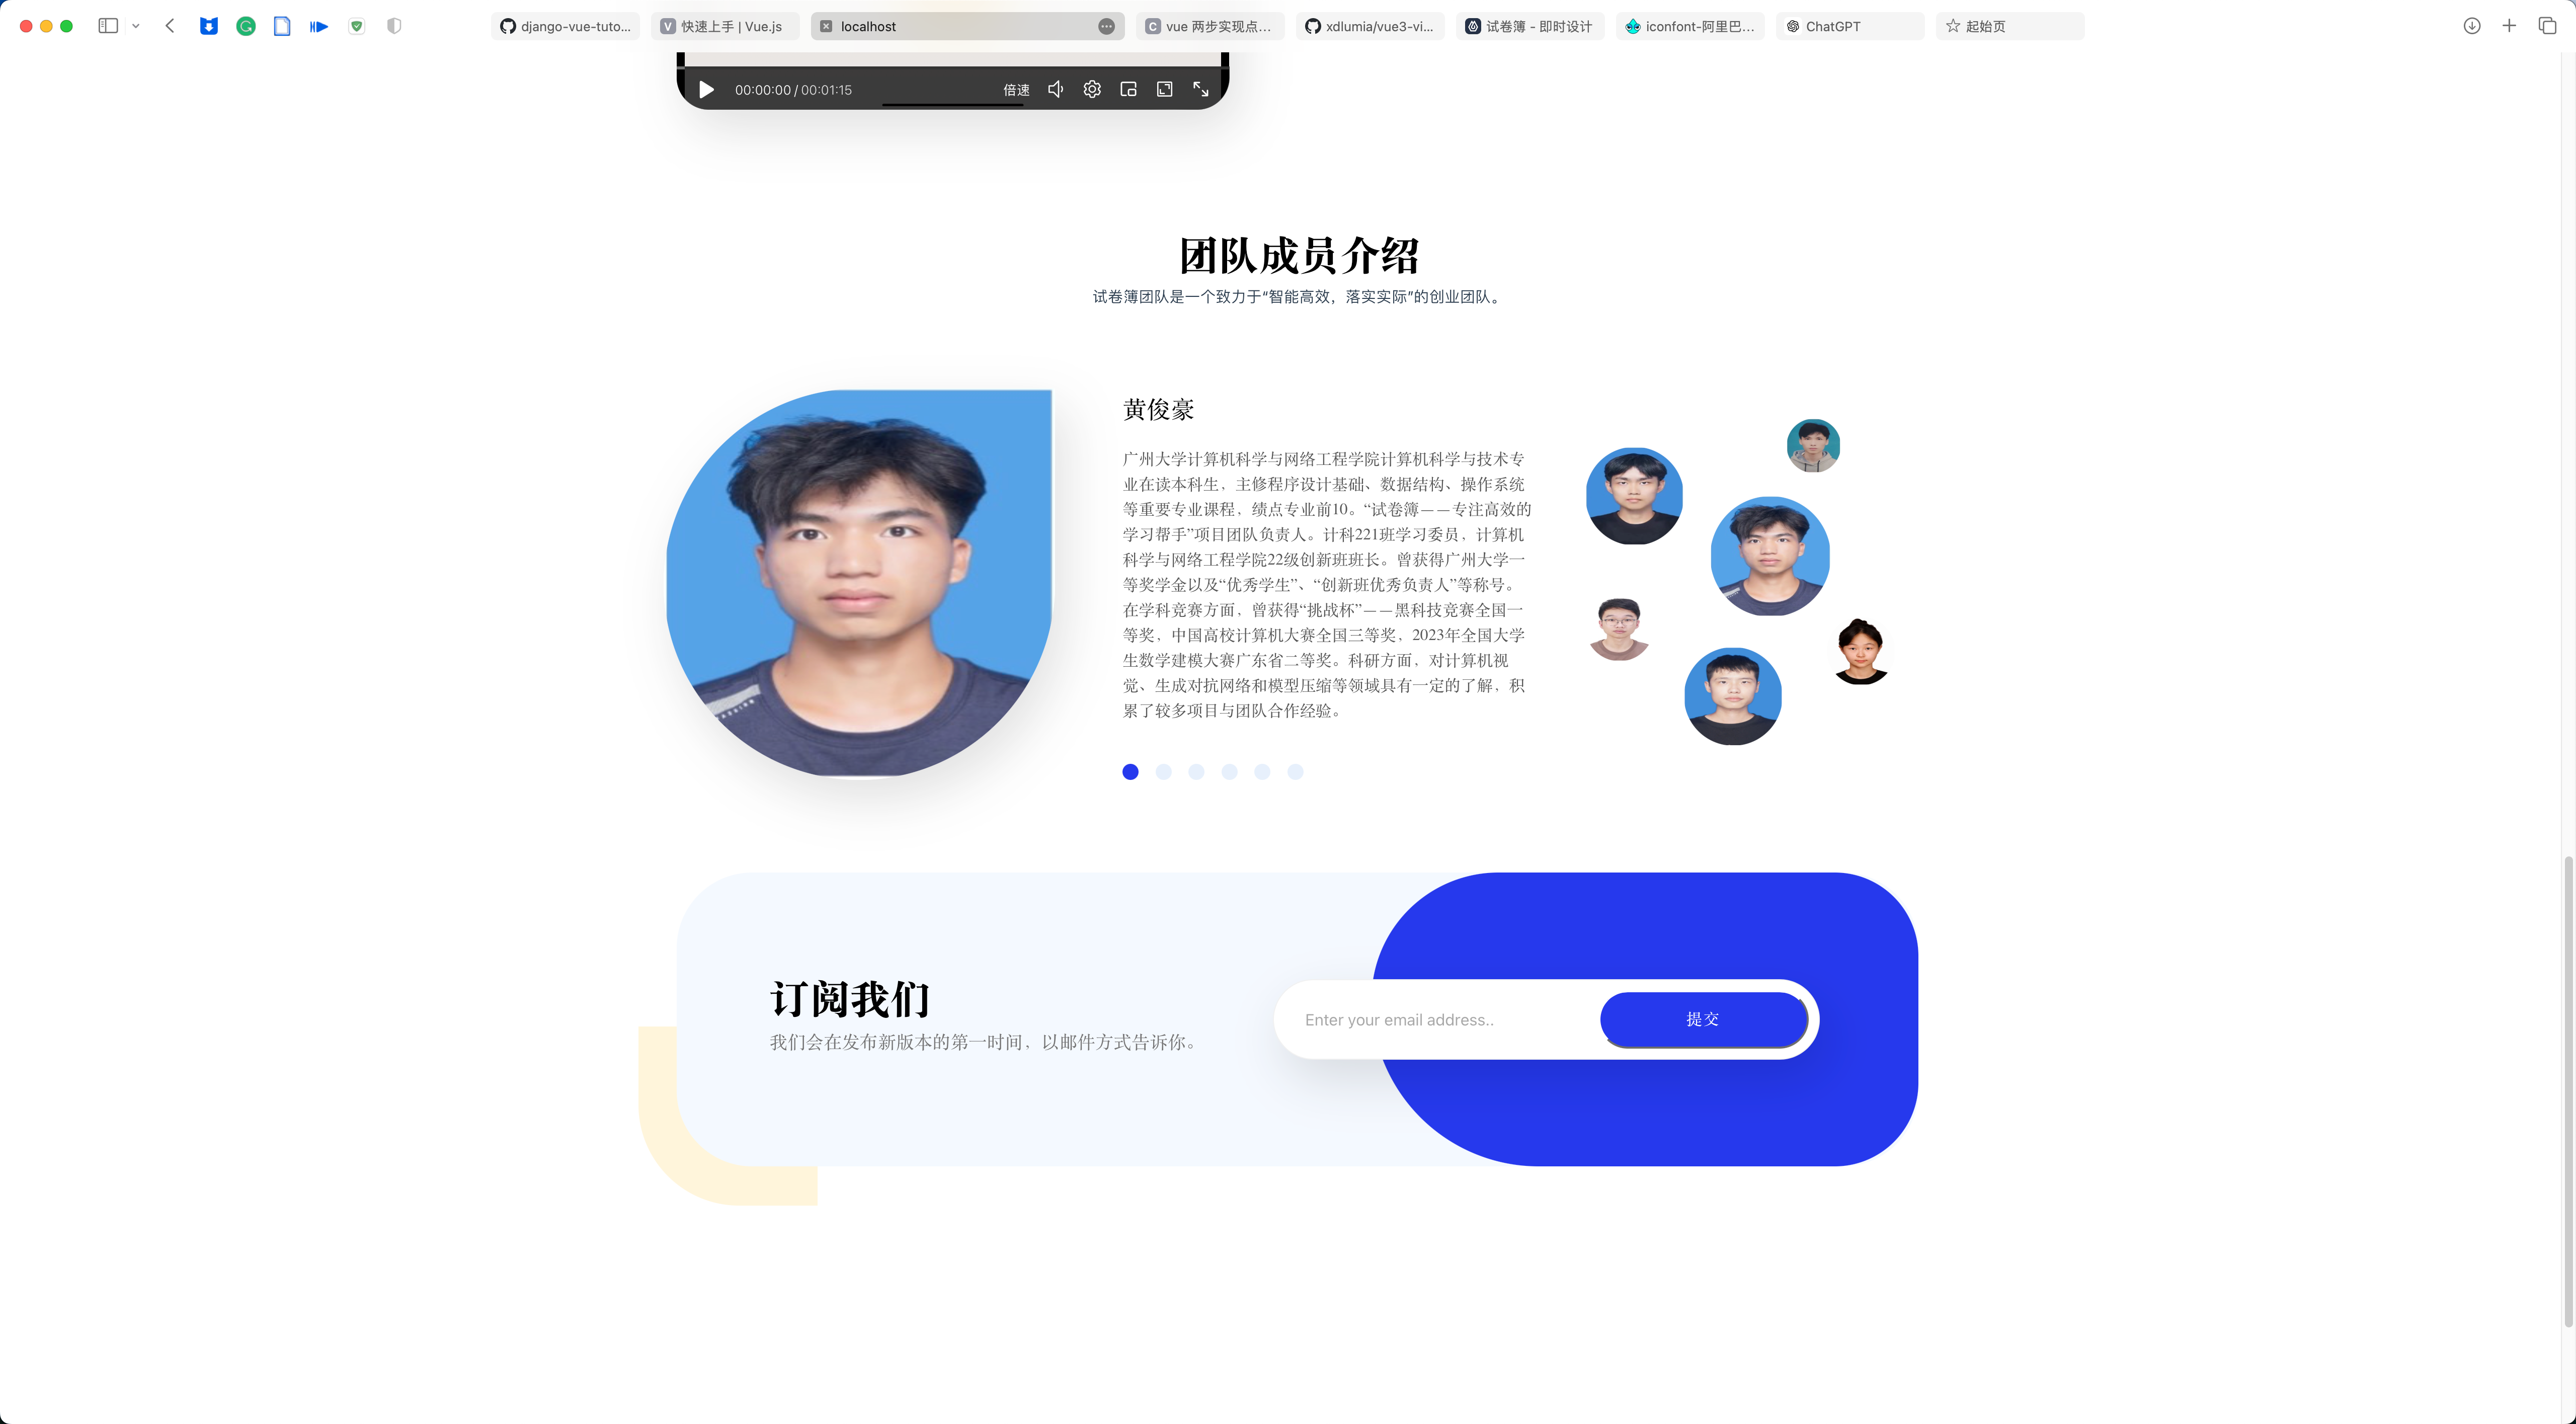
以上,前端靜態部分的所有佈局都畫好了,接下來要根據實際情況將內容修改成我們自己的。
在這裡,我想要做的是我們開發的一款app的介紹,所以將頁面改成了以下。(由於只需要修改內容,所以代碼就不展示了)


2. 網頁標題與圖標
-
將我們想用的圖標替換掉
public/favicon.ico -
修改根目錄下的
index.html文件:
<!DOCTYPE html>
<html lang="en">
  <head>
    <meta charset="UTF-8">
    <link rel="icon" href="/public/favicon.ico"> <!-- 改這裡 -->
    <meta name="viewport" content="width=device-width, initial-scale=1.0">
    <title>試卷簿——專註高效的學習幫手</title> <!-- 改這裡 -->
  </head>
  <body>
    <div id="app"></div>
    <script type="module" src="/src/main.js"></script>
  </body>
</html>
- 刷新即可看到修改成功。

六、動態部分
1. 頂部欄
1.1 固定在頂部
這個嚴格上不算是動態部分,可以直接通過css佈局設置實現,只不過我前面忘記做了,就在此補充上。
home.vue文件中設置佈局
<!-- 此處加個class和style -->
<TopBar class="fixed-top" />
<Headline style="margin-top: 116px;"/>

<!-- style中加上以下css -->
<style scoped>
.fixed-top {
  position: fixed;
  top: 0;
  left: 0;
  width: 100%; /* 可以根據需要設置寬度 */
  z-index: 999;
  background-color: white; /* 可以根據需要設置背景顏色 */
  /* 其他樣式屬性 */
}
</style>
TopBar.vue更改css
.bar {
    display: flex;
    justify-content: space-between;
  	/* margin要改成padding */
    padding-top: 42px;
    padding-left: 120px;
    padding-right: 120px;
    padding-bottom: 10px;
    box-shadow: 0px 2px 4px rgba(0, 0, 0, 0.1); /* 加上底部陰影好看一些*/
    /* margin-top: 42px;
    margin-left: 120px;
    margin-right: 120px; */
}
1.2 點擊跳轉指定位置
由於各個組件的高度是固定不變的,所以直接使用document.documentElement.scrollTop即可實現。
- 定義函數
<script>
export default {
  methods: {
    roll(where) {
      console.log('Div 被點擊了!');
      // 在這裡可以執行你想要的函數邏輯
      document.documentElement.scrollTop = where;
    }
  }
}
</script>
- 給標簽綁定函數
<template>
    <div class="bar">
        <div class="name">試卷簿</div>
        <div class="label">
            <div @click="roll(0)">首頁</div>
            <div @click="roll(650)">支持平臺</div>
            <div @click="roll(900)">特色與優勢</div>
            <div @click="roll(1850)">APP演示</div>
            <div @click="roll(2400)">團隊介紹</div>
            <div @click="roll(3000)">訂閱我們</div>
        </div>
    </div>
</template>
2. 兩個按鈕
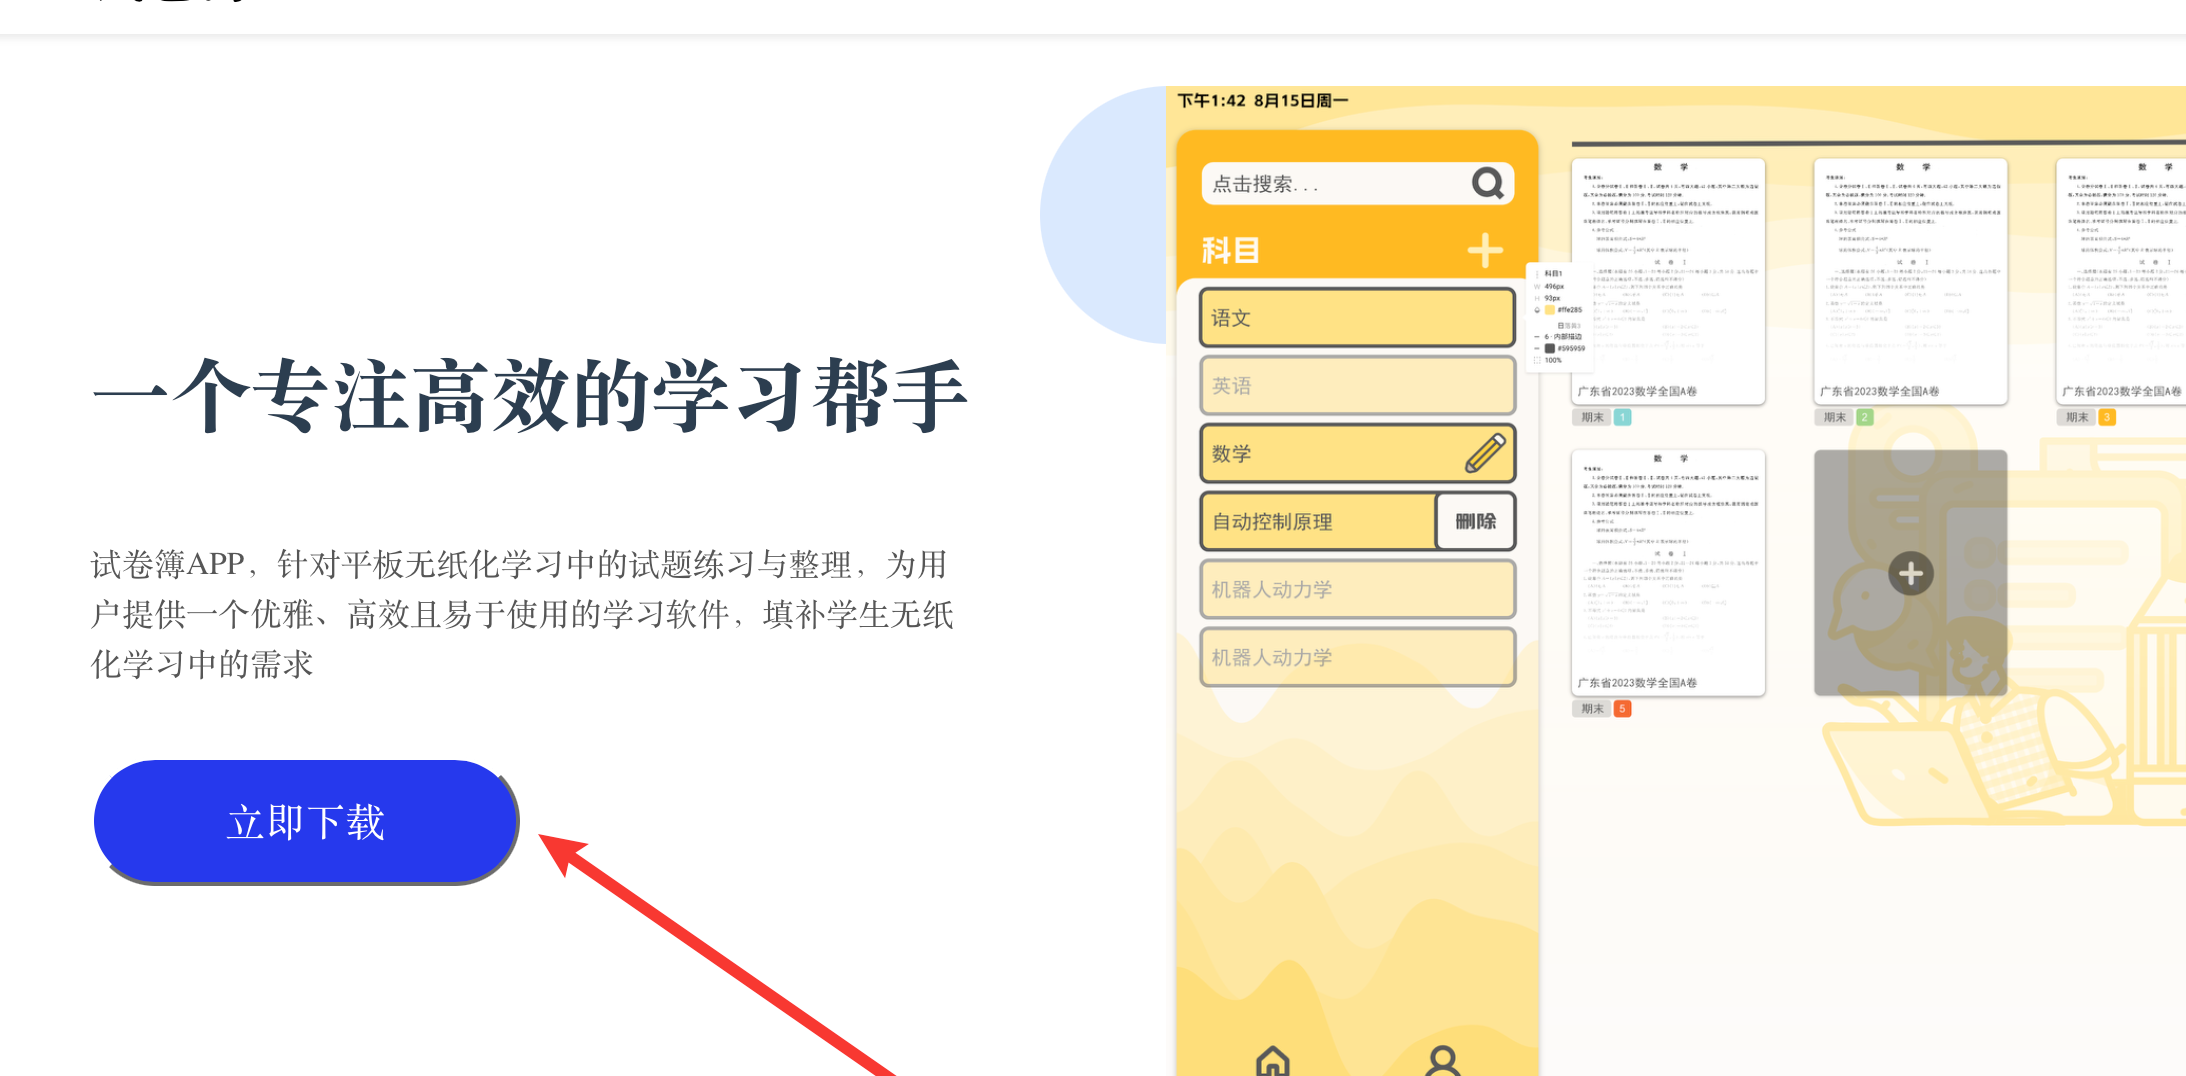

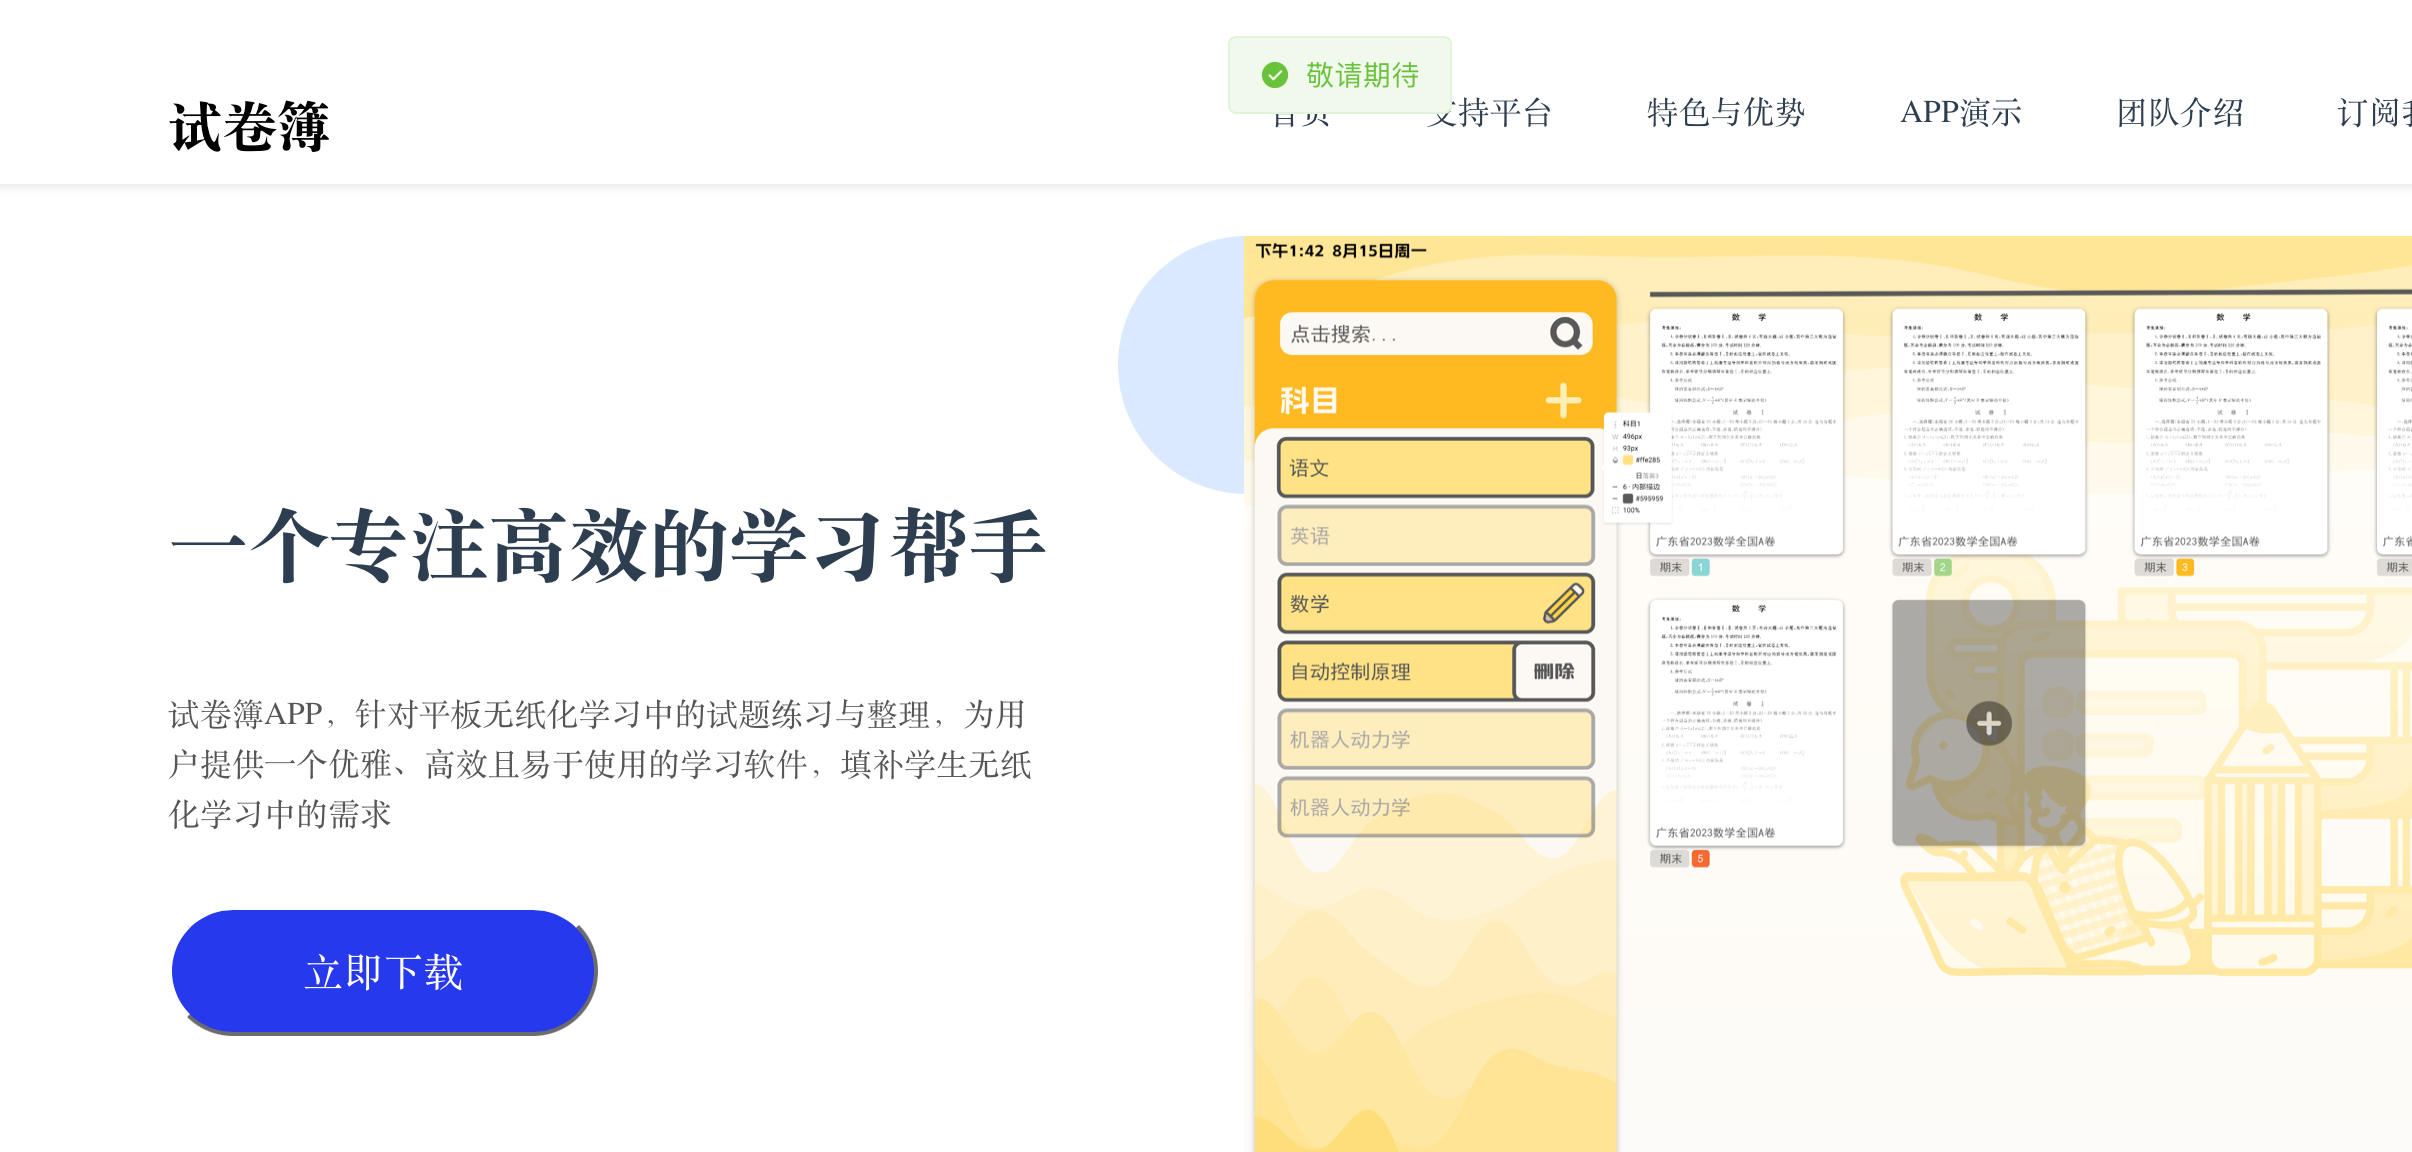
這兩個按鈕,“立即下降”按鈕只需要綁定一個下載鏈接即可,下載鏈接可以使用阿裡雲oss來獲取,具體方法和之前視頻m3u8鏈接獲取差不多,就不過多贅述。
“提交”按鈕需要綁定一個資料庫操作的介面,將輸入框中的內容加入到資料庫中。
由於目前沒有可以下載的東西和資料庫操作的介面,所以就簡單綁定了一個函數給個消息框。代碼就不展示了。
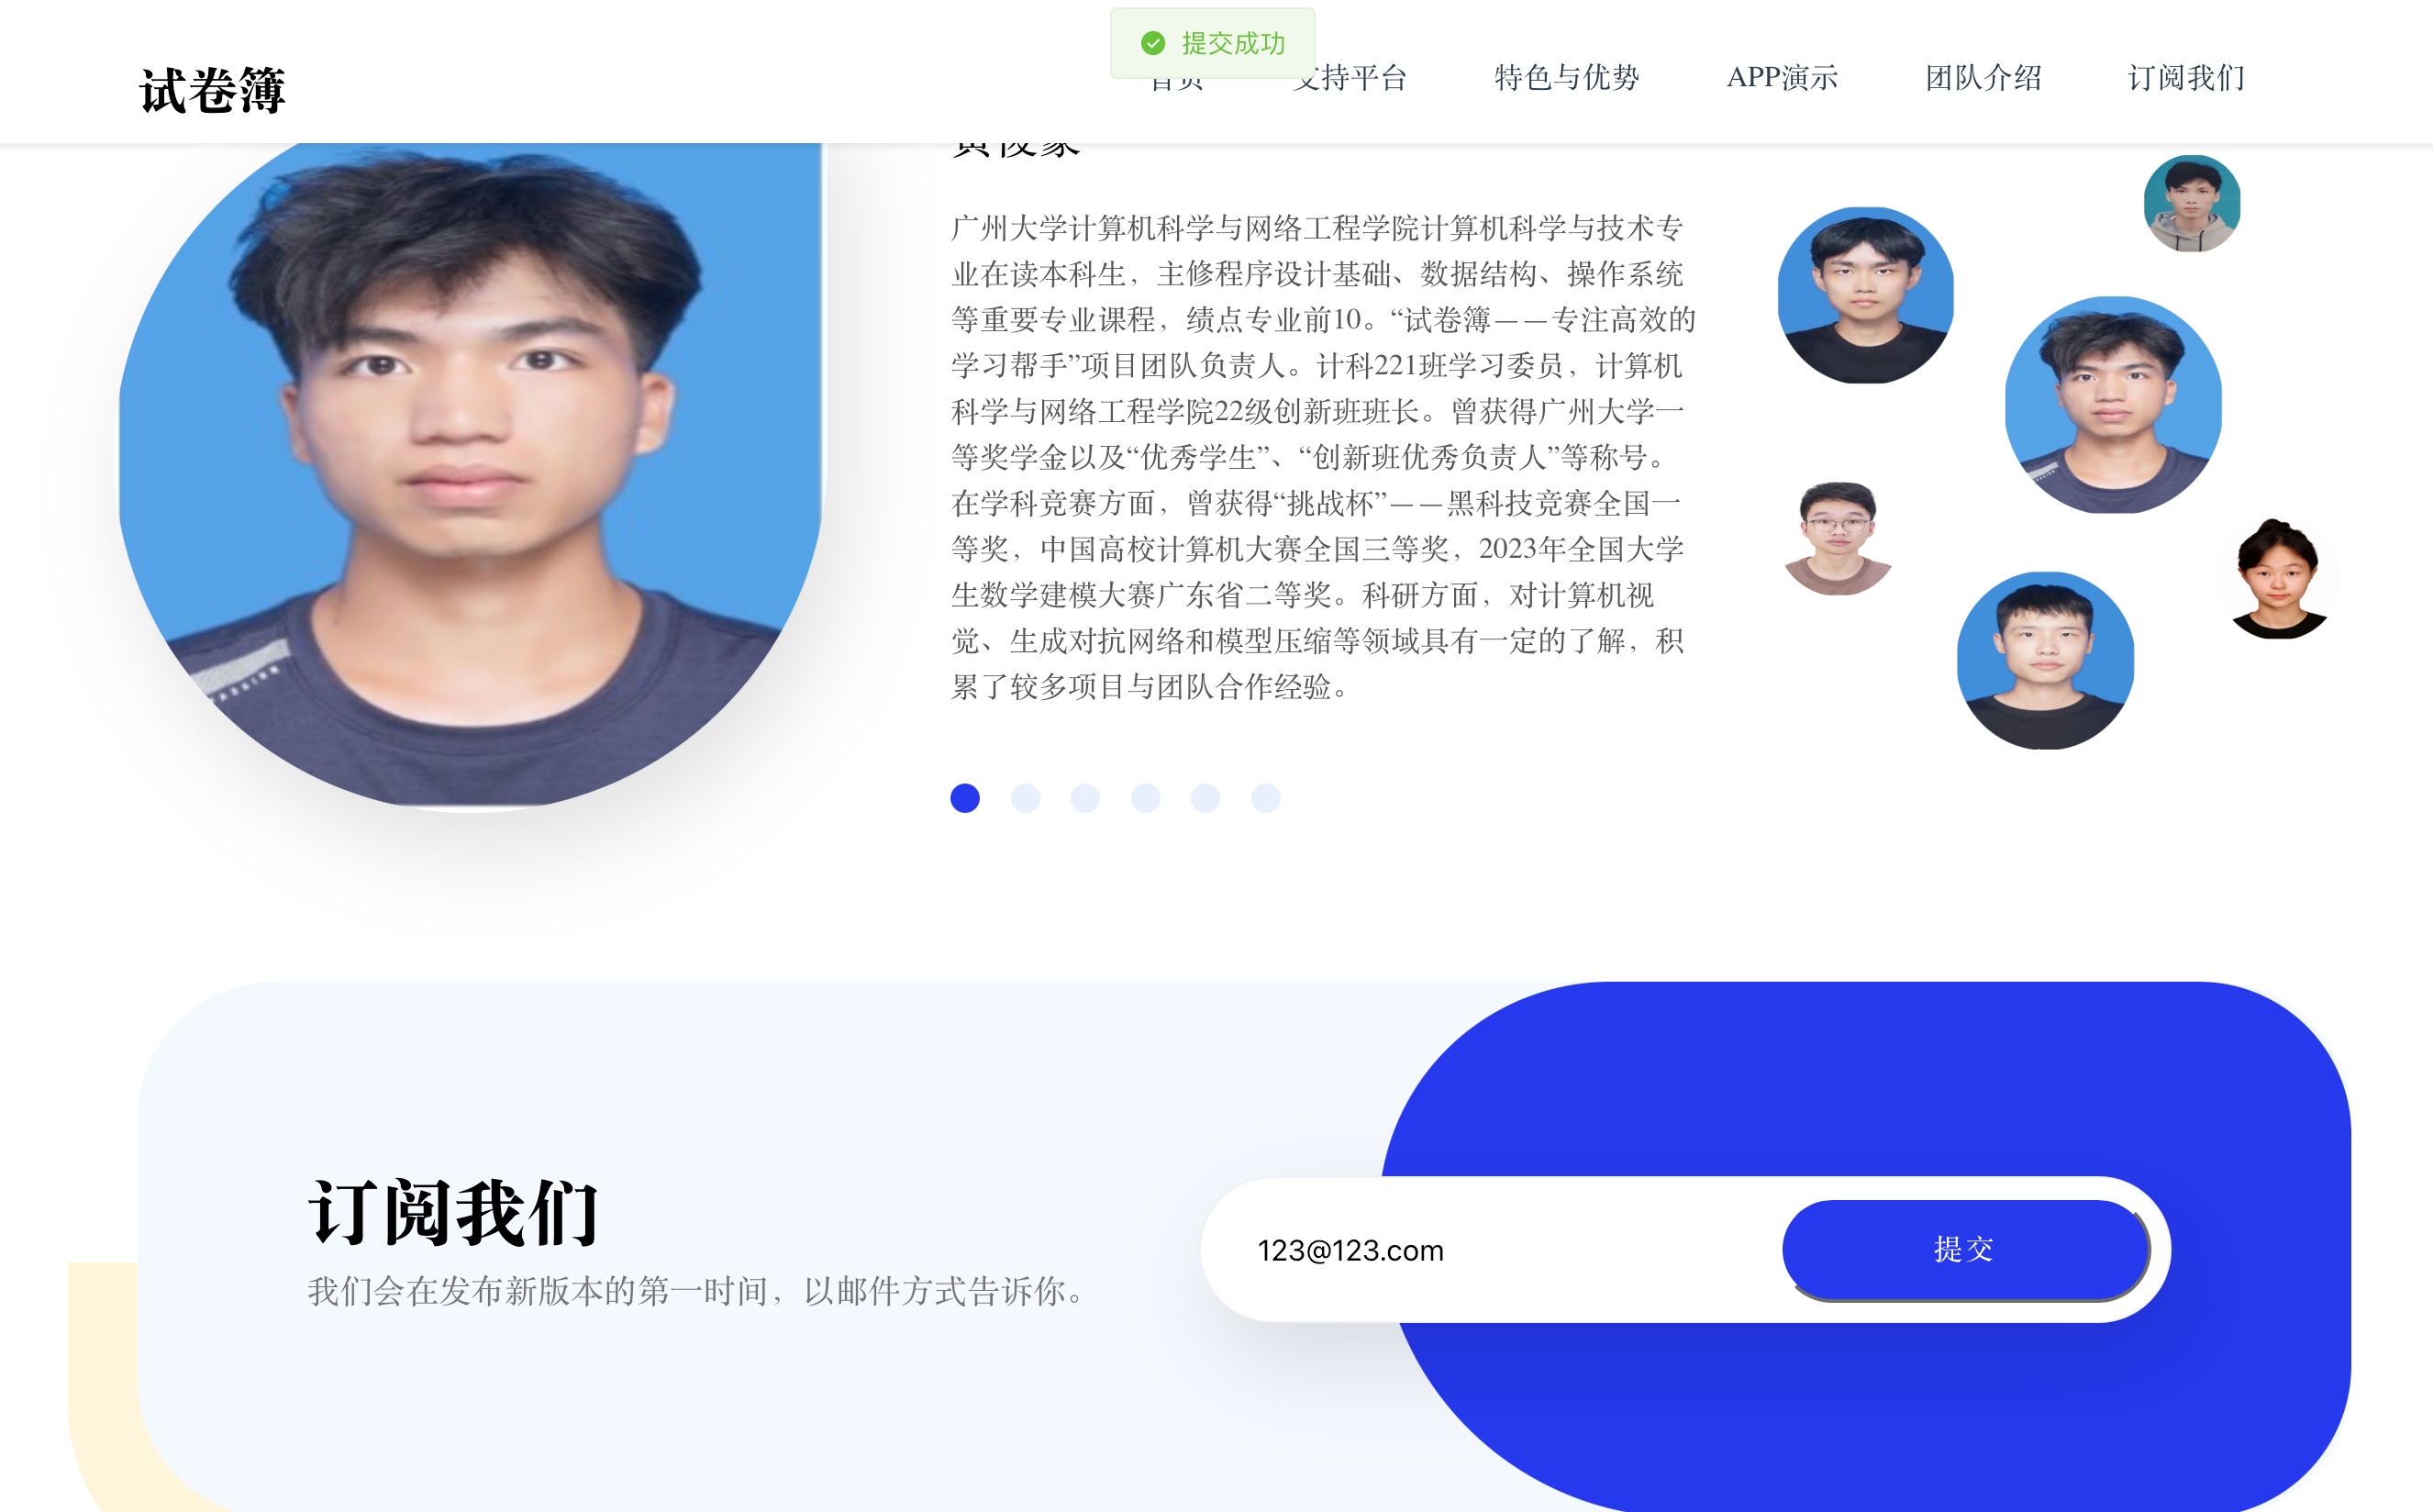
3. 成員介紹
成員介紹部分,需要做到可以點擊下麵的選擇按鈕,切換到對應的成員信息去。
template部分:
<div class="member-info" v-if="selectedMember">
  <img :src="selectedMember.avatar" alt="Member Avatar" class="bottom_1" />
  <div class="bottom_2">
      <p class="bottom_text1">{{ selectedMember.name }}</p>
      <p class="bottom_text2">{{ selectedMember.description }}</p>
      <div class="select">
          <div v-for="(member, index) in teamMembers" :key="index"
              :class="['option', { selected: selectedMemberIndex === index }]"
              @click="selectMember(index)">
          </div>
      </div>
  </div>
</div>
script部分:
<script>
import avatar1 from '../assets/people/hjh.jpg';
import avatar2 from '../assets/people/zwj.jpg';
import avatar3 from '../assets/people/hh.png';
import avatar4 from '../assets/people/jty.jpg';
import avatar5 from '../assets/people/sbq.png';
import avatar6 from '../assets/people/zjx.jpg';

export default {
    data() {
        return {
            selectedMemberIndex: 0,
            teamMembers: [
                {
                    avatar: avatar1,
                    name: '111',
                    description: '1的介紹',
                },
                {
                    avatar: avatar2,
                    name: '222',
                    description: '2的介紹',
                },
                {
                    avatar: avatar3,
                    name: '333',
                    description: '3的介紹',
                },
                {
                    avatar: avatar4,
                    name: '444',
                    description: '4的介紹',
                },
                {
                    avatar: avatar5,
                    name: '555',
                    description: '5的介紹',
                },
                {
                    avatar: avatar6,
                    name: '666',
                    description: '6的介紹',
                },
            ],
        };
    },
    computed: {
        selectedMember() {
            return this.teamMembers[this.selectedMemberIndex];
        },
    },
    methods: {
        selectMember(index) {
            this.selectedMemberIndex = index;
        },
    },
};
</script>
七、部署到github上
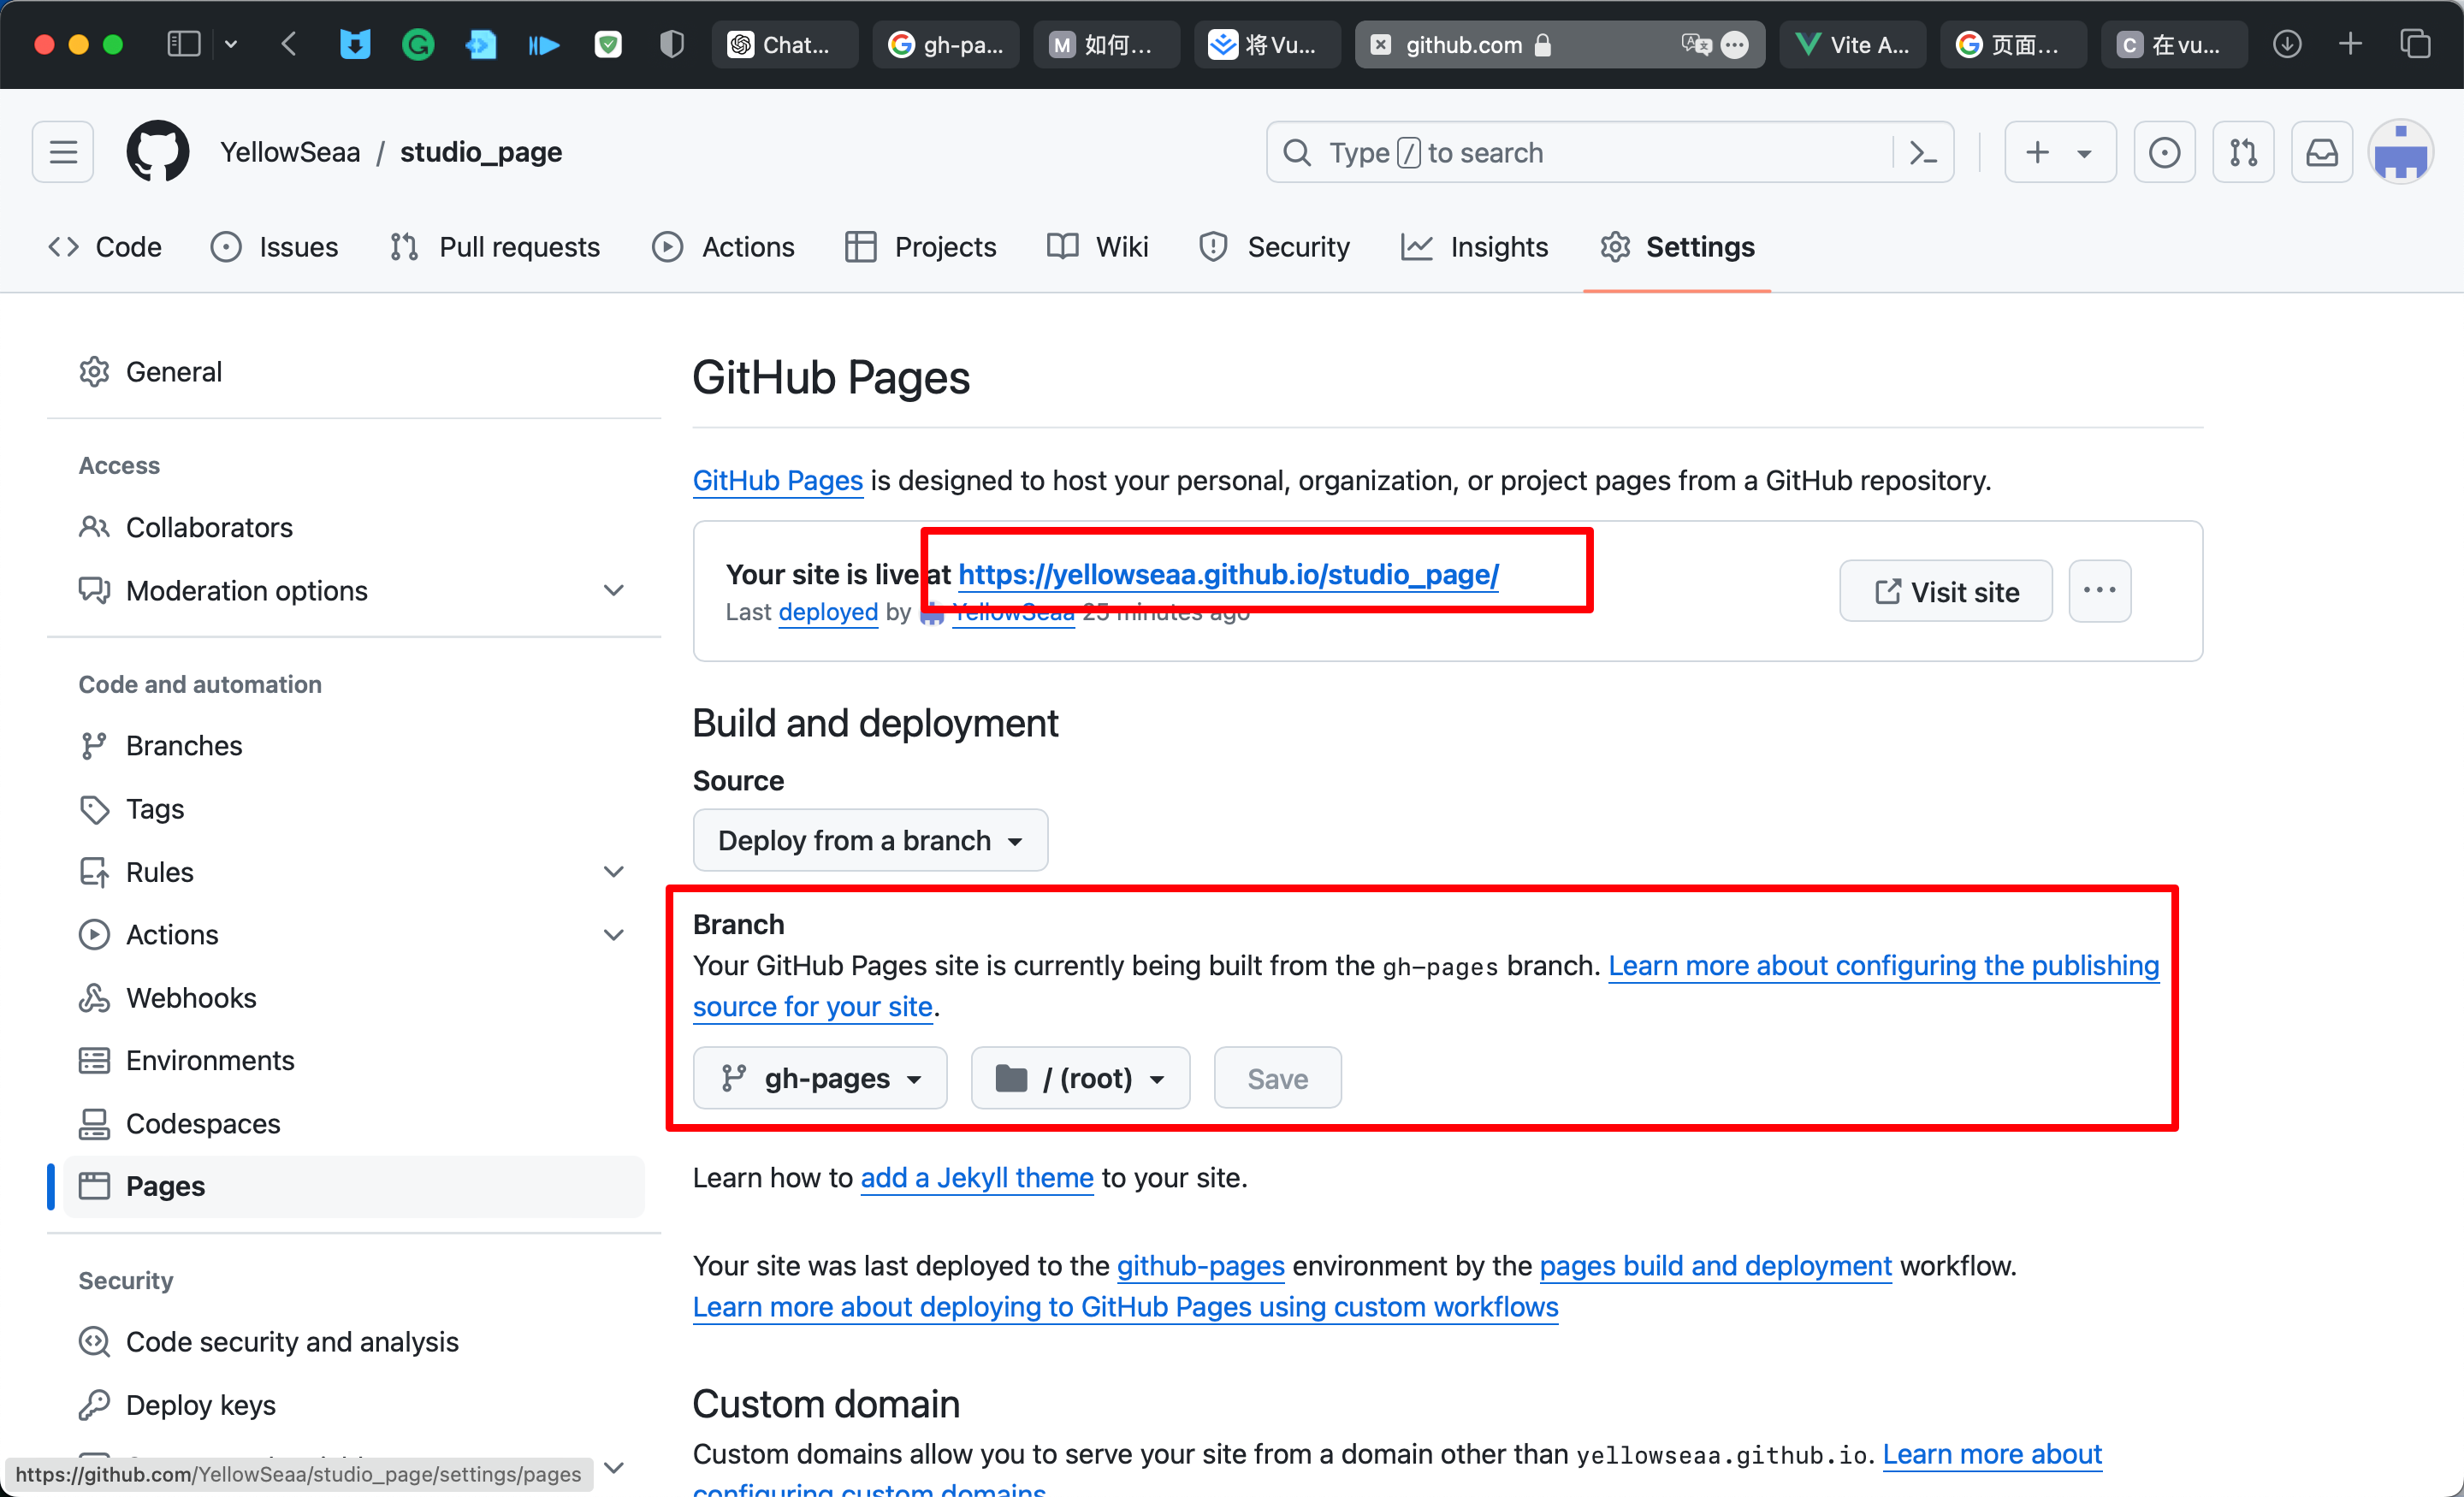
以上,web頁面基本完成,接下來就是將其部署到GitHub上。
參考教程:參考
- 先新建一個github倉庫,具體怎麼操作就不詳細講。
- 將代碼上傳到倉庫中。
- 修改配置文件
打開項目中的vite.config.js,找到下麵代碼塊,更改為對應的 github 倉庫名稱
export default defineConfig({
    base: '/your_repositories_name/', // github倉庫名稱
    plugins: [],
})
- 編譯vue代碼
npm run build
- 將編譯後的代碼上傳到倉庫中
先要在.gitignore文件中將dist文件夾的忽略給註釋掉。
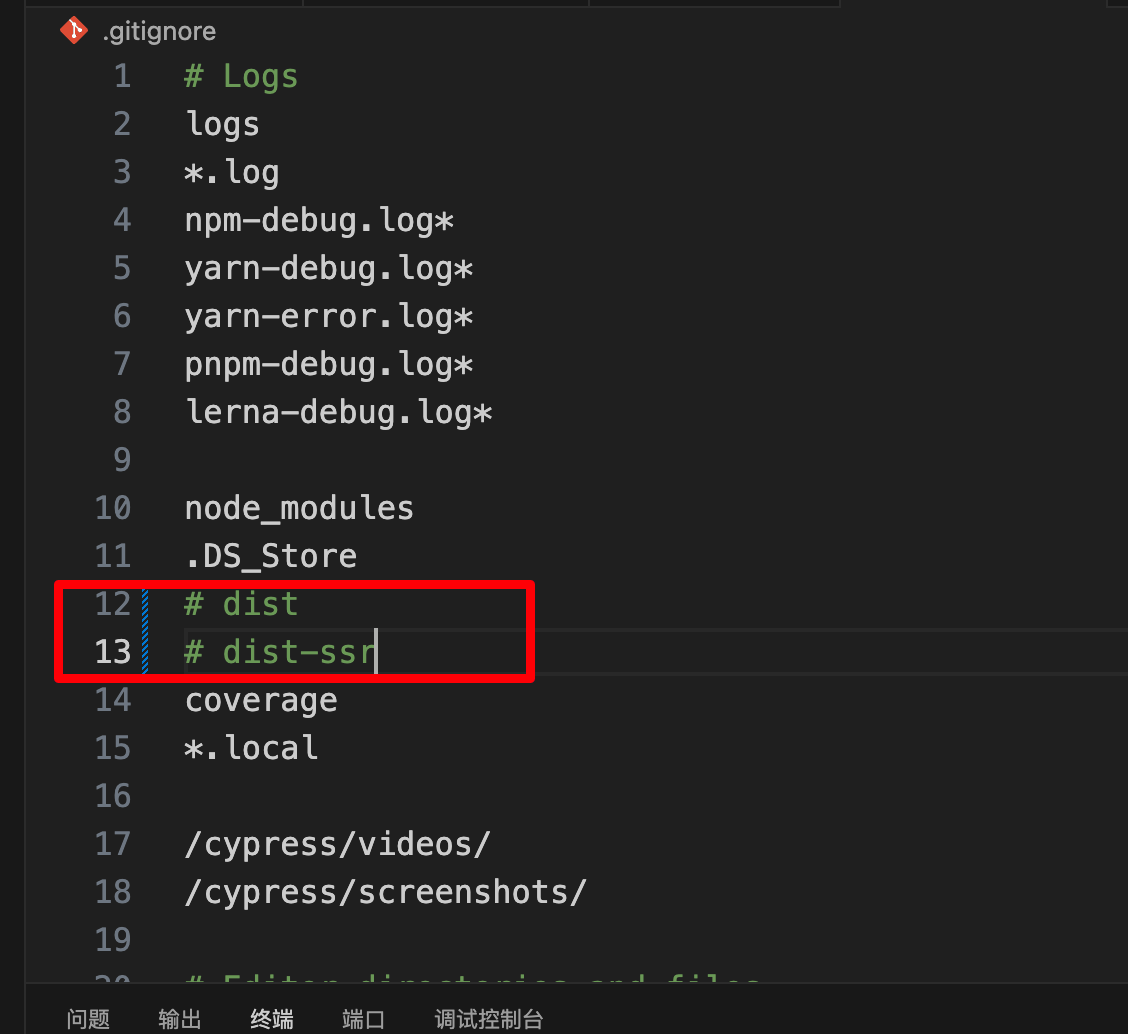
然後用git將該文件夾上傳到指定分支。
git add dist
git commit -m "Your commit message"
git subtree split --prefix dist -b dist-branch
git push your_repositories_name dist-branch:gh-pages # 這裡要改成具體的倉庫名
git branch -d dist-branch
最後在倉庫的設置中打開github page即可。
