MyBatis MyBatis特性 MyBatis 是支持定製化 SQL、存儲過程以及高級映射的優秀的持久層框架 MyBatis 避免了幾乎所有的 JDBC 代碼和手動設置參數以及獲取結果集 MyBatis可以使用簡單的XML或註解用於配置和原始映射,將介面和Java的POJO(Plain Old ...
MyBatis
MyBatis特性
- MyBatis 是支持定製化 SQL、存儲過程以及高級映射的優秀的持久層框架
- MyBatis 避免了幾乎所有的 JDBC 代碼和手動設置參數以及獲取結果集
- MyBatis可以使用簡單的XML或註解用於配置和原始映射,將介面和Java的POJO(Plain Old Java Objects,普通的Java對象)映射成資料庫中的記錄
- MyBatis 是一個 半自動的ORM(Object Relation Mapping)框架
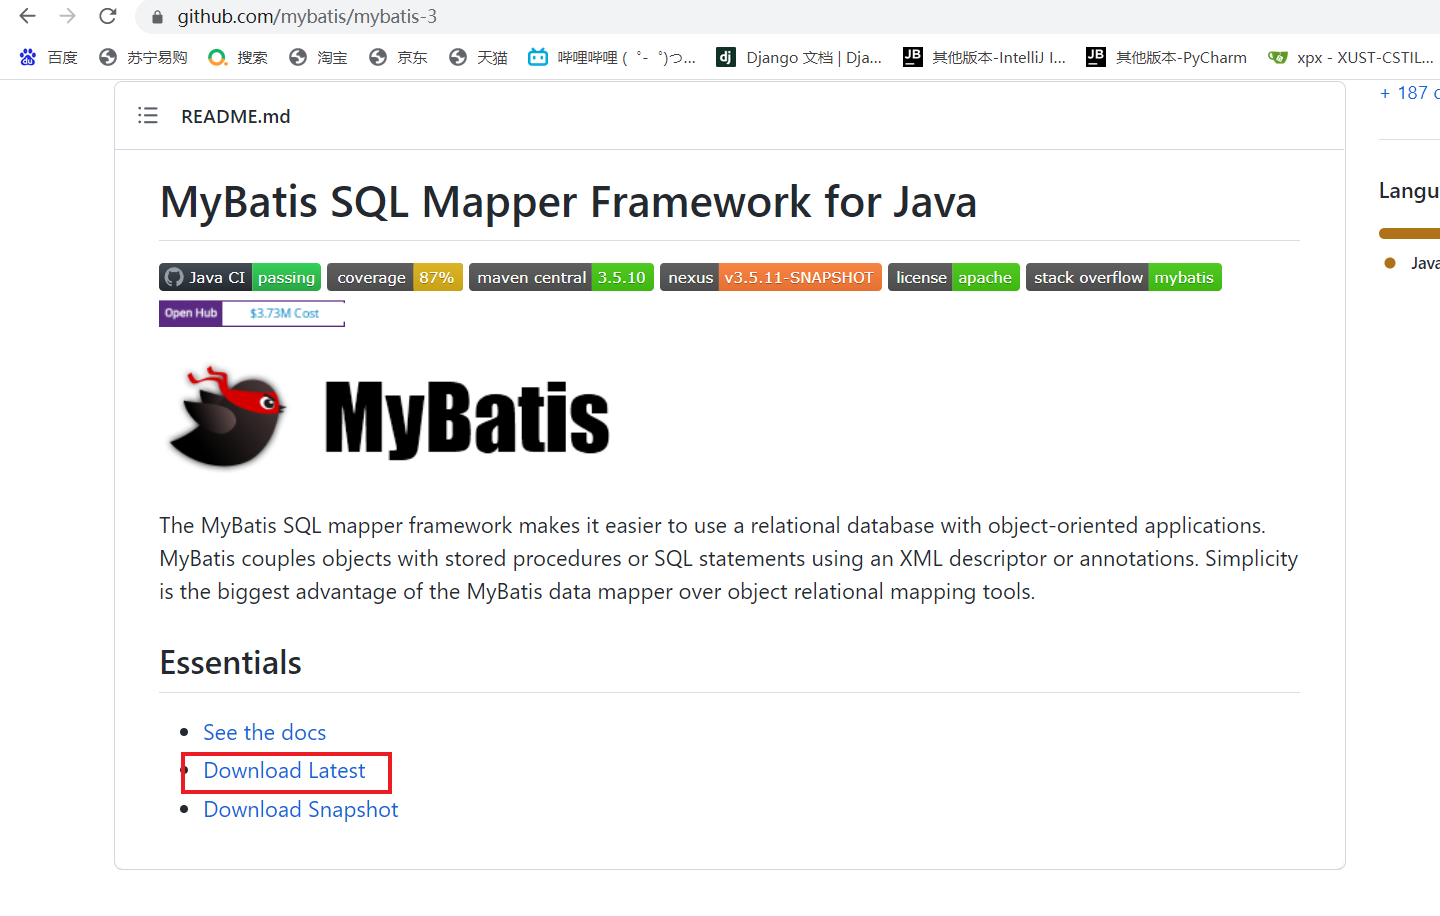
下載


持久化層技術對比
-
JDBC
- SQL 夾雜在Java代碼中耦合度高
- 維護不易且實際開發需求中 SQL 有變化,頻繁修改的情況多見
- 代碼冗長,開發效率低
-
Hibernate 和 JPA
- 操作簡便,開發效率高
- 程式中的長難複雜 SQL 需要繞過框架
- 內部自動生產的 SQL,不容易做特殊優化
- 基於全映射的全自動框架,大量欄位的 POJO 進行部分映射時比較困難
- 反射操作太多,導致資料庫性能下降
-
MyBatis
- 輕量級,性能出色
- SQL 和 Java 編碼分開,功能邊界清晰。Java代碼專註業務、SQL語句專註數據
- 開發效率稍遜於HIbernate,但是完全能夠接受
開發環境
idea:2019.3.5
MySQL:8.0
MyBatis:3.5.10
Maven:3.6.1
開始寫代碼

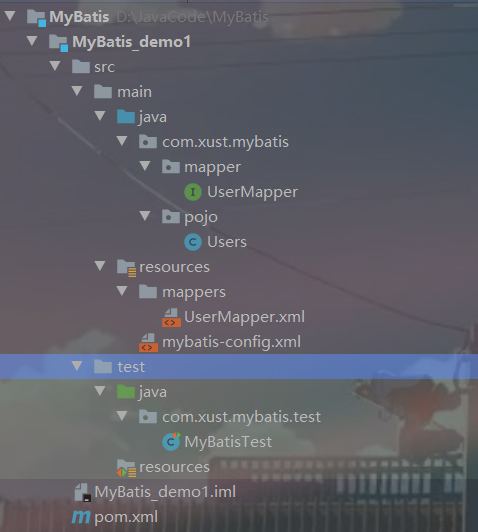
1.創建Maven工程
2.配置打包方式為jar
3.引入依賴
pom.xml
<dependencies>
	<!-- Mybatis核心 -->
	<dependency>
		<groupId>org.mybatis</groupId>
		<artifactId>mybatis</artifactId>
		<version>3.5.10</version>
	</dependency>
	<!-- junit測試 -->
	<dependency>
		<groupId>junit</groupId>
		<artifactId>junit</artifactId>
		<version>4.12</version>
		<scope>test</scope>
	</dependency>
	<!-- MySQL驅動 -->
	<dependency>
		<groupId>mysql</groupId>
		<artifactId>mysql-connector-java</artifactId>
		<version>8.0.30</version>
		</dependency>
</dependencies>
4.mybatis配置文件
mybatis-config.xml
<?xml version="1.0" encoding="UTF-8" ?>
<!DOCTYPE configuration
        PUBLIC "-//mybatis.org//DTD Config 3.0//EN"
        "http://mybatis.org/dtd/mybatis-3-config.dtd">
<configuration>
    <!--設置連接資料庫的環境-->
    <environments default="development">
        <environment id="development">
            <transactionManager type="JDBC"/>
            <dataSource type="POOLED">
                <property name="driver" value="com.mysql.cj.jdbc.Driver"/>
                <property name="url" value="jdbc:mysql://localhost:3306/mybatis"/>
                <property name="username" value="root"/>
                <property name="password" value="xxxxxxxxx"/>
            </dataSource>
        </environment>
    </environments>
    <!--引入映射文件-->
    <mappers>
        <mapper resource="mappers/UserMapper.xml"/>
    </mappers>
</configuration>
5.創建資料庫建表(略)併在Java代碼中創建對應實體類
Users.java
package com.xust.mybatis.pojo;

public class Users {
    private Integer id;
    private String username;
    private String password;
    private Integer age;
    private String sex;
    private String email;

    public Users() {
    }

    public Users(Integer id, String username, String password, Integer age, String sex, String email) {
        this.id = id;
        this.username = username;
        this.password = password;
        this.age = age;
        this.sex = sex;
        this.email = email;
    }

    public Integer getId() {
        return id;
    }

    public void setId(Integer id) {
        this.id = id;
    }

    public String getUsername() {
        return username;
    }

    public void setUsername(String username) {
        this.username = username;
    }

    public String getPassword() {
        return password;
    }

    public void setPassword(String password) {
        this.password = password;
    }

    public Integer getAge() {
        return age;
    }

    public void setAge(Integer age) {
        this.age = age;
    }

    public String getSex() {
        return sex;
    }

    public void setSex(String sex) {
        this.sex = sex;
    }

    public String getEmail() {
        return email;
    }

    public void setEmail(String email) {
        this.email = email;
    }

    @Override
    public String toString() {
        return "Users{" +
                "id=" + id +
                ", username='" + username + '\'' +
                ", password='" + password + '\'' +
                ", age=" + age +
                ", sex='" + sex + '\'' +
                ", email='" + email + '\'' +
                '}';
    }
}
6.創建mapper介面(不需要實現類)
UserMapper.java
package com.xust.mybatis.mapper;

/**
 * mybatis面向介面編程兩個一致
 * 1.映射文件的namespace要和mapper的全類名保持一致
 * 2.映射文件中SQL語句的id要和mapper介面中的方法名一致
 */
public interface UserMapper {
    /**
     * 添加用戶信息
     */
    int insertUser();
}
7.創建MyBatis映射文件
映射文件的namespace要和mapper的全類名保持一致
映射文件中SQL語句的id要和mapper介面中的方法名一致
UserMapper.xml
<?xml version="1.0" encoding="UTF-8" ?>
<!DOCTYPE mapper
        PUBLIC "-//mybatis.org//DTD Mapper 3.0//EN"
        "http://mybatis.org/dtd/mybatis-3-mapper.dtd">
<mapper namespace="com.xust.mybatis.mapper.UserMapper">
    <!--int insertUser();-->
    <insert id="insertUser">
		insert into t_user values(null,'張三','123',23,'女','[email protected]')
	</insert>
</mapper>
8.junit測試
SqlSession:代表Java程式和資料庫之間的會話。HttpSession是Java程式和瀏覽器之間的會話
SqlSessionFactory:是生產SqlSession的工廠
MyBatisTest.java
package com.xust.mybatis.test;

import com.xust.mybatis.mapper.UserMapper;
import org.apache.ibatis.io.Resources;
import org.apache.ibatis.session.SqlSession;
import org.apache.ibatis.session.SqlSessionFactory;
import org.apache.ibatis.session.SqlSessionFactoryBuilder;
import org.junit.Test;

import java.io.IOException;
import java.io.InputStream;

public class MyBatisTest {
    @Test
    public void testMyBatis() throws IOException {
        //載入核心配置文件
        InputStream is= Resources.getResourceAsStream("mybatis-config.xml");
        //獲取SqlSessionFactoryBuilder
        SqlSessionFactoryBuilder sqlSessionFactoryBuilder=new SqlSessionFactoryBuilder();
        //獲取SqlSessionFactory
        SqlSessionFactory sqlSessionFactory=sqlSessionFactoryBuilder.build(is);
        //獲取SqlSession
        SqlSession sqlSession=sqlSessionFactory.openSession();
        //獲取mapper介面對象
        UserMapper mapper=sqlSession.getMapper(UserMapper.class);
        //測試功能
        int result=mapper.insertUser();
        //提交事務
        sqlSession.commit();
        System.out.println("result:"+result);
    }
}
上面是手動提交事務,SqlSession預設不自動提交事務,自動提交可以在獲取sqlSession對象時,使用SqlSession sqlSession = sqlSessionFactory.openSession(true),傳入一個Boolean類型的參數,值為true,這樣就可以自動提交。
9.加入log4j日誌功能
引入依賴
<!-- log4j日誌 -->
<dependency>
    <groupId>log4j</groupId>
    <artifactId>log4j</artifactId>
    <version>1.2.17</version>
</dependency>
log4j.xml
<?xml version="1.0" encoding="UTF-8" ?>
<!DOCTYPE log4j:configuration SYSTEM "log4j.dtd">
<log4j:configuration xmlns:log4j="http://jakarta.apache.org/log4j/">
    <appender name="STDOUT" class="org.apache.log4j.ConsoleAppender">
        <param name="Encoding" value="UTF-8" />
        <layout class="org.apache.log4j.PatternLayout">
			<param name="ConversionPattern" value="%-5p %d{MM-dd HH:mm:ss,SSS} %m (%F:%L) \n" />
        </layout>
    </appender>
    <logger name="java.sql">
        <level value="debug" />
    </logger>
    <logger name="org.apache.ibatis">
        <level value="info" />
    </logger>
    <root>
        <level value="debug" />
        <appender-ref ref="STDOUT" />
    </root>
</log4j:configuration>
日誌的級別:FATAL(致命)>ERROR(錯誤)>WARN(警告)>INFO(信息)>DEBUG(調試)
日誌級別越低,列印越詳細
增刪改查
查詢功能必須指定resultType或resultMap
resultType:設置預設映射(欄位名和屬性名一致)
resultMap:設置自定義映射(一對多,多對一,欄位名和屬性名不一致)
<?xml version="1.0" encoding="UTF-8" ?>
<!DOCTYPE mapper
        PUBLIC "-//mybatis.org//DTD Mapper 3.0//EN"
        "http://mybatis.org/dtd/mybatis-3-mapper.dtd">
<mapper namespace="com.xust.mybatis.mapper.UserMapper">
    <!--int insertUser();-->
    <insert id="insertUser">
		insert into t_user values(null,'張三','123',23,'女','[email protected]')
	</insert>
    <!--void updateUser();-->
    <update id="updateUser">
        update t_user set username='李四' where id=1
    </update>
    <!--void deleteUser();-->
    <delete id="deleteUser">
        delete from t_user where id=2
    </delete>
    <!--Users getUserById();;-->
    <!--
        查詢功能必須指定resultType或resultMap
        resultType:設置預設映射(欄位名和屬性名一致)
        resultMap:設置自定義映射(一對多,多對一,欄位名和屬性名不一致)
    -->
    <select id="getUserById" resultType="com.xust.mybatis.pojo.Users">
        select * from t_user where id=3
    </select>
    <!--List<Users> getAllUser();-->
    <select id="getAllUser" resultType="com.xust.mybatis.pojo.Users">
        select * from t_user
    </select>
</mapper>
MyBatis核心配置文件
標簽順序
properties、settings、typeAliases、typeHandlers、objectFactory、objectWrapperFactory、reflectorFactory、plugins、environments、databaseIdProvider、mappers
mybatis-config.xml
<?xml version="1.0" encoding="UTF-8" ?>
<!DOCTYPE configuration
        PUBLIC "-//mybatis.org//DTD Config 3.0//EN"
        "http://mybatis.org/dtd/mybatis-3-config.dtd">
<configuration>
    <!--引入properties文件,此時就可以${屬性名}的方式訪問屬性值-->
    <properties resource="jdbc.properties"></properties>
    <typeAliases>
        <!--
        typeAlias:設置某個具體的類型的別名
        屬性:
        type:需要設置別名的類型的全類名
        alias:設置此類型的別名,且別名不區分大小寫。若不設置此屬性,該類型擁有預設的別名,即類名
        -->
        <!--<typeAlias type="com.atguigu.mybatis.bean.User"></typeAlias>-->
        <!--<typeAlias type="com.atguigu.mybatis.bean.User" alias="user">
        </typeAlias>-->
        <!--以包為單位,設置改包下所有的類型都擁有預設的別名,即類名且不區分大小寫-->
        <package name="com.xust.mybatis.bean"/>
    </typeAliases>
    <!--
		environments:配置多個連接資料庫的環境
		屬性:
			default:設置預設使用的環境的id
	-->
    <environments default="development">
        <!--
			environment:配置某個具體的環境
			id:表示連接資料庫的環境的唯一標識,不能重覆
		-->
        <environment id="development">
            <!--
                transactionManager:設置事務管理方式
                屬性:
                    type:設置事務管理方式,type="JDBC|MANAGED"
                    type="JDBC":設置當前環境的事務管理都必須手動處理
                    type="MANAGED":設置事務被管理,例如spring
            -->
            <transactionManager type="JDBC"/>
            <!--
                dataSource:設置數據源
                屬性:
                    type:設置數據源的類型,type="POOLED|UNPOOLED|JNDI"
                    type="POOLED":使用資料庫連接池,即會將創建的連接進行緩存,下次使用可以從緩存中直接獲取,不需要重新創建
                    type="UNPOOLED":不使用資料庫連接池,即每次使用連接都需要重新創建
                    type="JNDI":調用上下文中的數據源
            -->
            <dataSource type="POOLED">
                <property name="driver" value="${jdbc.driver}"/>
                <property name="url" value="${jdbc.url}"/>
                <property name="username" value="${jdbc.username}"/>
                <property name="password" value="${jdbc.password}"/>
            </dataSource>
        </environment>
    </environments>
    <!--引入映射文件-->
    <mappers>
        <!--
			映射文件較多時
            以包為單位,將包下所有的映射文件引入核心配置文件
            註意:
                1. 此方式必須保證mapper介面和mapper映射文件必須在相同的包下
                2. mapper介面要和mapper映射文件的名字一致
				3.在resources下創建和java目錄下包名相同的文件夾時,用/間隔不能用.
        -->
        <mapper resource="mappers/UserMapper.xml"/>
    </mappers>
</configuration>
jdbc.properties
jdbc.driver=com.mysql.cj.jdbc.Driver
jdbc.url=jdbc:mysql://localhost:3306/mybatis
jdbc.username=root
jdbc.password=xxxxxxx
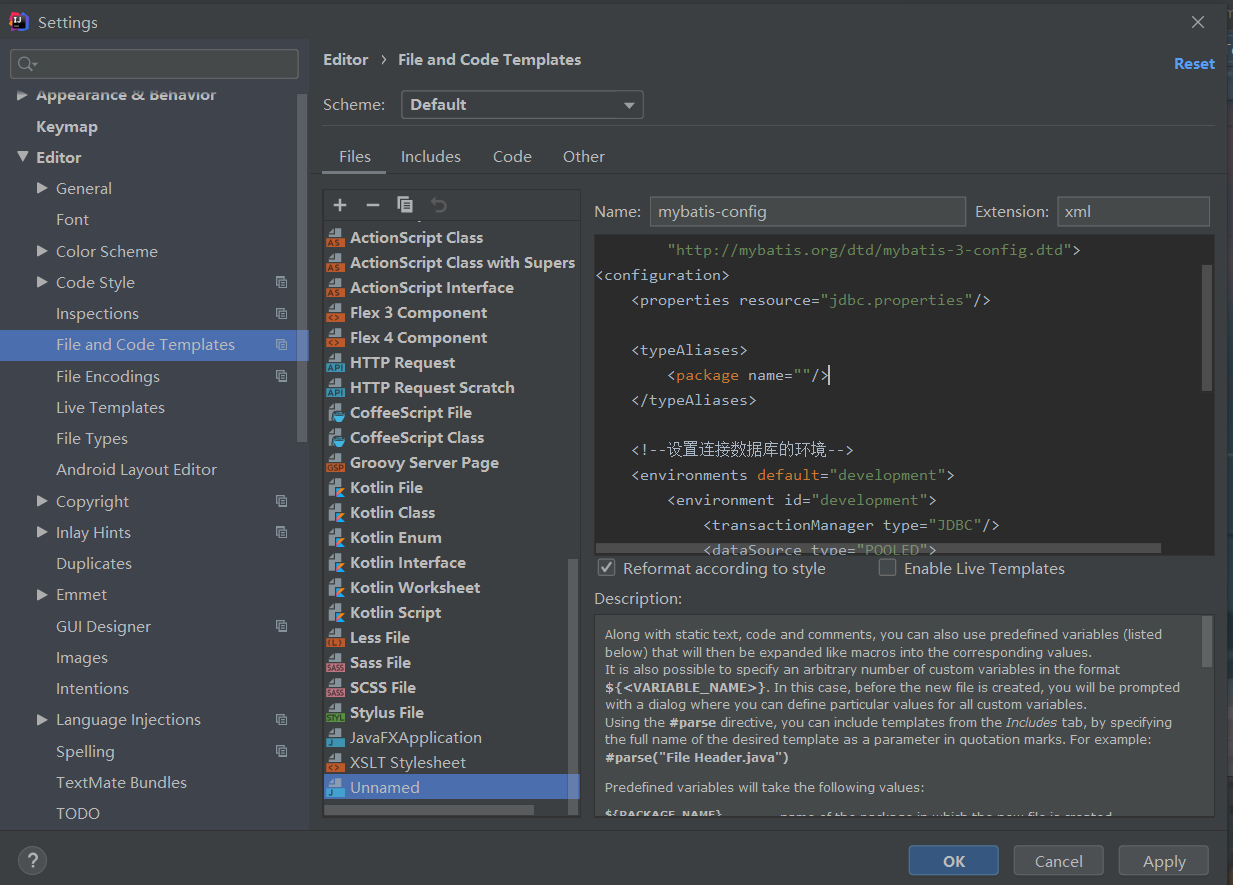
idea中設置核心配置文件模板

MyBatis中mapper獲取參數值的兩種方式
${}:字元串拼接的方式拼接sql,若為字元串類型或日期類型的欄位進行賦值時,需要手動加單引號
{}:使用占位符賦值的方式拼接sql,此時為字元串類型或日期類型的欄位進行賦值時,可以自動添加單引號
單個字面量類型的參數
{}中username可替換為任意值,${}要手動添加''
Test.java
public class ParameterTest {
    @Test
    public void testGetUserByUsername(){
        SqlSession sqlSession= SqlSessionUtils.getSqlSession();
        ParameterMapper mapper=sqlSession.getMapper(ParameterMapper.class);
        Users user=mapper.GetUserByUsername("李四");
        System.out.println(user);
    }
}
#{}
<select id="GetUserByUsername" resultType="users">
    select * from t_user where username=#{username}
</select>
${}
<select id="GetUserByUsername" resultType="users">
    select * from t_user where username='${username}'
</select>
多個字面量類型的參數
若mapper介面中的方法參數為多個時,此時MyBatis會自動將這些參數放在一個map集合中
- 以arg0,arg1…為鍵,以參數為值;
- 以param1,param2…為鍵,以參數為值;
{}中必須按照上面的參數寫
Test.java
public class ParameterTest {
    @Test
    public void testCheckLogin(){
        SqlSession sqlSession= SqlSessionUtils.getSqlSession();
        ParameterMapper mapper=sqlSession.getMapper(ParameterMapper.class);
        Users user=mapper.checkLogin("李四","123");
        System.out.println(user);
    }
}
#{}
<select id="checkLogin" resultType="users">
    select * from t_user where username=#{arg0} and password=#{arg1}
</select>
${}
<select id="checkLogin" resultType="User">
	select * from t_user where username ='${param1}' and password ='${param2}'
</select>
map集合類型的參數
mapper介面中的方法需要的參數為多個時,此時可以手動創建map集合,將這些數據放在map中只需要通過${}和#{}訪問map集合的鍵就可以獲取相對應的值
Test.java
public class ParameterTest {
    @Test
    public void testCheckLoginByMap(){
        SqlSession sqlSession= SqlSessionUtils.getSqlSession();
        ParameterMapper mapper=sqlSession.getMapper(ParameterMapper.class);
        Map<String,Object> map=new HashMap<>();
        map.put("username","李四");
        map.put("password","123");
        Users user=mapper.checkUserByMap(map);
        System.out.println(user);
    }
}
#{}
<select id="checkUserByMap" resultType="users">
    select * from t_user where username=#{username} and password=#{password}
</select>
${}略
實體類類型的參數
通過訪問實體類對象中的屬性名獲取屬性值
Test.java
public class ParameterTest {
    @Test
    public void testInsertUser(){
        SqlSession sqlSession= SqlSessionUtils.getSqlSession();
        ParameterMapper mapper=sqlSession.getMapper(ParameterMapper.class);
        int result=mapper.insertUser(new Users(null,"王五","123",23,"男","[email protected]"));
        System.out.println(result);
    }
}
#{}
<insert id="insertUser">
    insert into t_user values(null,#{username},#{password},#{age},#{sex},#{email})
</insert>
${}略
使用@Param註解命名參數
可以通過@Param註解標識mapper介面中的方法參數,此時,會將這些參數放在map集合中
- 以@Param註解的value屬性值為鍵,以參數為值
- 以param1,param2…為鍵,以參數為值
Test.java
public class ParameterTest {
    @Test
    public void testChesckLoginByParam(){
        SqlSession sqlSession= SqlSessionUtils.getSqlSession();
        ParameterMapper mapper=sqlSession.getMapper(ParameterMapper.class);
        Users user=mapper.checkLoginByParam("李四","123");
        System.out.println(user);
    }
}
mapper.java
Users checkLogdinByParam(@Param("username") String username,@Param("password") String password);
mapper.xml
<select id="checkLogdinByParam" resultType="users">
    select * from t_user where username=#{username} and password=#{password}
</select>
MyBatis查詢功能
查詢一個實體類對象
Users getUserById(@Param("id") Integer id);
<select id="getUserById" resultType="users">
    select * from t_user where id=#{id}
</select>
public class SelectMapperTest {
    @Test
    public void getUsereById(){
        SqlSession sqlSession= SqlSessionUtils.getSqlSession();
        SelectMapper mapper=sqlSession.getMapper(SelectMapper.class);
        System.out.println(mapper.getUserById(3));
    }
}
查詢List集合
List<Users> getAllUser();
<select id="getAllUser" resultType="users">
    select * from t_user
</select>
public class SelectMapperTest {
    @Test
    public void getAllUsers(){
        SqlSession sqlSession= SqlSessionUtils.getSqlSession();
        SelectMapper mapper=sqlSession.getMapper(SelectMapper.class);
        System.out.println(mapper.getAllUser());
    }
}
查詢單個數據
Integer getCount();
<select id="getCount" resultType="java.lang.Integer">
    select count(*) from t_user
</select>
public class SelectMapperTest {
    @Test
    public void testGetCount(){
        SqlSession sqlSession= SqlSessionUtils.getSqlSession();
        SelectMapper mapper=sqlSession.getMapper(SelectMapper.class);
        System.out.println(mapper.getCount());
    }
}
查詢一條數據為map集合
Map<String,Object> getUserByIdToMap(@Param("id") Integer id);
<select id="getUserByIdToMap" resultType="map">
    select * from t_user where id=#{id}
</select>
public class SelectMapperTest {
    @Test
    public void testGetUserByIdToMap(){
        SqlSession sqlSession= SqlSessionUtils.getSqlSession();
        SelectMapper mapper=sqlSession.getMapper(SelectMapper.class);
        System.out.println(mapper.getUserByIdToMap(3));
    }
}
查詢多條數據為map集合
法一:
List<Map<String,Object>> getAllUserToMap();
<select id="getAllUserToMap" resultType="map">
    select * from t_user
</select>
public class SelectMapperTest {
    @Test
    public void testGetAllUserToMap(){
        SqlSession sqlSession= SqlSessionUtils.getSqlSession();
        SelectMapper mapper=sqlSession.getMapper(SelectMapper.class);
        System.out.println(mapper.getAllUserToMap());
    }
}
法二:
@MapKey("id")
Map<String,Object> getAllUserToMap1();
<select id="getAllUserToMap1" resultType="map">
    select * from t_user
</select>
public class SelectMapperTest {
    @Test
    public void testGetAllUserToMap1(){
        SqlSession sqlSession= SqlSessionUtils.getSqlSession();
        SelectMapper mapper=sqlSession.getMapper(SelectMapper.class);
        System.out.println(mapper.getAllUserToMap1());
    }
}
特殊SQL的執行
模糊查詢
第三種方法最常用
List<Users> getUserByLike(@Param("username") String username);
<select id="getUserByLike" resultType="users">
    <!--select * from t_user where username like '%${username}%'-->
    <!--select * from t_user where username like concat('%',#{username},'%')-->
    select * from t_user where username like "%"#{username}"%"
</select>
public class SQLMapperTest {
    @Test
    public void testGetUserByLike(){
        SqlSession sqlSession= SqlSessionUtils.getSqlSession();
        SQLMapper mapper = sqlSession.getMapper(SQLMapper.class);
        List<Users> list=mapper.getUserByLike("a");
        System.out.println(list);
    }
}
批量刪除
int deleteMore(@Param("ids") String ids);
<delete id="deleteMore">
    delete from t_user where id in (${ids})
</delete>
public class SQLMapperTest {
    @Test
    public void testDeleteMore(){
        SqlSession sqlSession= SqlSessionUtils.getSqlSession();
        SQLMapper mapper = sqlSession.getMapper(SQLMapper.class);
        int result=mapper.deleteMore("1,2,3");
        System.out.println(result);
    }
}
動態設置表名
List<Users> getUserByTableName(@Param("tableName") String tableName);
<select id="getUserByTableName" resultType="users">
    select * from ${tableName}
</select>
public class SQLMapperTest {
    @Test
    public void testGetUserByTableName(){
        SqlSession sqlSession= SqlSessionUtils.getSqlSession();
        SQLMapper mapper = sqlSession.getMapper(SQLMapper.class);
        List<Users> list=mapper.getUserByTableName("t_user");
        System.out.println(list);
    }
}
添加功能獲取自增的主鍵
在插入一條數據的同時就可以獲得對應的id,不需要插入後再去查詢對應數據的id
useGeneratedKeys:設置使用自增的主鍵
keyProperty:因為增刪改有統一的返回值是受影響的行數,因此只能將獲取的自增的主鍵放在傳輸的參數user對象的某個屬性中
void insertUser(Users user);
<insert id="insertUser" useGeneratedKeys="true" keyProperty="id">
    insert into t_user values(null,#{username},#{password},#{age},#{sex},#{email})
</insert>
public class SQLMapperTest {
    @Test
    public void testInsertUser(){
        SqlSession sqlSession= SqlSessionUtils.getSqlSession();
        SQLMapper mapper = sqlSession.getMapper(SQLMapper.class);
        Users user=new Users(null,"趙六","123",23,"男","[email protected]");
        mapper.insertUser(user);
        System.out.println(user);
    }
}
自定義映射resultMap
欄位名與屬性名不一致
資料庫

Emp.java
package com.xust.mybatis.pojo;

public class Emp {
    private Integer eid;
    private String empName;
    private Integer age;
    private String sex;
    private String email;

    public Emp() {
    }

    public Emp(Integer eid, String empName, Integer age, String sex, String email) {
        this.eid = eid;
        this.empName = empName;
        this.age = age;
        this.sex = sex;
        this.email = email;
    }

    public Integer getEid() {
        return eid;
    }

    public void setEid(Integer eid) {
        this.eid = eid;
    }

    public String getEmpName() {
        return empName;
    }

    public void setEmpName(String empName) {
        this.empName = empName;
    }

    public Integer getAge() {
        return age;
    }

    public void setAge(Integer age) {
        this.age = age;
    }

    public String getSex() {
        return sex;
    }

    public void setSex(String sex) {
        this.sex = sex;
    }

    public String getEmail() {
        return email;
    }

    public void setEmail(String email) {
        this.email = email;
    }

    @Override
    public String toString() {
        return "Emp{" +
                "eid=" + eid +
                ", empName='" + empName + '\'' +
                ", age=" + age +
                ", sex='" + sex + '\'' +
                ", email='" + email + '\'' +
                '}';
    }
}
public class ResultMapTest {
    @Test
    public void testGetAllEmp(){
        SqlSession sqlSessaion= SqlSessionUtils.getSqlSession();
        EmpMapper mapper=sqlSessaion.getMapper(EmpMapper.class);
        List<Emp> list=mapper.getAllEmp();
        list.forEach(emp-> System.out.println(emp));
    }
}
方法一:為欄位起別名,使之與屬性名稱相同
EmpMapper.xml
<select id="getAllEmp" resultType="emp">
    select eid,emp_name empNaem,age,sex,email from t_emp
</select>
方法二:配置映射
在mybatis-config.xml中添加配置後自動將下劃線映射為駝峰
mybatis-config.xml
<!--設置mybatis全局配置-->
<settings>
    <!--將下劃線自動映射為駝峰,emp_name->empName-->
    <setting name="mapUnderscoreToCamelCase" value="true"/>
</settings>
EmpMapper.xml
<select id="getAllEmp" resultType="emp">
    select * from t_emp
</select>
方法三:自定義映射resultMap
所有屬性都要列出來
EmpMapper.xml
<!--id用於主鍵,result用於普通屬性-->
<resultMap id="empResultMap" type="Emp">
    <!--property屬性名,column欄位名-->
    <id property="eid" column="eid"></id>
    <result property="empName" column="emp_name"></result>
    <result property="age" column="age"></result>
    <result property="sex" column="sex"></result>
    <result property="email" column="email"></result>
</resultMap>

<!--getAllEmp-->
<select id="getAllEmp" resultMap="empResultMap">
    select * from t_emp
</select>
多對一映射
方法一:級聯操作
Emp.java
public class Emp {
    private Integer eid;
    private String empName;
    private Integer age;
    private String sex;
    private String email;
    private Dept dept;
    ......
}
Dept.java
package com.xust.mybatis.pojo;

public class Dept {
    private Integer did;
    private String deptName;
    ......
}
EmpMapper.xml
<resultMap id="empAndDeptResultMapOne" type="Emp">
    <id property="eid" column="eid"></id>
    <result property="empName" column="emp_name"></result>
    <result property="age" column="age"></result>
    <result property="sex" column="sex"></result>
    <result property="email" column="email"></result>
    <result property="dept.did" column="did"></result>
    <result property="dept.deptName" column="dept_name"></result>
</resultMap>
<!--getEmpAndDept-->
<select id="getAllEmp" resultMap="empAndDeptResultMapOne">
    select * from t_emp left join t_dept on t_emp.did=t_dept.did where t_emp.eid=#{eid}
</select>
方法二:association
association用來處理多對一的映射關係
javaType中是類型名
EmpMapper.xml
<resultMap id="empAndDeptResultMapTwo" type="Emp">
    <id property="eid" column="eid"></id>
    <result property="empName" column="emp_name"></result>
    <result property="age" column="age"></result>
    <result property="sex" column="sex"></result>
    <result property="email" column="email"></result>
    <association property="dept" javaType="Dept">
        <id property="did" column="did"></id>
        <result property="deptName" column="dept_name"></result>
    </association>
</resultMap>
方法三:分步查詢
EmpMapper.xml
<resultMap id="empAndDeptByStepResultMap" type="Emp">
    <id property="eid" column="eid"></id>
    <result property="empName" column="emp_name"></result>
    <result property="age" column="age"></result>
    <result property="sex" column="sex"></result>
    <result property="email" column="email"></result>
    <!--
        property:多對一對應屬性
        select:分佈查詢sql的唯一標識,全類名
        column:分佈查詢的條件
    -->
    <association property="dept"
                 select="com.xust.mybatis.mapper.DeptMapper.getEmpAndDeptByStepTwo"
                 column="did"></association>
</resultMap>
<!--getEmpAndDeptByStepOne-->
<select id="getEmpAndDeptByStepOne" resultMap="empAndDeptByStepResultMap">
    select * from t_emp where eid=#{eid}
</select>
DeptMapper.xml
<select id="getEmpAndDeptByStepTwo" resultType="Dept">
    select * from t_dept where did=#{did}
</select>
public class ResultMapTest {
    @Test
    public void testGetEmpAndDeptByStep(){
        SqlSession sqlSessaion= SqlSessionUtils.getSqlSession();
        EmpMapper mapper=sqlSessaion.getMapper(EmpMapper.class);
        Emp emp=mapper.getEmpAndDeptByStepOne(1);
        System.out.println(emp);
    }
}
一對多映射
Dept.java
public class Dept {
    private Integer did;
    private String deptName;
    private List<Emp> emps;
    ......
}
方法一:collection
collection:用來處理一對多的映射關係
ofType:表示該屬性對飲的集合中存儲的數據的類型
<resultMap id="deptAndEmpResultMAp" type="Dept">
    <id property="did" column="did"></id>
    <result property="deptName" column="dept_name"></result>
    <collection property="emps" ofType="Emp">
        <id property="eid" column="eid"></id>
        <result property="empName" column="emp_name"></result>
        <result property="age" column="age"></result>
        <result property="sex" column="sex"></result>
        <result property="email" column="email"></result>
    </collection>
</resultMap>
<!--getDeptAndEmp-->
<select id="getDeptAndEmp" resultMap="deptAndEmpResultMAp">
    select * from t_dept left join t_emp on t_dept.did=t_emp.did where t_dept.did=#{did}
</select>
public class ResultMapTest {
    @Test
    public void testGetDeptAndEmp(){
        SqlSession sqlSessaion= SqlSessionUtils.getSqlSession();
        DeptMapper mapper=sqlSessaion.getMapper(DeptMapper.class);
        Dept dept=mapper.getDeptAndEmp(1);
        System.out.println(dept);
    }
}
方法二:分步查詢
DeptMapper.xml
<resultMap id="deptAndEmpByStepResultMap" type="Dept">
    <id property="did" column="did"></id>
    <result property="deptName" column="dept_name"></result>
    <collection property="emps"
                select="com.xust.mybatis.mapper.EmpMapper.getDeptAndEmpByStepTwo"
                column="did"></collection>
</resultMap>
<!--getDeptAndEmpByStepOne-->
<select id="getDeptAndEmpByStepOne" resultMap="deptAndEmpByStepResultMap">
    select * from t_dept where did=#{did}
</select>
EmpMapper.xml
<select id="getDeptAndEmpByStepTwo" resultType="Emp">
    select * from t_emp where did=#{did}
</select>
public class ResultMapTest {
    @Test
    public void testGetDeptAndEmpByStep(){
        SqlSession sqlSessaion= SqlSessionUtils.getSqlSession();
        DeptMapper mapper=sqlSessaion.getMapper(DeptMapper.class);
        Dept dept=mapper.getDeptAndEmpByStepOne(1);
        System.out.println(dept);
    }
}
動態SQL
Mybatis框架的動態SQL技術是一種根據特定條件動態拼裝SQL語句的功能,它存在的意義是為瞭解決拼接SQL語句字元串時的痛點問題
if標簽
if標簽可以對test中接收到的屬性值進行判斷,為true則拼接if標簽下的內容
where後加1=1為了更好實現拼接效果,防止出現拼接錯誤
List<Emp> getEmpByCondition(Emp emp);
<select id="getEmpByCondition" resultType="Emp">
    select * from t_emp where 1=1
    <if test="empName!=null and empName!=''">
        and emp_name=#{empName}
    </if>
    <if test="age!=null and age!=''">
        and age=#{age}
    </if>
    <if test="sex!=null and sex!=''">
        and sex=#{sex}
    </if>
    <if test="email!=null and email!=''">
        and email=#{email}
    </if>
</select>
public class DynamicSQLMapperTest {
    @Test
    public void testGetEmpByCondition(){
        SqlSession sqlSessaion= SqlSessionUtils.getSqlSession();
        DynamicSQLMapper mapper=sqlSessaion.getMapper(DynamicSQLMapper.class);
        List<Emp> list=mapper.getEmpByCondition(new Emp(null,"張三",12,"男","[email protected]"));
        System.out.println(list);
    }
}
where標簽
相比直接使用if標簽,where標簽會自動清除多餘的and和or,條件全不滿足時where不起作用,不會出現拼接錯誤
但是where標簽只能將內容之前多餘的and和or清除,如果and和or放在拼接的語句之後,則不能清除
<select id="getEmpByCondition" resultType="Emp">
    select * from t_emp
    <where>
        <if test="empName!=null and empName!=''">
            emp_name=#{empName}
        </if>
        <if test="age!=null and age!=''">
            and age=#{age}
        </if>
        <if test="sex!=null and sex!=''">
            and sex=#{sex}
        </if>
        <if test="email!=null and email!=''">
            and email=#{email}
        </if>
    </where>
</select>
trim標簽
prefix/suffix:將trim標簽中內容前面/後面添加指定內容
prefixOverrides/suffixOverrides:將trim標簽中內容前面/後面去掉指定內容
<select id="getEmpByCondition" resultType="Emp">
    select * from t_emp
    <trim prefix="where" suffixOverrides="and|or">
        <if test="empName != null and empName !=''">
            emp_name = #{empName} and
        </if>
        <if test="age != null and age !=''">
            age = #{age} and
        </if>
        <if test="sex != null and sex !=''">
            sex = #{sex} or
        </if>
        <if test="email != null and email !=''">
            email = #{email}
        </if>
    </trim>
</select>
choose,when,otherwise標簽
相當於if...else if...else,只會執行一個
when至少要有一個,otherwise至多只有一個
<select id="getEmpByChoose" resultType="Emp">
    select * from t_emp
    <where>
        <choose>
            <when test="empName!=null and empName!=''">
                emp_name=#{empName}
            </when>
            <when test="age!=null and age!=''">
                age=#{age}
            </when>
            <when test="sex!=null and sex!=''">
                sex=#{sex}
            </when>
            <when test="email!=null and email!=''">
                email=#{email}
            </when>
            <otherwise>
                did=1
            </otherwise>
        </choose>
    </where>
</select>
foreach標簽
collection:設置要迴圈的數組或集合
item:表示集合或數組中的每一個數據
separator:設置迴圈體之間的分隔符,分隔符前後預設有一個空格
open:開始符
close:結束符
int deleteMoreByArray(@Param("eids") Integer[] eids);
<delete id="deleteMoreByArray">
    delete from t_emp where eid in
        <foreach collection="eids" item="eid" separator="," open="(" close=")">
            #{eid}
        </foreach>
</delete>
public class DynamicSQLMapperTest {
    @Test
    public void testDeleteMoreByArray(){
        SqlSession sqlSessaion= SqlSessionUtils.getSqlSession();
        DynamicSQLMapper mapper=sqlSessaion.getMapper(DynamicSQLMapper.class);
        int result=mapper.deleteMoreByArray(new Integer[]{6,7,8});
        System.out.println(result);
    }
}
批量刪除
,換成or
<delete id="deleteMoreByArray">
    delete from t_emp where eid in
        <foreach collection="eids" item="eid" separator="or" open="(" close=")">
            #{eid}
        </foreach>
</delete>
批量添加
int insertMoreByList(@Param("emps") List<Emp> emps);
<insert id="insertMoreByList">
    insert into t_emp values
    <foreach collection="emps" item="emp" separator=",">
        (null,#{emp.empName},#{emp.age},#{emp.sex},#{emp.email},null)
    </foreach>
</insert>
public class DynamicSQLMapperTest {
    @Test
    public void insertMoreByList() {
        SqlSession sqlSession = SqlSessionUtils.getSqlSession();
        DynamicSQLMapper mapper = sqlSession.getMapper(DynamicSQLMapper.class);
        Emp emp1 = new Emp(null,"a",1,"男","[email protected]");
        Emp emp2 = new Emp(null,"b",1,"男","[email protected]");
        Emp emp3 = new Emp(null,"c",1,"男","[email protected]");
        List<Emp> emps = Arrays.asList(emp1, emp2, emp3);
        mapper.insertMoreByList(emps);
        System.out.println(emps);
    }
}
SQL標簽
sql片段,可以記錄一段公共sql片段,在使用的地方通過include標簽進行引入
<sql id="empColumns">eid,emp_name,age,sex,email</sql>

<select id="getEmpByCondition" resultType="Emp">
	select <include refid="empColumns"></include> from t_emp
</select>
MyBatis緩存
MyBatis一級緩存
一級緩存是SqlSession級別的,通過同一個SqlSession查詢的數據會被緩存,下次查詢相同的數據,就會從緩存中直接獲取,不會從資料庫重新訪問
使一級緩存失效的四種情況:
- 不同的SqlSession對應不同的一級緩存
- 同一個SqlSession但是查詢條件不同
- 同一個SqlSession兩次查詢期間執行了任何一次增刪改操作
- 同一個SqlSession兩次查詢期間手動清空了緩存
MyBatis二級緩存
二級緩存是SqlSessionFactory級別,通過同一個SqlSessionFactory創建的SqlSession查詢的結果會被緩存;此後若再次執行相同的查詢語句,結果就會從緩存中獲取
二級緩存開啟的條件:
- 在核心配置文件中,設置全局配置屬性cacheEnabled=“true”,預設為true,不需要設置
- 在xml映射文件中設置標簽
- 二級緩存必須在SqlSession關閉或提交之後有效
- 查詢的數據所轉換的實體類類型必須實現序列化的介面
- 使二級緩存失效的情況:兩次查詢之間執行了任意的增刪改,會使一級和二級緩存同時失效
二級緩存相關配置
在mapper配置文件中添加的cache標簽可以設置一些屬性:
eviction屬性:緩存回收策略
- LRU(Least Recently Used) – 最近最少使用的:移除最長時間不被使用的對象。
- FIFO(First in First out) – 先進先出:按對象進入緩存的順序來移除它們。
- SOFT – 軟引用:移除基於垃圾回收器狀態和軟引用規則的對象。
- WEAK – 弱引用:更積極地移除基於垃圾收集器狀態和弱引用規則的對象。
- 預設的是 LRU
flushInterval屬性:刷新間隔,單位毫秒
- 預設情況是不設置,也就是沒有刷新間隔,緩存僅僅調用語句(增刪改)時刷新
size屬性:引用數目,正整數
- 代表緩存最多可以存儲多少個對象,太大容易導致記憶體溢出
readOnly屬性:只讀,true/false
- true:只讀緩存;會給所有調用者返回緩存對象的相同實例。因此這些對象不能被修改。這提供了很重要的性能優勢。
- false:讀寫緩存;會返回緩存對象的拷貝(通過序列化)。這會慢一些,但是安全,因此預設是false
MyBatis緩存查詢順序
先查詢二級緩存,因為二級緩存中可能會有其他程式已經查出來的數據,可以拿來直接使用
如果二級緩存沒有命中,再查詢一級緩存
如果一級緩存也沒有命中,則查詢資料庫
SqlSession關閉之後,一級緩存中的數據會寫入二級緩存
整合第三方緩存
向pom.xml中添加依賴
<!-- Mybatis EHCache整合包 -->
<dependency>
	<groupId>org.mybatis.caches</groupId>
	<artifactId>mybatis-ehcache</artifactId>
	<version>1.2.1</version>
</dependency>
<!-- slf4j日誌門面的一個具體實現 -->
<dependency>
	<groupId>ch.qos.logback</groupId>
	<artifactId>logback-classic</artifactId>
	<version>1.2.3</version>
</dependency>
resources下創建ehcache.xml文件
<?xml version="1.0" encoding="utf-8" ?>
<ehcache xmlns:xsi="http://www.w3.org/2001/XMLSchema-instance"
         xsi:noNamespaceSchemaLocation="../config/ehcache.xsd">
    <!-- 磁碟保存路徑 -->
    <diskStore path="D:\atguigu\ehcache"/>
    <defaultCache
            maxElementsInMemory="1000"
            maxElementsOnDisk="10000000"
            eternal="false"
            overflowToDisk="true"
            timeToIdleSeconds="120"
            timeToLiveSeconds="120"
            diskExpiryThreadIntervalSeconds="120"
            memoryStoreEvictionPolicy="LRU">
    </defaultCache>
</ehcache>
設置二級緩存類型
mapper.xml的cache標簽中
<cache type="org.mybatis.caches.ehcache.EhcacheCache"/>
加入logback日誌
<?xml version="1.0" encoding="UTF-8"?>
<configuration debug="true">
    <!-- 指定日誌輸出的位置 -->
    <appender name="STDOUT"
              class="ch.qos.logback.core.ConsoleAppender">
        <encoder>
            <!-- 日誌輸出的格式 -->
            <!-- 按照順序分別是:時間、日誌級別、線程名稱、列印日誌的類、日誌主體內容、換行 -->
            <pattern>[%d{HH:mm:ss.SSS}] [%-5level] [%thread] [%logger] [%msg]%n</pattern>
        </encoder>
    </appender>
    <!-- 設置全局日誌級別。日誌級別按順序分別是:DEBUG、INFO、WARN、ERROR -->
    <!-- 指定任何一個日誌級別都只列印當前級別和後面級別的日誌。 -->
    <root level="DEBUG">
        <!-- 指定列印日誌的appender,這裡通過“STDOUT”引用了前面配置的appender -->
        <appender-ref ref="STDOUT" />
    </root>
    <!-- 根據特殊需求指定局部日誌級別 -->
    <logger name="com.atguigu.crowd.mapper" level="DEBUG"/>
</configuration>
MyBatis逆向工程
正向工程:先創建Java實體類,由框架負責根據實體類生成資料庫表。Hibernate是支持正向工程的。
逆向工程:先創建資料庫表,由框架負責根據資料庫表,反向生成Java實體類,Mapper介面,Mapper映射文件。
創建逆向工程的步驟
1.添加依賴和插件
pom.xml
<packaging>jar</packaging>

<dependencies>
    <!-- MyBatis核心依賴包 -->
    <dependency>
        <groupId>org.mybatis</groupId>
        <artifactId>mybatis</artifactId>
        <version>3.5.10</version>
    </dependency>
    <!-- junit測試 -->
    <dependency>
        <groupId>junit</groupId>
        <artifactId>junit</artifactId>
        <version>4.12</version>
        <scope>test</scope>
    </dependency>
    <!-- MySQL驅動 -->
    <dependency>
        <groupId>mysql</groupId>
        <artifactId>mysql-connector-java</artifactId>
        <version>8.0.30</version>
    </dependency>
    <!-- log4j日誌 -->
    <dependency>
        <groupId>log4j</groupId>
        <artifactId>log4j</artifactId>
        <version>1.2.17</version>
    </dependency>
</dependencies>
<!-- 控制Maven在構建過程中相關配置 -->
<build>
    <!-- 構建過程中用到的插件 -->
    <plugins>
        <!-- 具體插件,逆向工程的操作是以構建過程中插件形式出現的 -->
        <plugin>
            <groupId>org.mybatis.generator</groupId>
            <artifactId>mybatis-generator-maven-plugin</artifactId>
            <version>1.3.0</version>
            <!-- 插件的依賴 -->
            <dependencies>
                <!-- 逆向工程的核心依賴 -->
                <dependency>
                    <groupId>org.mybatis.generator</groupId>
                    <artifactId>mybatis-generator-core</artifactId>
                    <version>1.3.2</version>
                </dependency>
                <!-- 資料庫連接池 -->
                <dependency>
                    <groupId>com.mchange</groupId>
                    <artifactId>c3p0</artifactId>
                    <version>0.9.2</version>
                </dependency>
                <!-- MySQL驅動 -->
                <dependency>
                    <groupId>mysql</groupId>
                    <artifactId>mysql-connector-java</artifactId>
                    <version>8.0.27</version>
                </dependency>
            </dependencies>
        </plugin>
    </plugins>
</build>
2.創建MyBatis核心配置文件
Mybatis.xml
<?xml version="1.0" encoding="UTF-8" ?>
<!DOCTYPE configuration
        PUBLIC "-//mybatis.org//DTD Config 3.0//EN"
        "http://mybatis.org/dtd/mybatis-3-config.dtd">
<configuration>
    <properties resource="jdbc.properties"/>
    <typeAliases>
        <package name=""/>
    </typeAliases>
    <environments default="development">
        <environment id="development">
            <transactionManager type="JDBC"/>
            <dataSource type="POOLED">
                <property name="driver" value="${jdbc.driver}"/>
                <property name="url" value="${jdbc.url}"/>
                <property name="username" value="${jdbc.username}"/>
                <property name="password" value="${jdbc.password}"/>
            </dataSource>
        </environment>
    </environments>
    <mappers>
        <package name=""/>
    </mappers>
</configuration>
3.將log4j.xml和jdbc.properties複製過來
4.創建逆向工程配置文件
文件名必須是generatorConfig.xml
MyBatis3Simple: 生成基本的CRUD
MyBatis3: 生成帶條件的CRUD(使用最多)
generatorConfig.xml
<?xml version="1.0" encoding="UTF-8"?>
<!DOCTYPE generatorConfiguration
        PUBLIC "-//mybatis.org//DTD MyBatis Generator Configuration 1.0//EN"
        "http://mybatis.org/dtd/mybatis-generator-config_1_0.dtd">
<generatorConfiguration>
    <!--
    targetRuntime: 執行生成的逆向工程的版本
    MyBatis3Simple: 生成基本的CRUD(清新簡潔版)
    MyBatis3: 生成帶條件的CRUD(奢華尊享版)
    -->
    <context id="DB2Tables" targetRuntime="MyBatis3Simple">
        <!-- 資料庫的連接信息 -->
        <jdbcConnection driverClass="com.mysql.cj.jdbc.Driver"
                        connectionURL="jdbc:mysql://localhost:3306/mybatis"
                        userId="root"
                        password="xpx24167830">
        </jdbcConnection>
        <!-- javaBean的生成策略-->
        <javaModelGenerator targetPackage="com.xust.mybatis.pojo" targetProject=".\src\main\java">
            <!--是否能夠使用子包-->
            <property name="enableSubPackages" value="true" />
            <!--去掉字元串前後空格-->
            <property name="trimStrings" value="true" />
        </javaModelGenerator>
        <!-- SQL映射文件的生成策略 -->
        <sqlMapGenerator targetPackage="com.xust.mybatis.mapper"
                         targetProject=".\src\main\resources">
            <property name="enableSubPackages" value="true" />
        </sqlMapGenerator>
        <!-- Mapper介面的生成策略 -->
        <javaClientGenerator type="XMLMAPPER"
                             targetPackage="com.xust.mybatis.mapper" targetProject=".\src\main\java">
            <property name="enableSubPackages" value="true" />
        </javaClientGenerator>
        <!-- 逆向分析的表 -->
        <!-- tableName設置為*號,可以對應所有表,此時不寫domainObjectName -->
        <!-- domainObjectName屬性指定生成出來的實體類的類名 -->
        <table tableName="t_emp" domainObjectName="Emp"/>
        <table tableName="t_dept" domainObjectName="Dept"/>
    </context>
</generatorConfiguration>
5.執行MBG插件的generate目標
雙擊mybatis-generator:generate
6.通過Example進行查詢演示
public class MBGTest {
    @Test
    public void testMBG(){
        try {
            InputStream is= Resources.getResourceAsStream("mybatis-config.xml");
            SqlSessionFactory sqlSessionFactory=new SqlSessionFactoryBuilder().build(is);
            SqlSession sqlSession=sqlSessionFactory.openSession(true);
            EmpMapper mapper=sqlSession.getMapper(EmpMapper.class);

            //查詢所有
//            List<Emp> list=mapper.selectByExample(null);
//            list.forEach(emp-> System.out.println(emp));

            //條件查詢
            EmpExample example=new EmpExample();
            example.createCriteria().andEmpNameEqualTo("張三").andAgeGreaterThanOrEqualTo(11);
            List<Emp> list=mapper.selectByExample(example);
            list.forEach(emp-> System.out.println(emp));
        } catch (IOException e) {
            e.printStackTrace();
        }
    }
}
分頁插件
步驟
添加依賴
<!-- https://mvnrepository.com/artifact/com.github.pagehelper/pagehelper -->
<dependency>
	<groupId>com.github.pagehelper</groupId>
	<artifactId>pagehelper</artifactId>
	<version>5.2.0</version>
</dependency>
配置插件
<plugins>
    <plugin interceptor="com.github.pagehelper.PageInterceptor"></plugin>
</plugins>
開啟分頁功能
public class PageHelperTest {
    @Test
    public void testPageHelper(){
        try {
            InputStream is= Resources.getResourceAsStream("mybatis-config.xml");
            SqlSessionFactory sqlSessionFactory=new SqlSessionFactoryBuilder().build(is);
            SqlSession sqlSession=sqlSessionFactory.openSession(true);
            EmpMapper mapper=sqlSession.getMapper(EmpMapper.class);

            PageHelper.startPage(1,4);
            List<Emp> list = mapper.selectByExample(null);
            list.forEach(emp-> System.out.println(emp));
        } catch (IOException e) {
            e.printStackTrace();
        }
    }
}


