
一.相關介紹 Dockerfile:關於Dockerfile的使用說明,我在文章《讓.NetCore程式跑在任何有docker的地方》中有說到,這裡不在贅述,需要的可以先看下,本文主要介紹Jenkinsfile結合dockerfile配合使用,自動構建.NetCore應用程式。 Jenkinsfil ...
一.相關介紹
Dockerfile:關於Dockerfile的使用說明,我在文章《讓.NetCore程式跑在任何有docker的地方》中有說到,這裡不在贅述,需要的可以先看下,本文主要介紹Jenkinsfile結合dockerfile配合使用,自動構建.NetCore應用程式。 Jenkinsfile :Jenkinsfile 是 Jenkins 2.x 或更高版本核心特性 Pipeline(流水線) 的腳本,或者說對於Jenkins 流水線的定義被寫在一個叫Jenkinsfile的文本文件中,該文件可以被提交到項目的源代碼的控制倉庫。這是"流水線即代碼"的基礎; 將CD 流水線作為應用程式的一部分,像其他代碼一樣進行版本化和審查。 創建 `Jenkinsfile`並提交它到源代碼控制中提供了以下幾個好處:- 自動地為所有分支創建流水線構建過程並拉取請求。
- 在流水線上代碼複查/迭代 (以及剩餘的源代碼)。
- 對流水線進行審計跟蹤。
- 該流水線的真正的源代碼 , 可以被項目的多個成員查看和編輯。
二.Jenkins和GitLab的安裝
工欲善其事,必先利其器 Jenkins的安裝可以看我之前的一篇文章:https://www.cnblogs.com/peyshine/p/12891935.html Gitlab的安裝推薦看下這篇文章:https://segmentfault.com/a/1190000021593151三.打通GitLab Webhooks與Jenkins流程
1.這裡先新建一個.net core應用程式,除了新增加了一個Jenkinsfile文件以外,其他沒有任何代碼的修改 註意,Jenkinsfile的J需要大寫,我測試了,小寫會提示找不到文件.
Jenkinsfile中添加了幾行測試代碼:
註意,Jenkinsfile的J需要大寫,我測試了,小寫會提示找不到文件.
Jenkinsfile中添加了幾行測試代碼:
pipeline{
    agent any
    stages {
        stage('Build') {
            steps{
                echo 'This is a build step'
            }
        }
        stage('Test') {
            steps{
                echo 'This is a test step'
            }
        }
        stage('Deploy') {
            steps{
                echo 'This is a deploy step'
            }
        }
    }
}
然後將程式文件push到Gitlab上
2.在Jenkins系統管理,系統配置中,在Gitlab處添加相關信息
 下麵點擊添加憑據,類型選擇GitLab Api Token,由於這個Token需要由GitLab來提供,所以先到GitLab生成一個Api Token
3.生成Api Token
下麵點擊添加憑據,類型選擇GitLab Api Token,由於這個Token需要由GitLab來提供,所以先到GitLab生成一個Api Token
3.生成Api Token

 點擊創建之後,Token就生效了
將Api Token複製到Jenkins中,點擊添加
點擊創建之後,Token就生效了
將Api Token複製到Jenkins中,點擊添加
 添加完成後,就可以在Credentials中選擇剛剛添加好的憑據
 點擊保存,這樣系統配置中的Gitlab的全局配置就生效了
4.新建流水線任務測試
下麵打開Jenkins,新建一個流水線發佈任務,取名test,然後點擊確定.
點擊保存,這樣系統配置中的Gitlab的全局配置就生效了
4.新建流水線任務測試
下麵打開Jenkins,新建一個流水線發佈任務,取名test,然後點擊確定.
 勾選構建觸發器
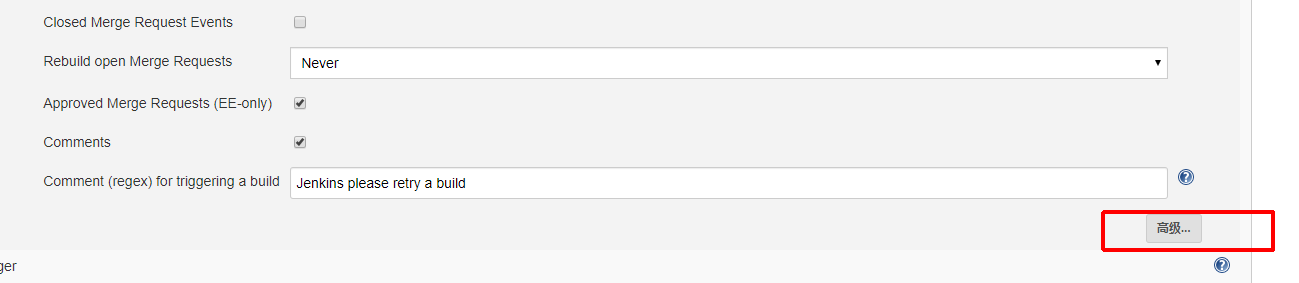
 由於我們需要達到的目的是在GitLab提交代碼,Jenkins可以自動構建相關任務,所以我們還需要配置一個觸發器。如圖,點擊下麵的"高級"按鈕
 點擊“Generate”,生成一個SecretToken
 然後再流水線Tab定義處,下拉選擇“Pipeline script from SCM”,SCM選擇Git,然後填寫代碼庫的地址和訪問用戶密碼,下麵腳本路徑有個Jenkinsfile,意思就是從我們提交到源代碼管理根目錄下麵的Jenkinsfile中讀取相關定義好的的流水線任務流程
 點擊保存
在Gitlab如下圖地方進入,來配置web鉤子
點擊保存
在Gitlab如下圖地方進入,來配置web鉤子


 將在Jenkin中截圖的一個url和生成的token分別填寫在下方,在觸發器的地方勾選上 Push events,然後點擊下方的“Add webhook” 按鈕。如果你還有其他事件發生時想觸發Jenkins的任務,也可以自行勾選上
 添加完成後點擊測試
 這個時候可以看到上方出現了成功的提示
 而另一邊Jenkins中,正在執行任務,並且任務的執行是 GitLab有推送任務

 完成之後,可以看到流水線任務流程圖
 下麵通過代碼推送來測一下,我在跟目錄新建一個空的README.md文件,然後推送,推送完成後可以看到Jenkins開始執行第二次構建任務
 至此,從GitLab提交代碼到Jenkins自動構建的整個流程已經完成了,細心的你會發現,只是流程跑通了,這個Jenkinsfile沒有實質性的內容,下麵進入Jenkinsfile
四.接入Jenkinsfile,Dockerfile實現自動發佈
編寫Dockerfile如下:FROM mcr.microsoft.com/dotnet/core/sdk:3.1-buster AS build COPY *.csproj ./app/ WORKDIR /app RUN dotnet restore COPY . ./ RUN dotnet publish -o out /p:PublishWithAspNetCoreTargetManifest="false" FROM mcr.microsoft.com/dotnet/core/aspnet:3.1-buster-slim AS runtime ENV ASPNETCORE_URLS http://+:80 WORKDIR /app COPY --from=build /app/out ./ ENTRYPOINT ["dotnet", "WebApplication_Jenkinsfile.dll"]編寫Jenkinsfile如下:
pipeline{
    agent any
    stages {
        stage('Checkout') {
            steps{
            git credentialsId: '85ca7e47-532e-4901-9828-50a8da071d16', url: 'http://xxx.gitlab.com/webapplication_jenkinsfile.git', branch:'master'
                    echo '---This is a Checkout step---'
            }
        }
        stage('Build') {
            steps{
                    sh '''cd WebApplication_Jenkinsfile
            docker rmi -f docker_webapplication_test:1.0
            docker build -t docker_webapplication_test:1.0 .'''
            echo '---This is a Build step---'
            }
        }
        stage('Run') {
            steps{
            sh '''docker rm -f docker_webapplication_test
            docker run --name docker_webapplication_test -d -p 7489:80 docker_webapplication_test:1.0
            '''
                    echo '---This is a run step---'
            }
        }
    }
}
說明:
stages 必須,包括順序執行的一個或多個stage命令,在pipeline內僅能使用一次,通常位於agent/options後面 steps 必須,steps位於stage指令塊內部,包括一個或多個step。僅有一個step的情況下可以忽略關鍵字step及其{} 這裡為了演示,只添加了幾個核心的步驟,可以根據需要自行添加自動測試,郵件提醒等額外步驟 流水線語法,可以參照下圖中的示例步驟點擊後,可以生成腳本信息,上面Jenkinsfile中的git credentialsId信息就是在這裡生成的 完成之後,將Jenkinsfile和Dockerfile推送到Gitlab,推送成功可以看到如下圖的Jenkins自動構建過程,並且遵照定義規範發佈了應用
 如果需要查看日誌,或者在發佈失敗後查看失敗原因,可以通過下麵的 Console Output來查看
 Console Output中的詳細日誌信息如下圖,可以看到構建過程是遵循在Dockerfile中的定義
 docker 容器運行狀態檢查
 自動部署效果截圖
 五.結束總結
在定義web鉤子的時候,我勾選的是push events,所以每次有提交代碼到master,都會自動去走Jenkinsfile中的流水線任務,在實際生產中,如果不想這樣操作,可以將持續集成流水線與持續發佈流水線獨立開來
其實只需要前期一次將Jenkins和Gitlab觸發器打通之後,後面只需要在源代碼中維護Dockerfile和Jenkinsfile即可,這是比較優雅的一種CI、CD方式,動手試試吧!
五.結束總結
在定義web鉤子的時候,我勾選的是push events,所以每次有提交代碼到master,都會自動去走Jenkinsfile中的流水線任務,在實際生產中,如果不想這樣操作,可以將持續集成流水線與持續發佈流水線獨立開來
其實只需要前期一次將Jenkins和Gitlab觸發器打通之後,後面只需要在源代碼中維護Dockerfile和Jenkinsfile即可,這是比較優雅的一種CI、CD方式,動手試試吧!

