
我們在使用Spring框架中,特別是框架級的功能,經常看到有@Import導入功能, 我就介紹下它能導入什麼,首先聲明下@Import是註解,導入類型可分為三類: 1. 導入配置 @Configuration,類似於spring早期版本2.5的import xml文件一樣, <?xml vers ...
我們在使用Spring框架中,特別是框架級的功能,經常看到有@Import導入功能,
![]()
我就介紹下它能導入什麼,首先聲明下@Import是註解,導入類型可分為三類:
1. 導入配置 @Configuration,類似於spring早期版本2.5的import xml文件一樣,
<?xml version="1.0" encoding="UTF-8"?>
<beans xmlns="http://www.springframework.org/schema/beans"
       xmlns:xsi="http://www.w3.org/2001/XMLSchema-instance"
       xsi:schemaLocation="
       http://www.springframework.org/schema/beans http://www.springframework.org/schema/beans/spring-beans-2.5.xsd
       ">

    <import resource="cms-validator-service.xml"/>
    <import resource="cms-validator-dao.xml"/>

</beans>
只是現在註解搶了風頭,但目的一樣,用於使用所有標有@configuration註解的配置。
下麵我就寫個小例子,怎麼建java項目就略了
先建java主包com.spring, 然後分別建子包
com.spring.service, com.spring.service.impl, com.spring.config, com.spring.test1.1 建立服務介面
package com.spring.service;

/**
 *
 * @author dgm
 * @describe "日誌服務介面"
 */
public interface LogService {

    void print(String message);
}
1.2 建立服務實現類,分三種情況,控制台、文件和資料庫mysql
package com.spring.service.impl;

import org.springframework.stereotype.Component;
import com.spring.service.LogService;

/**
 * @author dgm
 * @describe "日誌到控制台"
 */
@Component
public class StdOutLogServiceImpl implements LogService {

	@Override
	public void print(String message) {
        System.out.println(message);
        System.out.println("寫日誌到控制台!");
	}
}


import java.io.File;
import java.io.FileWriter;
import java.io.IOException;

import org.springframework.stereotype.Component;
import com.spring.service.LogService;

/**
 *
 * @author dgm
 * @describe "日誌到文件"
 */
@Component
public class FileLogServiceImpl implements LogService {

	private static final String FILE_NAME="d://LogService.txt";
	@Override
	public void print(String message) {
		try {
			File file = new File(FILE_NAME);
			FileWriter fw = null;
			// true:表示是追加的標誌
			fw = new FileWriter(file, true);
			fw.write(message+"\n");
			fw.close();

	        System.out.println(message);
			System.out.println("寫日誌入文件!");
		} catch (IOException e) {
		}
	}
}


/**
 * @author dgm
 * @describe "寫日誌入mysql資料庫"
 */
@Component
public class MysqlLogServiceImpl implements LogService {

	@Override
	public void print(String message) {
        System.out.println(message);
        System.out.println("寫日誌入資料庫");
	}
}
1.3 寫配置類,三個服務實現類對應三個@Configuration
package com.spring.config;

import org.springframework.context.annotation.Bean;
import org.springframework.context.annotation.Configuration;

import com.spring.service.LogService;
import com.spring.service.impl.StdOutLogServiceImpl;

@Configuration
public class StdOutConfig {

	@Bean(name="stdOutLogServiceImpl")
	public LogService stdOutLogServiceImpl(){
		return new StdOutLogServiceImpl();
	}
}


import org.springframework.context.annotation.Bean;
import org.springframework.context.annotation.Configuration;

import com.spring.service.LogService;
import com.spring.service.impl.FileLogServiceImpl;

@Configuration
public class FileLogConfig {

	@Bean(name="fileLogServiceImpl")
	public LogService fileLogServiceImpl(){
		return new FileLogServiceImpl();
	}
}

import org.springframework.context.annotation.Bean;
import org.springframework.context.annotation.Configuration;

import com.spring.service.LogService;
import com.spring.service.impl.MysqlLogServiceImpl;

@Configuration
public class MysqlLogConfig {

	@Bean(name="mysqlLogServiceImpl")
	public LogService mysqlLogServiceImpl(){
		return new MysqlLogServiceImpl();
	}
}
然後@Import註解登場了
import org.springframework.context.annotation.Configuration;
import org.springframework.context.annotation.Import;

@Configuration
@Import({StdOutConfig.class, FileLogConfig.class, MysqlLogConfig.class})
public class LogParentConfig {

}
1.4 建立測試類看效果
import org.springframework.context.annotation.AnnotationConfigApplicationContext;
import com.spring.config.LogParentConfig;
import com.spring.service.*;

/**
 * @author dgm
 * @describe "java configuration bean"
 */
public class LogConfigurationAppTest {
	public static void main(String[] args) {
		AnnotationConfigApplicationContext  context = new AnnotationConfigApplicationContext(
				LogParentConfig.class);
		//控制台
		LogService obj = (LogService) context.getBean("stdOutLogServiceImpl");
		System.out.println(obj);
		obj.print("控制台輸出");
		//file
		obj = (LogService) context.getBean("fileLogServiceImpl");
		System.out.println(obj);
		obj.print("文件輸出");
		//mysql
		obj = (LogService) context.getBean("mysqlLogServiceImpl");
		System.out.println(obj);
		obj.print("資料庫mysql");

		context.close();
	}
}
輸出效果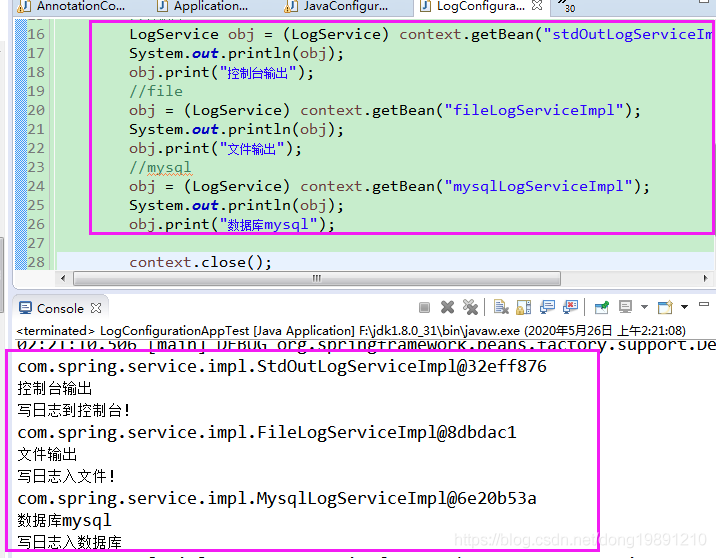

2. 導入實現ImportSelector介面或子介面DeferredImportSelector的類
@Import annotation can also be configured with an ImportSelector implementation to select @Configuration classes programmatically, based on some selection criteria.
下麵我也演示下,這個很重要,框架里和spring擴展開發用的多,先建立備用子包com.spring.bean和com.spring.importSelector,然後建立配置文件目錄conf
2.1 實現了ImportSelector
2.1.1 建立輔助類ApplicationProperties.java和外置配置文件myapp.properties
package com.spring.bean;

public class ApplicationProperties {
	private String connectionUrl;
	private String connectionName;

	public String getConnectionUrl() {
		return connectionUrl;
	}

	public void setConnectionUrl(String connectionUrl) {
		this.connectionUrl = connectionUrl;
	}

	public String getConnectionName() {
		return connectionName;
	}

	public void setConnectionName(String connectionName) {
		this.connectionName = connectionName;
	}

	@Override
	public String toString() {
		return "ApplicationProperties [connectionUrl=" + connectionUrl
				+ ", connectionName=" + connectionName + "]";
	}
}
然後在conf目錄下建立配置文件myapp.properties,內容如下:
app.url=https://github.com/dongguangming
app.name=dongguangming
2.1.2 建立@Configuration配置類
@Configuration
@PropertySource("classpath:conf/myapp.properties")
public class AppConfig {
	@Autowired
	ConfigurableEnvironment environment;

	@Bean
	ApplicationProperties appProperties() {
		ApplicationProperties bean = new ApplicationProperties();
		bean.setConnectionUrl(environment.getProperty("app.url"));
		bean.setConnectionName(environment.getProperty("app.name"));
		return bean;
	}
}
2.1.3 建立實現了ImportSelector介面的導入類,返回列表裡的值是有標誌@Configuration
public class LogImportSelector implements  ImportSelector{

	@Override
	public String[] selectImports(AnnotationMetadata importingClassMetadata) {

		    return new String[]{"com.spring.config.AppConfig","com.spring.config.LogParentConfig"};
	}

}
2.1.4 建立有@import功能的配置類,導入2.1.3的實現類
package com.spring.config;

import org.springframework.context.annotation.Configuration;
import org.springframework.context.annotation.Import;

import com.spring.importSelector.LogImportSelector;

@Configuration
@Import(LogImportSelector.class)
public class LogImportSelectorConfig {

}
2.1.5 編寫測試類
import org.springframework.context.annotation.AnnotationConfigApplicationContext;

import com.spring.bean.ApplicationProperties;
import com.spring.config.LogImportSelectorConfig;
import com.spring.service.*;

/**
 * @author dgm
 * @describe "java configuration bean"
 */
public class LogImportSelectorConfigurationAppTest {
	public static void main(String[] args) {
		AnnotationConfigApplicationContext context = new AnnotationConfigApplicationContext(
				LogImportSelectorConfig.class);
		// 控制台
		LogService obj = (LogService) context.getBean("stdOutLogServiceImpl");
		System.out.println(obj);
		obj.print("控制台輸出");
		// file
		obj = (LogService) context.getBean("fileLogServiceImpl");
		System.out.println(obj);
		obj.print("文件輸出");
		// mysql
		obj = (LogService) context.getBean("mysqlLogServiceImpl");
		System.out.println(obj);
		obj.print("資料庫mysql");

		//
		ApplicationProperties ap = context.getBean(ApplicationProperties.class);
		System.out.println(ap);

		context.close();
	}
}
輸出效果: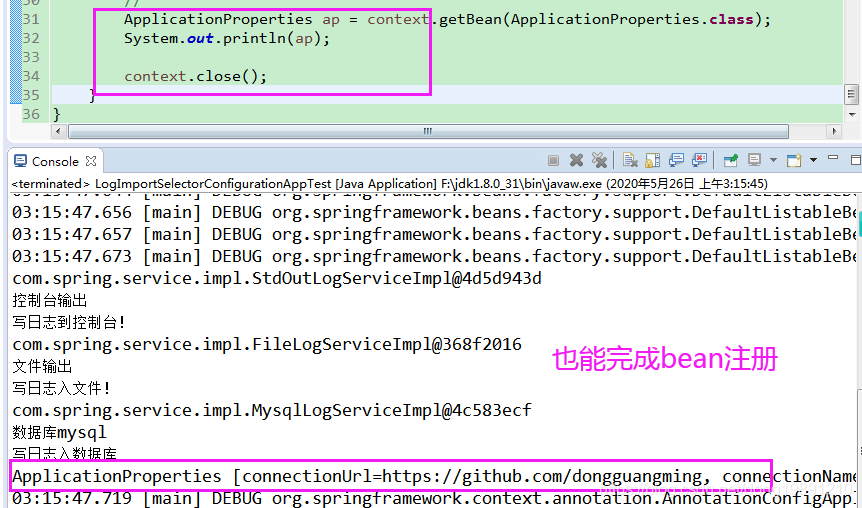
![]()
效果不錯,也能完成bean的註冊
還有一種基於註解的變體,我也示例下,先建個子包com.spring.annotation
建立自定義註解:
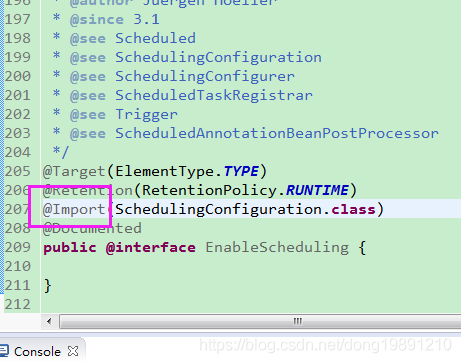
@Target(ElementType.TYPE)
@Retention(RetentionPolicy.RUNTIME)
@Documented
@Import(LogImportSelector.class)
/**
 * @author dgm
 * @describe "自定義Enable功能"
 */
public @interface EnableLogService {
	//預設日誌輸出到控制台
	String logType() default "stdout";

	@AliasFor("value")
	String[] basePackages() default {};

	@AliasFor("basePackages")
	String[] value() default {};
}
然後修改導入選擇器實現類,根據啟用日誌功能時傳的參數絕對載入哪個bean
AnnotationAttributes attributes = AnnotationAttributes
				.fromMap(importingClassMetadata.getAnnotationAttributes(
						EnableLogService.class.getName(), false));
		System.out.println(attributes);

		//根據日誌類型確定載入bean
		String logType = attributes.getString("logType");

		if (logType.equalsIgnoreCase("StdOut")) {
			return new String[] { "com.spring.config.AppConfig",
					"com.spring.config.StdOutConfig" };
		} else if (logType.equalsIgnoreCase("File")) {
			return new String[] { "com.spring.config.AppConfig",
					"com.spring.config.FileLogConfig" };
		} else if (logType.equalsIgnoreCase("Mysql")) {
			return new String[] { "com.spring.config.AppConfig",
					"com.spring.config.MysqlLogConfig" };
		} else {
			return new String[] { "com.spring.config.AppConfig",
					"com.spring.config.LogParentConfig" };
		}
修改配置類,追加自定義註解@EnableLogService,並設置參數為file(可選stdout,file,mysql)
@Configuration
//@Import(LogImportSelector.class)
@EnableLogService(logType="file")
public class LogImportSelectorConfig {

}
修改測試類,此時不再是三種日誌實現的bean都載入,按配置參數載入
LogService obj = (LogService) context.getBean("fileLogServiceImpl");
		System.out.println(obj);
obj.print("文件輸出"); 
![]()
就因為配置了@EnableLogService(logType="file"),只載入了一個日誌實現bean
2.2 實現了 DeferredImportSelector
public interface DeferredImportSelector extends ImportSelector {
}
可是看出它是2.1的子介面
The configuration class directly registered with the application context given preference over imported one. That means a bean of type T, configured in the main configuration will be used instead of a bean of the same type T from imported configuration. That applies to ImportSelector as well. On the other hand, DeferredImportSelector applies after all other configuration beans have been processed.
我們可以比較下實現兩種介面的區別
在主選擇器的配置類LogImportSelectorConfig.java中增加
@Bean
	LogBean logBean() {
		return new LogBean();
	}

	@Bean(name = "fileLogServiceImpl")
	public LogService fileLogServiceImpl() {
		return new FileLogServiceImpl(" 來自LogImportSelectorConfig  ");
	}
在文件配置類FileLogConfig.java中修改為
@Bean(name="fileLogServiceImpl")
	public LogService fileLogServiceImpl(){
		return new FileLogServiceImpl("來自  FileLogConfig");
	}
選擇器實現類還是
public class LogImportSelector implements ImportSelector {。。。}執行測試代碼
LogBean bean = context.getBean(LogBean.class);
bean.printMessage(); 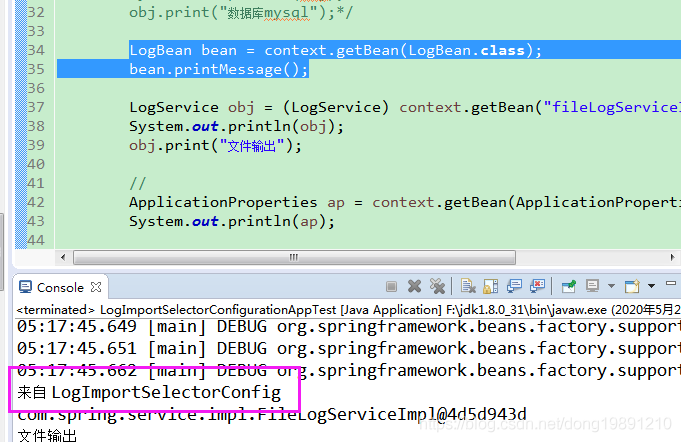
![]()
此時修改選擇器實現的介面改為DeferredImportSelector,其它不改
public class LogImportSelector implements DeferredImportSelector {。。。}
再次執行測試

2.3 導入實現了ImportBeanDefinitionRegistrar介面的類
可以先瞄下介面的如何定義和定義了什麼
public interface ImportBeanDefinitionRegistrar {


