
測試的時候找個自己封裝的方法或UI控制項就可以了 這裡用我剛封裝的Redirect重定向的請求體為例 1, 在github上創建一個Redirect,重要:記得選擇開源協議 (MIT)(如果木有GitHub那先百度一下) 2, 使用 Github Desktop Clone (克隆) Redirect ...
測試的時候找個自己封裝的方法或UI控制項就可以了 這裡用我剛封裝的Redirect重定向的請求體為例
1, 在github上創建一個Redirect,重要:記得選擇開源協議 (MIT)(如果木有GitHub那先百度一下)

2, 使用 Github Desktop Clone (克隆) Redirect 到電腦桌面
註: 修改Redirect文件里的東西記得及時更新,如何使用Github Desktop請百度
3, cd到當前目錄
$ cd Redirect
4, 創建一個podspec文件,命令:
$ pod spec create Redirect
5, 編輯 podspec文件,這裡是用vim打開的,命令:(當然使用文本編輯器打開也可以)
$ vim Redirect.podspec
6, 創建之後會自動生成一個模板,裡面會有詳細的註釋,我們只需要按需要修改這個文件即可,
下邊這個是測試的時候我編輯的 (如果需要更更多的配置 可以參考別的開源項目的podspec文件):
(註: 以#開頭的是可以刪掉滴)
Pod::Spec.new do |s|


  s.name         = "Redirect"
  s.version      = "0.0.1"
  s.summary      = "Redirecting Requests."
  s.description  = <<-DESC
                          This is a Redirecting Requests.
                   DESC
  s.homepage     = "http://www.cnblogs.com/ljcgood66/"
  s.license      = "MIT"
  s.author       = { "LiJunCheng" => "[email protected]" }
  s.platform     = :ios
  s.source       = { :git => "https://github.com/ganlinmeng/Redirect.git", :tag =>"0.0.1" }
  s.source_files  = "Redirect", "Redirect/**/*.{h,m}"
  s.exclude_files = "Classes/Exclude"
  s.framework  = "UIKit"
  # s.frameworks = "SomeFramework", "AnotherFramework"
  # s.library   = "iconv"
  # s.libraries = "iconv", "xml2"


  # ――― Project Settings ――――――――――――――――――――――――――――――――――――――――――――――――――――――――― #
  #
  #  If your library depends on compiler flags you can set them in the xcconfig hash
  #  where they will only apply to your library. If you depend on other Podspecs
  #  you can include multiple dependencies to ensure it works.

  # s.requires_arc = true

  # s.xcconfig = { "HEADER_SEARCH_PATHS" => "$(SDKROOT)/usr/include/libxml2" }
  # s.dependency "JSONKit", "~> 1.4"

end
s.name:名稱,pod search 搜索的關鍵詞,註意這裡一定要和.podspec的名稱一樣,否則報錯
s.version:版本號
s.ios.deployment_target:支持的pod最低版本
s.summary: 簡介
s.homepage:項目主頁地址
s.license:許可證
s.author:作者
s.social_media_url:社交網址
s.source:項目的地址
s.source_files:需要包含的源文件
s.resources: 資源文件
s.requires_arc: 是否支持ARC
s.dependency:依賴庫,不能依賴未發佈的庫
s.dependency:依賴庫,如有多個可以這樣寫
(註: 也有這樣寫: s.license= { :type => "MIT", :file => "LICENSE" }
7, 創建tag,並推送到github,依次執行以下命令:
$ git add .
$ git commit -m "0.0.1"
$ git tag 0.0.1
$ git push --tags
$ git push origin master
(註: 當執行完 git push --tags 後終端會讓你輸入GitHub的賬號和密碼)
Username for 'https://github.com':
Password for 'https://[email protected]':
8, 驗證podspec文件
$ pod spec lint Redirect.podspec
如果終端提示 (but you can use `--allow-warnings` to ignore them).
你可以
$ pod spec lint Redirect.podspec --allow-warnings
- 如果驗證不通過,會有詳細的ERROR和WARING提示,根據提示依次解決,然後回到第7步重新來一遍。
註意:在重新開始之前,我們要刪除遠程庫的tag和本地的tag,命令如下:
$ git tag -d 1.2                   //刪除本地tag
$ git push origin :refs/tags/1.2  // 刪除遠程庫tag
如果驗證通過會這樣顯示

9, 如果是第一次提交,需要先執行這個命令:
$ pod trunk register 這裡寫郵箱 '這裡起個名字' --description=' 這裡寫描述'
執行完成之後,會給你的郵箱里發一封郵件,去郵箱點擊鏈接!
然後提交到CocoaPods
(註意:由於我驗證podspec文件時使用了--allow-warnings 所以這裡後面也加上--allow-warnings)
pod trunk push Redirect.podspec --allow-warnings
10, 提交完成後,就可以通過cocopods查找Redirect了

(註意:)剛提交後項目用pod search命令會搜不到,因為本地的索引沒有更新,使用下麵命令刪除索引文件
rm ~/Library/Caches/CocoaPods/search_index.json
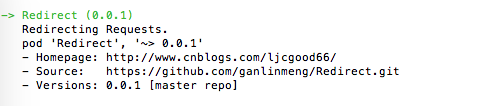
最後pod search 命令搜到自己的項目,大功告成
如果還是不行就再執行
rm ~/Library/Caches/CocoaPods/search_index.json
pod setup
再進行pod search,
-完美
這樣就可以進行使用了.
最後感謝各位大佬
參考:
https://www.jianshu.com/p/0e1d796b2a42
https://www.jianshu.com/p/a1339d45a324
http://www.cocoachina.com/ios/20160301/15459.html
https://www.cnblogs.com/richard-youth/p/4704413.html
https://www.jianshu.com/p/283584683b0b
https://www.cnblogs.com/xzjxylophone/p/4956469.html
https://www.jianshu.com/p/b5e5cd053464


